User avatar
LA47
Green Thumb
Posts: 404
Joined: Sun Oct 14, 2012 11:55 am
Location: Idaho

Seed Starting Checklist

We bought 1 2-light fluorescent with daylight bulbs. Mike is going to build the stand so I can raise and lower the light to keep it near the plants.

I'm starting with nothing since the move so I ordered trays and domes. I'm going to try the self watering trays so, for the first try, I also ordered the 3 yard capillary mat from Gardeners Supply. I plan on using wood blocks and thin plywood as the support for the mat and plants to sit on.

I also bought a bag of MG potting soil. I also plan on using disposable plastic glasses (had those already from get-togethers) in 6 oz and 12 oz sizes. I also have two heat mats. Do I need anything else? OH! I also ordered my seeds. :D

User avatar
IndyGerdener
Green Thumb
Posts: 392
Joined: Thu Jun 21, 2012 12:32 pm
Location: Greenwood, Indiana

Are you placing the cups in the self watering tray? how are you going to get the water to wick / drain from the dirt?

imafan26
Mod
Posts: 14001
Joined: Tue Jan 01, 2013 8:32 am
Location: Hawaii, zone 12a 587 ft elev.

I think your cups are a little big for seeds. 12 oz are too big. 6 oz may be ok. I use shallow containers less than 2 inches tall for seeds and I plant multiple seeds in them to save space. Large containers with just one seed, you will run out of space quickly and also if there is too much soil in the container, they won't dry fast enough and your seeds may dampen off unless you are very careful watering. If you are using the cups for seedlings they may be fine. What are you using for labels? Plastic knives, old vertical blinds, and craft sticks work.
Last edited by imafan26 on Tue Feb 05, 2013 1:59 am, edited 1 time in total.

User avatar
applestar
Mod
Posts: 30551
Joined: Thu May 01, 2008 7:21 pm
Location: Zone 6, NJ (3/M)4/E ~ 10/M(11/B)

Poke or drill holes (some people melt holes with hot nails or soldering iron) in the bottom (and near base on the sides) -- making sure the holes will make contact with the wet capillary mat, make sure to tamp down the pre-moistened potting mix all the way to the bottom of the cups. The potting mix will wick up the moisture.

Critical that the wicking holes are located flush to the bottom surface where they touch the mat and not up where the cup bottom may arch up, though you can make holes there too.

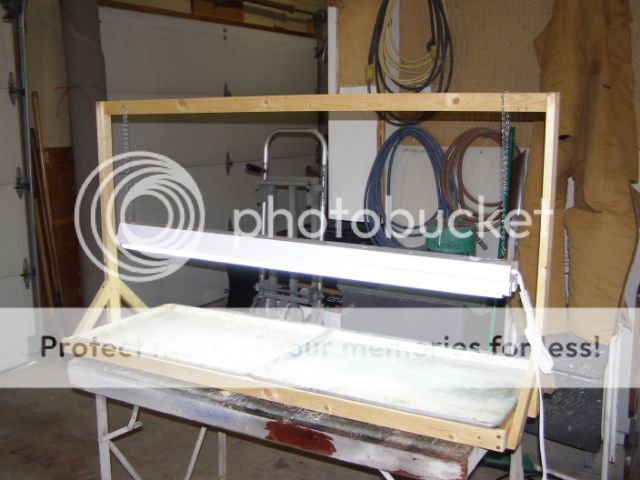
You may want to test before committing to planting the seeds and seedlings. :wink:

Missing items: small fan, timer (for lights, fan or both -- or turn on lights in morning and turnoff before going to bed, turn the fan on for few hours each day), plastic utencils (knife, spoon, fork), hand or pump adjustable mist-stream sprayer, turkey baster, labels (cut up window blinds, milk jugs, popsicle sticks etc.) or mark directly on cups with waterproof marker (NOT sharpie -- get the kind call "Garden Marker" or paint marker, or china marking pencil), planting schedule for each kind of plant (when to start seeds, when to start hardening off, when to transplant out in the garden), calendar/journal :D

User avatar
applestar
Mod
Posts: 30551
Joined: Thu May 01, 2008 7:21 pm
Location: Zone 6, NJ (3/M)4/E ~ 10/M(11/B)

Imafan has a good point, many people start with 3 oz bathroom cups. You can also start seeds in community containers -- I.e. sow multiple seeds 1/2" apart in the 6oz then separate them to individual 6oz after first set of true leaves. I prefer deeper community containers to start seeds per Jeavons' 3" deep flat recommendation just because it gives me a little more window of time before they have to be uppotted.

User avatar
LA47
Green Thumb
Posts: 404
Joined: Sun Oct 14, 2012 11:55 am
Location: Idaho

:( I thought I had it all planned so well. I will get smaller plant containers to start the seeds in and use the bigger ones to up pot to. I had planned to use a timer on the light and also the fan. I already have small plastic markers that I bought in bulk several years ago. I did learn then that a sharpy pen doesn't work well. :? I have started plants several times but never with the self-watering method. I'm not doing mega seeds as the green house isn't up yet and I don't have the space for the setup I used to have so when I get the cash I'll get shelves, lights, ect. to grow upward. I do know I'll have to get another light set up just to finish what few plants I'm going to start when I start up potting them. I'll probably get a 4 foot 4 light unit then. I also have a pump mister and garden planner. Why do I need a turkey baster??

User avatar
rainbowgardener
Super Green Thumb
Posts: 25279
Joined: Sun Feb 15, 2009 6:04 pm
Location: TN/GA 7b

I use turkey baster to suck up leachate from the tray under the worm bin, so I can use it. I think applestar uses hers to take extra water from the bottom watering tray. I just am very careful how much water I put in, in the first place.

Congratulations on starting seeds!

TexasGardener99
Full Member
Posts: 12
Joined: Mon Jan 16, 2012 6:11 pm
Location: Allen, TX

wet a paper towel, sprinkle seeds on it, put in a ziplock bag, wait for seedlings to grow, move them to dirt, and watch the seedlings grow.

works well

User avatar
IndyGerdener
Green Thumb
Posts: 392
Joined: Thu Jun 21, 2012 12:32 pm
Location: Greenwood, Indiana

I have found that plastic dixi cups with 4 holes melted in the bottom and up the side works well for a seed starting pot. I placed them in a shoe box sized plastic container. I have had no problems.

lily51
Greener Thumb
Posts: 735
Joined: Mon Aug 02, 2010 2:40 am
Location: Ohio, Zone 5

Meanards has the starting trays and plastic domes for $0.97.
Use the dome until seedling pops up, then remove. After that, Place under grow lights.

User avatar
LA47
Green Thumb
Posts: 404
Joined: Sun Oct 14, 2012 11:55 am
Location: Idaho

This is the grow light Mike built for me. :D
Image


Return to “Seed Starting Discussions”