Lakerhater
Newly Registered
Posts: 6
Joined: Sun Dec 30, 2012 8:46 am

New Gardener . . . New House . . . What would you plant?

Hello,

I have recently moved into a quaint (aka needs a lot of work) home in the Los Angeles area. I have little gardening experience. The exterior of the home was not taken of and I have stripped out a lot of dying/dead plants and have essentially a blank canvas in which to work with. I find myself going to the nursery but I get scared to pull the trigger on purchases having little experience in this world. So I am asking for help. What would you plant in these areas?

Front door:

Image

I tore out some grotesque shrub and have hidden the dirt with planters. I could leave the planters or remove them. The soil here is very compact, theres not a lot of area and there are pipes and such not that far underneath the soil.

Front door to the right:

Image

I put in that mexican feather grass and planted roughly 300 bulbs throughout the bed (which you can see sprouting a little). I have room to plant a small amount next to the feather grass.

Front of house:

Image

There were two shrubs like the one on the left in the planter. I ripped both of them out. The shrub I left wass the smallest of the three. The planter that is attached to the house is not that wide (1 ft) and not that deep (1 ftish). There's a trellis which you could grow something up. I could also rip out the two remaining shrub things. I have no idea what to plant here.
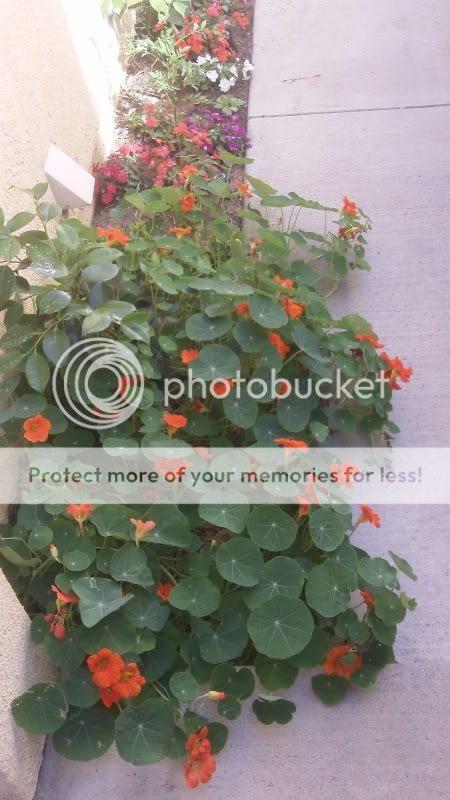
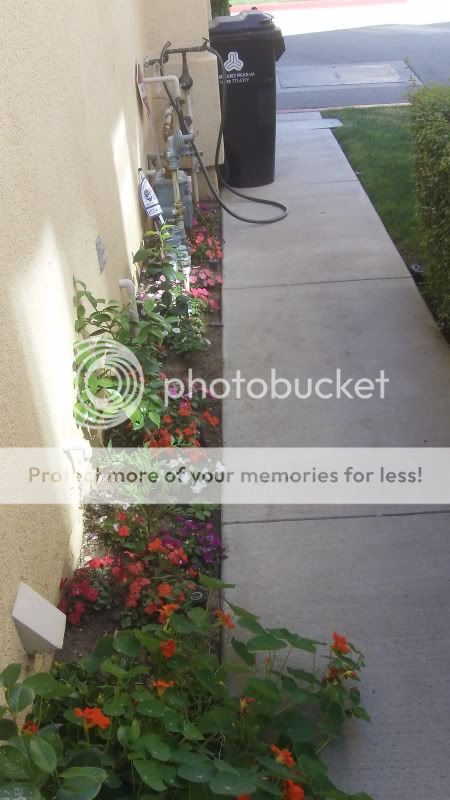
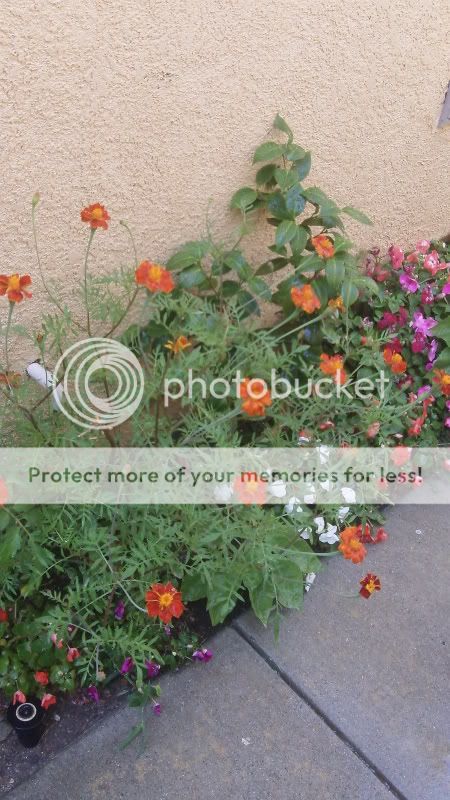
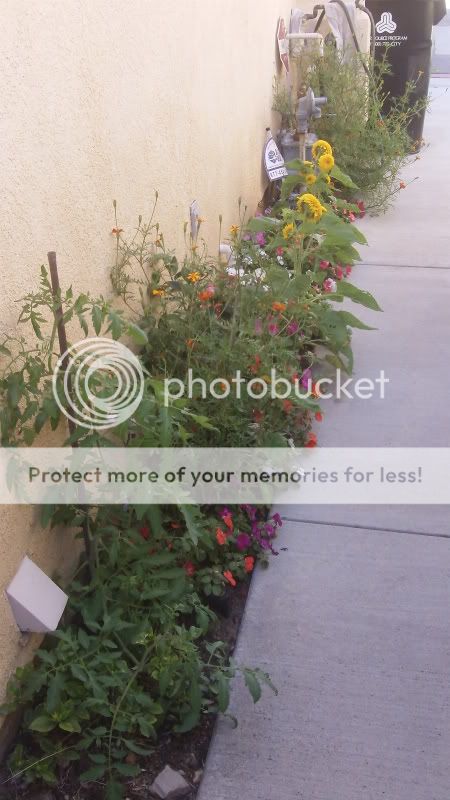
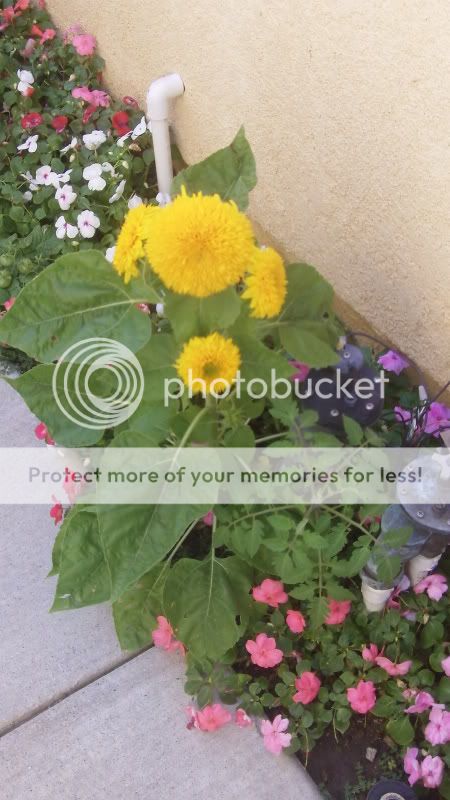
Side of the house:

Image

I built this above ground planter and planted about 500 bulbs in it. I was thinking of waiting until they bloom and then planting annuals around the flowers once they bloom.
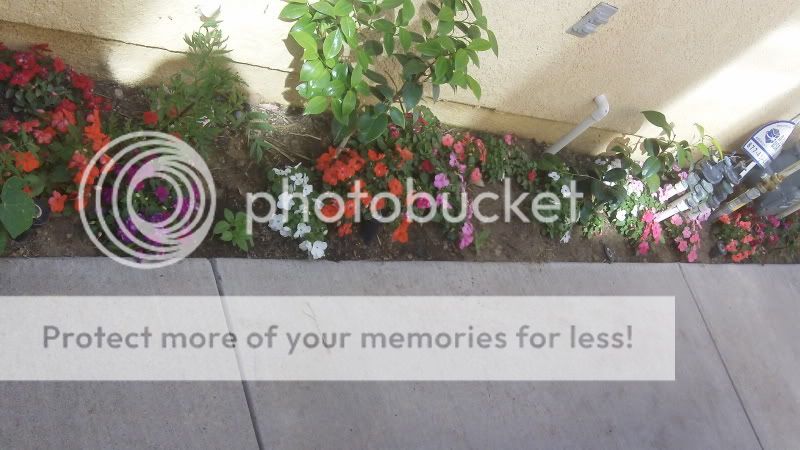
Back of the house:

Image

I ripped out what was in this area. Its like 1.5 feet wide, not real deep. I don't know what to plant back here and have toyed with possibly doing a vegatable garden although I have never maintained one. That shrub thing to the right of the area I may pull out too or may just leave it. I don't really like it but it wasn't quite as bad as some of the other stuff that I took out.

Thanks for reading and any help is greatly appreciated. I will post after photos as well.

Bobberman
Super Green Thumb
Posts: 2437
Joined: Mon Nov 15, 2010 10:31 pm
Location: Latrobe Pa.

I would put in at least 4 tomato plants 2 small super sweet types and a early girl and a pine apple or a better boy hybrid! I would add a few vine crops like peas or climbing beans! For looks try a few runner beans with the nice red flowers and you can eat them also! That is a start! Good luck and welcome to the forum!

User avatar
rainbowgardener
Super Green Thumb
Posts: 25279
Joined: Sun Feb 15, 2009 6:04 pm
Location: TN/GA 7b

Lot of good suggestions from Marlingardener. In the bottom picture by the pool, is that dirt or asphalt? It would be a lovely place for some really tropical plantings. Start with 1-2 banana trees, a dwarf palm, and fill in with colorful tropicals like bird of paradise, red hot poker plants, crotons, elephant ears, philodendrons, etc etc. Give your pool that tropical paradise look.

Sort of a miniaturized version of this:

https://www.flickr.com/photos/blackdoll/7827586154/

Did you say the distance between the wall and the pool is only 1.5 feet? That isn't making any sense to me given the scale of the bricks sitting on it etc.

OH OOPS!! I just enlarged the picture and realized what you were talking about is the little tiny strip next to the wall behind the blacktop. What Mg said about the previous folks making all these tiny areas. Personally if you can't rip some of the blacktop out, I would make it a container garden of tropicals. You can still give some of the effect I was going for, just with a bunch of big pots. Or even build a deep planter on top of the blacktop.

The little skinny strip with a huge wall behind it is pretty worthless!

It would help to know what kind of sun exposure your various beds get.

Remember, unless you are filthy rich and can just hire the whole thing done, landscaping doesn't happen over night. It will be an on-going project for some years. But at the end you will have a beautiful yard and the satisfaction that you did it yourself! In the meantime, be patient and take it a bit at a time, learning as you go.

You plunged in and planted hundreds of bulbs and as Mg suggests, may not be entirely satisfied with the results. Your beds will look better with more structure-- that is a mixture of a little shrubs in a few places, some perennials including some taller things, and then some of the bulb and smaller type stuff. You are blessed with a year round growing season, you need to think in year round terms.

But what a wonderful project! You will have fun with it for a long time :) Best Wishes!

User avatar
ElizabethB
Super Green Thumb
Posts: 2105
Joined: Sat Nov 24, 2012 12:53 am
Location: Lafayette, LA

Lakerhater - first let me welcome you to the forum. This is a great place to be.

My suggestions are just that - suggestions based on 10 years experience as a landscape contractor. Take what you like and leave the rest. The little strip next to yur sidewald is really too narrow for effective planting. The surrounding concrete prevents good drainage and planting up against wood siding is never a good idea. Lay down a layer of very heavy landscape cloth (the only time I use it) and cover with a mixed agregate gravel. Not pea gravel but road gravel. You can either leave it like that or use it as you are now for potted plants. Add some taller plants to your mix. Varied heights add lots of visual interest as long as the plants don't encroach on the walk. In pots with taller plants under plant with trailing folage or flowers. Have you ever planted ornamental sweet potatoe? The purple and chartreuse make an amazing color combination and will do very well in your climate.

The strip along your tone wall - how far out does your eave extend? If I were soing your yard I would instal a gravel barrier from the house to 6" outside of the drip line. seperate the gravel and the back of your bed with steel edging. This prevents rain from washing ut the bed, prevents soil splash back on your stone from rain or irrigation and provides you with a maintenance strip to work the back side of you beds. I would bring the bed much farther out with curves and swoops on the front edge. Build your bed high. A good landscaping bed is 6' deep with curves/bump outs that extend ot 8'-10' from back to front. Water will be an issue for you so you want drought tolerant plants. Pay close attention to mature size. Allow enough room for your plants to grow or you will be ripping them out in 5 years. Your stone planter is narrow. Plant low growing, cascading plants. The ornamental sweet potato vines would be good on the trellace. Use the 2 colors for a lovely contrast. Purslane and portulaca do well in your area. they are drought tolerent, provide nice flowers and have a cascading habit which would be nice in your planter. Your planter would be a wonderful place for bougainvillea if your trellace is very sturdy. In SOCAL climate bougainvillea doesn't die back over winter so it needs very stout support and lots of pruning to keep it from taking over BUT what a wonderful display of color. If you really play up your planter you may want to leave that secton of the yard as lawn. Maybe put 3 very large pots with lots of color on each end of the planter.

IDK about the wooden box. The tree was already there? Can't tell what kind of tree it is. Generally it is not a good idea to do a raised bed around an existing tree. The heavy layer of soil will smother the roots. You will also have issues with roots struggling through the soil for air and they will become a nusense to any thing else you plant competing for moisture and nutrients. That would be a good place for ground cover my fave is dwarf mondo. I love the puff ball shape and it will fill an area without being as aggressive as regular mondo. What is the black around your pool? I see a very narrow box along your brick wall. Veggies would be great but that box really looks small. Try growing tomatoes and cucumbers vertically up the brick wall. You can use mortar screws and run twine from the top of the wall to the base of the plants and train them to grow up the twine. Since that box offers very little back to front depth you will have to compensate by allowing more room left to right for root development.

Wish I could actually walk through your yard with my tape measure and sketch pad. Do spend some time on planning. Get a large pad of 1/4" - 1' scale graph paper. If you can get your hands on a landscaping template do so. Try your university book store. Major points - mature size, sun and water requirements, Staggered planting - Mother Nature does not do straight lines.


Congratulations on your new home :!:

User avatar
ElizabethB
Super Green Thumb
Posts: 2105
Joined: Sat Nov 24, 2012 12:53 am
Location: Lafayette, LA

Marlingardener - EXCELLENT suggestion on the prostrate rosemary for the stone planter. Combine with some colorful folialage or blooming trailing plants and that will be a beautiful site. Take down the trellis. It isn't sturdy enough for bougainvillea. The sweet potato vines would look better trailing over the wall.

I am so looking forward to seeing your progress. I actually have a mental picture of what your yard could look like. Guess that is why I was successful as a landscape contractor - I can "SEE" the final product before I even begin a project.

Lots of luck and =

Happy New Year :!:

Lakerhater
Newly Registered
Posts: 6
Joined: Sun Dec 30, 2012 8:46 am

So let me first start off by saying, wow was I was overwhelmed with your responses. Thank you so much for taking the time to assist me. I can't tell you how much I appreciate it.

One, its clear I should have come one here before I did anything. Especially that planter box debacle I now have. I only added about 3-4 inches of soil over the existing roots. I planted some bulbs in that bed. That tree is huge. Its probably 30-40 ft tall. Should I remove all that soil I planted; the hell with the bulbs? I certainly don't want that tree falling on my house because I killed the roots. The "well" idea that was suggested may be an option too.

Two, I'm sad that the bulbs I planted will only last a few weeks! I didn't know that. I was reading about mixing perennials in with bulbs, but they never recommended what kind or show how to do it. So I just went with the bulbs. I love your advice for mixing in some varying plants of heights and sizes. If you have a picture of a bed with this type of imagery I'd love if you could post it.

Three, I am going to go with a container garden around the pool as suggested and probably do nothing with that little strip of dirt. That's a great idea about the tropical feel.

Four, Elizabeth you stated: "The strip along your tone wall - how far out does your eave extend? If I were soing your yard I would instal a gravel barrier from the house to 6" outside of the drip line. seperate the gravel and the back of your bed with steel edging. This prevents rain from washing ut the bed, prevents soil splash back on your stone from rain or irrigation and provides you with a maintenance strip to work the back side of you beds. I would bring the bed much farther out with curves and swoops on the front edge. Build your bed high. A good landscaping bed is 6' deep with curves/bump outs that extend ot 8'-10' from back to front. Water will be an issue for you so you want drought tolerant plants. Pay close attention to mature size. Allow enough room for your plants to grow or you will be ripping them out in 5 years."

So this is pretty amazing, because this is exactly what happens. The water drips off the roof and into the bed and causes constant erosion and soil splash. I would like to build out the bed like you recommended. Do you have a picture of "a good landscaping bed with carves/bump outs?" I want to be exactly sure I know what I am building. Do you have a picture of the "gravel barrier" you describe?

Thanks again for your wonderful responses. I will keep you informed of how I progress. The first thing I'm going to do is Elizabeth's suggestion re: the landscaping cloth and gravel. I will add some taller plants to the mix and give you a picture update in the next week or so. Thank you thank you thank you!!!!!!

User avatar
ElizabethB
Super Green Thumb
Posts: 2105
Joined: Sat Nov 24, 2012 12:53 am
Location: Lafayette, LA

Thank you for your appreciation. I don't have picks. I had to give up my landdscaping business because of a very bad accident. Multiple surgeries, laid up for a year then fell into a major depressiion that I fought for several years. During that time I destroyed all of my work - drawings, plans, pictures. I feel sick just thinking about the work I burned (litterally). The concept of the gravel barrier is really simple. Measure from your house to 6" outside of the drip line. Scape off any grass. Lay heavy duty landscaping cloth. Install 4" high steel edging on the outside edge then back fill with a mixed agregate gravel - NOT pea gravel. You want road gravel - much courser. That edging should be a straight line to provide a back to your beds.

From there - think curves. You want a bump out on each end. Not knowing how deep your yard is makes it hard to recommend. A good bed is 6' deep at the least with bump outs that extend to 10' - 12'. Even the shallower sections should have curves.

If you want to you can send me some deminsions. Allow for the gravel barrier then give me the dimensions across the bed - left to right and exactly how much room you have to work with from the gravel barrier to the street or sidewalk. What is on either side? I can do some research on your climate and make some decent recommendations. You WILL have to do a lot of soil work so get ready. I love a challenge so bring it on :!:

Lakerhater
Newly Registered
Posts: 6
Joined: Sun Dec 30, 2012 8:46 am

Elizabeth,

I did what you said in regards to the little strip of dirt for when you walk in. The result is below. It looks much better than the original. I plan to take down the screens on the windows and put a windowsill box on each window and put some flowers in there. The house needs a coat of paint but thats for a different forum. I am very pleased with the result, so thanks so much for your advice.

Image

I went to the nursery. Here's a picture of my stock:

Image

I got 3 rosemary protrate, 1 cat scat, 1 scabiosa, 2 6 pack of linaria, 1 unknown and 1 curly willow tree (yes I got a curly willow tree, why I have no idea). Ok, so now I have some questions.

Here's where I am looking to plant:

Image

First, do I just plant the three rosemary's where I marked the red ice cream cones and then plant the flowers around it? How much do I need to separate the flowers?

Two, is there anything I need to do to train the rosemary to trail?

Three, what type of soil mix would you recommend?

Four, what type of daily/monthly/yearly care do I need to think about?

Finally, What the heck am I going to do with this tree? The planter in the second picture above is that too small to plant it in? How big does the planter need to be? I don't just plant it in the front yard right, I put it in a planter and put it by the pool out back? What type of soil is required and any daily care I need to know about?

Anyway, I really appreciate you guys helping out someone with a million questions who doesn't have an eye for painting with the landscapers brush.

User avatar
PunkRotten
Greener Thumb
Posts: 1989
Joined: Sat Apr 16, 2011 8:48 pm
Location: Monterey, CA.

Consider a dwarf fruit tree in the front yard and keep it prune to a manageable size. It all depends on how much sun you get in these areas. I like to plant flowers and some herbs along the walkway to my door. What kind of fruits veggies do you like to eat? Once you figure that out then find out the requirements to grow them. Then plant where you can best accommodate those plants.

User avatar
ElizabethB
Super Green Thumb
Posts: 2105
Joined: Sat Nov 24, 2012 12:53 am
Location: Lafayette, LA

What is that shrub on the left of your stone planter box? Take it out. Plant prostrate rosemary (note not regular rosemary) on each end and in the middle. They need no training to trail over the wall. How is the drainage in that box? Basic potting soil is fine. Check with your local big box store for broken bags. Negotiate. You can get great deals on soil.

Lakerhater
Newly Registered
Posts: 6
Joined: Sun Dec 30, 2012 8:46 am

I have no idea what that shrub is nor do I like it. Taking it out is no problem. I will probably have to get another rosemary prostrate. I have 3 1 gallon plants. Then do I just plant the flowers around the rosemary? I don't know how the drainage is to be honest. I can put some water in there and see if it puddles. So far I have 1 cat scat, 1 scabiosa, 2 6 pack of linaria, 1 unknown. If you don't think I should plant them there I will find another place for them.

Punk,

Are you stating I should plant flowers and/or herbs that line the sidewalk to the right? Any particular kind you recommend that would look nice? Any picture you might have to reflect what you are describing?

User avatar
PunkRotten
Greener Thumb
Posts: 1989
Joined: Sat Apr 16, 2011 8:48 pm
Location: Monterey, CA.

Depends how much sun you get. My walkway gets like 2 hours of direct sun only. I have grown marigolds, small sunflowers, dwarf tomatoes, impatiens, nasturtiums, yarrow etc.


Here is some pics:

Image

Image

Image

Image

Image

Image

Image

User avatar
tomf
Super Green Thumb
Posts: 3233
Joined: Mon May 18, 2009 8:15 am
Location: Oregon

Wow PR talk about doing a lot with a little space.

Lakerhater
Newly Registered
Posts: 6
Joined: Sun Dec 30, 2012 8:46 am

Great information guys. I'm planting this weekend and will let you know how it goes with pictures of course.

Lakerhater
Newly Registered
Posts: 6
Joined: Sun Dec 30, 2012 8:46 am

I did some planting!

Front door:

I tore out the mexican feather grass and put in three little plants. I didn't look too close at the names so I don't remember them offhand:

Image

Image


I made a container garden underneath the rock wall that you see first once you walk out the front door:

Image

Image

I dug out and planted the rosemary and assorted flowers and plants in the stone planter. I left the bush in for now:

Image

Image

Image

Out back by the pool where I have that narrow strip I put the mexican feather grass in and surrounded it by flowers:

Image

Image


Lets hope I keep them alive to enjoy the results to come. I'll keep the thread updated. I plan to do more every weekend and I'll have more questions for sure. First one: What fertilizer should I use (if any)? And how much and how often and when do I use it? Did I do anything wrong? Thanks again!

User avatar
rainbowgardener
Super Green Thumb
Posts: 25279
Joined: Sun Feb 15, 2009 6:04 pm
Location: TN/GA 7b

Yeah, very nice! You have accomplished a lot, very fast!

joshua1988
Newly Registered
Posts: 1
Joined: Fri Mar 29, 2013 11:34 pm

I think you are missing green of turf or grass. what about Artificial Turf austin

User avatar
ElizabethB
Super Green Thumb
Posts: 2105
Joined: Sat Nov 24, 2012 12:53 am
Location: Lafayette, LA

You did a great job of incororating the advice given and making it your own. Outstanding :!:

Looks lovely :D


Return to “Flower Gardening & Garden Design”