User avatar
applestar
Mod
Posts: 30541
Joined: Thu May 01, 2008 7:21 pm
Location: Zone 6, NJ (3/M)4/E ~ 10/M(11/B)

Re: Applestar’s 2018 Garden

Some tomato seedlings: The Witz is back from last year. So productive and yummy and pretty yellow/orange — my DD2 declared this one better than Dwarf Blazing Beauty, which we had been favoring until The Witz started ripening. :D (Growing both again this year :wink: ).

Image


Zena’s Gift is supposed to grow into an XL vigorous plant/vine with 1 Lb+ pink blunt oxheart fruits (maybe a contender for 2018 Largest Tomato Contest); King Aramis is a dwarfed version of Grandma Oliver’s Chocolate — hoping this one will join Dwarf Blazing Beauty, Dwarf Choclate Lightning, and (Dwarf) Uluru Ochre) line up as one of our faves. (BTW - You can see how the genetic dwarfs are much more compact with reduced internodes.)

Image


Featuring Napa Rosé cherry in this photo, but note Pinocchio to the right which is a micro variety — growth comparison is interesting — and please note my Ladyfingers F4 (I have to fix that label!) behind and Molten Sky F4 in the paper cup :()

Image

User avatar
digitS'
Super Green Thumb
Posts: 3932
Joined: Sun Sep 26, 2010 1:10 pm
Location: ID/WA! border

applestar wrote:Can you put something black under them? Maybe a black tote/storage box with black lid filled with water? Black stock tank with a cover ... if you are doing that, maybe even connect to a solar water heater (DIY or otherwise).
Well, that's an idea: try to separate the heat lovers from the cool season plants in the greenhouse.

It's good to know about your family members' preferences in your tomato tasting trials :D .

Part of my problems is probably being a tightwad, AppleStar. I have a pretty good idea how fast that 200 sqft of greenhouse space loses (& gains) heat during weather like today: a day that starts off at 27°f, has wind gusts above 20mph, broken clouds, by afternoon it's 42° outdoors, the greenhouse is open on east & west ends with an automatic fan at ceiling height, it's 80° ... But later, I turn the heat down to 60° for overnight. Well shoot! They may have nearly as cool of nights with July days above 90°, just like in 2017 with 14 such days & nights!

I was up-potting more peppers today along with zinnias, marigolds and broccoli. Should get to the cabbage and tomatoes ... what a mixed lot in there!

:? Steve :)

User avatar
applestar
Mod
Posts: 30541
Joined: Thu May 01, 2008 7:21 pm
Location: Zone 6, NJ (3/M)4/E ~ 10/M(11/B)

...Haha :roll: I am officially in denial... according to my spreadsheet tally, I now have over 50 tomato seedlings containers, each looking something like this with average 4-5 seedlings in each. :shock:

These are mostly my cherry and cocktail sized named segregates from the (Maglia Rosa x Coyote) cross breeding project. Oh, Shimofuri is a highly variegated segregate from the (Whippersnapper x Faelan’s First Snow) cross.

Image
Shimofuri #1 F5 (light blue container)
Afternoon Rosé F4 (white)
Buttermints F4 (white)
Wild Rosa F4 (white)
Ladyfingers F4 (paper cup)
Molten Sky F4 (paper cup)
Wild Rosa F4 (paper cup)
Dwarf Chocolate (paper cup)

...there was a container of Shimofuri #2 F5 (less variegated but better tasting fruits) in the middle but they got too tall and had to be moved out. This will let me uppot another variety to put in the middle.

User avatar
applestar
Mod
Posts: 30541
Joined: Thu May 01, 2008 7:21 pm
Location: Zone 6, NJ (3/M)4/E ~ 10/M(11/B)

Image

- The chitted russets (sprouting eyes cut from huge baking potatoes) are ready to plant — this week, I hope ...since the local yellow forsythias are in full bloom!
- the box on the bottom contains cut pieces of Yukon Gold potatoes. They don’t look as ready as the Russets even though they were “started” a week earlier....

The sweet potato — two Methods —
- a Whole small potato in water is starting to grow white roots... and
- I tried cutting off sprouting ends and eyes from REALLY BIG sweet potatoes and planting the pieces in this little container with a loose cover on and sitting on the heat mat with the Seedzip-germinating pepper seeds and sprouted seedlings (thermostat set to 82°F). I checked under the lid today and found these two sprouts :-()

User avatar
applestar
Mod
Posts: 30541
Joined: Thu May 01, 2008 7:21 pm
Location: Zone 6, NJ (3/M)4/E ~ 10/M(11/B)

I’m so relentless in posting progress that the tomatoes and peppers end up needing their own thread :oops:

I’ve started the solanacea progress thread for this year. Now that they are developing true leaves and graduating from neonatal to pediatrics nursery, I will continue with their progress in the new thread:

Subject: Applestar’s 2018 Tomatoes (and peppers ...maybe eggplants)
applestar wrote:I estimate 4 more weeks until tomato planting weather, 5-6 more weeks until pepper planting weather....

The seedlings are chugging along :D This should mean 3-4 more sets of true leaves on the tomatoes by then. Peppers are generally slower-growing.

Image
...Tomatillo seedlings in the top-left photo — First time growing these ... I started them with first round of peppers and they are growing fast (one of them was touching the light bulb in the morning and got scorched before I noticed it). I probably could have waited to start them with tomatoes.

...I’ve started moving seedlings with true leaves out to the cooler Garage V8 Nursery. These will be Uppotted to individual and divided community containers soon.

Image

User avatar
applestar
Mod
Posts: 30541
Joined: Thu May 01, 2008 7:21 pm
Location: Zone 6, NJ (3/M)4/E ~ 10/M(11/B)

To make room for the tomato seedlings being moved out to the Garage V8 to toughen up, I finally got around to dealing with 2 community containers of stunted seedlings that I had been almost ready to give up on, I discovered that for some reason I had filled this and only these two 1 quart berry container with mostly sterile organic seed starter (which I never use) and vermiculite. no wonder they were stunted — they were starving! I think only thing that may (or may not — we have to see) have saved them was that had been moved out to the V8 way early while it was still chilly (40’s°F) and they were only growing slowly.

Image
- Celery and Red Chdori — brilliant purple color! Solstice broccoli in the background
- I’m a bit scared of those tomato seedlings and the amount of work they represent....
- Swiss Chard sprouted in the garage temperatures

...not pictured are some nice lettuce seedlings, Brunswick cabbage seedlings, White sage and Broadleaf sage seedlings, and a couple of spinach seedlings that may still make it (6-8 other tiny seedlings with two sets of true leaves had given up and we’re trying to bolt — I Put them in the vermicomposter :twisted: )

The cool-weather seedlings can be moved outside in a couple of days after they settle in and be hardened off. :D

... oh, here are some more stuff — I think they’ve been demoted to B-team in my mind... but ...
Image
- in the foreground are some overwintered celery.
- Then my little seedling Japanese maple bonsai wannabe — I have red and green laceleaf shrub-type and a neighbor has red tree-type. These seedlings show traits that look like crosses. The brownish leaves to the left are actually the red-leafed ones but crossed with the green or maybe faded due to current insufficient light.
- in the back to the right — dark green leaves are store-bought watercress that I planted last summer to see if they would grow.
- in the back to the left under the tulle netting are some stunted broccoli and kale seedlings actually from last fall. Not sure if they are worth planting/saving at this point... but who knows, they might grow without bolting?

User avatar
kayjay
Green Thumb
Posts: 416
Joined: Mon Feb 17, 2014 7:14 am
Location: Southern Ontario

Wow, amazing. I'm intrigued by the cross-breeding project.

I wish I had more time and space to play like that. :)

User avatar
applestar
Mod
Posts: 30541
Joined: Thu May 01, 2008 7:21 pm
Location: Zone 6, NJ (3/M)4/E ~ 10/M(11/B)

...thanks KayJay! :() I will report their progress — I’m Super excited about them. :-()

Copying this here because some of the colored tape tags are gone — I Think they were whipped around in the wind while super cold and sheared off:

posted Nov 6, 2017
Finally, FINALLY got the chance to plant the garlic —

Image

User avatar
applestar
Mod
Posts: 30541
Joined: Thu May 01, 2008 7:21 pm
Location: Zone 6, NJ (3/M)4/E ~ 10/M(11/B)

Subject: Applestar’s 2018 Tomatoes (and peppers ...maybe eggplants)
applestar wrote:TOMATOES in Garage V8 Nursery — I’m running out of room but the community pots are burgeoning... however, with overnight forecast in the 30’s with windchill of 33°F, 33°F, the 31°F for the next three nights, I’m forced to wait.

Image


PEPPERS (and eggplant...odd tomatoes here and there) in the house on Winter Paradise (inside the covered shelves) and Winter Paradise Penthouse (outside the cover above the shelves):
Image
Just had to copy the above here. The progress in these seedlings compared to photos earlier in on this page is just amazing!

...also making note of these two Barker’s Hot pepper seedlings:
Image

I must have significantly damaged their roots when separating them from their sibs in the initial community Kcup to uppot them to individual Kcups — these two had gone completely flaccid and were drooping over the edge. ICU STAT! :eek:

So I had to use the black plastic spoonheads I use for SpoonSeedzip to support them, then I put these cutoff bottle humidity domes over them and put them over the heatmat...

...Some 6 hours later, when I took this photo, they are looking much better and don’t really look like they are leaning on the spoons for support, but I left their domes on for overnight. I’ll look in on them later to see if the spoonheads can be removed.

The other 2, smaller, seedlings with less developed roots were fine — so If these pull through, I will have 4 plants.

—- 8AM update —

All better now. They are standing up on their own — I took off the domes as well as the spoons.
Image
Last edited by applestar on Mon Apr 16, 2018 7:55 am, edited 1 time in total.
Reason: Added the 8AM update

User avatar
MoonShadows
Senior Member
Posts: 149
Joined: Mon Dec 11, 2017 4:50 am
Location: Stroudsburg, PA - Zone 6a

I enjoy reading your posts about your 2018 garden. Your enthusiasm shines out in your posts. You sound like you are having a great time and are truly addicted!

User avatar
applestar
Mod
Posts: 30541
Joined: Thu May 01, 2008 7:21 pm
Location: Zone 6, NJ (3/M)4/E ~ 10/M(11/B)

Thank-you MoonShadows :D You have such a lovely, well-organized set up to die for!

...My cobbled together hobby space IS fun, though :>

User avatar
applestar
Mod
Posts: 30541
Joined: Thu May 01, 2008 7:21 pm
Location: Zone 6, NJ (3/M)4/E ~ 10/M(11/B)

Oldest of the tomato and pepper babies went out to play in the sun today:

Image
Image
...they were in the bare branches dappled sun until the sun came around... I covered the top with the shoes shelves to create additional latticed shadows, and later on in the mid-afternoon when the sun was full on, I put the white lids on top of the shelves, held down with bricks and pulled forward to fully shade the seedlings in the front.

I will bring them inside for the night.


So far, my lettuces are doing really well on the patio table. Later, this area will get too hot, but right now with the sun still angled lower, they get bare branches dappled morning sun and then the house completely shades the table by early afternoon. I’m tempted to plant a bunch of them in big pots like I did with the black nursery pot in the green bucket. I’m liking how clean they are, and how nothing has bothered them so far — no slugs, no aphids, no worries about spring bunnies getting in among them — I just step out from the kitchen with a pair of scissors and snip off as much as I need.

Image

User avatar
applestar
Mod
Posts: 30541
Joined: Thu May 01, 2008 7:21 pm
Location: Zone 6, NJ (3/M)4/E ~ 10/M(11/B)

what’s the temperature range for the tomatillos? Are they like tomatoes or peppers? ...or can they take even cooler temps? They are already HUGE!! :shock:

pepperhead212
Super Green Thumb
Posts: 2879
Joined: Wed Oct 15, 2014 1:52 pm
Location: Woodbury NJ Zone 7a/7b

I would think they'd like warmer, given where they are grown and cooked with. However, I have noticed volunteers popping up with the ground still cool - like right after tomatoes go in. I usually plant them with the eggplants, a week after tomatoes, and a week before peppers.

User avatar
applestar
Mod
Posts: 30541
Joined: Thu May 01, 2008 7:21 pm
Location: Zone 6, NJ (3/M)4/E ~ 10/M(11/B)

First batches of pre-germinated and started corn are starting to sprout and grow. These are Pink and Purple Mexican giant corn and Japanese Striped Maize (variegated foliage):

Image

User avatar
applestar
Mod
Posts: 30541
Joined: Thu May 01, 2008 7:21 pm
Location: Zone 6, NJ (3/M)4/E ~ 10/M(11/B)

I sorted the kernels from Applestar’s Medley #sweet# cobs pictured in the copied post below, and selected the seed corn I want to grow this year — mostly with the shriveled and shrunken indicators of sweet corn genetics, but a few domed popcorn-flintcorn types which I’m hoping are the ones that took from hand pollinating with Japanese Striped Maize.

Image

Subject: Applestar's 2017 Garden
Mon Sep 25, 2017 11:46 am
applestar wrote:It's really bumming me out that the question of how-to hand pollinate those Pink and Purple Mexican corn is becoming moot. I have been looking and looking, but see no sign of silks emerging, while the tassels have been maturing and dropping pollen. :?

HOWEVER, I did harvest some more fun corn for sorting and saving as seeds. The best part is that one of these Applestar's Medley #popcorn# and at least another one that's still green and will be harvested when ready have a small chance of having caught some of the Pink and Purple Mexican corn pollen. Image

Image

User avatar
rainbowgardener
Super Green Thumb
Posts: 25279
Joined: Sun Feb 15, 2009 6:04 pm
Location: TN/GA 7b

So beautiful! Can you eat them or is it just popcorn?

I'm very boring and just grow Silver Queen, because it has done well for me and it is what we love to eat....

User avatar
applestar
Mod
Posts: 30541
Joined: Thu May 01, 2008 7:21 pm
Location: Zone 6, NJ (3/M)4/E ~ 10/M(11/B)

I was trying to remember if I had tried to explain all this before — and found a thread :lol: What does Silver Queen seed corn kernels look like?

Subject: Isolate Corn? Avoid Cross-pollination? Hah! LOL
Mon Aug 15, 2016 3:42 pm
applestar wrote:Here are some fun corn you can grow if you INTENTIONALLY cross/hand-pollinate your corn Image

I don't know what I'm doing, though. All I know is that the shrunken kernels are likely due to the the (sh) genes that make the sweet corn hybrid varieties sweet. I'd love it if you could comment on what you see. Any thoughts? Tips? Advice for what to do next?


Harvested today -- Kandy Korn x Glass Gem F2, self pollinated and/intentionally crossed with available pollen from Mirai350BC, Ashworth, Double Red Sweet, volunteer that might be Bloody Butcher.


Image

I'm definitely going to save the seeds from that top one with ALL the different colors separately. That one is a beauty. DD jokingly asked if she could EAT that one :roll: – I told her she can eat what grows from them next year :D
Image


Harvested a few days ago

MIrai350BC cobs -- .Lots of shrunken kernels? Some are shrunken but GG like?
Image

In the next group, same top and bottom as above but the middle one is Ashworth for comparison
Image

Here are more Ashworth
Image


Mirai350BC x Double Red Sweet F1
Image

imafan26
Mod
Posts: 13989
Joined: Tue Jan 01, 2013 8:32 am
Location: Hawaii, zone 12a 587 ft elev.

Corn tassels appear and actually have more pollen than they need. Apparently lots of plants do this. Just like the male cucurbit and papaya putting out male flowers first, to attract the pollinators. Corn is wind pollinated, but bees also love corn and may assist wild corn to cross pollinate. The first ears of corn are ready to pick 10 days after the tassels appear. I don't have a large stand of corn so I bag my tassels and hand pollinate. You could do the same and bag the tassels and save the pollen a few days to give the ears a chance to emerge and to do some cross pollination of your own. Pollen has a limited life span. It is why you can isolate corn pollination if you plant different or the same varieties (that mature) at least two weeks apart.

User avatar
applestar
Mod
Posts: 30541
Joined: Thu May 01, 2008 7:21 pm
Location: Zone 6, NJ (3/M)4/E ~ 10/M(11/B)

Ooh sounds good, imafan. I hand cross-pollinate by collecting pollen from tassels, but don’t protect the silks. I also plant these in a mixed patch and shake the pollen onto each other’s silks.

How do you “save” the pollen? Or do you mean just bag the tassels and use the pollen collected in the bags? I generally distribute the pollen as soon as I collect them — usually just what falls on a folded Manila folder since I get impatient trying to get a tassel inside a too small bag or bags that refuse to stay open. haha.

Varieties that I’ve grown before, I have a better idea, but I rely on maturity days and stagger planting times, too. Sometimes it works, sometimes it doesn’t.

User avatar
applestar
Mod
Posts: 30541
Joined: Thu May 01, 2008 7:21 pm
Location: Zone 6, NJ (3/M)4/E ~ 10/M(11/B)

In addition to temperatures, direct sunlight, and wind, it’s very important to check and see if the seedlings need water before leaving them for the night and first thing in the morning for sure. I still find “hefting” to be the best indicator, and tedious as it may be, it IS best to heft-check each individual container. (I find cells can be difficult to tell which is dry and which is wet — still best to use daisy/mesh tray and dunk/bottom water)

For tomato plants, when overnight forecast is around mid-40’s°F, actual temp can be low 40’s here, so I cover the tubs with their snap on lids, then wrap with a layer of heavy garden fleece, then a mesh tarp for good measure. I also do this when heavy rain is forecast. In this case, the picnic table with solid surface, raised above the ground level cold air provides additional insurance/insulation

Image

Once the rays of the rising sun reach the tubs, I remove the wraps and angle the lids open for ventilation but not all the way yet — there is warm air under the lids and heavy condensation on the inside walls. A little while later when the temperature in the sun is in mid-50’s, I go out again and remove the lids completely, as well as take out the pepper tub that spent the too-cold-for-peppers night inside.

You can see my oldest tray of seedlings outside of the tubs but sheltered in between. Another one spent the night out in the open but on the more sheltered patio table, where the first rays of the morning sun shines — it was later moved aside to give way to the pepper tub. Older plant tubs will/are also moved down to the seat level to expose them to slightly cooler temps.

In the bottom photo, you can see that corn which doesn’t need as much temperature protection are being left out with their lids removed. The shoes rack/shelves are deterrent against curious squirrels and birds.

User avatar
digitS'
Super Green Thumb
Posts: 3932
Joined: Sun Sep 26, 2010 1:10 pm
Location: ID/WA! border

applestar wrote:In addition to temperatures, direct sunlight, and wind, it’s very important to check and see if the seedlings need water before leaving them for the night and first thing in the morning for sure. I still find “hefting” to be the best indicator, and tedious as it may be, it IS best to heft-check each individual container. ...
Most of the watering so far this year has been with a basin and setting flats full of containers in there and leaving them ... quite some time! Tedious, yet again :wink: ! This approach will continue until the plants are strong enough to stand up under a watering wand.

Several years ago, I thought - how might someone know when to water if they have not had the experience of hefting all those trays containing different containers, 6-packs, 4-packs, 4" pots, 8" pots, or hefting individual containers? How might they practice?

I'm sure that it would differ somewhat by potting soil. It might also differ by preference but just for me: I weighed some trays of containers, soil and plants that I felt needed some water. Then, I weighed them after they had soaked up all the water they could but had been allowed an hour or so to drip out excess. They had doubled in weight.

Anyone could do this. Perhaps a novice could start from a thoroughly soaked plant in its container. Divide the weight by 1/2. Watch carefully as it dries and loses weight, rules of thumb (or, digitS' :wink: ) shouldn't be allowed to kill a plant, or put it in an unhealthy state.

Steve

imafan26
Mod
Posts: 13989
Joined: Tue Jan 01, 2013 8:32 am
Location: Hawaii, zone 12a 587 ft elev.

I use paper bags to collect pollen. I do use the pollen collected in the bag. If you want to know what you are crossing you can bag the ears so you can pollinate with a known variety. I don't have room to do a mixed planting and the UH corn and silver queen varieties mature in about 80 days. I usually plant silver queen in summer and UH corn as the third crop since it is a tropical corn and will still mature with an 11 hour day. Silver Queen needs the max daylight I get (14 hours). Monsanto, Pioneer and the other seed companies that bought the sugar lands here grow seed corn in our winter with additional lights because of our usually predictable weather, and can grow corn through the winter months. In fact they don't grow their seed corn in summer because they don't want to accidentally cross their corn with local corn growers. The do bag their tassels and silks and they do not allow farmers on their rented fringe lands to grow corn or soy beans (their other crop) so they have a buffer of at least 600 ft. In summer they grow mustard as a cover crop. The seed corn is a temperate corn so it does better in cooler weather. Our locally developed corn from the UH is a tropical corn. It has a long maturity of 80 days but only needs 12-14 hours of daylight.

User avatar
applestar
Mod
Posts: 30541
Joined: Thu May 01, 2008 7:21 pm
Location: Zone 6, NJ (3/M)4/E ~ 10/M(11/B)

I still haven’t had the chance to plant the artichokes :roll:
...but they are greening up and looking less pathetic — either the warmer temperatures or the bit of fertilizer I gave them ... or both

Image

User avatar
applestar
Mod
Posts: 30541
Joined: Thu May 01, 2008 7:21 pm
Location: Zone 6, NJ (3/M)4/E ~ 10/M(11/B)

Earlier this year on March 11th, I went to a free rain barrel making workshop sponsored by the Pinelands Preservation Alliance and the AmeriCorps NJ Watershed Ambassadors Program. Until the worst of the spring freezing temperature fluctuations were over, I left the barrel covered and isolated, then with the arrival of the thaw and spring rains, I hooked it up to capture the overflow from my existing rainbarrel.

The new barrel was 2/3 full when I started using it for watering my seedlings that had started their hardening off process to acclimate to the great outside world.

Image

...it’s about 1/2 full now ...but we’re (hopefully) expecting more rain soon ...we didn’t get the little sprinkle that had been forecast for last night.

I sold some of my started plants at a plant sale at the local Agricultural Center :()
Image
...One of the customers invited me to participate in another event at beginning of June, and I was also asked about starting a regular table at the Farmer’s Market. Hmmm... I’m going to have to think about this... :D

User avatar
applestar
Mod
Posts: 30541
Joined: Thu May 01, 2008 7:21 pm
Location: Zone 6, NJ (3/M)4/E ~ 10/M(11/B)

I somehow didn’t post about these and didnt even write down in my garden diary or take photos — I must have been in a hurry and then got too busy — but I planted these around three days ago.

Image

...oh! I found it! I did make a visual record of sorts in the Numbers Garden Journal. According to this I planted them on 5/2.
Image
- cabbage, Brunswick
- cabbage, Cuor di Bue
- cabbage, Kalibos
- broccoli, Romanesco
- kale, Dazzling Blue
- kale, Red Chidori F1
- kale, Beira Tronchuda
- cilantro, Dynamo

- cauliflower, Veronica
- broccoli, Solstice
- lettuce, Rosemarry
- lettuce, Valmaine

User avatar
kayjay
Green Thumb
Posts: 416
Joined: Mon Feb 17, 2014 7:14 am
Location: Southern Ontario

Hi Applestar! Thanks for popping by my little thread.
Red Robin is considered a “micro dwarf” and only grows to about 12 inches (18 inches including the pot). I had them - and their sister variety Yellow Canary - growing under lights last fall through early winter in plastic tubs that on-line ordered marzipan cookies and coconut macaroons come in ... I think they are about 3 quart size. Sweet tasty fruits. Have you grown them before? I think you will like them.
Yes, this is my third year (IIRC) growing Red Robins from saved seed. I'm not a huge fan of grape and cherry tomatoes, but I wanted some little plants for my hanging baskets. I chose the RRs because my father's name is Robin, and his birthday is in late April, and I thought some seedlings would be a cute gift. :() He enjoyed them. He's always liked growing tomatoes. I will definitely look into those other micro dwarfs, thanks for the tip.

Best of luck if you decide to 'expand' into farmers market tables!

User avatar
applestar
Mod
Posts: 30541
Joined: Thu May 01, 2008 7:21 pm
Location: Zone 6, NJ (3/M)4/E ~ 10/M(11/B)

Got the artichokes planted. :clap:

I decided to plant them in the two VG.PSRB’s (Vegetable Garden - Pallet Sided Raised Beds). These PSRB’s are pseudo-hugelkultur, with decaying branches and logs in the bottom, and are high enough to require some thought into what to plant: Shallow-rooted and moisture hungry plants are out. The swale/paths in front of them, as well as the neighbor’s side yard on the other side of the fence can get pretty swamped, so the moisture is available, but the plants need to be able to handle drier soil up top and grow long exploratory feeder roots that can also withstand soggy subsoil layers.

In the past, sunflowers, corn, and eggplants, as well as indeterminate and cherry tomatoes, luffah and cucumbers have done well here. Salvias, Nasturtiums, and Balsam are others that have adapted well in these beds.

This year, the Emerald F1 artichokes are planted, along with Swiss Chard (“5-color Silverbeet”). There is room for something else as well, I think, until the artichokes gain their foothold.

In the VG.SIP (Vegetable Garden - Sub-Irrigated Planter), I planted one artichoke to see if constant even moisture and high level of nutrients will make a difference for the artichoke, and also planted the remaining 4 Veronica F1 cauliflowers and some lettuce which will benefit from the moisture but probably won’t last long here where it is one of the first beds to get the direct sun and heats up fast.

Image

...I made a collage to show how they actually look...(click for enlarged view)
Image

I managed to prep VGA (Vegetable Garden [bed] A) and weeded VGB. I didn’t think the Gobo in VGA would last this long - this is it’s 3rd year.... I’m thinking 2 watermelon in the middle, and cabbages and kales on either side, since this bed was tomatoes, peppers, eggplants, and basil last year. Cucumbers on the trellis in VGB (last year’s satellite indeterminate tomato bed).

Image

User avatar
rainbowgardener
Super Green Thumb
Posts: 25279
Joined: Sun Feb 15, 2009 6:04 pm
Location: TN/GA 7b

Everything is looking great! Off to a good start!

User avatar
applestar
Mod
Posts: 30541
Joined: Thu May 01, 2008 7:21 pm
Location: Zone 6, NJ (3/M)4/E ~ 10/M(11/B)

Thanks KayJay and Rainbowgardener :D

User avatar
applestar
Mod
Posts: 30541
Joined: Thu May 01, 2008 7:21 pm
Location: Zone 6, NJ (3/M)4/E ~ 10/M(11/B)

... I always experience and expect the diminished physical strength and endurance coming out of the winter into spring — and Not being able to accomplish as much each day as I remember being able to back in the fall, after a full season of conditioning in the garden. Usually though, there has been a slow rebuilding of strength and muscle tone as the weather warms up in late winter and early spring.

This year, I came out of winter with two injuries in critical areas — my old shoulder/rotator cuff injury on my dominant side that had begun to act up making it impossible to lift even the lightest object let alone carry them, and bursitis/sciatica causing excruciating pain in my right hip and down the leg. Both of these joints somehow ending up with pinched nerve on occasion to make it even worse. That plus the cold and frost that dragged on and taking care of my aging parents that is adding to my time/energy consumption, resulting in delays in spring gardening, and I’m finding myself planning the day’s garden activities that are beyond my ability to accomplish — especially when I throw in additional tasks that are time consuming and energy depleting, but needed to be done ...usually having to do with cleanup that should have been taken care of a month ago.... :roll:


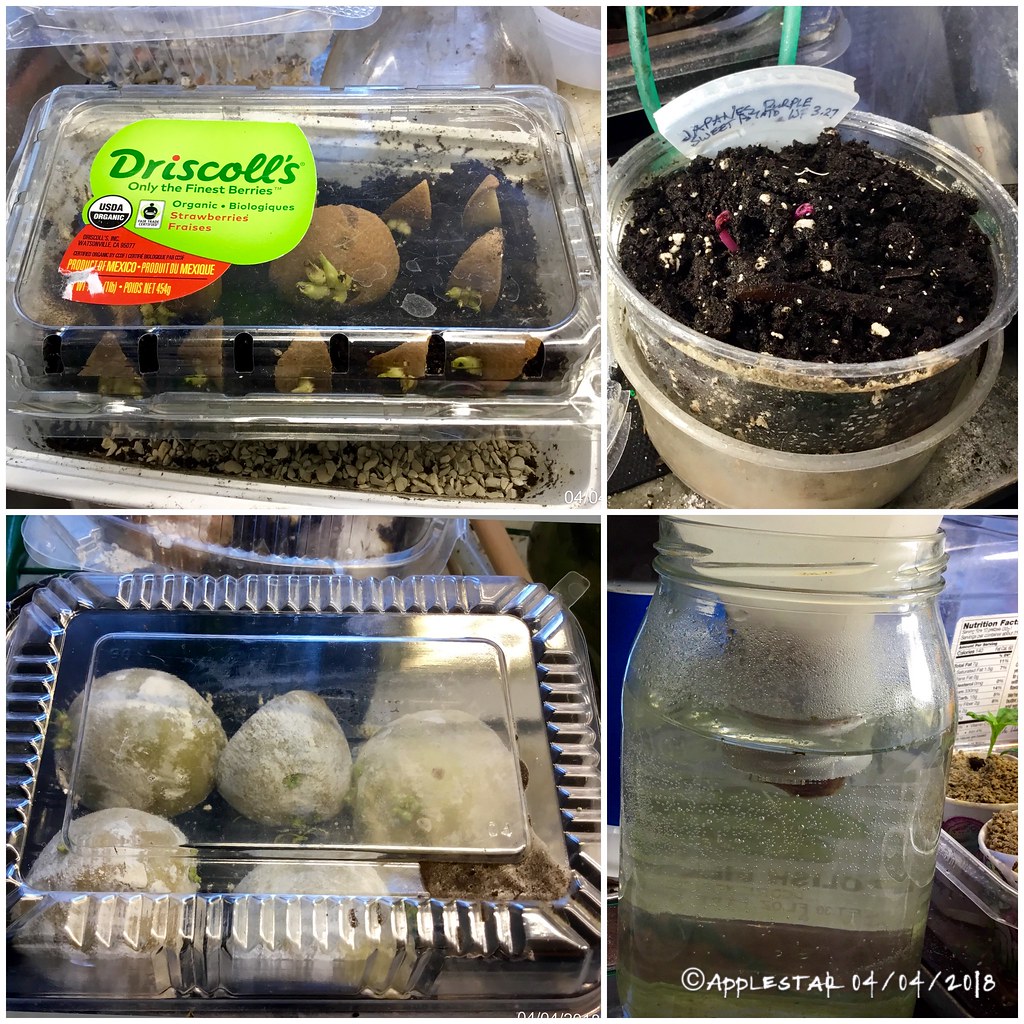
Yesterday, I ended up re-piling my plastic compost bin. It has a nice design — remove lid, slide off Four plastic stays, and remove the front and back halves of the wall, start the new pile next to the old with materials from the top, re-assemble the bin around it and finish building the pile, layering in fresh materials to balance the mixture until the old pile is down to semi-finished compost. Winter pile is hardly consumed, so only maybe 1/5 of the pile was semi-finished, but that approximately 8 inch high bottom section was literally ROILING with red wigglers.

I emptied out the finished compost in one of my compost tumblers into one of the Veg Garden beds, and put most of the chunky but fully decomposed unfinished compost in it. The tumbler allows me to quickly mature the compost.

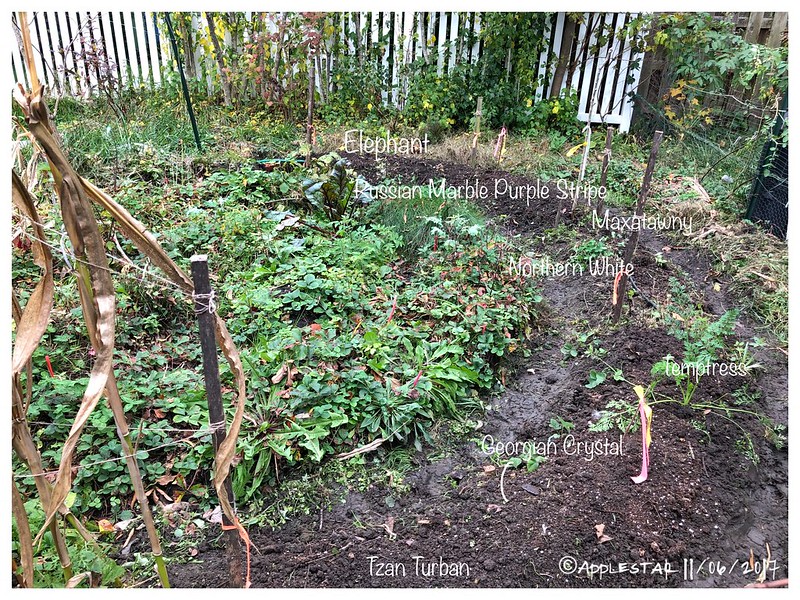
Then I cleaned out the Can-o-Worms which I had left outside covered with heavy garden fleece — hardly Enough for this winter’s severe, negative single digit temperatures — by putting the little bit of good looking vermicast in one tray in the tumbler and emptying the undigested moldy looking scraps and bedding in the newly re-piled compost bin. Gave the trays a quick wash and filled one of the trays with the unfinished compost full — and I mean FULL — of red wigglers. THERE! Can-o-Worms has been repopulated! (I still have to bring out the 2 gallon stacked vermicomposter of worms — they can have another tray to themselves). I then set up the Can-o-Worms in the shaded area next to the blueberry bed (Yeah that’s another project that needs doing — I WAS going to dig up and move the blueberry bushes that had become MOST shaded by the neightbor’s fence border-planted pine trees and re-configure the blueberry bed early this spring.... )

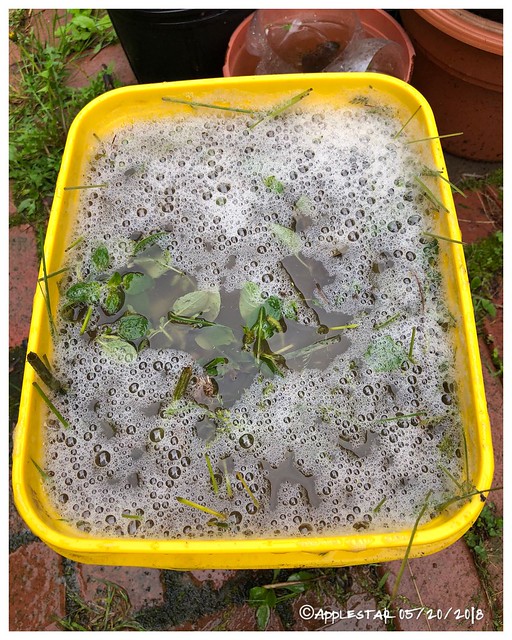
That still left me with about 4 inches of nearly finished compost that were still full of worms — I needed to do something with it all, but really didn’t have the time. So I ended up half filling the Rubbermaid SIP I emptied to re-fill (the old SIP potting mix went in the VG.PSRB and VGA the other day). To keep out the robins and other raiders, I “covered” the compost with the sub-irrigation platform. Hopefully that is enough. With any luck, the worms will migrate down, away from the light, and let me take out the compost without getting in the way. I might also scoop out onto a tarp for a quick sorting first.

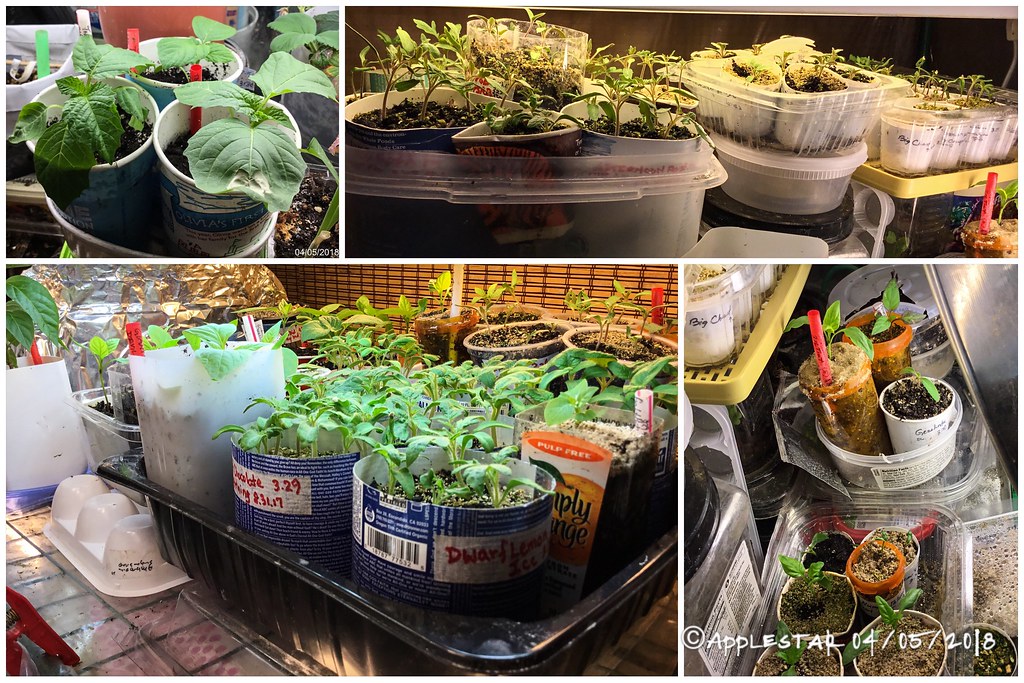
Since I have more than enough worms for the vermicomposter already, I’ll distribute the rest of the worms and compost in the garden and use the worms to “Verm” the container plants as they come out of the house — which Also needed to be done yesterday.

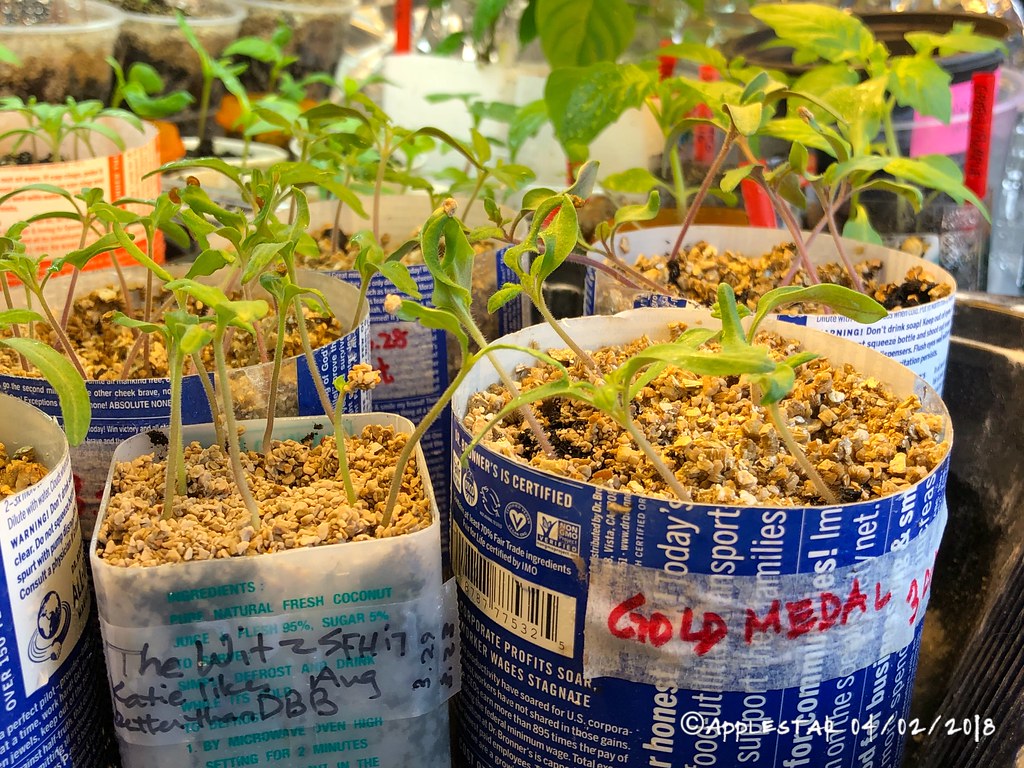
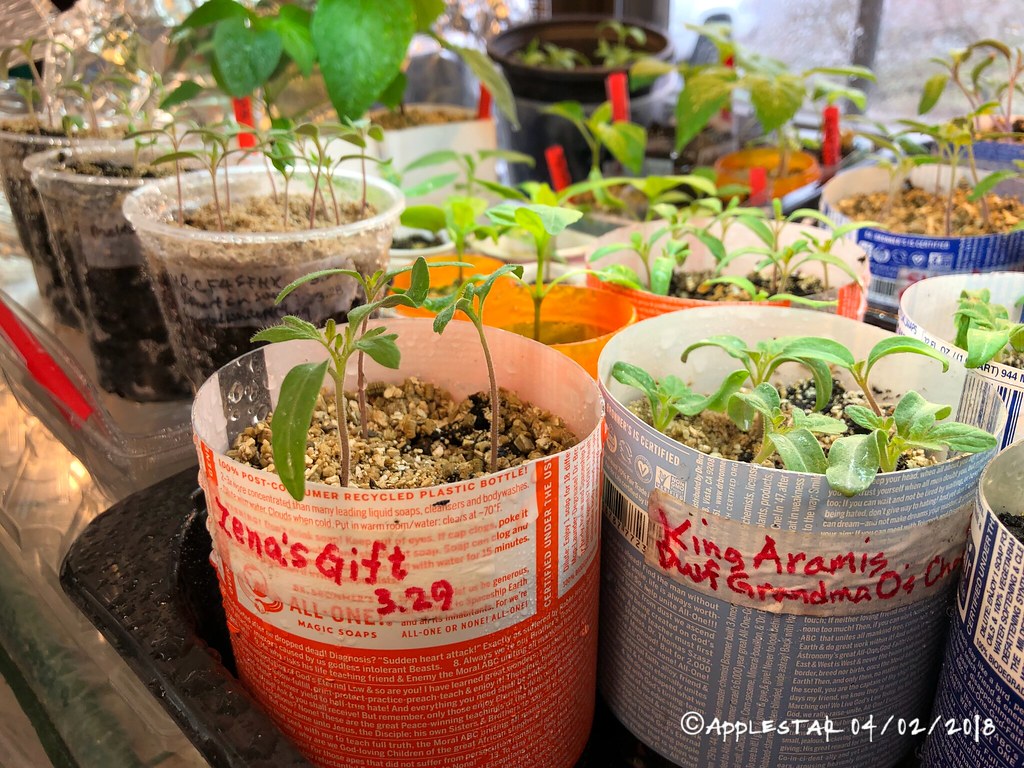
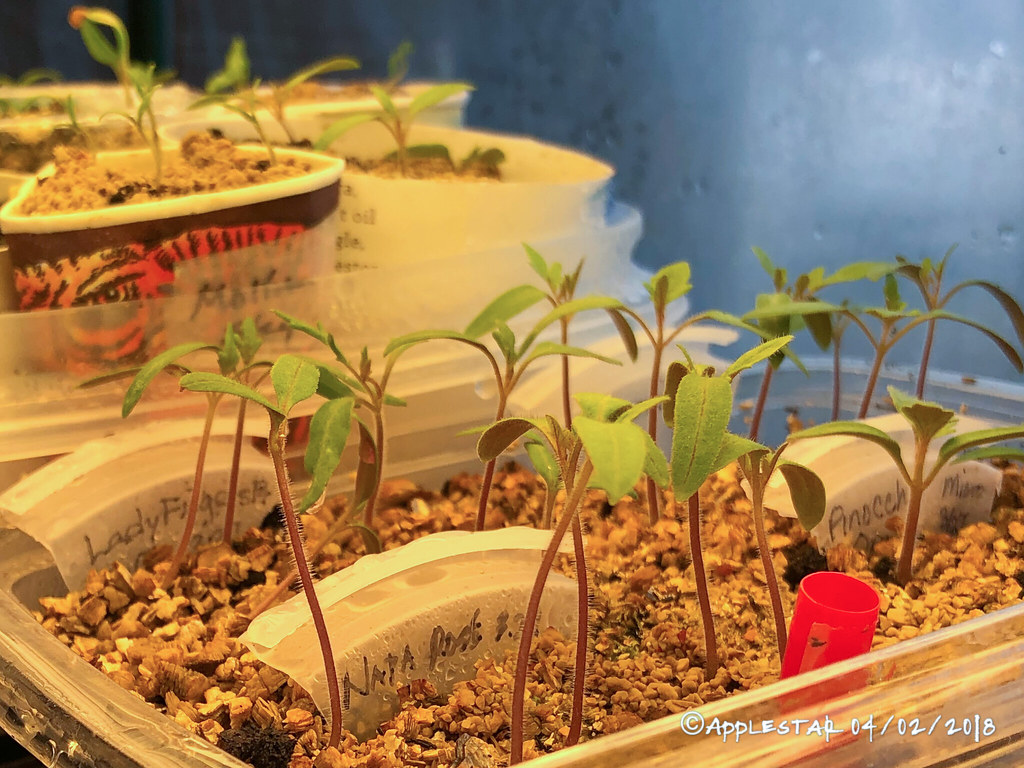
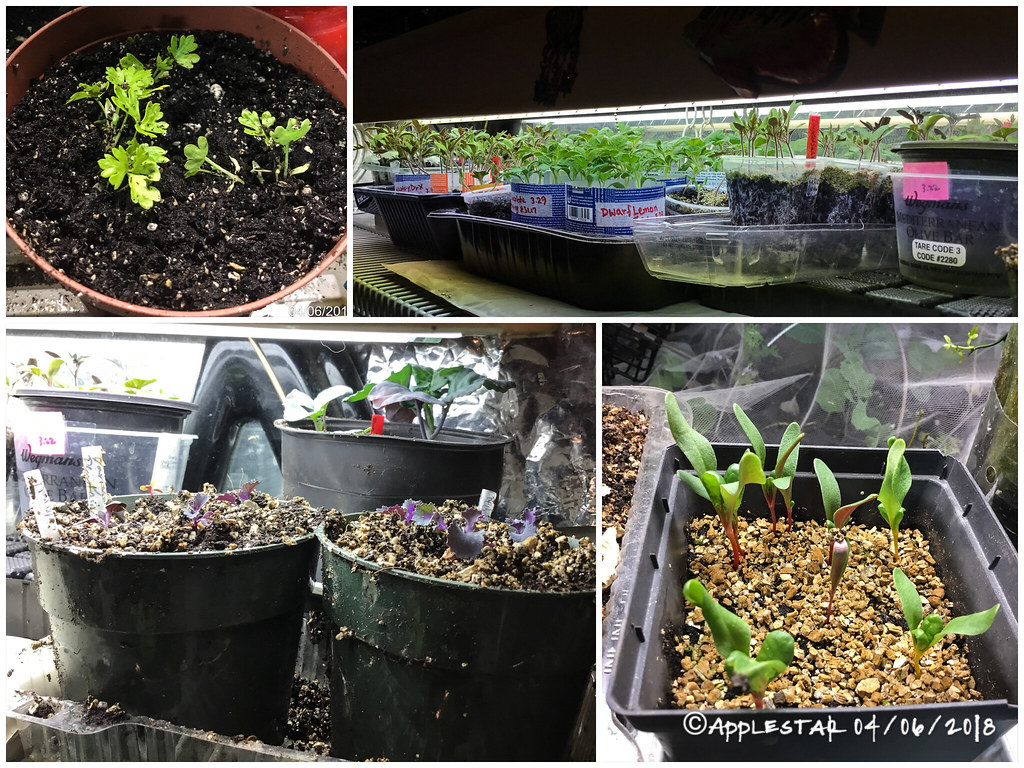
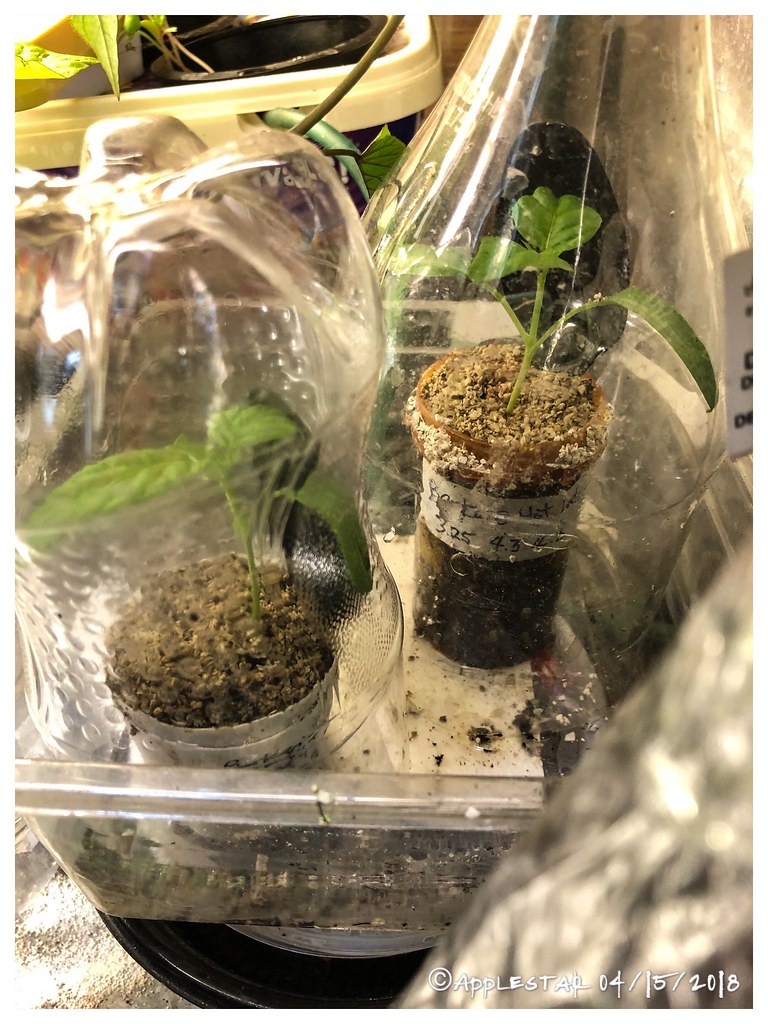
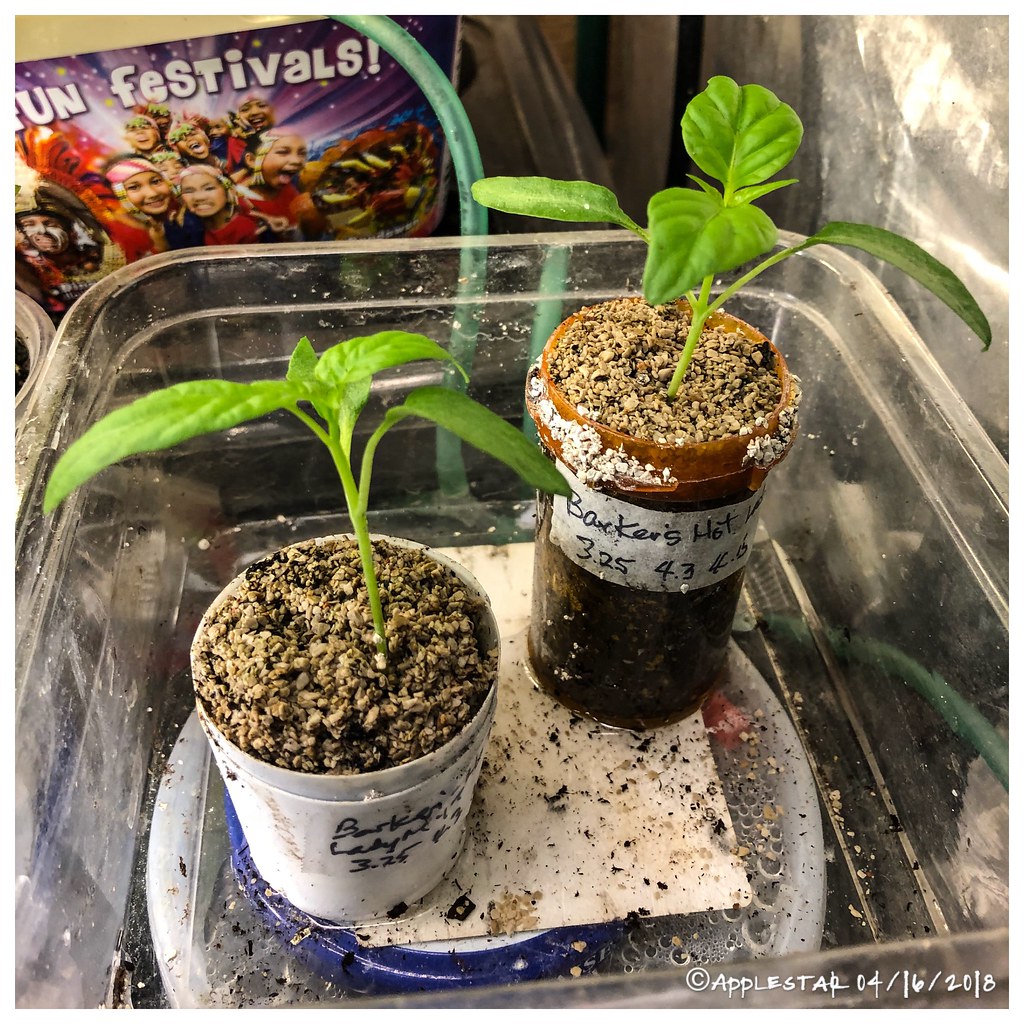
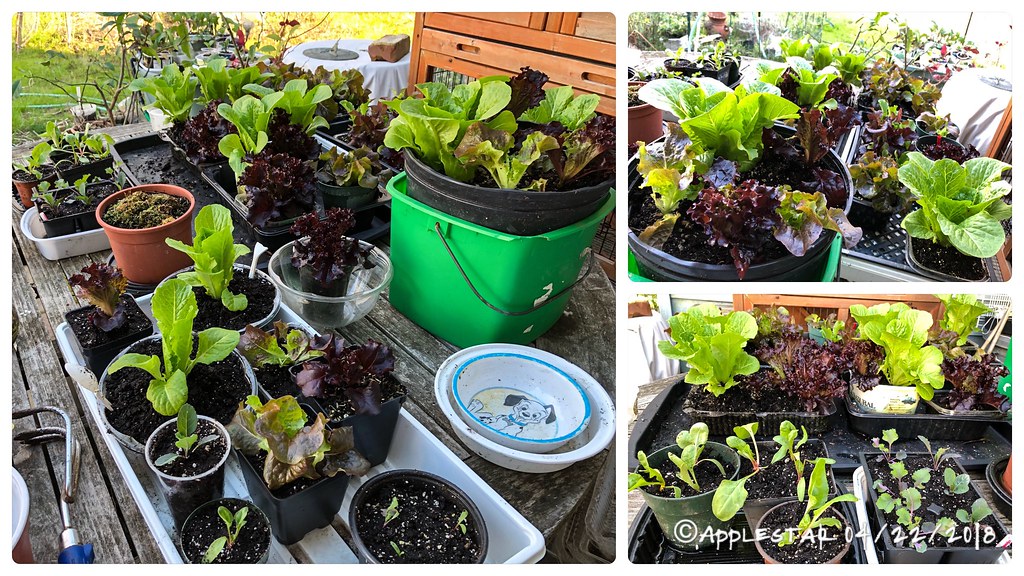
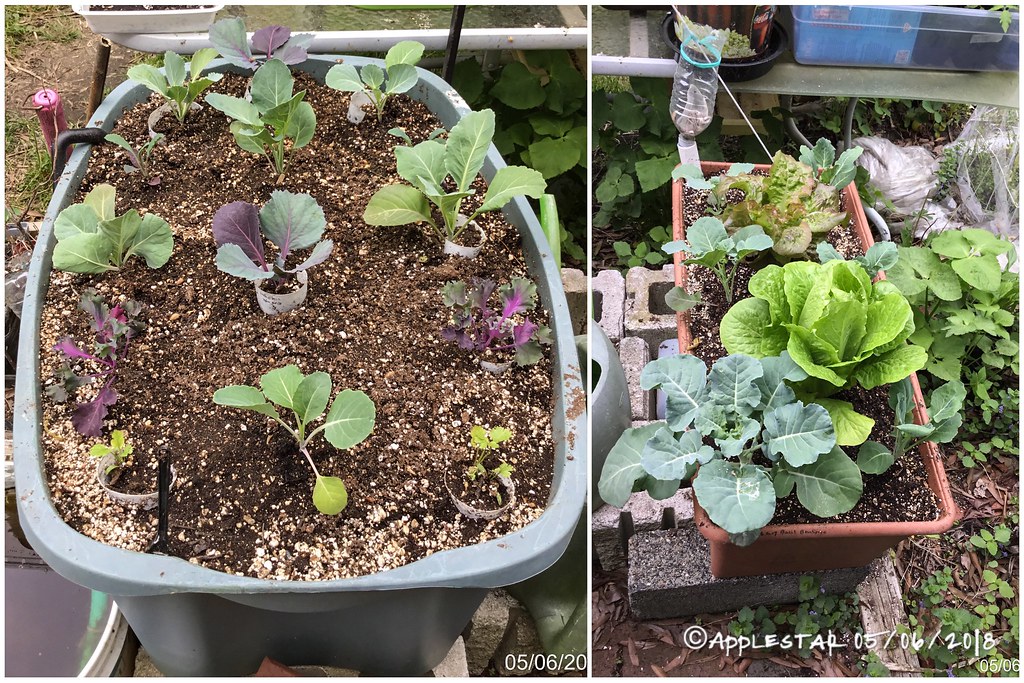
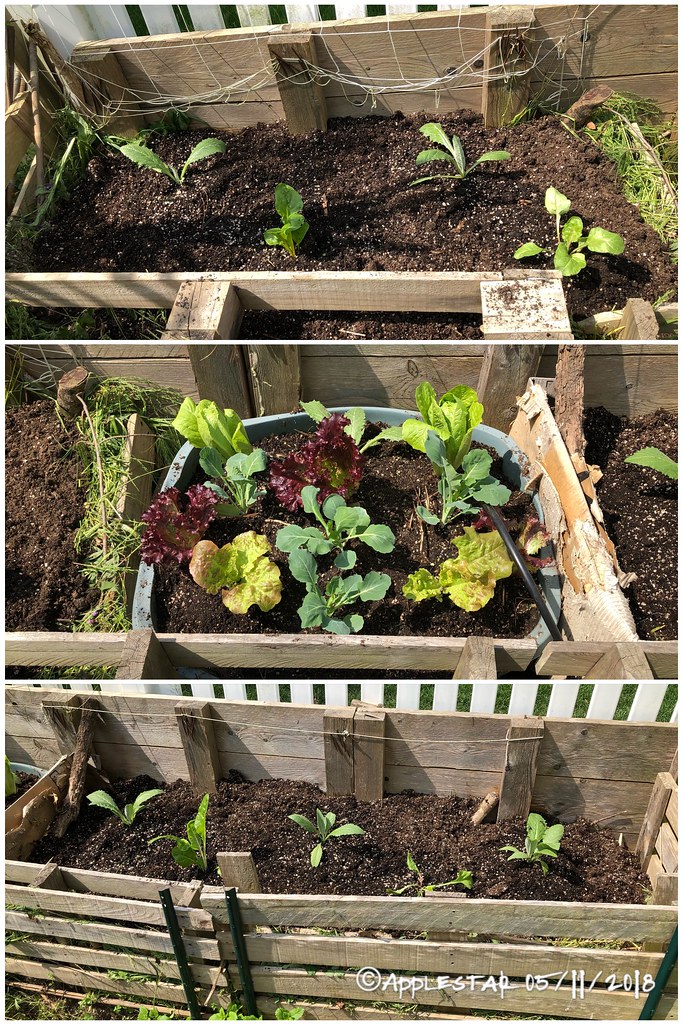
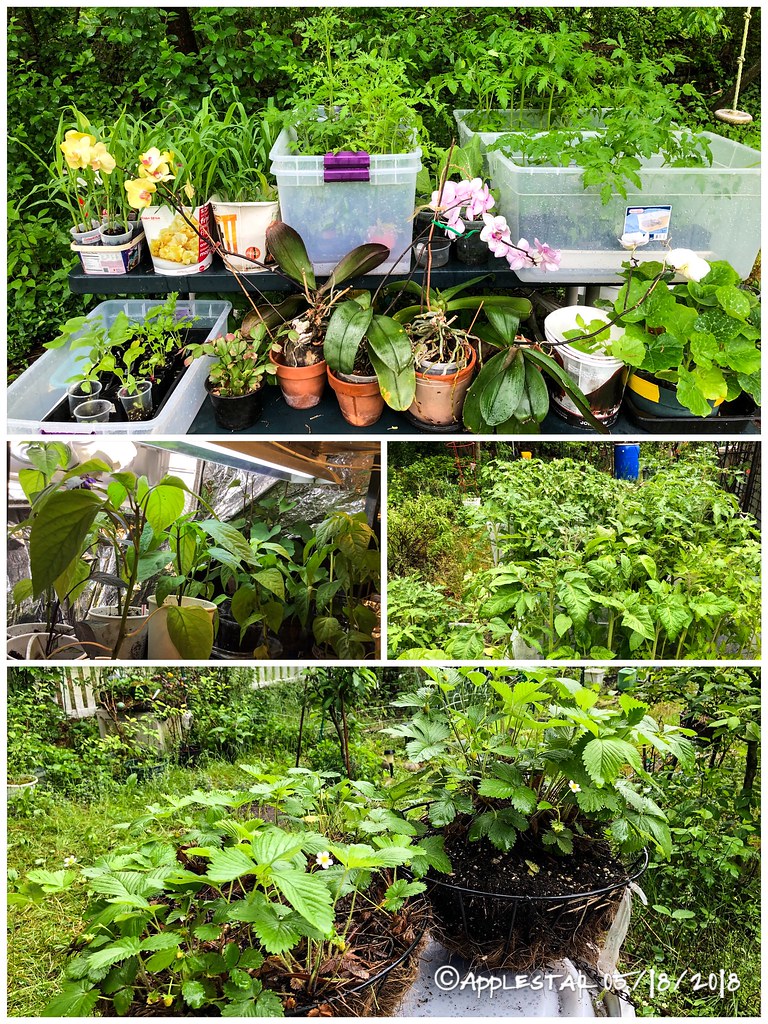
— Once high 70’s and the 80’s temperatures arrive, I want all the plants out so the plant lights don’t add to the heat in the house, and so I can close all the window curtains and blinds to block out the sun. I also want to be able to open/close as well as clean the windows which I can’t access while the plants are crowding around them. Some of these plants could have come out a little earlier, but basically same schedule as tomatoes — once all danger of frost is over and 50’s or above. In most cases, they need to be up- or re-potted once they go outside....

The SIP doesn’t have drainage holes except for the one higher up in the side so I will have to deal with the remaining worms the compost very soon — moreover, I intended to plant some of the peppers in it, so yeah — I just added an extra step to THAT project. But I didn’t have another tub that could handle the weight and volume.

User avatar
rainbowgardener
Super Green Thumb
Posts: 25279
Joined: Sun Feb 15, 2009 6:04 pm
Location: TN/GA 7b

Sorry to hear you are having so much trouble with pain, applestar. But sounds like you are being very productive even so!

You are still waiting for temps to get into the 80's? High today 91, tomorrow 92. Then we get some rain and a cool down, back into the 80's

User avatar
applestar
Mod
Posts: 30541
Joined: Thu May 01, 2008 7:21 pm
Location: Zone 6, NJ (3/M)4/E ~ 10/M(11/B)

Thanks @rainbowgardener — I tend to push through whatever ails me, so when I go down, you know it’s pretty serious.

I planted tomatillos today. I had four plants but sold one at the plant sale. I mixed up seeds from ones labeled “purple” and ones labeled “green” so I don’t know which ones these are. It will be a surprise. :D They were completely pot-bound and had started to bloom.

@rainbowgardener, they were starting to have lower leaves that had turned bright yellow....


...I’ve never grown tomatillos before, I wonder will these useless-for-tomato cages be enough??

Image

...I also managed to get the VGC section inside the fence, where giant plants of volunteer strawberries are trying to take over — I Think I will plant cherry tomatoes in leftover spaces around them — as well as the VGC/VGD combined 4x4 bed prepped to plant before it started raining heavily enough for me to call it quits. :-() ...I’m putting down some dolomitic lime, Pennsylvania mushroom compost, Black Kow composted cow manure, and BumperCrop.

(...that sounds confusing, I need to assign new designations for these beds since I reconfigured the bed spaces. :| )

...I have to figure out where to plant that pepper ...I think that’s Giant Sweet Devil’s Horn.

User avatar
applestar
Mod
Posts: 30541
Joined: Thu May 01, 2008 7:21 pm
Location: Zone 6, NJ (3/M)4/E ~ 10/M(11/B)

I planted the VGA (Vegetable Garden [bed] A) yesterday morning :D ...yes, they are a little too close, but the cabbages and kale can be removed as necessary and as the summer heat wears them down. This will do for now. In addition to the composted cow manure, mushroom compost, and BumperCrop I added, there are tons of earthworms here — mostly Nightcrawlers that favor the wet clay subsoil underneath the raised bed which had been originally scraped and double dug to the bare clay, as well as red wigglers that live in the constantly mulched with yard debris/weeds swale.paths.

Image

... and, today, insect netting (swaths of tulle) draped over and secured in place to keep out Cabbage White Butterflies and Cabbage Moths. Plus if any aphids and sucking insects manifest inside, I can release ladybugs.

Before finishing, I had to evict a yellow jacket who seemed intent on inspecting every plant as well as nook and cranny. I’m assuming since she didn’t find anything, the plants are still free from infestation... unless the thing is waiting for eggs to hatch into more sizable caterpillars... ? I got it out of there once, then before I finished securing all gaps/openings, it snuck back in again and had to be escorted out. :roll:

BTW half the water in the VG.SIP remote reservoir bucket was gone this morning, so the siphon has been activated and is working. now I just have to keep the bucket filled and the SIP will be automatically refilled with water. Image

User avatar
applestar
Mod
Posts: 30541
Joined: Thu May 01, 2008 7:21 pm
Location: Zone 6, NJ (3/M)4/E ~ 10/M(11/B)

I’m finally getting around to tackling the big garden beds on NE side of the house (opposite side of the house from the VG beds). This area is lower and colder with house shadow completely shading the entire area during the winter, and by mid-afternoon in spring. So it stays soggy for a long time ...but this year, I am especially late.

In the following collage, upper half shows how I barely managed to start weeding the far section (Haybale Row and Sunflower House+Sunflower House Extension) yesterday in the high 80’s/low 90’s blazing heat and had to give up raking up the debris. Lower half shows this morning’s cleanup of the Spiral Garden in the light drizzling rain, beheading all the grass inflorescence/spike that grew to 3-4 feet, then cutting the remaining “hay” down as mulch.

Image

The beheaded inflorescence filled a cat litter bucket (is that 4 gallon or 5 gallon?) — my neighbor gave me some more buckets ...they are SO handy around the garden! :() I packed them down by stomping on them with my booted foot, then filled the bucket to the top with nutrient-rich rain water saved from the hardening off started plant trays. I’ll keep stomping them down to submerge and they will ferment and be digested by microbes into “drowned weeds juice” — Nitrogen-rich fertilizer. They should start bubbling and foaming in a few days to a week, and when the foaming action subsides, and the mixture smells like fresh horse manure, you know it’s basically done. It’s a good way to dispose of weeds that are too mature and pose danger of dropping seeds, though just like horse manure, not all seeds will be killed.

What I like about this method is it can thwart those pesky weeds that will refuse to die and will mature immature soft seeds if allowed to remain dry. The strained liquid will be used as soil drench fertilizer, and the leftover digested plant matter will very quickly heatup the compost pile.

I plan on using this to feed the corn, squash, and melons.

User avatar
applestar
Mod
Posts: 30541
Joined: Thu May 01, 2008 7:21 pm
Location: Zone 6, NJ (3/M)4/E ~ 10/M(11/B)

Spiral Garden is currently being slowly taken over by strawberries. They are blooming and earliest have small green berries on them. There are wild strawberries and Sea Scape cultivar mixed in there, and I really need to mark the large-fruiting day neutral Sea Scape better, so I can encourage more of them to spread and not as much of the Wild strawberries, which are fantastic in their own way but are only June bearing.

Generally speaking, since I grow taller-growing tomatoes, winter squash, and corn as main rotation crop in this bed, the strawberries don’t seem to bother them as companion ground cover. And since they spread on their own, I have no compunction about taking out ones growing where I want to plant the main crop. (...but this is another season to know which ones NOT to dig up.)

Spikey looking blue-green leaves are fall-planted garlic. I was reviewing my notes and was disappointed to note that not all of the late-planted cloves seem to have established. Oh well, we will see.

There is the elderberry at the entrance to the Spiral, of course. There are a few other things growing in the Spiral Garden that were left in place on purpose, including a patches of hot pink Coral Reef Beebalm, variegated Creeping Charley, and Purpurea milkweed. There is also some kind of shrub — a fresh-cut branch that I had used for tomato stake one year — which seems to have rooted. I have to compare leaves and ID which one it is. :>

SQWIB
Greener Thumb
Posts: 970
Joined: Tue Feb 16, 2016 9:21 am
Location: Zone 7A - Philadelphia, PA

Hope your feeling well and hope your parents are doing OK.

My woes aren't near as bad a yours but I get it. My main problem is by May I loose my gardening motivation, more so this year than last year, I don't know why but it's more mental than physical. By late June I'll be bouncing off the walls with excitement (harvest time).

How my little brain works is I take on a project and go balls-to-the-wall and sort of fizzle out. I'm the type of person that when I get something in my head I have to try it, first it's researched, built in my head, then I transfer to paper then build it. Most of the time it works out well. You can see that in my Koi Pond.
The last four years I have been very aggressive with my outdoor stuff. I go all out, try new things then tweak.
I got heavy into Hydroponics then switched back to soil. It wasn't difficult but I stressed too with adding nutrients and heat waves. I don't like to be stressed so the Hydro was out.

I look at what works and what was work! For instance, I love my air pruning pots but replenishing the soil and putting them away each season was becoming a chore, so now I only use a few Air pruning pots.

My arborvitaes were looking shabby in the back and were a bear to maintain so they were replaced with a fence, lighting, perennial flowers and perennial edibles.

My vertical towers worked great the first couple of years but changing out the potting mix is near impossible, so I removed one this year and will remove the other next year.

My Bradford pear trees were becoming dangerous and a nuisance, they all came out, 5 of them, this reduced my stress a great deal and also gave me a ton more gardening options.

My compost bin was great until late winter, I think I added too much cardboard too late in the season and it filled up quickly. My tweaks this year is to use less cardboard. Also to keep the bin from filling too quickly, whatever I trim out of the garden, stays in the garden. I have weed and volunteer veggie plants growing everywhere, I don't stress over these on a daily basis and pull some here and there and/or cover them up with garden trimmings.
When weeding troublesome weeds and if the weeds haven't gone to seed, they get pulled and placed on top of the beds also, if they have gone to seed, they get dumped in a 5 gallon bucket with rainwater, then later will be dumped in the compost bin.

I allow my lettuces, cabbages, kale and broccoli go to flower and leave them if they aren't shading out other plants.

I let my oregano and strawberries go nuts in the garden and will cut back every so often.

I replaced many ornamental shrubs with Edible perennials, I figured if I'm gonna have to take care of a plant it might as well be an edible.

Problem grass areas in the front were replaced with gardens with perennial flowers and herbs, I also installed pavers and patios in these trouble areas.

I reduced more stress by adding an irrigation system to water nearly everything.

Every year I take a look at what stressed me out, what was too much work for the payoff and then I try to eliminate those things or at least tweak them.

My biggest stresser this year was the weather, I learned (actually too stubborn to follow my own gut) that I need to assume the worst when it comes to weather so next year everything will be started two weeks later and planted two weeks later, no exceptions.

Everything looks great in your garden but if it becomes too labor intensive, maybe it's time to reduce some stress, keep whatever gives you the most joy and slowly reduce what gives you the most mental/physical stress, whether productive or not!

User avatar
applestar
Mod
Posts: 30541
Joined: Thu May 01, 2008 7:21 pm
Location: Zone 6, NJ (3/M)4/E ~ 10/M(11/B)

Thanks @SQWIB — As I was reading your experiences and conclusions/solution, I was intrigued that many of your thought processe/progression have coincided with mine and how I have been evolving as a gardener. I tell ya — great minds and all that. :wink:

A glaring omission on my part is the ability to build and craft. Ah if only I was better at it. I don’t think I’m incapable, it’s just daunting, and as projects go, I seem to lack the engineering/mechanical mindset — anything that requires any kind of precision had better not be my responsibility. (I can’t sew either.)

Another obvious is energy levels. I fizzle out way before you do from what I’ve seen. :> But as far as stresses go — garden Is where I relax and mentally recharge, no matter how much I complain. :roll:

User avatar
applestar
Mod
Posts: 30541
Joined: Thu May 01, 2008 7:21 pm
Location: Zone 6, NJ (3/M)4/E ~ 10/M(11/B)

Snapshots from my garden

— first broccoli — variegated tomatoes — “It’s alive, Jim” (more later)
Image
— lettuce harvest — gorgeous photo — peaches


—almost everybody has been escorted outside for the summer —
— orchids get special spot with babies, others are elsewhere not shown —
Image - 
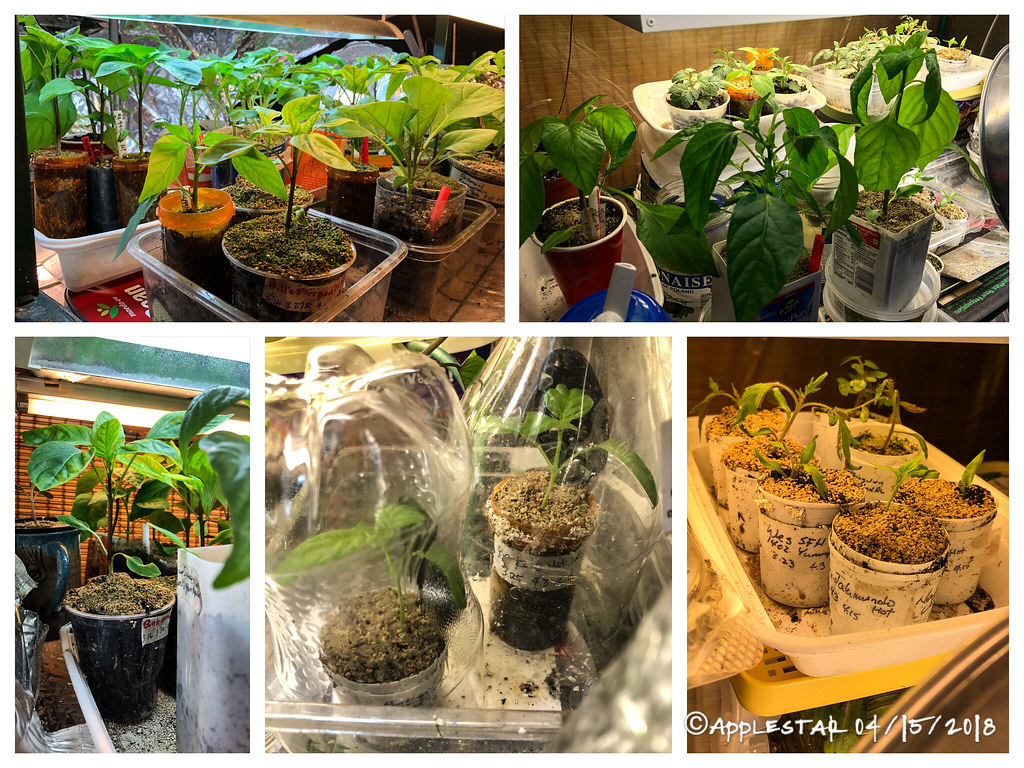
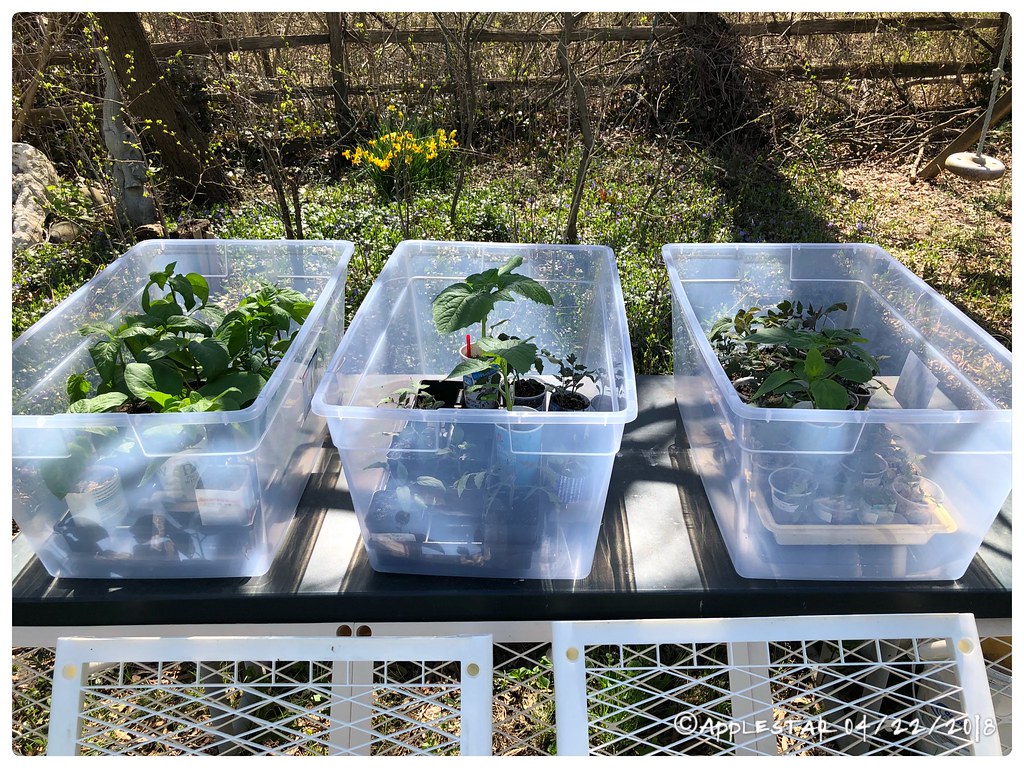
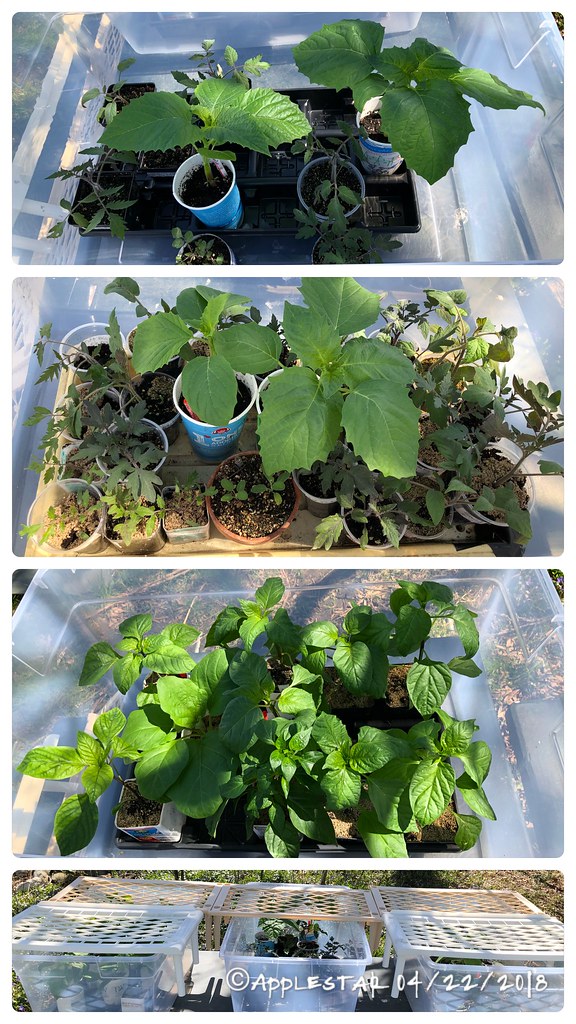
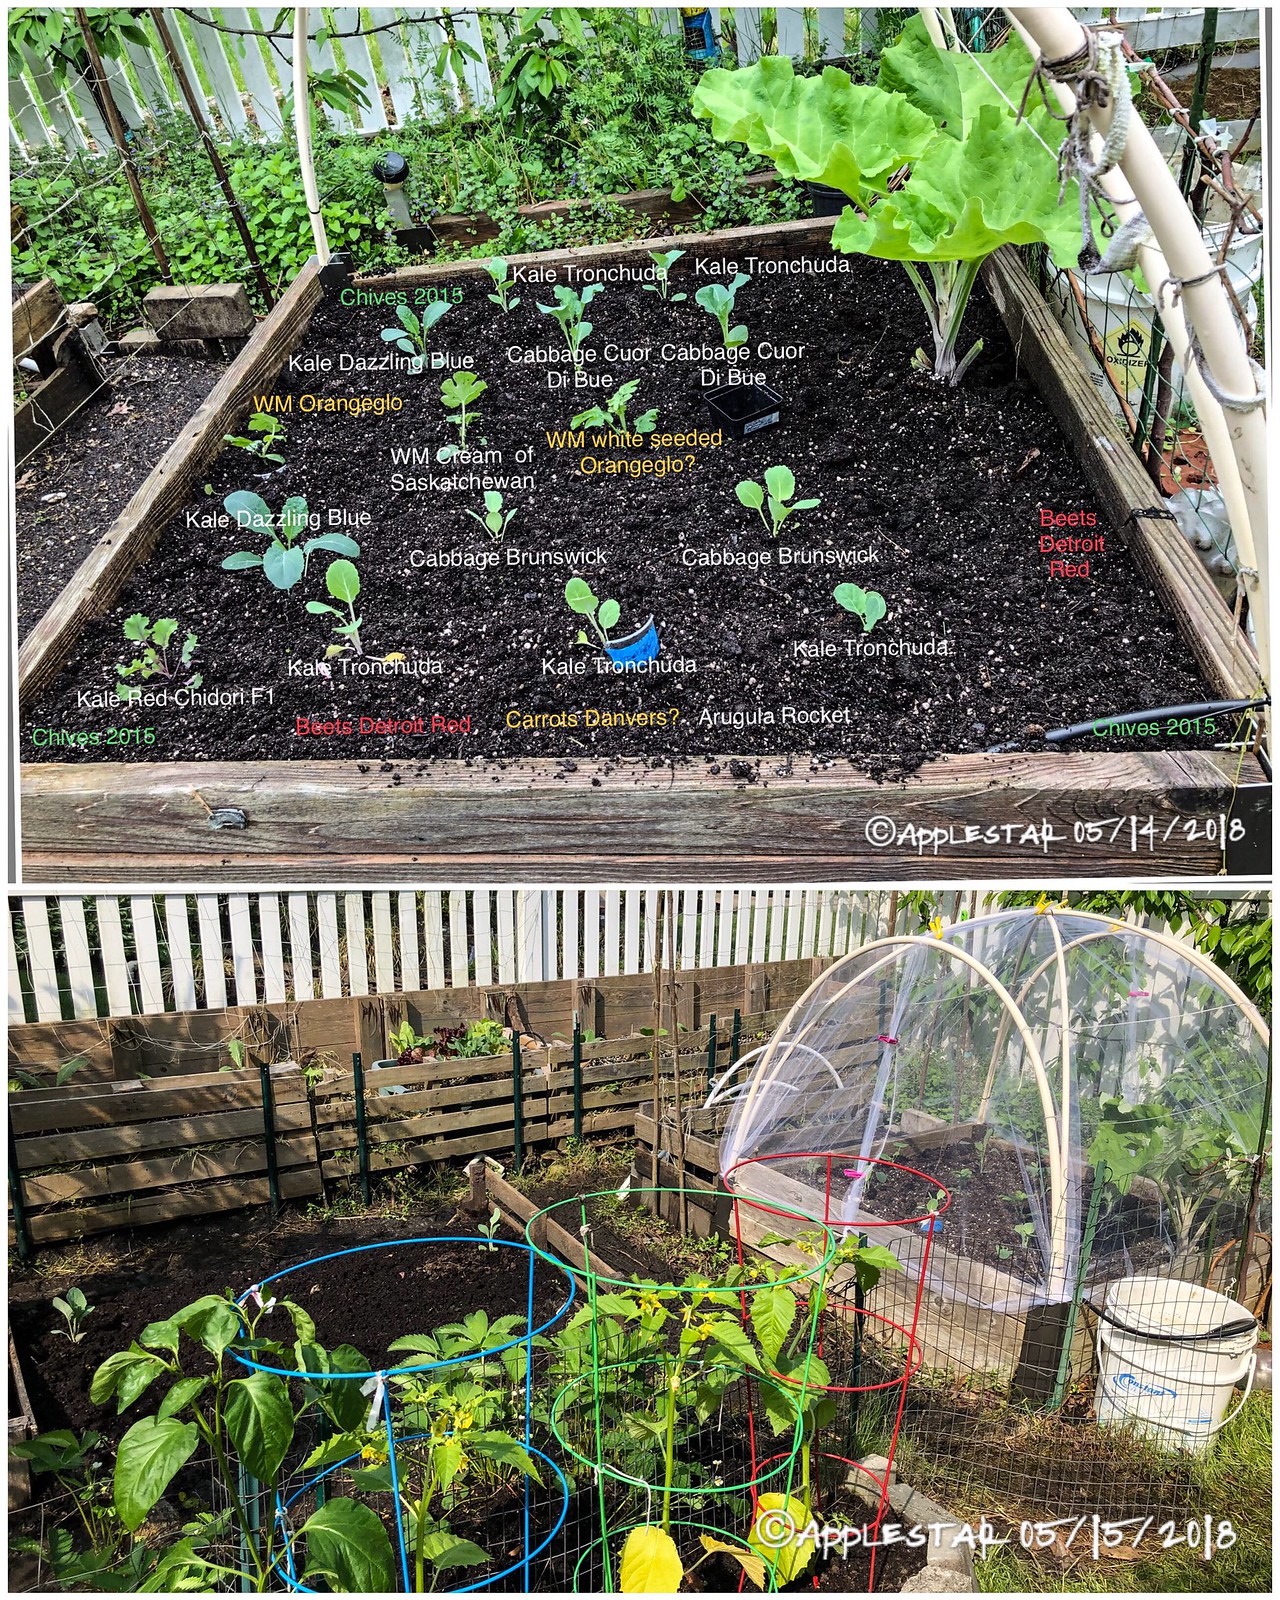
peppers/tomatoes need to be planted -
— alpine strawberries in hanging baskets —

User avatar
applestar
Mod
Posts: 30541
Joined: Thu May 01, 2008 7:21 pm
Location: Zone 6, NJ (3/M)4/E ~ 10/M(11/B)

“Drowned Weed Bucket” was already smelling like silage yesterday. Image

- ETA -

Image


Return to “Vegetable Garden Progress + Photos & Videos”