User avatar
MichaelC
Senior Member
Posts: 232
Joined: Wed May 13, 2015 11:32 pm
Location: Scotts Valley, CA

Re: MichaelC's 2016 garden

KitchenGardener wrote:So cool to see your hard work paying off! I bet your pea plants are huge now and your beans are going crazy. Have you gotten your pepper plants in the ground yet?
Sorry I missed responding to this. Yes, my peppers went in a week or two ago.
Oh, and I'm totally jealous of your irrigation system...I'm still too intimidated to even try assembling one. Maybe next year.
It was really easy! And even easier this second year after learning last year. Feel free to message me anytime for specific advice.

It wasn't expensive, and Peaceful Valley makes it pretty simple to figure out what you need and their prices are much lower than most places. I think I spent $100 tops including the electric timer (refurbished from amazon). This year I spent less than $10 for a few additional bits and bobs. 1/2" fittings of various types cost less than half than those from my local ACE. I also found very cheap fittings from Drip Depot via amazon.

I really like the emitter tubing, I was able to reuse it this year with no clogging. The only downside is the limitation of the 12" spacing, compared with regular drip fittings that you can put exactly where you want them. I was able to plan it this year so that each plant type has its own valve. I'm very happy with it, and in this drought couldn't justify a vegetable garden otherwise.
ETA: sorry, now I see that you did plant your peppers and there were more pics than I first saw. Your mulch looks great, as do all of your veggies. :)
Thanks so much for your kind comments! I need to put up some new pictures. I seem to be terrible at taking photos of tomato plants.

User avatar
MichaelC
Senior Member
Posts: 232
Joined: Wed May 13, 2015 11:32 pm
Location: Scotts Valley, CA

Time for some new photos.

First up, my beans. I'm starting to wonder if the starts I bought this year were mislabelled bush beans! But I can't remember exactly what they were doing this time last year. They are growing like crazy and just started flowering heavily. But they are showing no signs of going UP.
beans1.jpg
beans2.jpg
The cucumbers seem to be off to a pretty normal start.
cuke.jpg
The peas are clearly suffering from the heat, and I don't think they'll do as well as they did last year. I remember that last May was very cold. That's OK, the beans will take over that side later (that is, IF they are pole beans!) This little bunch seem to be soldiering through enough to provide a few pods:
peas.jpg
The peppers are going slowly. Here's a couple:
pep1.jpg
This one is pretty sickly. It just started making a bunch of flowers, I'm keeping an eye on it.
sickpep.jpg
Last edited by MichaelC on Tue May 17, 2016 12:37 am, edited 2 times in total.

User avatar
MichaelC
Senior Member
Posts: 232
Joined: Wed May 13, 2015 11:32 pm
Location: Scotts Valley, CA

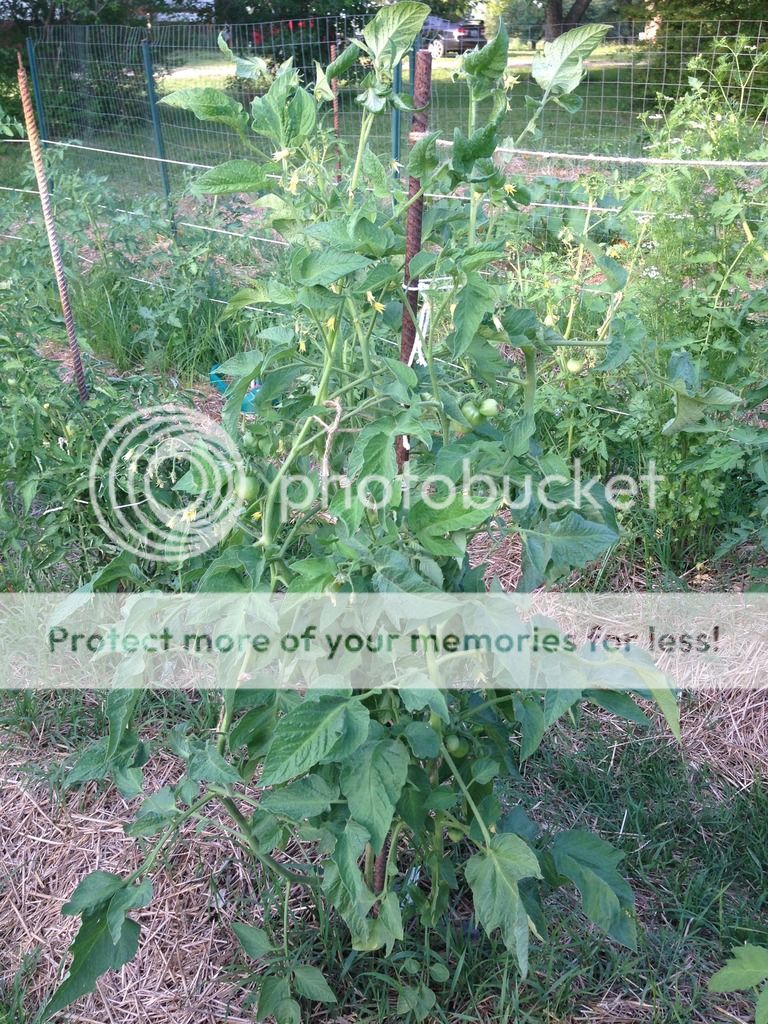
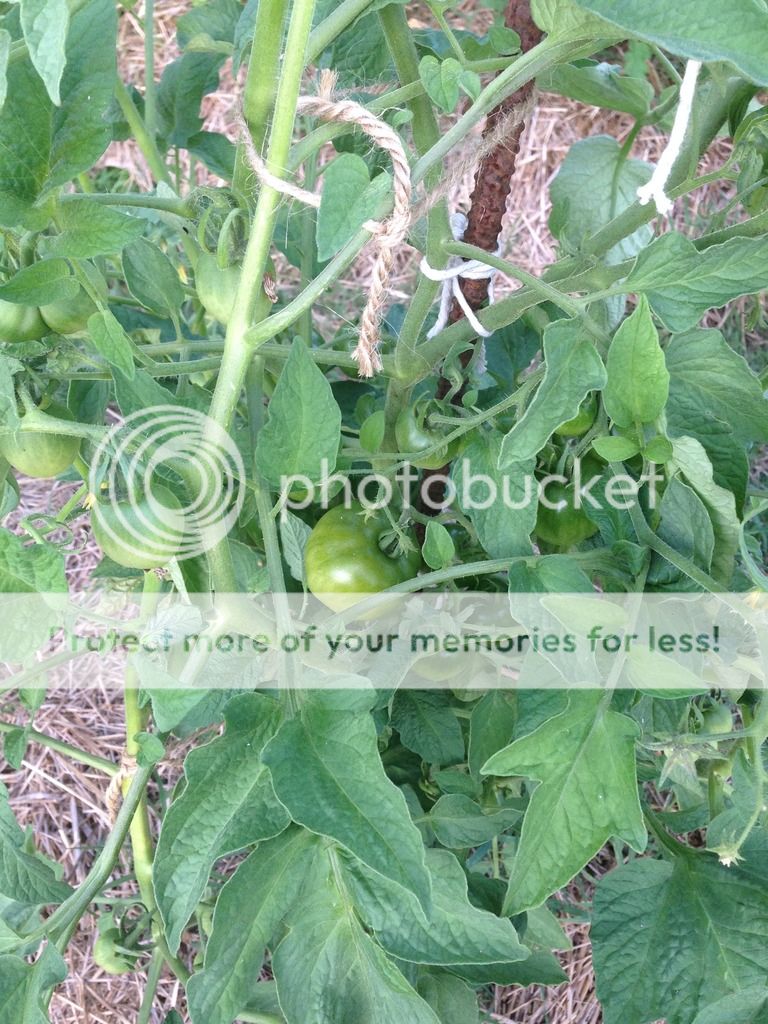
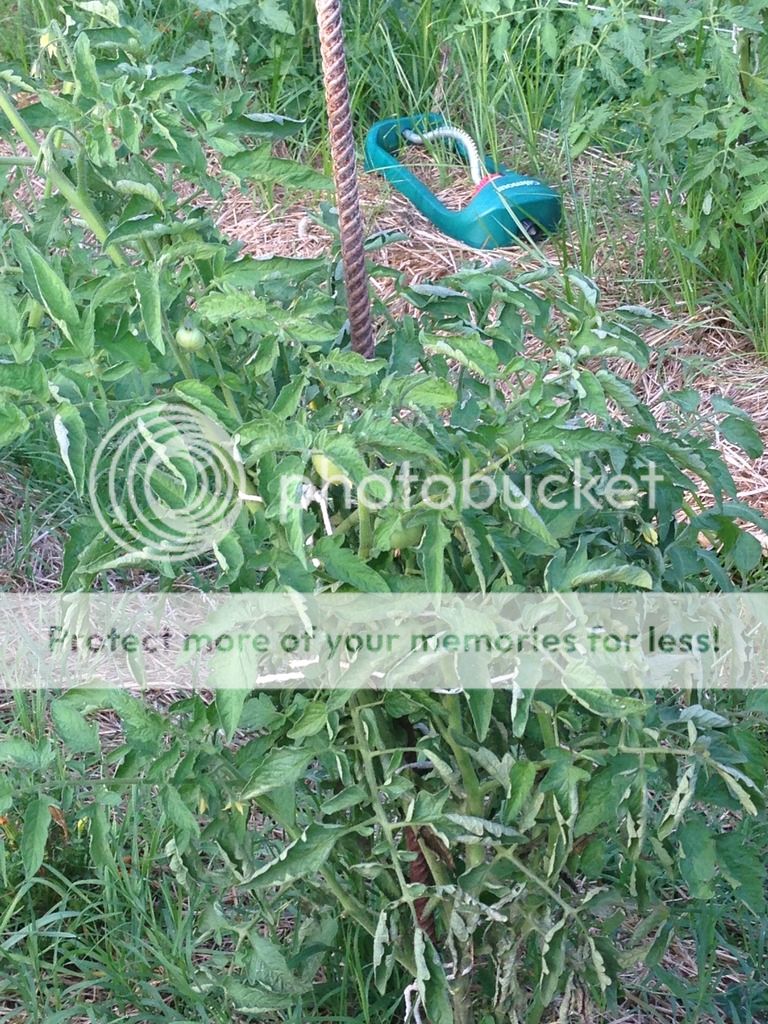
Here are some shots of a few of my tomatoes, which are doing super. I'm just terrible at taking pictures of them.
tom1.jpg
tom2.jpg
tom3.jpg
I forgot to take a shot of the Sweet Million that I had to replace after 6 weeks of growth thanks to the antics of one of my feline friends. I also should take one of the volunteer (likely from Matt's Wild Cherry), which seems to be doing pretty well since I started fertilizing it. It is outside the area of soil that I cultivate.

User avatar
Lindsaylew82
Super Green Thumb
Posts: 2115
Joined: Wed May 21, 2014 9:26 pm
Location: Upstate, SC

So pretty!!! It's looking really good, Michael!

User avatar
applestar
Mod
Posts: 30542
Joined: Thu May 01, 2008 7:21 pm
Location: Zone 6, NJ (3/M)4/E ~ 10/M(11/B)

Looking great! But you should just sow your own beans. Beans are easy. My DD's grew some beans that spilled out from hand-made actual bean-stuffed beanbags when they were little. :()

I have Christmas Lima bean that I bought just a small amount from the organic bulk section a couple of years ago, first year was a touch and go but collected seeds have shown more vigor. Usually they do better if you pre-germinate in a sprouter and plant just the vigorous ones. Larger beans like Lima's might be heat dried, which would reduce viability.

Stuff from the sprouting section has better viability since they are mostly expected to sprout.

...and of course you could get actuall packets of seeds :lol:

User avatar
cousinjordo
Full Member
Posts: 30
Joined: Sun May 15, 2016 9:24 pm
Location: Middle Tennessee - Zone 7B

rainbowgardener wrote:Yup! tomato seeds must be extremely hardy! Everywhere I plant with my homemade compost I get volunteer tomato plants. I already pulled a couple this spring. It's amazing they go through the compost process, and through all the freezes in winter, you can look at your compost and not see any seeds, but as soon as you plant it they pop up!
So I've got a TON of what I believe with some degree of certainty are orange oxheart heirloom tomatoes volunteering all over my garden from last years compost. I plan to leave a few to sprawl because I have found in years past regardless of hybrids coming back (not true varieties, just smaller) or heirlooms, compost volunteers make the BEST tomatoes. I've got volunteer squash coming up too, probably going to let a few of them go as well. Plants are cool little things! :mrgreen:

User avatar
MichaelC
Senior Member
Posts: 232
Joined: Wed May 13, 2015 11:32 pm
Location: Scotts Valley, CA

applestar - I'm going to do beans from seed next year, I think. I've already got seeds. The reason I use starts is that I don't till my cover crop into the soil until a few weeks before I plant. My garden is not ready for planting until sometime in April. So direct sowing will mean a later start.

For plants like tomatoes, I find it much simpler to buy high quality starts instead going to the effort, space consumption, learning curve, and expense of investing in seed propagation gear. That last is not so important, I know one can make good use of improvised materials. Pennywise and pound foolish? Maybe, but that's my comfort level.

cousinjordo - I understand that's pretty common with composting depending on what one composts! This little guy has to have come from a Matt's Wild Cherry fruit that escaped my hands as I was harvesting. It's tricky holding on to every single one of those tiny things when I'm working six feet above the ground! If it comes to fruition, it'll be interesting to see what kind of fruits it has. It could have been pollinated by any number of its neighbors.

I'll post photos of the volunteer and Sweet Million soon. The Sweet Million has incredibly dark green foliage. I'm very disappointed by the untimely death of its predecessor, it would have been pretty darned big by now.

User avatar
Lindsaylew82
Super Green Thumb
Posts: 2115
Joined: Wed May 21, 2014 9:26 pm
Location: Upstate, SC

But you can just start most of those seeds right in the garden and they'll be up within a week or 2! Most of them anyway! Squash, peas, beans, okra, corn, Cukes... They all go right on in the garden dirt! Just till a little earlier, or even better, just don't till! Add a layer of compost, and then just remulch!

User avatar
MichaelC
Senior Member
Posts: 232
Joined: Wed May 13, 2015 11:32 pm
Location: Scotts Valley, CA

I may try tilling earlier next year. The cover crop and tilling it in are a major part of my soil strategy. This soil was awful two summers ago when I began gardening. After growing a massive cover crop and tilling it in with a couple other small amendments, it was fantastic last year. An additional factor is when the spring rains occur. This year I had a very brief window in which to till in the cover crop.

Here are a few more photos. First, I took a few shots to show the whole garden area. I think I've firmly decided that that little pear tree (planted, like all of our fruit trees, by the previous owner) is going next year. It's in the way, it shades the vegetables in an area that already gets a less than optimal amount of sun, and none of us even likes pears.
over1.jpg
over2.jpg
over3.jpg
over4.jpg

Here's the Sweet Million:
SM.jpg
And the volunteer - in this photo I think you can get a sense of how lousy the soil here is without being worked.
volunteer.jpg
Last edited by MichaelC on Wed May 18, 2016 4:29 pm, edited 4 times in total.

User avatar
MichaelC
Senior Member
Posts: 232
Joined: Wed May 13, 2015 11:32 pm
Location: Scotts Valley, CA

I've taken a couple more shots of my tomatoes as I'm growing some of the same varieties as Lindsay.

Stupice:
stupice.jpg
Green Zebra:
zebra.jpg
Check out the crazy leaf curl they're starting to exhibit. It seems to be a standard tomato characteristic in my garden. It worried me to no end last summer, but the plants thrived and produced prodigiously, so I've stopped questioning it!

User avatar
MichaelC
Senior Member
Posts: 232
Joined: Wed May 13, 2015 11:32 pm
Location: Scotts Valley, CA

Lindsaylew82 wrote:But you can just start most of those seeds right in the garden and they'll be up within a week or 2! Most of them anyway! Squash, peas, beans, okra, corn, Cukes... They all go right on in the garden dirt! Just till a little earlier, or even better, just don't till! Add a layer of compost, and then just remulch!
I've thought a little more about this. The trellis area where I grow beans and peas is against a wall and thus a little bit sheltered. It never gets walked on but is adjacent to a path. I've built a trellis robust enough to be left in the ground and merely restrung.

Next year, I could mow the cover crop from that area and the path earlier than the rest, not till that portion but just cultivate the topsoil, and I could get pea and bean seeds going much earlier than the rest of the garden. I could maybe even strategize enough to get my cucumber trellis and area set that early too.

I don't know if I'll do it, but you've got me to seriously consider my options.

User avatar
Lindsaylew82
Super Green Thumb
Posts: 2115
Joined: Wed May 21, 2014 9:26 pm
Location: Upstate, SC

Looking great!!!

j3707
Green Thumb
Posts: 306
Joined: Sun Jul 12, 2009 10:11 pm
Location: Pacific Northwest, Zone 8, 48" annual rainfall, dry summers.

Michael - what cover crops do you like to use?

User avatar
MichaelC
Senior Member
Posts: 232
Joined: Wed May 13, 2015 11:32 pm
Location: Scotts Valley, CA

j3707 wrote:Michael - what cover crops do you like to use?
It's a mix of fava beans, hairy vetch, rye, and crimson clover. But the clover never gets anywhere because the others grow taller much quicker. I think these two photos are from the same year - not this last winter but the year before:
10849881_10152877840270926_5964591776937759953_n.jpg
10666094_10152988520245926_1690963607377149126_n.jpg
It gets mowed down a few weeks before planting and tilled into the soil.

User avatar
Lindsaylew82
Super Green Thumb
Posts: 2115
Joined: Wed May 21, 2014 9:26 pm
Location: Upstate, SC

That's intimidating to look at! All those dense "weeds"!

The second Stupice is ripening! It cracked pretty bad around the top. :( How's your Stupice coming along?

j3707
Green Thumb
Posts: 306
Joined: Sun Jul 12, 2009 10:11 pm
Location: Pacific Northwest, Zone 8, 48" annual rainfall, dry summers.

Lindsay, all that fertility and biomass...it's a thing of beauty! 8)

User avatar
MichaelC
Senior Member
Posts: 232
Joined: Wed May 13, 2015 11:32 pm
Location: Scotts Valley, CA

Lindsaylew82 wrote:How's your Stupice coming along?
It's only been a few days since the last photo. It's doing fine, getting its first trusses started like the other tomatoes. It's the slowest growing of this year's tomatoes.

OMG Lindsay, it is a lot of hard work chopping down that mass and working it in to the soil. But it's been of tremendous benefit to my soil.

j3707 -

This is the first year I've mulched. It sounds like you are experienced with cover crops. What am I supposed to do with the mulch (fir bark) when I go to seed my cover crop?

User avatar
Lindsaylew82
Super Green Thumb
Posts: 2115
Joined: Wed May 21, 2014 9:26 pm
Location: Upstate, SC

j3707 wrote:Lindsay, all that fertility and biomass...it's a thing of beauty! 8)
Oh I fully agree! My knowledge agrees, but my eyes see all that and I get a little nervous sweat!
It's the slowest growing of this year's tomatoes.
It's definitely the fastest grower here, and it's ripening within 2 weeks of fruit set.

User avatar
applestar
Mod
Posts: 30542
Joined: Thu May 01, 2008 7:21 pm
Location: Zone 6, NJ (3/M)4/E ~ 10/M(11/B)

I love seeing how you are working with cover crops. I REALLY wanted to, but have found it takes some creative thinking to work cover crops into my own gardening scheme when Not using power tools and tilling. So I've done a lot of armchair cover cropping, some sweat and toil (and some genteel swearing), more noodling. I do more composting, mulching and trampling (in paths), and longer term using winter freeze as part of the decomposition process.
MichaelC wrote: j3707 -

This is the first year I've mulched. It sounds like you are experienced with cover crops. What am I supposed to do with the mulch (fir bark) when I go to seed my cover crop?
Not j, but I think this will depend on availability of the fir bark mulch and your willingness to get completely new supply of mulch.
Also, what you are using as cover crop and what you will be planting in the same bed next season.

(1) rake off all the mulch and pile somewhere, seed bed with cover crop. AFTER tilling In the cover crop (and planting), cover with same now composted fir bark mulch or get a new supply of mulch. Note - Some crops are better sown or planted by pushing aside the mulch.
(2) till in the seasoned mulch -- think of this as very lightweight version of hugelkultur but there will be some nitrogen tie-up so maybe add a layer of compost or soak with AACT (actively aerated compost tea) first -- then seed with cover crop, etc. Get new supply of mulch next season.

(3) ...I just now had this idea so I am not entirely sure if this is a viable option but -- inoculate the fir mulched bed with compatible mushroom spawn ...a species that would grow in composted mulch and garden litter --- a completely different sort of "cover crop" -- cover crop and till in after spawn run and mushroom production is over.

j3707
Green Thumb
Posts: 306
Joined: Sun Jul 12, 2009 10:11 pm
Location: Pacific Northwest, Zone 8, 48" annual rainfall, dry summers.

I rate myself as a beginner, but like applestar said, I would rake the mulch out of the way and I'd want to eventually get that mulch composted and mixed into the soil (assuming it is just straight untreated/uncolored bark). A couple more thoughts to build on what applestar said:

(4) You could compost the mulch separately while the cover crop grows, then knock down the cover crop and cover over it with the old bark, then cover over that with fresh bark as needed. A sort of no-till lasagna method.

(5) If you would rather till, consider tilling in the old bark and cover crops at the same time. Mixing the green/brown into freshly aerated soil may help further compost the bark. Then cover with fresh mulch.

I wish I could do more cover cropping. My current goal is to have a 4 season garden, so I will need to integrate cover cropping into that model as I can...I wish there was a 5th season just for cover crops!

User avatar
MichaelC
Senior Member
Posts: 232
Joined: Wed May 13, 2015 11:32 pm
Location: Scotts Valley, CA

OK, it's time for some updated photos. First, the tomatoes. These are all about three feet tall except for Sweet Million. All are flowering but flowers not visible in all photos.
mwc.jpg
Matt's Wild Cherry. First to set fruit! Same as last year's, not a very thick stalk but it wants to go everywhere.
os.jpg
Orange Strawberry. This guy has grown skewed to one side and will be difficult to keep staked as the season goes by.
gz.jpg
Green Zebra. So far a very hardy grower!
sm.jpg
Sweet Million. The replacement plant is catching up. You can see the intense forest green of its foliage!
yp.jpg
Yellow Pear. Looks just like last year's.
st.jpg
Stupice. By far the slowest grower this year, but looking good. The twin trusses coming from the same node are a good sign, I think.
Last edited by MichaelC on Thu May 26, 2016 1:43 am, edited 5 times in total.

User avatar
MichaelC
Senior Member
Posts: 232
Joined: Wed May 13, 2015 11:32 pm
Location: Scotts Valley, CA

And for the rest.
vol.jpg
First up, the volunteer MWC tomato, which is looking great! As you can see in the photo of the mature plant in the above post, MWC is a serious sprawler, and the fruit weigh nothing. So I think I'm going to just let it do its thing - no stake, no pruning, just see what happens.
cukes.jpg
Cucumbers are looking good. Flowers have just started and I'm expecting a flush in the near future.
beans.jpg
We're going to be eating beans soon! I'm still waiting to see whether perhaps these are really bush beans that were mislabelled. They're only about a foot high. I've never grown bush beans so all I know is this is a lot different from last years Blue Lake pole beans!
car.jpg
Container carrots going to be harvested in a week or two. I took one shot of Purple Jalapeño, which has set a beautiful ringlet of flowers. But the photo I took was lousy and now it's too dark to retry. Overall the peppers look like a bust again this year. I'm not really too keen to show them off.

User avatar
MichaelC
Senior Member
Posts: 232
Joined: Wed May 13, 2015 11:32 pm
Location: Scotts Valley, CA

Stupice has put out two trusses from the same node. Not all the blossoms have opened yet, but I counted ten blossoms on one and at least ten on the other. You'll likely have to view full size.
truss.jpg

User avatar
MichaelC
Senior Member
Posts: 232
Joined: Wed May 13, 2015 11:32 pm
Location: Scotts Valley, CA

Today I have a bad update. Temperatures rose suddenly by 30 degrees today, and despite plenty of water, I have some major wilt damage. It looks like some of this tissue won't be coming back. Here are a few photos:
pearwilt.jpg
zebrawilt.jpg
mwcwilt.jpg
What can I do about this for tomorrow?

For Lindsay, a couple shots of Stupice, which did not suffer terribly today. That is some insane leaf roll, but it seems happy enough!
stupcurl.jpg
stupfruit.jpg

User avatar
Lindsaylew82
Super Green Thumb
Posts: 2115
Joined: Wed May 21, 2014 9:26 pm
Location: Upstate, SC

That is really strange!

Here is mine: Took it today for your comparison! It's 5' tall, and loaded!
Image
Image

I'm wondering if you might have too much nitrogen going on? I'm curious what others think!

Here is my black Krim, really struggling this year, although it had a very good year last year!

Image

Image

User avatar
MichaelC
Senior Member
Posts: 232
Joined: Wed May 13, 2015 11:32 pm
Location: Scotts Valley, CA

I just took a look outside, and it looks like everything recovered except for the top growing shoots of the Green Zebra, sadly the site of many flowers. Should I clip off the parts that don't recover? I haven't had this happen before.

I think I have some white sheeting that I can drape down from the top of the stakes tomorrow if need be, but the temperature is suppose to return to normal.

Too much nitrogen is possible. How does that contribute to the leaf roll? Anyway, the Stupice is doing well despite its freakish appearance. It stood up to today's heat wave better than most. I've stopped pinching the suckers since it isn't growing like a jungle as the rest are. It's already set a nice number of fruits, though Matt's Wild Cherry was first.

User avatar
Lindsaylew82
Super Green Thumb
Posts: 2115
Joined: Wed May 21, 2014 9:26 pm
Location: Upstate, SC

I've never tried MWC, but I've been curious for years.

High nitrogen fertilizers, or soils high in nitrogen promote lush green top growth at the expense of inadequate root growth. So the plant gets hot up top on super hot days, and transpiration increases! But if the roots are inadequate, then the plant can't uptake water as quickly as it transpires. Leaf roll is a way for the plant to slow down transpiration.

I never trim suckers!

User avatar
MichaelC
Senior Member
Posts: 232
Joined: Wed May 13, 2015 11:32 pm
Location: Scotts Valley, CA

Matt's Wild Cherry is a winner! Last year it gave me many pints of incredibly flavorful, tiny fruits. It's a serious sprawler, the one I actually planted is using yards of gardening tape to maintain. So far, I've resisted the temptation to do anything to the volunteer plant except feed and water it.

I've got a slew of new photos but not the energy to deal with all the writing and linking tonight.

I pulled the row of bush-beans-sold-as-pole beans today. In total I harvested maybe a pound and a half, hardly worth the effort and expense. What a disappointment. I sowed some blue lake pole bean seeds in the empty part of the trellis last week, and they sprouted. So, tonight I planted more across the space the bush beans were using. I figure by the end of the summer I'll be getting the quantities and shade I was expecting.


Return to “Vegetable Garden Progress + Photos & Videos”