-
applestar

- Mod
- Posts: 30545
- Joined: Thu May 01, 2008 7:21 pm
- Location: Zone 6, NJ (3/M)4/E ~ 10/M(11/B)
Does anyone keep track of Max/Min of the soil when using heating mats? I guess if you have the heating mat thermostat, the temperatures will stay even? I keep thinking about buying one, then some other purchase take priority.... I think human heating pad with some kind of setting like Low-Mid-High would still count as having an attached thermostat.
So far, my impression from various pepper seed starting threads and comments is that CONSISTENT even temperature of upper 70's to low 80's yield the best "germination" (Defining soil "germination" as knuckling of the seed sprouts out of the surface of the soil mix) at a relatively fast rate.
The temperatures in my indoor "greenhouse" shelves range from low 80's high to as low as 60°F overnight, just from the lights being on during the day and turned off at night. So my pepper (and eggplant) germination has been on the slow side at 12 days on the average.
DAYS TO FIRST GERMINATION
Caveat -- Remember, though, that this is *germination* in the seedzip bags when the first root tip shows... Only recorded first germination on the spoon and not individual seeds so the data is skewed... AND it takes additional time for them to knuckle and sprout. I'm going to process those numbers in more detail later, but there has been WILD variation: some pepper seeds took very long time to knuckle and even longer to *sprout* and unfold their leaves out of the seed shells.
FWIW -- tomato seeds have been consistently "knuckling" in 2-3 days after germination and sprouting out in another couple of days after that.
So far, my impression from various pepper seed starting threads and comments is that CONSISTENT even temperature of upper 70's to low 80's yield the best "germination" (Defining soil "germination" as knuckling of the seed sprouts out of the surface of the soil mix) at a relatively fast rate.
The temperatures in my indoor "greenhouse" shelves range from low 80's high to as low as 60°F overnight, just from the lights being on during the day and turned off at night. So my pepper (and eggplant) germination has been on the slow side at 12 days on the average.
DAYS TO FIRST GERMINATION
FWIW -- tomato seeds have been consistently "knuckling" in 2-3 days after germination and sprouting out in another couple of days after that.
-
applestar
- Mod
- Posts: 30545
- Joined: Thu May 01, 2008 7:21 pm
- Location: Zone 6, NJ (3/M)4/E ~ 10/M(11/B)
Here's a tomato seedling that is stubbornly still alive. I didn't realize it but at some point, I had accidentally broken this seedling in half. Today, I was going to cull it if I didn't need it, but then realized that both of the two previously planted Blush seedlings had succumbed to damping off, so inspected this and another imperfect seedling on the spoon and was amazed to find that the broken seedling had grown roots. I don't know if the bottom half of the seedling is going to do anything, but it looked healthy, too....
I planted both halves in the same soilblock. Hopefully one or the other will make it and become a healthy seedling. 
-
applestar
- Mod
- Posts: 30545
- Joined: Thu May 01, 2008 7:21 pm
- Location: Zone 6, NJ (3/M)4/E ~ 10/M(11/B)
I posted this in another thread, but it was a good evaluation of the Spoonzip method which I had been meaning to add to this thread, so I will cross post it here
Subject: Carnivorous plant - Venus Flytrap from seeds
Subject: Carnivorous plant - Venus Flytrap from seeds
applestar wrote:Hey Allyn. I wanted to think about it a bit before answering, especially since I wasn't sure if the result you saw in the photo above was enough to say it works. But I checked them again today -- and I will post new photos tomorrow but -- I would say the method I'm calling "Spoonzip" (spoon in zipped seed bag) method works well enough, but maybe not AS WELL as the container.Allyn wrote:That is excellent!I haven't tried any method other than the one I described. How do you feel this one works compared to the other method as far as success? I know it's too early to reach any real conclusions, but how do you feel about it?
As you may know already, I tried using the Spoonzip method last year to start tomatoes and peppers. And I had great success and spectacular failures. Only first time last year, and I don't believe any technique can be evaluated from just one time trial since you need to LEARN the ins and outs of it first
-- A technique can't be blamed for operator error -- one of my pet peeves with instructional blogs and especially YouTube videos in which they start out by saying "this is my first time doing this..." ...PARTICULARLY when they don't come back and provide a self evaluation of what THEY did wrong or HOW things can go wrong even if they succeeded... But I digress.
I think Spoonzip is a smaller -tiny- environment which make it more difficult to control EVEN/STABLE temperature and moisture. NUTRIENT is another issue for other seeds, but I realized this is where VFT and other carnivorous seeds would have and advantage since you truly don't need to fertilize them.
Spoonzip is a fantastic technique for saving space for growing a LOT of different varieties and keeping them securely labeled and keeping track of them. (This is where I went WAY overboard last year with the tomatoes and peppers and -seriously- overwhelmed myself) if you are using the method to grow a large number of Spoonzipped seeds, it's actually easier to control the environment because you can keep them together in a larger container that will maintain thermal mass.
Spoonzip is a great way to SEE the seeds actually germinating. Tonight, I saw that quite a few more of the seeds on the spoon have tiny white radicles/root tips showing even though they haven't sprouted anything green yet. (I'll post a macro photo tomorrow -- I'll be able to see better how *well* they are doing then. That's another issue, germinating and sprouting are different stages in the seedling development. Some germinate but fail to sprout. I don't know for sure if this is the norm but we just never see that with seeds sown in soil mix, or if it's due to the unstable Spoonzip environment.
BTW I want to clarify that I used unrolled REAL cotton ball (not synthetic fiber) for the Venus flytrap seeds (I need to find where I got that idea from and give credit... Found itYouTube video below). I have yet to find out how easy or difficult it will be to remove the seedlings from (or with) the cotton fibers and plant.
The Spoonzip method I used last year for tomatoes and peppers originally was described as using "kitchen paper" for the moist medium, but I found Bounty paper towels to be too strong and found paper napkins from takeout/fast food places were variable -- still working on finding which works best. Printer/copier/office papers actually works well because they fall apart into pulp with no directional fiber to catch/break the tender roots.
(And that's another thing -- the extra, sometimes mind-numbingly delicate step/procedure needed to transfer the tender seedlings to a larger container of real/appropriate growing medium.)
Venus Fly trap in 80 days - YouTube
-
applestar
- Mod
- Posts: 30545
- Joined: Thu May 01, 2008 7:21 pm
- Location: Zone 6, NJ (3/M)4/E ~ 10/M(11/B)
I mentioned in this thread -- Subject: Almost Spring '16...what are you doing (or have done) Today?
...so I decided to streamline what needed to be done today in favor of saving time and space (Because I don't have the room) -- that meant using the Spoonzip technique.
But one of the issues I had pointed out in my summary is the way paper napkins tended to have fibers that force directional tearing even when soaking wet, that can be frustrating to work with so as not to damage the tender roots. Printing paper when wet turns into pulp but I noticed there is some kind of binding agent/glue that sometimes encourage mildew to grow (this may be because I'm not using the bleach step).
I decided to experiment by using UltraSorb DE which I bought a while back, thinking it was the large gravel/perlite size, but which turned out to be sand-like in size.
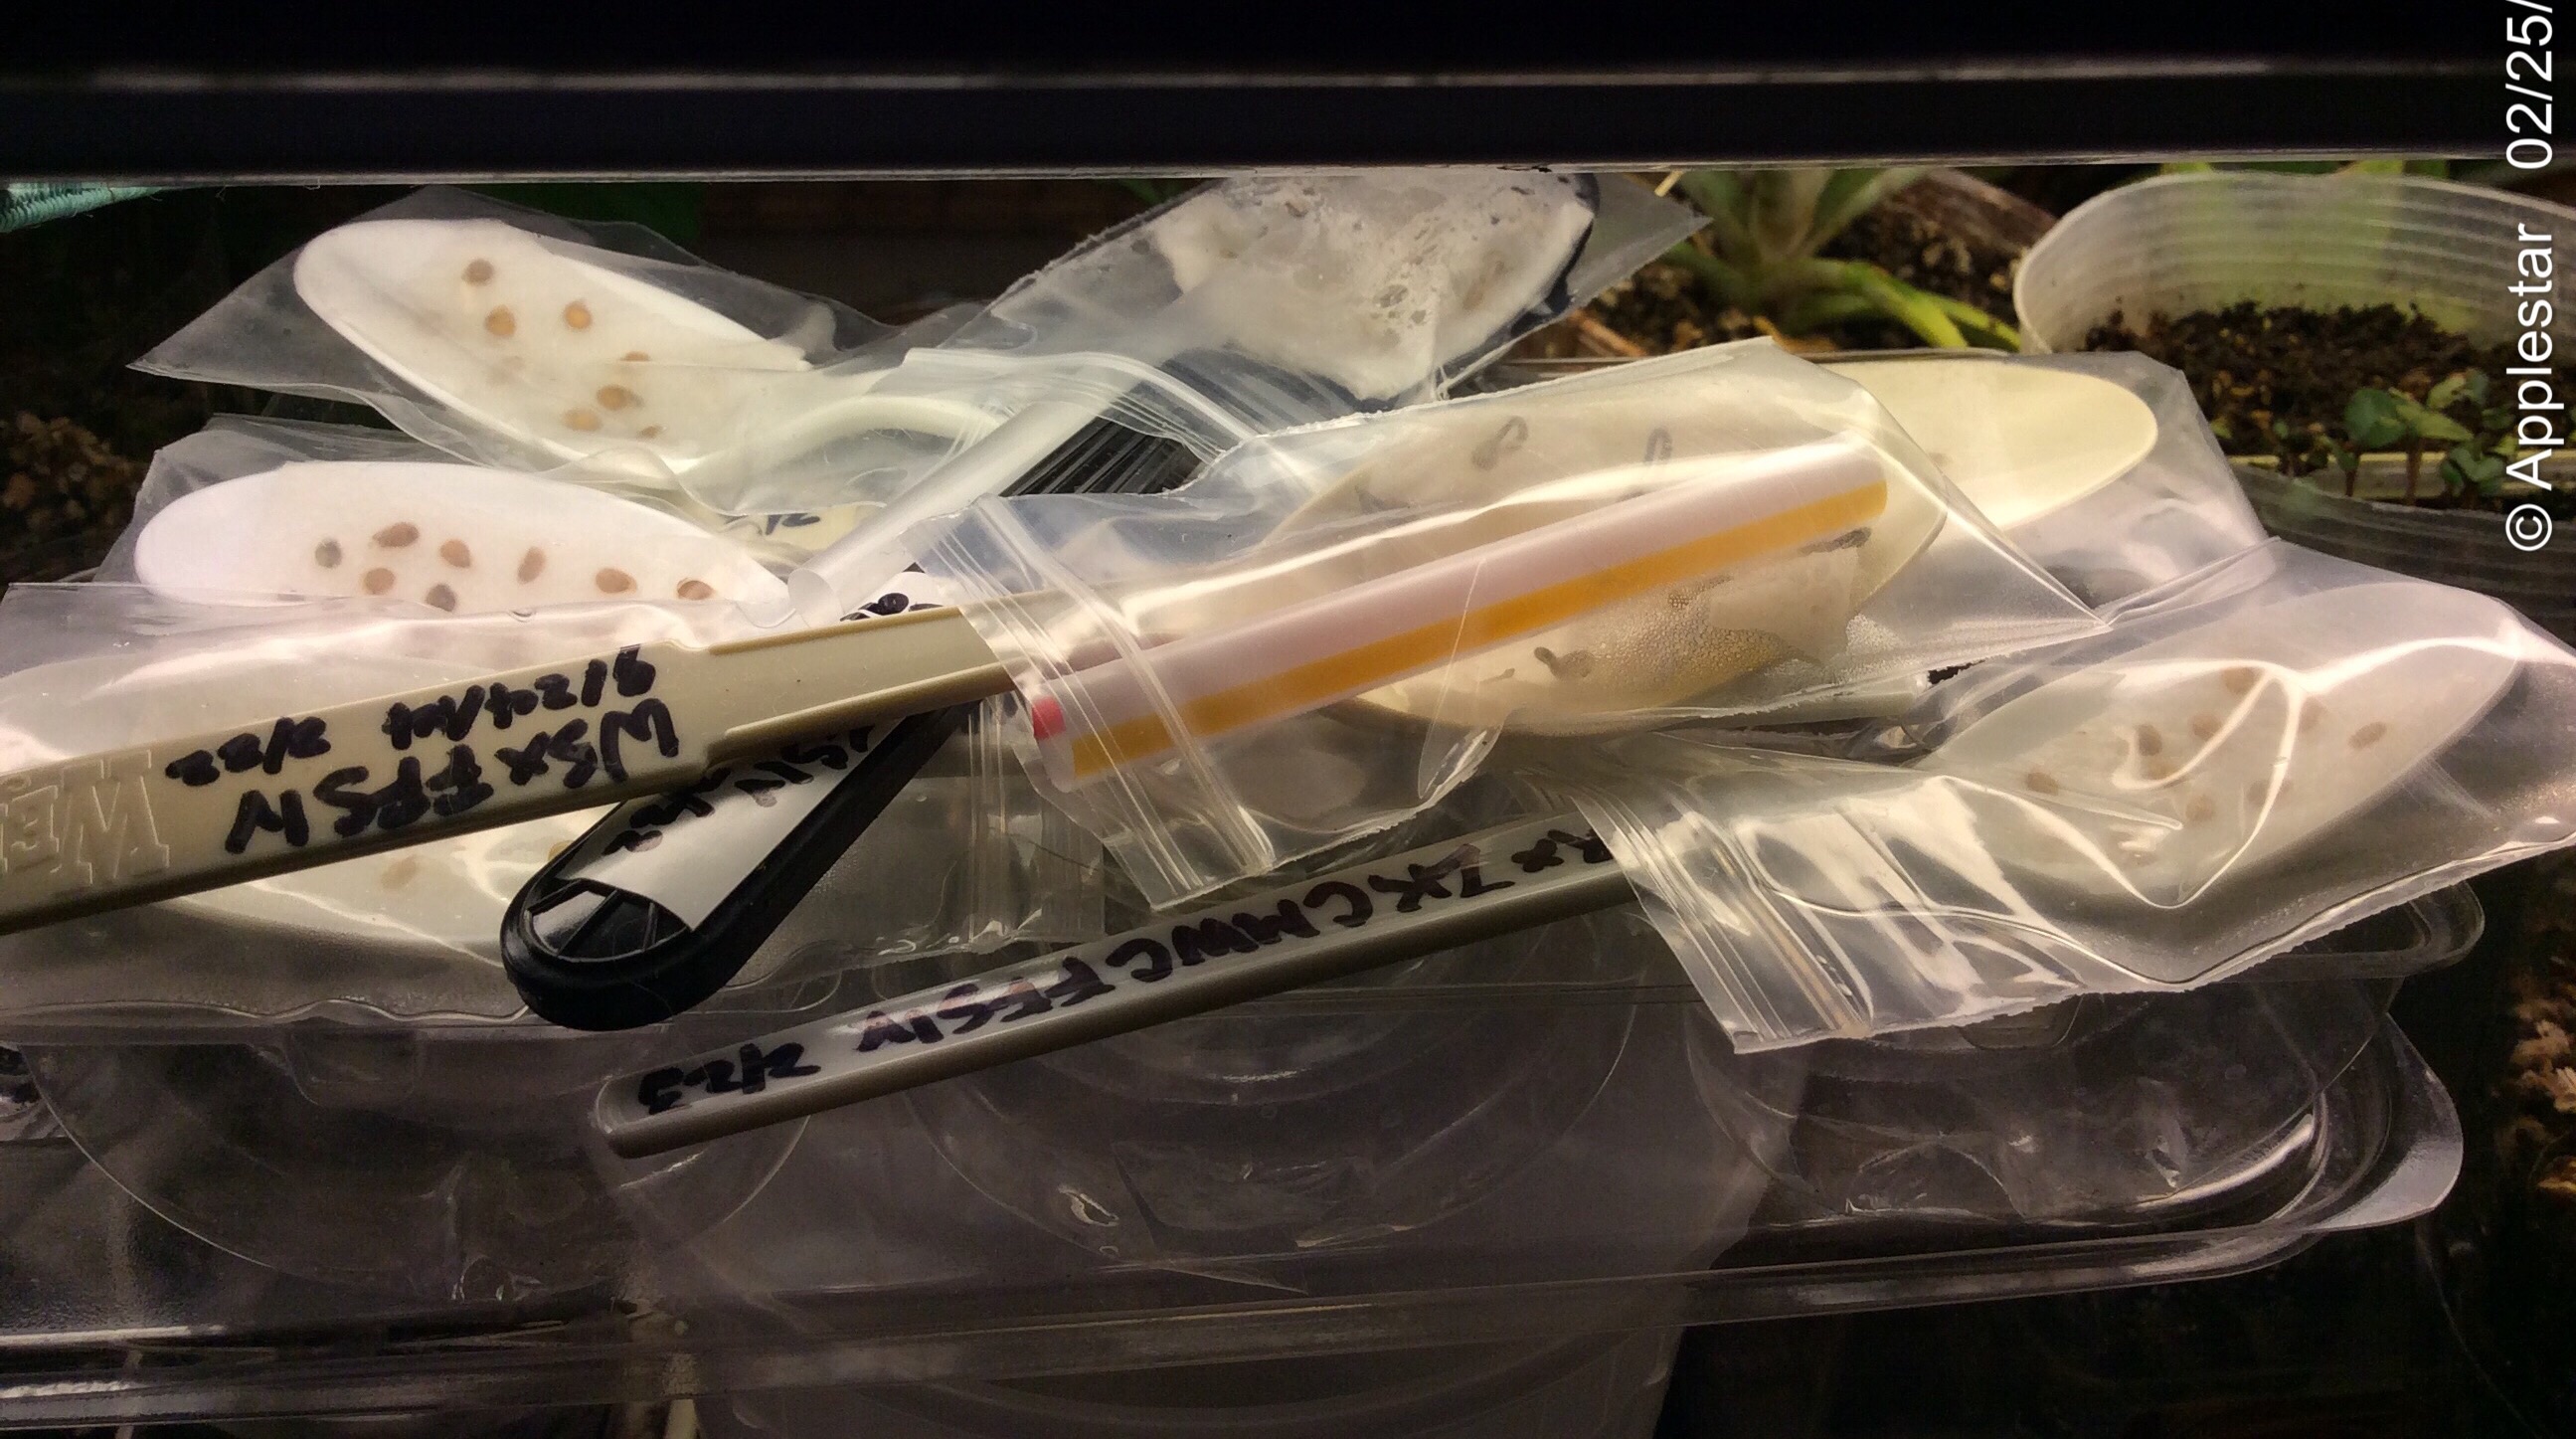
All 38 Spoonzip bags fit in a large clamshell which would hold 9 or 10 K-cups
Well, when I actually counted, there wer THIRTY-EIGHT little zip bags of soaking seeds.applestar wrote:Last night, I went overboard with varieties of tomatoe to start for this year by putting the selected seeds in zip seed bags and adding water to soak them, which means I can't change my mind and put them backafterwards, I realized there were still some dwarf and micro varieties that I held back on last time, and I will have to decide whether to give up on them or not. The soaked seeds will need to be started in some way -- either Spoonzip method or more Doubled K-cups. I found more sandwich/bakery clamshells I had been saving and DH is drinking more coffee on weekends since he gave up on sugar substitute sodas, so I might have enough K-cups to start one more batch today.
...so I decided to streamline what needed to be done today in favor of saving time and space (Because I don't have the room) -- that meant using the Spoonzip technique.
But one of the issues I had pointed out in my summary is the way paper napkins tended to have fibers that force directional tearing even when soaking wet, that can be frustrating to work with so as not to damage the tender roots. Printing paper when wet turns into pulp but I noticed there is some kind of binding agent/glue that sometimes encourage mildew to grow (this may be because I'm not using the bleach step).
I decided to experiment by using UltraSorb DE which I bought a while back, thinking it was the large gravel/perlite size, but which turned out to be sand-like in size.
-
pepperhead212
- Super Green Thumb
- Posts: 2882
- Joined: Wed Oct 15, 2014 1:52 pm
- Location: Woodbury NJ Zone 7a/7b
-
applestar
- Mod
- Posts: 30545
- Joined: Thu May 01, 2008 7:21 pm
- Location: Zone 6, NJ (3/M)4/E ~ 10/M(11/B)
It's quick draining -- acts a lot like sand. I'm hoping it does at the same time absorb and hold onto water. But I'm having trouble using it as potting mix additive because I really think DE needs to be washed first to remove the micro fine dust-like particles to prevent clay-like, compacting action... And at THIS size, it's a pain to rinse. The larger chunky perlite like size was easier to rinse. I hope I can get that kind again.
Thanks for the TP tip
Thanks for the TP tip
-
pepperhead212
- Super Green Thumb
- Posts: 2882
- Joined: Wed Oct 15, 2014 1:52 pm
- Location: Woodbury NJ Zone 7a/7b
Seeing you try that in the spoons makes me think about trying vermiculite in spoons. This is what I use to start all of my later pepper seeds, using those shallow trays with 20 strips. I'll probably still do those that way, since it is much easier to check so many varieties at once, but maybe I'll use it for earlier ones.
-
applestar
- Mod
- Posts: 30545
- Joined: Thu May 01, 2008 7:21 pm
- Location: Zone 6, NJ (3/M)4/E ~ 10/M(11/B)
This year, I ended up starting all the pepper seeds in doubled K-cups of seed starting mix (Potting mix, coir, sand, perlite/PBRH... Something like 3:3:1:1) PBRH=parboiled rice hulls. They were arranged inside vented sandwich clamshells and placed on a new heat mat -- about 85-90°F/75°F soil temp.
Germination notes and sprouted seedlings that were moved out of the clamshells up to the lights:
Subject: 2016 Pepper Varieties -- whatcha growin?
BUT, I want to continue exploring and experimenting with The SPOONZIP method/technique in this thread because it is highly effective for some applications and especially when trying to start many different varieties while keeping them clearly labeled and separate, or for germination tests, or pre-germinating before sowing (Peas, cucurbits, etc.) while saving valuable heat mat (or refrigerator) space until germination takes place. (I'm going to try pre-germinating spinach seeds using this method).
If anyone else is trying this method, please post your impressions here.

-
applestar
- Mod
- Posts: 30545
- Joined: Thu May 01, 2008 7:21 pm
- Location: Zone 6, NJ (3/M)4/E ~ 10/M(11/B)
When starting seeds this way, you put a piece of drinking straw on the spoon once they start germinating and open the zip for lifting up the top of the bag to give them room to grow, and for ventilation -- like this.
In this one's case,
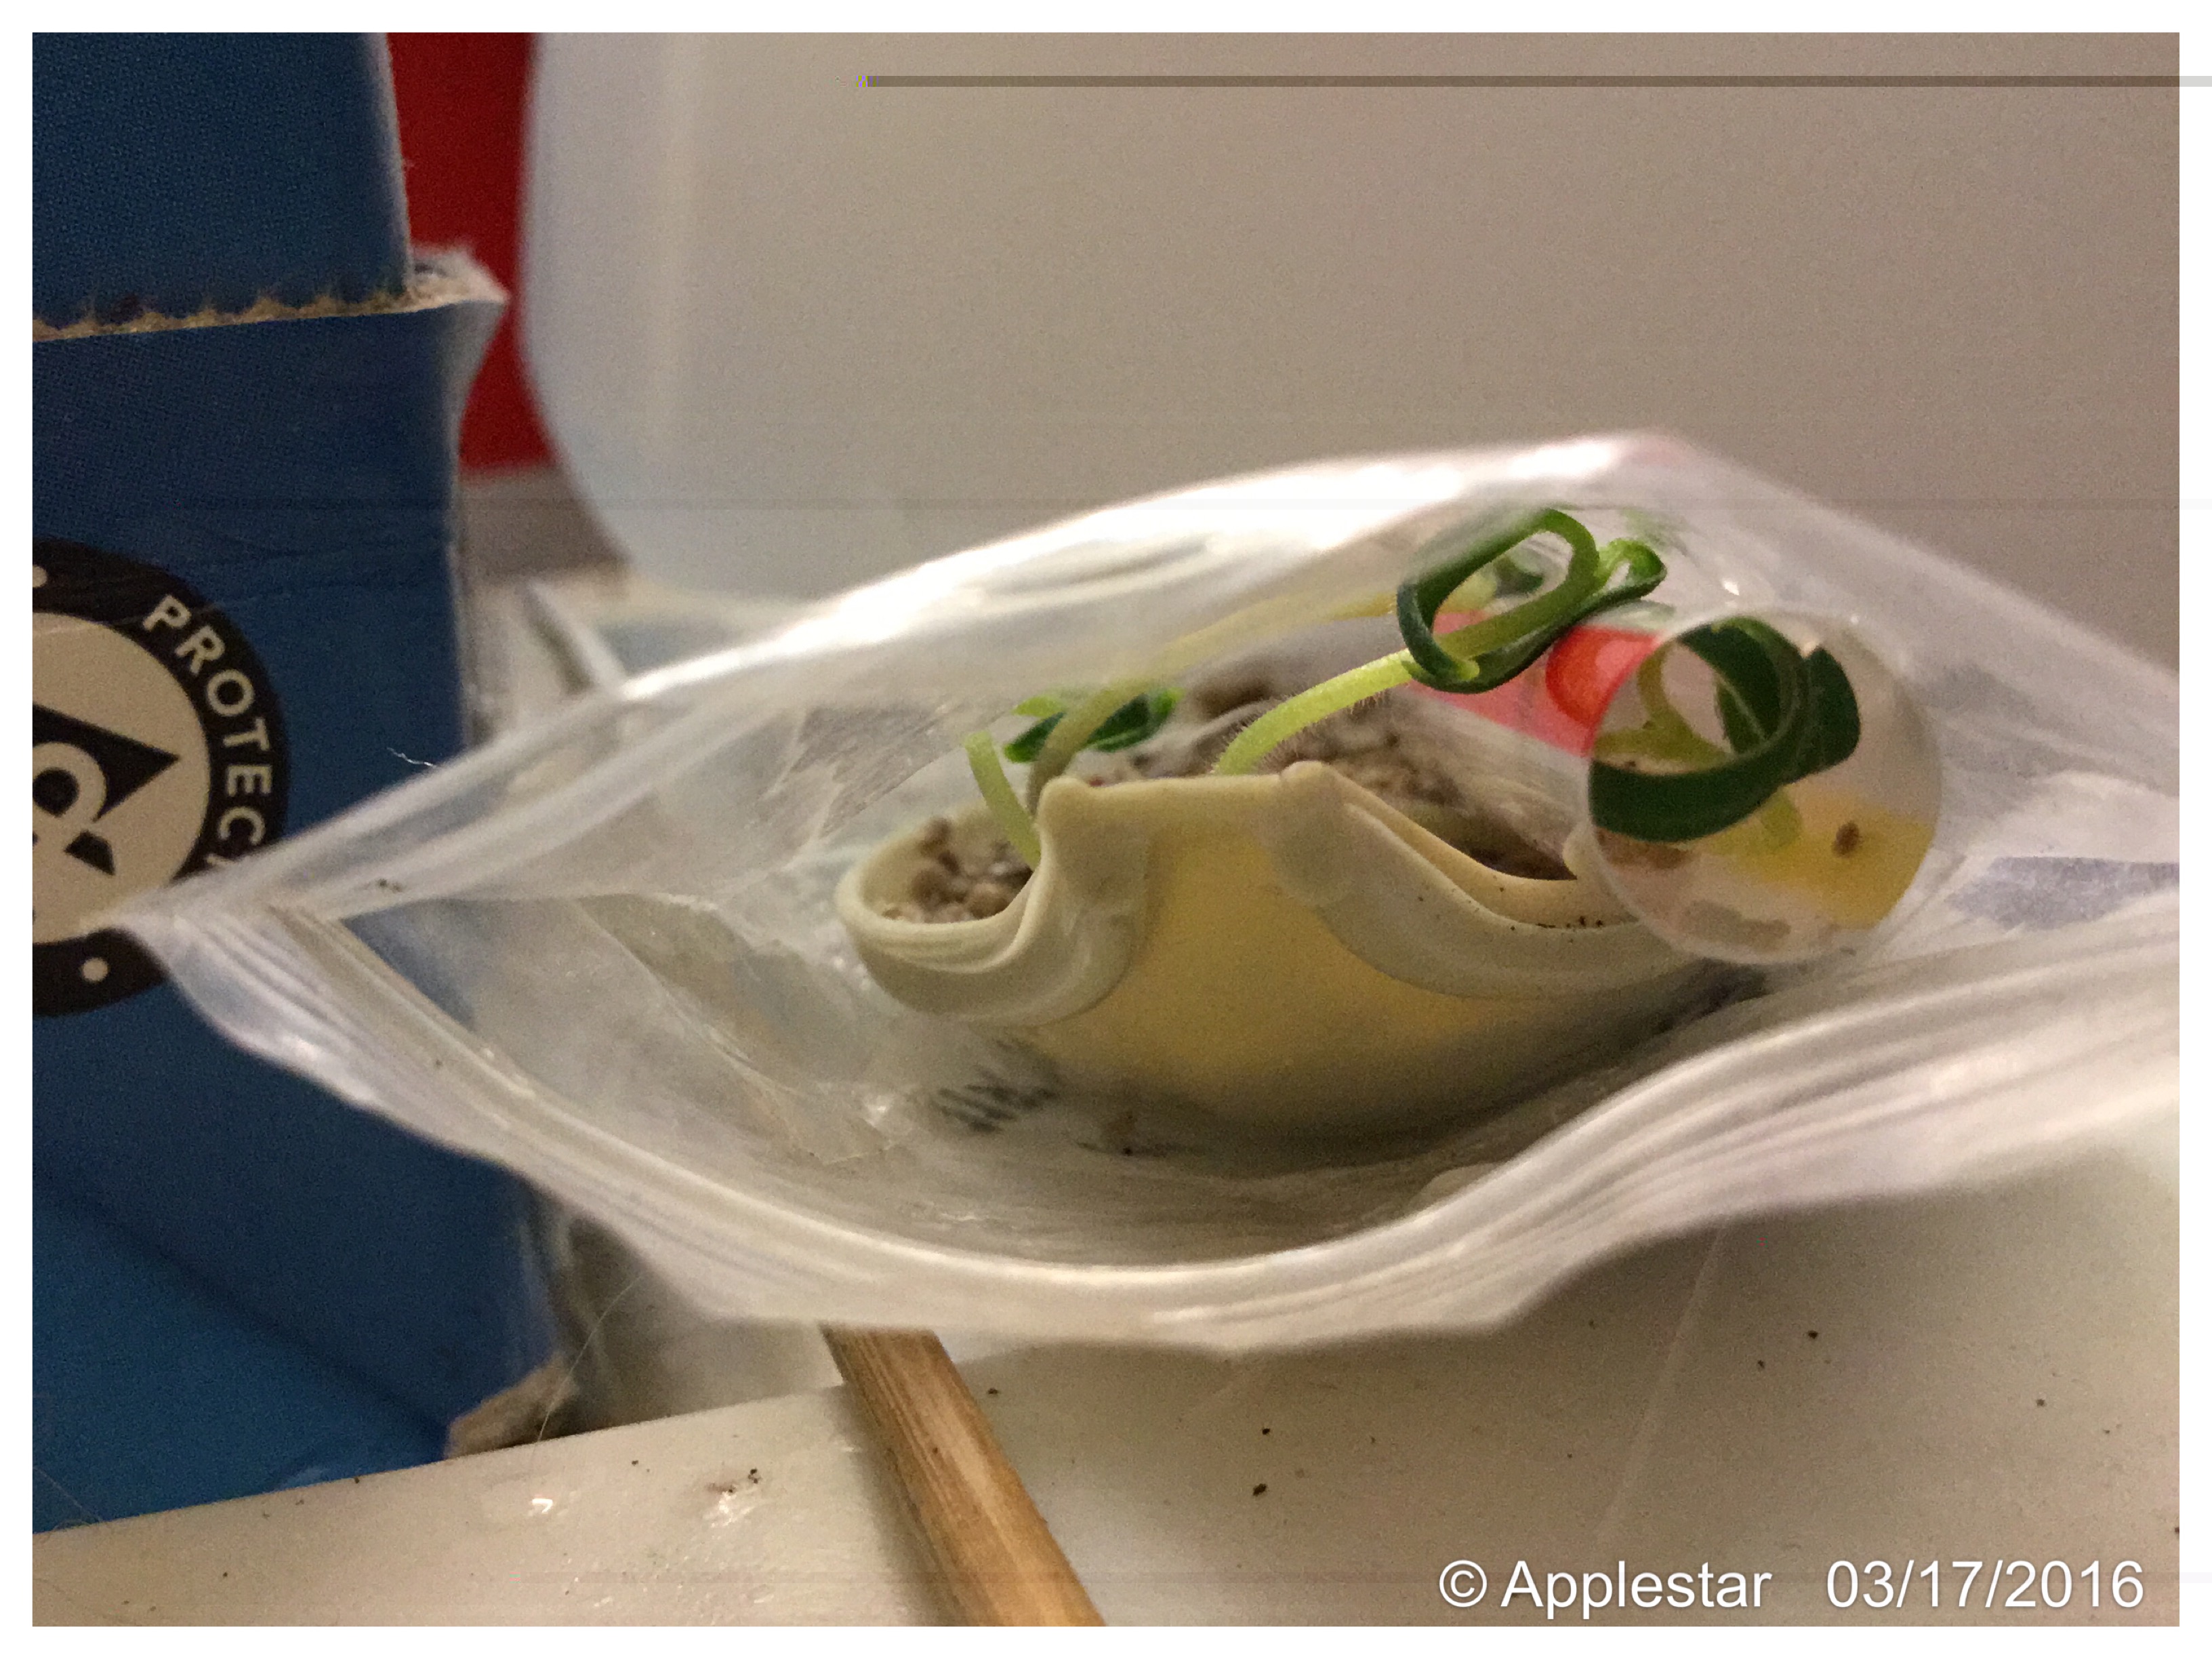
-- I procrastinated planting these sprouted seedlings until several had already completely unfolded their seed leaves, which is pretty much the latest you want to wait. They quickly deplete the spoonful of water and need to be watered judiciously twice or more a day, and way outgrow the little bags. But I didn't notice the little seedling inside the straw because until they do unfold their leaves, you don't see much color.
BTW this year's sand sized DE medium is solving the problem I had before with seedlings that had grown this big, which is the way the roots tangled up in the layers of paper that would only tear directionally, requiring really careful handling not to break off the roots. With the DE, filling the spoon with water loosens everything up and all the roots slide right out.
In this one's case,
-- I procrastinated planting these sprouted seedlings until several had already completely unfolded their seed leaves, which is pretty much the latest you want to wait. They quickly deplete the spoonful of water and need to be watered judiciously twice or more a day, and way outgrow the little bags. But I didn't notice the little seedling inside the straw because until they do unfold their leaves, you don't see much color.
BTW this year's sand sized DE medium is solving the problem I had before with seedlings that had grown this big, which is the way the roots tangled up in the layers of paper that would only tear directionally, requiring really careful handling not to break off the roots. With the DE, filling the spoon with water loosens everything up and all the roots slide right out.
-
pepperhead212
- Super Green Thumb
- Posts: 2882
- Joined: Wed Oct 15, 2014 1:52 pm
- Location: Woodbury NJ Zone 7a/7b
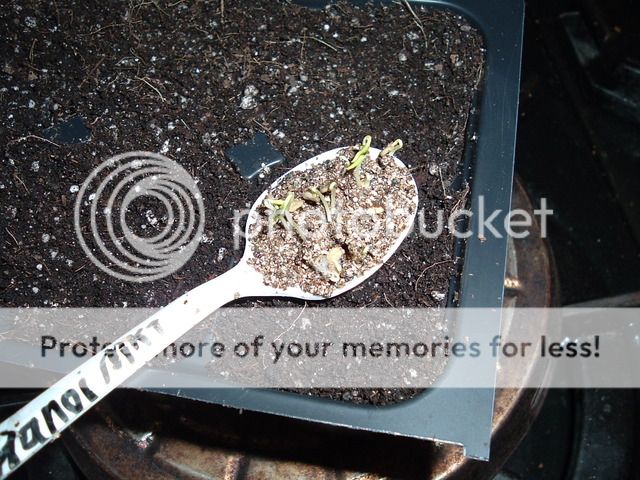
Here's one of the peppers I started in the vermiculite - the Hanoi Market. I started this one early because it is usually one of the slowest to germinate, yet it was the first one this time - in just 5 1/2 days! I transferred all of them to two pots - I planted more than I did for all the others, only because I had a bunch, since I saved them. I'll just snip them, and leave the best, once they get going.