Rairdog
Green Thumb
Posts: 373
Joined: Sun Mar 16, 2014 4:46 pm
Location: Noblesville, IN Zone 5

Seed starting chamber

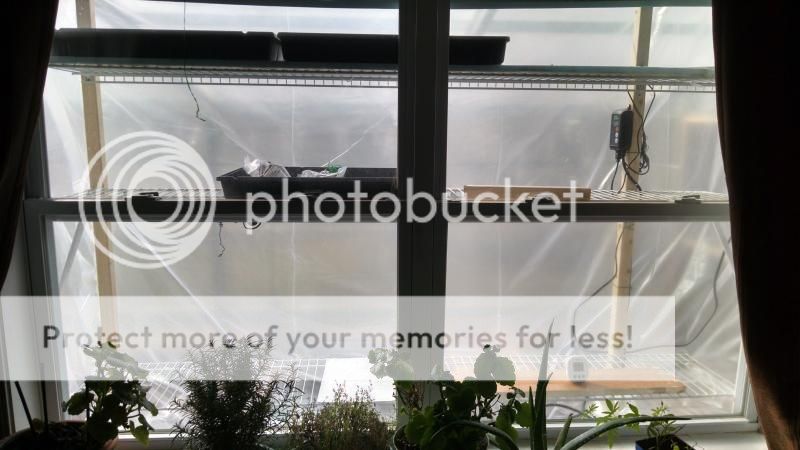
I am wanting to build a seed starting chamber and looking for ideas. It will be located in the attached lean-to greenhouse. Here is a shot from inside of where it will be located. I will put up more shelves and enclose it with glass and plastic so I can capture some heat from the window.

Image

Things I need to figure out:

1) Supplemental heat. Christmas lights, light bulb, heat mat or any other ideas.

2) Automatic watering system. This is where I can't seem to get a good plan. I want to attach it to the existing Aquaponics system. I have used wicking mats type starters but seem to have problems with damping off.

3) Up-potting/media. I have used solo cups but they tend to fall over. I also left them too long and they got root bound which stunted them and caused my tomato starts to bloom.

Basically, I want to keep it at 80 deg and not have to babysit the watering. I spend way to much time watering and worrying each spring. I also spend a lot of time moving trays in and out of the house on cool nights.

Bobberman
Super Green Thumb
Posts: 2437
Joined: Mon Nov 15, 2010 10:31 pm
Location: Latrobe Pa.

I bought a small 5 foot greenhouse kit at big lots that they had on sale at the end of the summer for only $25 and plan on putting it inside my solar greenhouse that goes down to around 30 at the lowest. I am putting a personal heater I got at wal mart for $10 that is only 250 watts. I am putting it on a timer so it comes on every 2 hours for a 1/2 hour and blows against a 5 gallon bucket of water. I could even add a thermostat for better temp! The small greenhouse is all clear plastic with zipper door and will let light through The bucket of water holds heat and also gives humidity to the plants! I can put about 10 flats in the small greenhouse for starting seeds!

Rairdog
Green Thumb
Posts: 373
Joined: Sun Mar 16, 2014 4:46 pm
Location: Noblesville, IN Zone 5

Thanks Bobberman. That gives me some ideas.


After some searching I have come up with a heating pad system. It is what snake/reptile breeders use under their tanks. It will consist of 12 ft of 11" flexwatt tape, connecting wire and Hydrofarm MTPRTC Digital Thermostat for Heat Mats with soil temperature prob. This will give me 2-6 ft heated shelves for $108. It is a much more reliable system and cheaper than multiple seed heat mats.

Here is a youtube vid from Big Apple pet supply showing how to assemble.

https://youtu.be/KRdwPlqn0Zg

User avatar
applestar
Mod
Posts: 30540
Joined: Thu May 01, 2008 7:21 pm
Location: Zone 6, NJ (3/M)4/E ~ 10/M(11/B)

Several incoherent snippets of thoughts:
1) only for seed starting, remove as seedlings achieve transplantable size?
2) ability to control temp level on each shelf would enable starting different kinds of seeds
3) flood and drain on timer - once or twice a day or every other days - for watering
4) I like recycling 2 qt rice milk cartons they fit EXACTLY in standard trays

Image

Rairdog
Green Thumb
Posts: 373
Joined: Sun Mar 16, 2014 4:46 pm
Location: Noblesville, IN Zone 5

applestar wrote:Several incoherent snippets of thoughts:
1) only for seed starting, remove as seedlings achieve transplantable size?
2) ability to control temp level on each shelf would enable starting different kinds of seeds
3) flood and drain on timer - once or twice a day or every other days - for watering
4) I like recycling 2 qt rice milk cartons they fit EXACTLY in standard trays

Image

I am thinking of boxing in the sides/top/bottom of the window around the shelves with reflective foam insulation. Then plastic on the front. The top two shelves would have the heat pad. I was thinking 80 deg for peppers and tomatoes. The bottom 2 shelves would be for transplanting into bigger pots. If I open the window the inside house air would keep it between 50 to 70 which should work for starting lettuce, kale, spinach celery and other seeds. I will place a fan blowing inside the house to draw out excessive heat. The GH heats up 40-50 deg above outside temp on sunny days.

I haven't figured out the watering. I can run water to the trays for wicking from the AP system but draining and consistency would be an issue. The AP water would also be to cool in the spring. I have also thought about a net pots filled with coco choir and a misting system like HP's use. Then I could keep the tank inside at a consistent temp.

I can baby the seedlings until they get going. The problems I am trying to avoid are bringing everything in on cold night and going to work only to come home to dried sun baked plants. It would probably be easier to set up an indoor shelf with lights like some of you do. I don't have room in the house and the walk out basement gets too cool. I think my plan will work using sunlight. Boxing it in should hold in humidity to keep them from drying out. Keep the ideas coming!

User avatar
applestar
Mod
Posts: 30540
Joined: Thu May 01, 2008 7:21 pm
Location: Zone 6, NJ (3/M)4/E ~ 10/M(11/B)

Flood and drain -- I came across this idea in a carnivorous plants forum somewhere -- don't have the link... Just looked at it and thought it was interesting.... Basically, they had drilled a hole near the top of a standard tray and inserted a tube from a pump that was set up to pump water into the tray.

Now I can't remember if I'm recalling this correctly -- I *think* the design I'm thinking of just pumped enough water to a certain level, then the pump shut off and the water drained out of the same tube down to the pump. The key point was that the end of the tube was secured to the floor of the tray so it would suck everything out as it drained.

I was also intrigued by the bell-and-siphon design used in the hydro/aquaponics systems during that time, and this one *may* have had a separate drain using this concept to prevent overflow, but I might be attributing it to this design just because it seemed like a good idea.

I've been wanting to try implementing it amongst my wanna try projects, but I have zero experience with such systems and I have yet to "take the plunge" So, if you decide to experiment with it, please let me know what the best way to do this is, and -yes- I need you to draw me a diagram. :-()

Rairdog
Green Thumb
Posts: 373
Joined: Sun Mar 16, 2014 4:46 pm
Location: Noblesville, IN Zone 5

I will definitely draw you a diagram with lots of pics AS. I could do a small scale Aquaponics system with warm water stored inside. I have started seeds in my system with good success when it warms up. The problem is the media is too big and seeds fall to different levels. You use a lot of seeds and have to thin them out. I have used small bits tissue and pasted a seed to the side of an expanded clay pebble with success. I could try some course sand. Coco choir tends to stay too wet and dampens off too easy for a flood and drain or constant flood. Rock wool is a little expensive and non renewable.

I have seen a system similar to what you described but he used a 5 gal bucket. He lifted the bucket up on a table and let it fill the trays via a tube. Then he set the 5 gal bucket on the floor and it siphoned the water back in. The problem with a pump and timer is consistency due to algea in (small)tubes and small particles clogging it up if you use soil type mixes.

Another idea is a nebulizer like some are using in their grafting chambers to keep them humid. There are some small ones for cheap that you place a soda bottle upside down in and they lasts 8 to 10 hours. A good watering in the AM and humidity should keep things moist when the GH heats up and I don't make it home to ventilate.

Bobberman
Super Green Thumb
Posts: 2437
Joined: Mon Nov 15, 2010 10:31 pm
Location: Latrobe Pa.

My thought was to put a small 10 gallon aquarium in the bottom of the 5 foot greenhouse and using a aquarium heater set it for 70 degrees. The water will also give humidity to the inside of the small greenhouse. The aquarium heaters are cheap and work very well with little electric used! I could even ru a fan to circulate the heat off of the aquarium! Remember this greenhouse is inside my main solar greenhouse. The water will also cool the small greenhouse when the sum makes the main greenhouse over 100 degrees on sunny days.

Bobberman
Super Green Thumb
Posts: 2437
Joined: Mon Nov 15, 2010 10:31 pm
Location: Latrobe Pa.

This is similar to what I bought for less than $30 on sale. This is like having a triple layer of plastic since its inside a double layer greenhouse! Keeping the temp inside here above 60 should be easy. I will let you know since I am setting it up now for starting the early cole crops!


https://www.tractorsupply.com/en/store/f ... m_vc=IOPDP

Gardener_Wes
Cool Member
Posts: 75
Joined: Mon Nov 10, 2014 8:50 pm

Got a better deal then I did.
https://www.google.com/?gws_rd=ssl#tbm= ... 3756385813
This is the one I got for christmas from the girlfriend.

Rairdog
Green Thumb
Posts: 373
Joined: Sun Mar 16, 2014 4:46 pm
Location: Noblesville, IN Zone 5

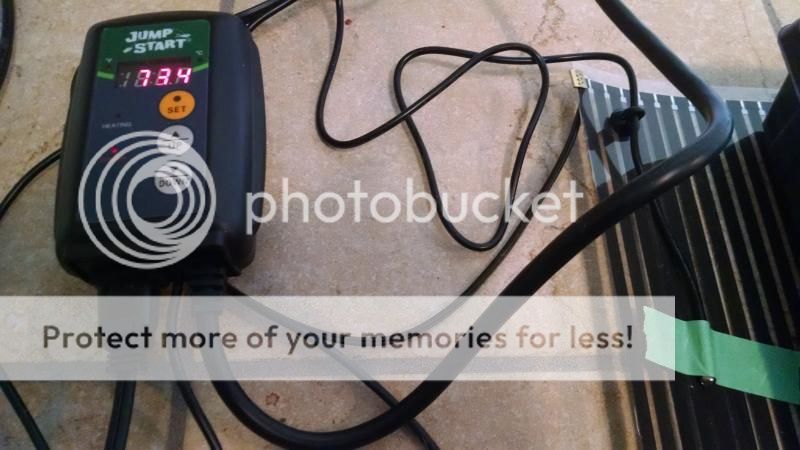
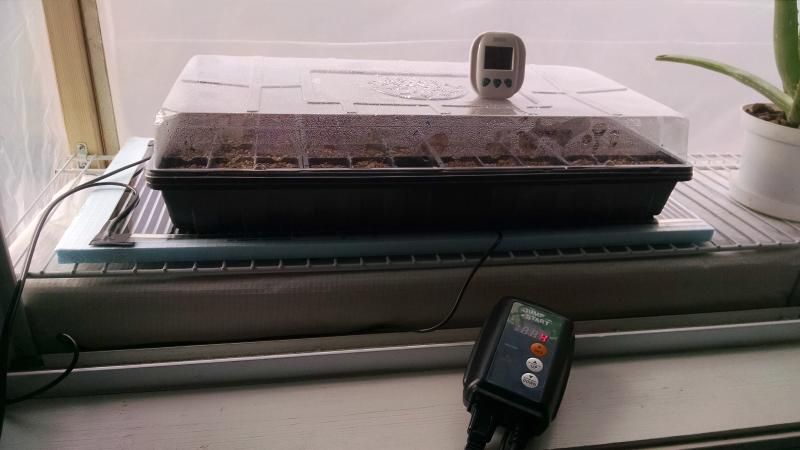
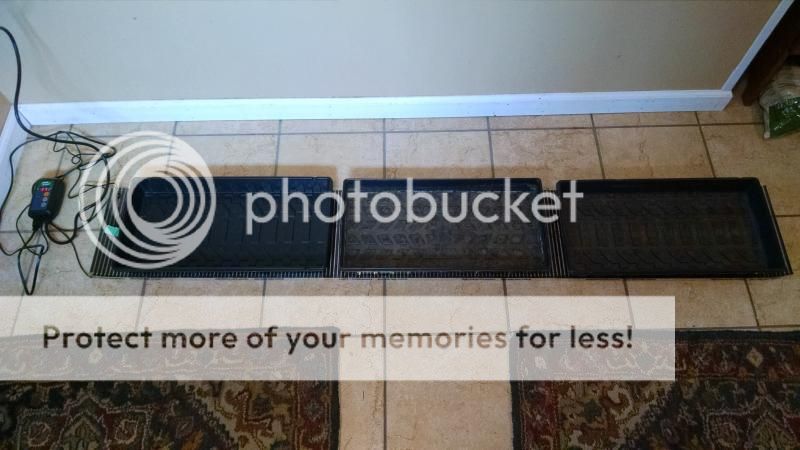
The heat mat and components have been delivered. It is pretty economical for a 6 foot heat mat compared to several heat mats. The Flewatt heat mat is sold by the ft. You simply crimp a connector to each side and plug it into a heat controlled thermostat which can be set to desired temp. A 6 ft strip will heat 3 - 1020 trays.

Image

The temp probe which is under the green tape can be placed under the trays or directly into the soil. Set it at 80 deg or desired temp and it is done. This is a proven system that has been used by reptile breeders for years.

Image

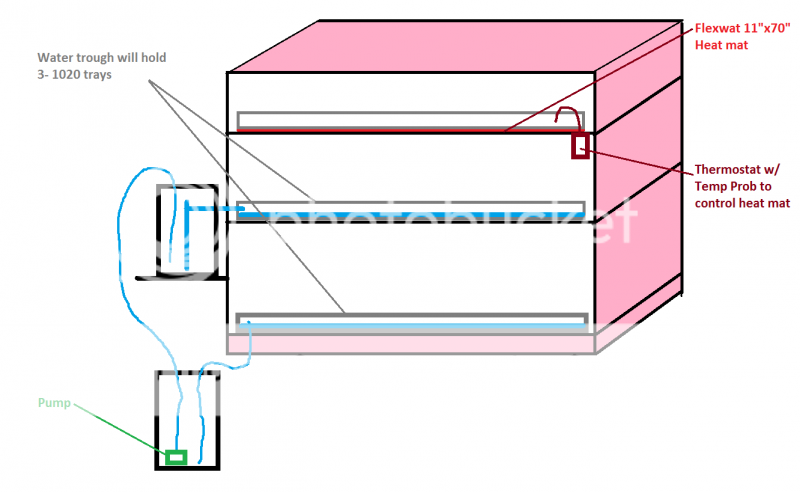
So far this is my design. I plan to turn the pump on in the morning to flood the trays and bottom water. The pump will be on a timer to flood the trays once or twice a day to keep them from drying out until I get home.

Image

Rairdog
Green Thumb
Posts: 373
Joined: Sun Mar 16, 2014 4:46 pm
Location: Noblesville, IN Zone 5

The top shelf will be 1020 trays covered in seran wrap and heated for sprouting. The bottom bucket with pump will fill the top bucket. The top bucket will fill a trough that holds the 1020 trays for bottom watering. It will drain into lower shelf /trough for watering and drain back to bottom bucket.

Rairdog
Green Thumb
Posts: 373
Joined: Sun Mar 16, 2014 4:46 pm
Location: Noblesville, IN Zone 5

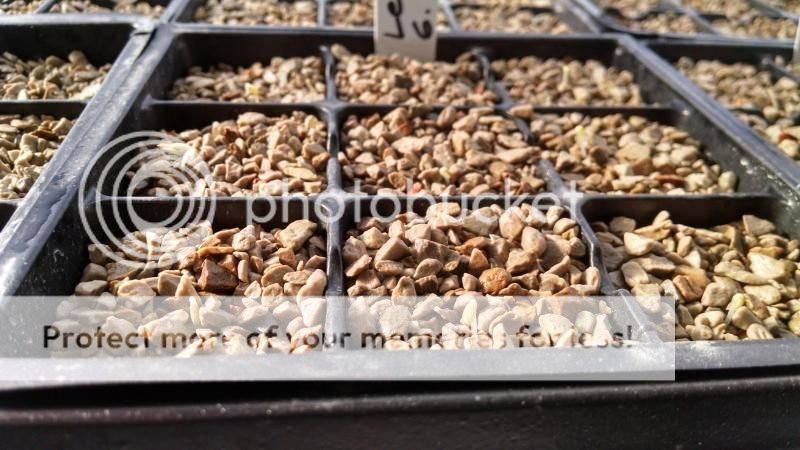
I have been reading about the HP guys using it DE. It has great wicking power and is ph neutral. Side by experiments (tomatoville) against jiffy mixes(peat/perlite) showed better root development, rinsed easier and less damaged roots. There was also less dampening off. There is no organic matter to grow the bad stuff and is widely used as a topping to prevent dampening off. It can be reused and sterilized in the oven.

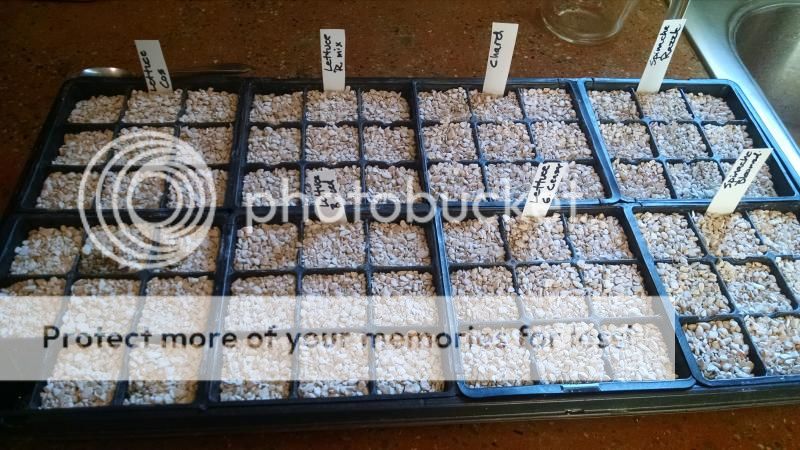
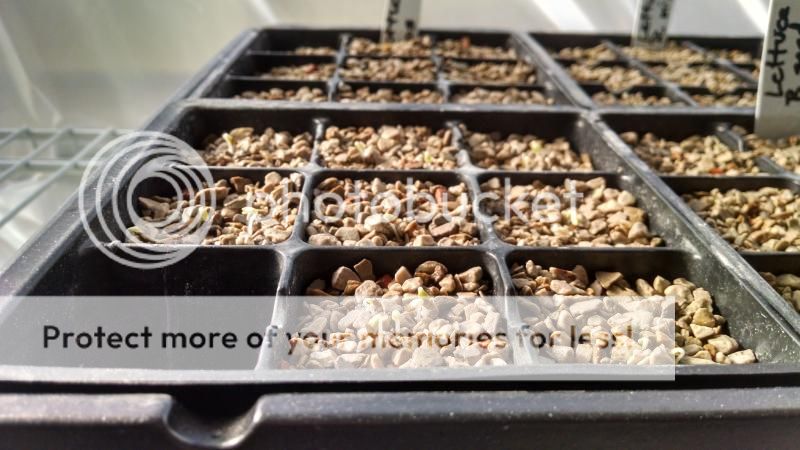
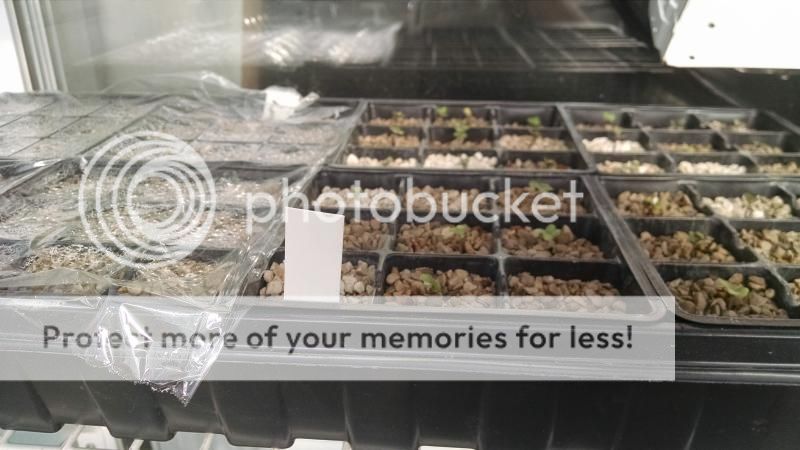
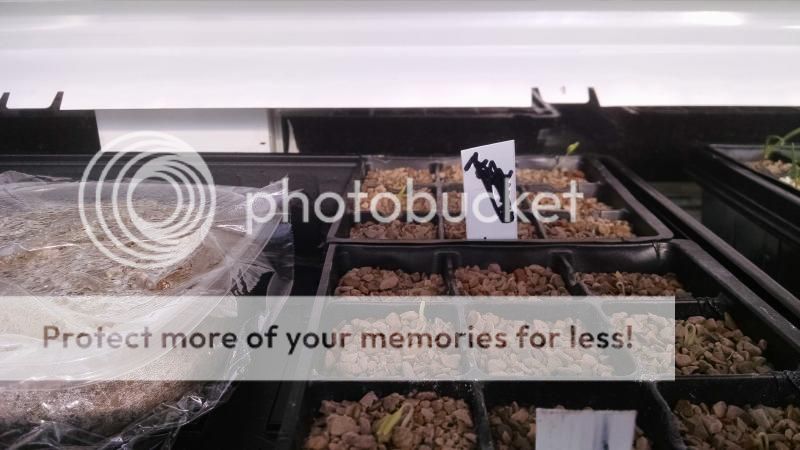
I planted some cool weather greens in Optisorb today. 14 bucks for a 25 lb bag at Fastenal. It's basically 100% DE granules used for cat litter or oil absorbent. It is a coarser grade than the Ultrasorb sold at NAPA and others. I filled the 1020 trays and added 8 cups of water. The water wicks to the top and turns the media dark. Light weight and easy media to work with planting seeds.
Image

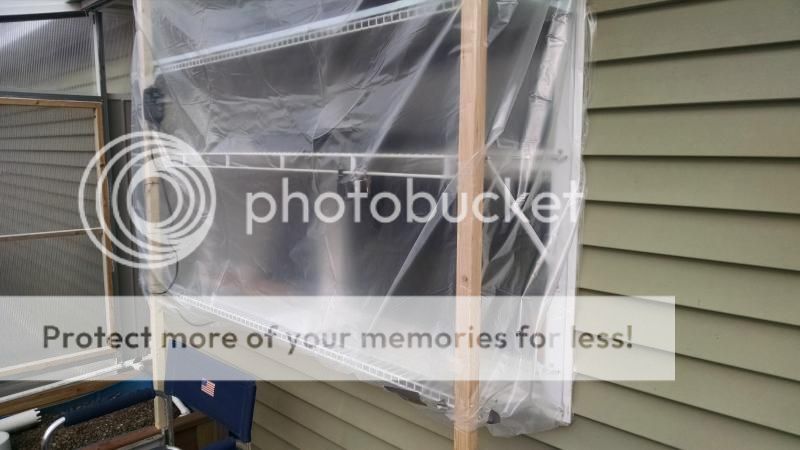
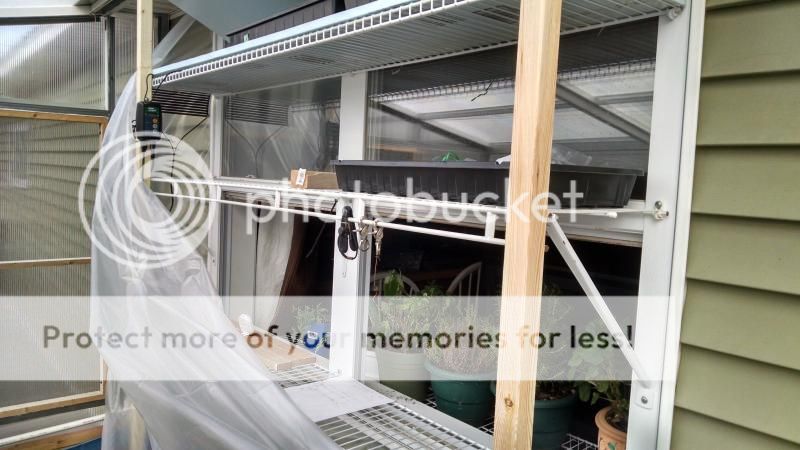
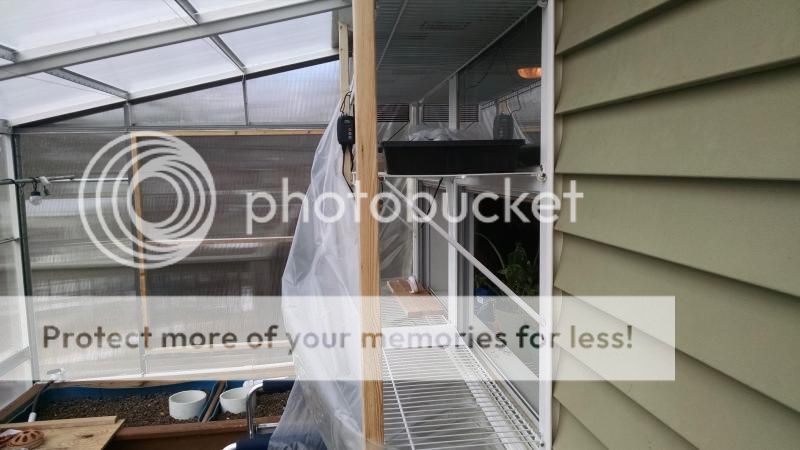
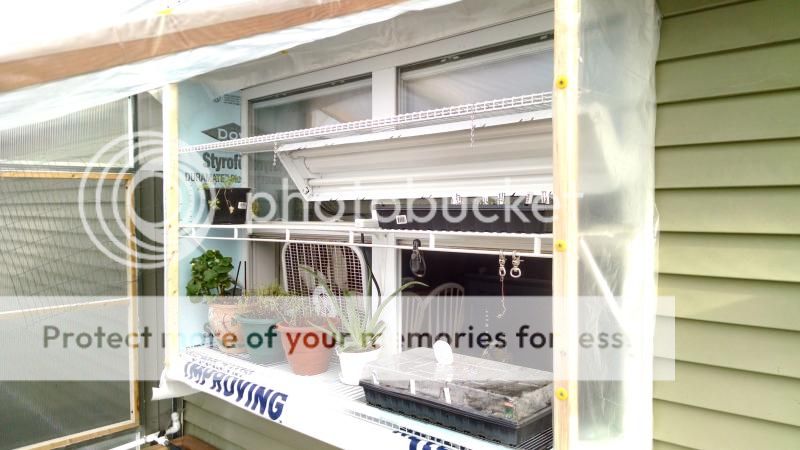
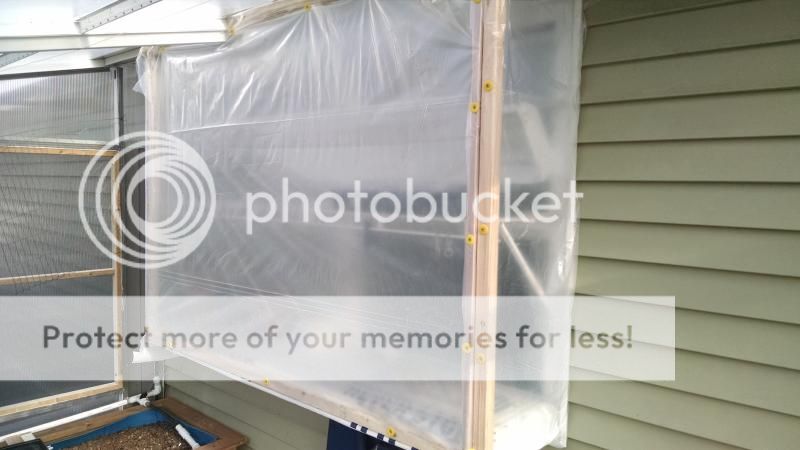
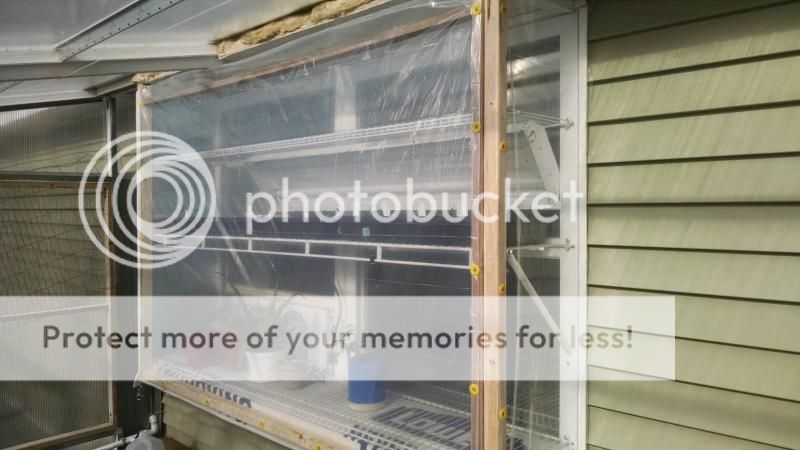
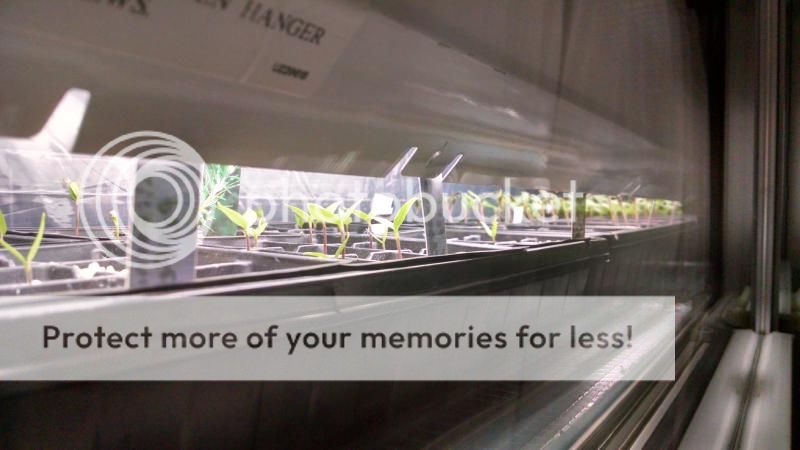
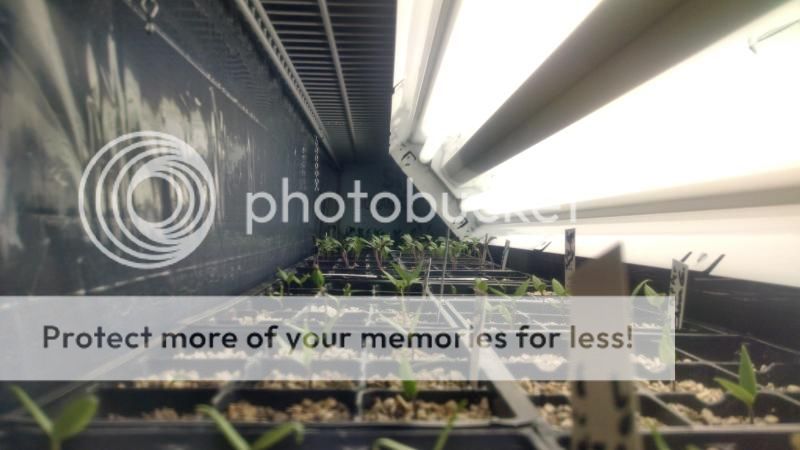
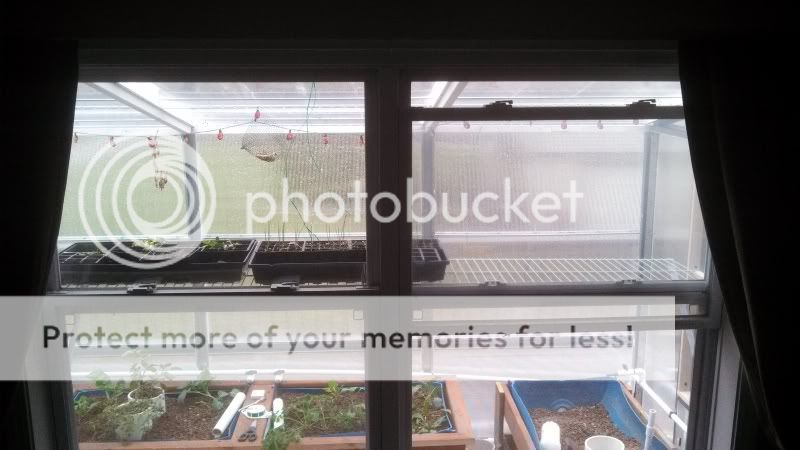
It's just a hillbilly garden window!
Image
Image
Image
Image
This is just a temporary enclosure to test temperature and layout. It didn't fare to well keeping it warm last night and needs much better insulation.

Rairdog
Green Thumb
Posts: 373
Joined: Sun Mar 16, 2014 4:46 pm
Location: Noblesville, IN Zone 5

After 3 days 8 out of 9 Giant Caesar have sprouted in the DE
Image

These are Cos lettuce seeds I collected from the garden. I just sprinkled some in to finish out the 1020 tray and they started spouting in 2 days and are near 100% in 3 days.

Image

The DE is outperforming my expectations so far.

It is easier to plant in IMO
It wicks better and uses less water
It is cheap!
TBD will it reduce/prevent dampening off and fungus nats.

User avatar
applestar
Mod
Posts: 30540
Joined: Thu May 01, 2008 7:21 pm
Location: Zone 6, NJ (3/M)4/E ~ 10/M(11/B)

Looks great! I'm defitely experimenting with DE for seed starting now -- I have UltraSorb. Did I mention that already?

Rairdog
Green Thumb
Posts: 373
Joined: Sun Mar 16, 2014 4:46 pm
Location: Noblesville, IN Zone 5

applestar wrote:Looks great! I'm defitely experimenting with DE for seed starting now -- I have UltraSorb. Did I mention that already?

What do you recommend feeding? I have Maxicrop with iron 0-0-1 and I have AP/aquarium water for N. Since the DE is inert I figure they are going to need fed more especially if I up-pot in DE. I will have to order it since everything sold here is MG. I have considered HP solution....just can't seem to locate and all-in-one mix in small quantities.

I picked up a couple 4 ft T8 fixtures for supplemental light. From what I've read a 6500 is best for starts and greens.

User avatar
applestar
Mod
Posts: 30540
Joined: Thu May 01, 2008 7:21 pm
Location: Zone 6, NJ (3/M)4/E ~ 10/M(11/B)

I like making AACT (actively aerated compost tea). I use earthworm castings, UCG (used coffee grounds) and rinse out water from various beverage containers, leftover tea and coffee, etc. I also add strained alfalfa pellet soaking water, I might toss in "got yucky in the refrigerator mushroom caps", etc., occasionally a handful of organic potting mix....

I'm not scientific at all so my answer/methods may not appeal to everyone :P

Oh! but I would most likely uppot in organic potting mix blended with some coir and a bit of DE.

Are you planning to plant in your ...what was it? Hydro or Aqua ponic beds?

Rairdog
Green Thumb
Posts: 373
Joined: Sun Mar 16, 2014 4:46 pm
Location: Noblesville, IN Zone 5

The greens I have started now will go into the Aquaponics hopefully in a few weeks depending on water temps. The peppers, toms...etc will go in dirt and need some supplemental feeding if I start them this early.

I have some Buffalo loam 1-1-1 and Encap compost 1-0.5-0.5 to try some tea. I was thinking of bumping up the P & K.

Rairdog
Green Thumb
Posts: 373
Joined: Sun Mar 16, 2014 4:46 pm
Location: Noblesville, IN Zone 5

I have been working out the bugs on my new seed chamber. So far it has kept the temp above 60 when the GH is in the low 30's and the outside temp is in the mid 20's. The goal is to start toms and peppers etc in Jan. The plant will then move to GH (some in AP beds) beds in March and into the dirt in May. It will also allow me to grow greens all winter and overwinter some herbs and misc plants.

Here are some peppers and toms germinating. The temp does not show up on camera correctly. I am still experimenting with Hydofarm temp probe placement. When placed in the media the mat gets fairly hot (90ish). When placed directly on mat the media is slightly cooler. So far when thermostat is set at 83 the media is around 78.

Image

The door is a double layer of poly which helped get the temp up to 60.

Image
Image

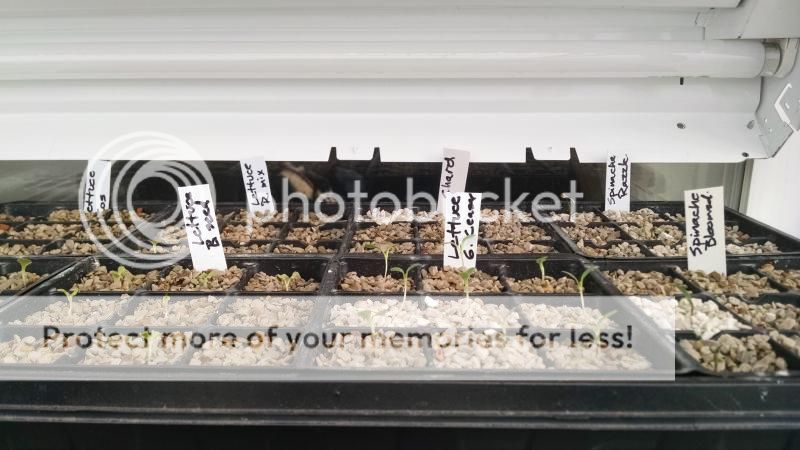
I added a light/timer to supplement morning and evening light. Here are some lettuce, spinach and chard coming up.

Image

Rairdog
Green Thumb
Posts: 373
Joined: Sun Mar 16, 2014 4:46 pm
Location: Noblesville, IN Zone 5

I changed out the plastic to a heavier/clearer plastic and put in a window fan that was on clearance. I am not really happy with the fan and plan on a temperature actived fan when the price is right. The outside temp is 30 and the GH got up to 80 but the chamber stabilizes between 63 and 75 so far this week regardless of temps and sunshine. The goal was to keep it between 60 and 80 without supplemental heat. I don't mind 60 watts of supplemental light and whatever the fan uses. The DE is great at retaining water and so far has made life much easier when I don't have to woory about over watering and drying out. The next issue wil be excessive heat when outside temp get above 50 and GH temps approach 90. I'm hoping a gas activated window opener will keep the GH from overheating. It can go from 50 to 80 in 10 minutes or drop when it suddenly turn cloudy. I don't mind the challenge when it free solar heat.

Here are some more pics. The new plastic...

Image
Image

Spinach, chard and lettuce (lettuce is getting a little leggy from the cloudy weather but not bad). Shot through the new plastic.

Image

This will be my first attempt at kohlrabi grown in aquaponics. Greens do very well and broccoli did great but took too long and too much space. We will see how the kohlrabi likes wet feet.

Image

Some tomatoes coming up. This is the frst time I have ever attempted saving tomato seeds so it's more of a germination test. They will have a hard time making it until May but I plan on starting new toms 6-8 weeks before last frost.

Image

Rairdog
Green Thumb
Posts: 373
Joined: Sun Mar 16, 2014 4:46 pm
Location: Noblesville, IN Zone 5

Keeping the seedlings above 55 has not been a problem when it drops to single digits. Today it got up to 32 outside. The GH got to 88. The thermostat kicks the fan on at 75 and blows into the house. The air coming into the house was around 72 deg for 4 hrs....free heat!

Whats is nice is they are hardened off from the start with minimal elec use and no moving in/out. The fan is 17 watt and only runs for a few hrs above 75 deg. The heat mat is 40 watts and runs about 50% of the time just for the peppers. The light is 60 watts and runs for 10 hrs. 5 hrs in the am and 5 hrs in the pm with direct sunlight from 11am to 4pm. I have over 300 plants going as of now but only 160 of them get the extra light.

Keeping them from frying will be the next issue and require a lot of manual input.

From inside the house looking out the window
Image

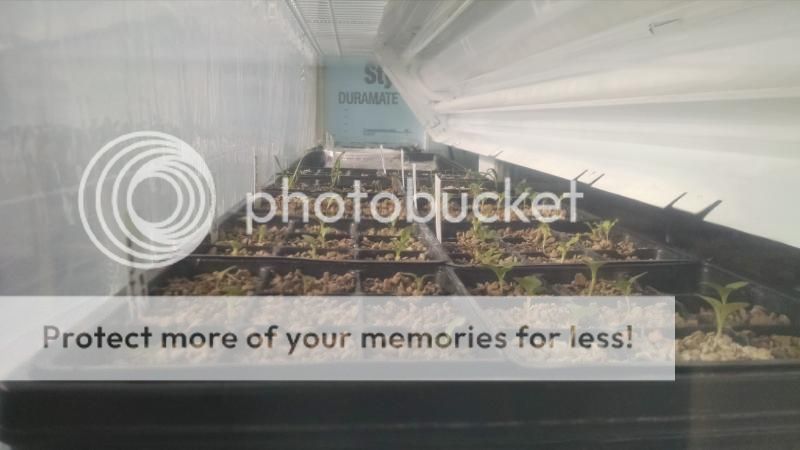
From outside in the GH looking into the end of the chamber.
Image

They are a little leggy but the stems are sturdy. I blow on them and the just wiggle without bending. The toms are very purple on underside of leaves with a 55 to 70 deg grow. I will start more...these are just an experiment for slow growing.


Return to “Seed Starting Discussions”