
-
applestar

- Mod
- Posts: 30543
- Joined: Thu May 01, 2008 7:21 pm
- Location: Zone 6, NJ (3/M)4/E ~ 10/M(11/B)
Re: 2014 pre-germinating/sprouting experiment Peas, Corn, Cu
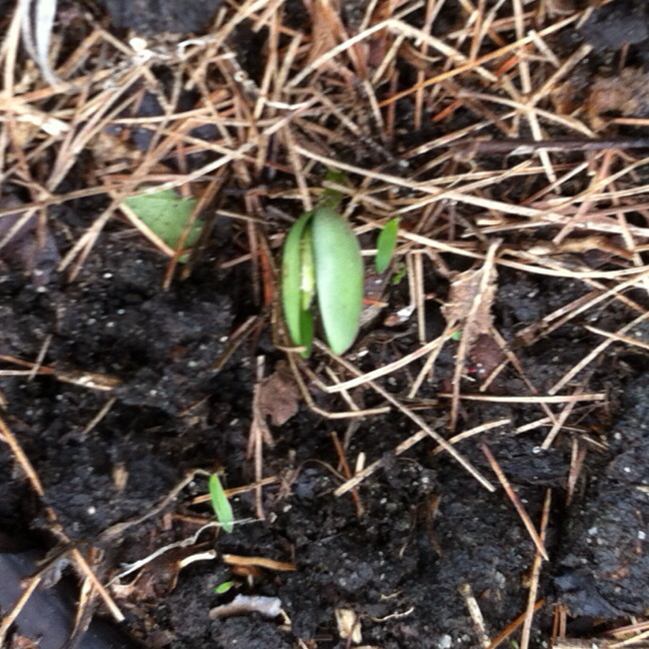
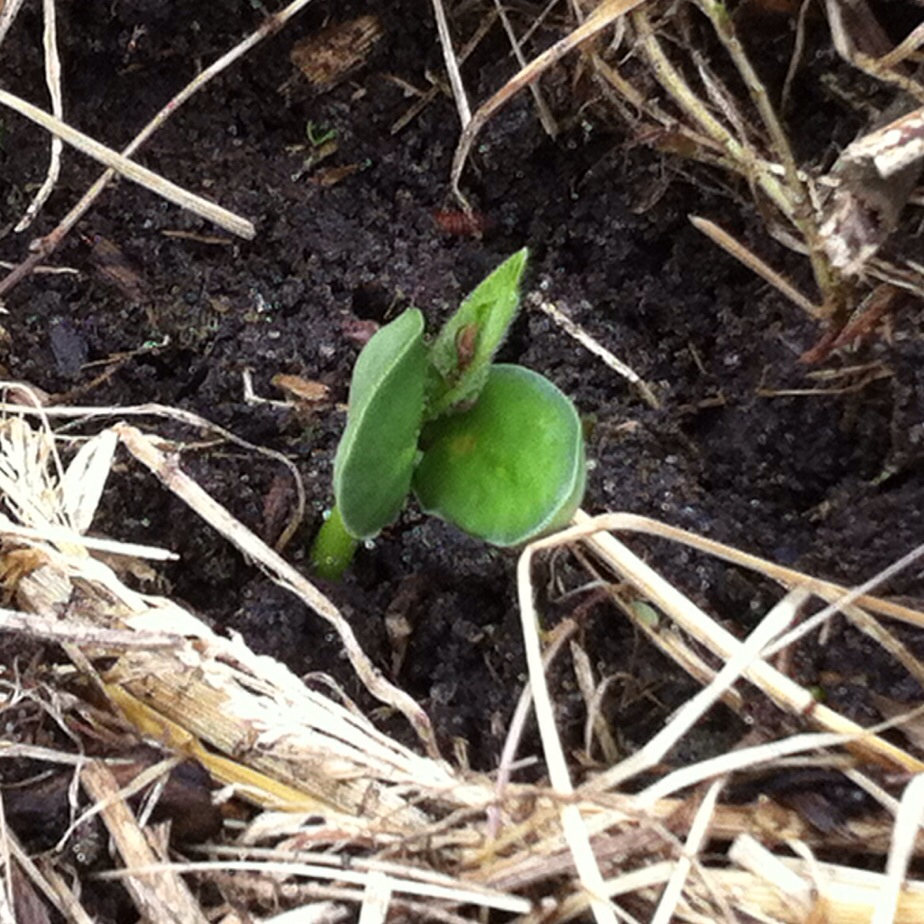
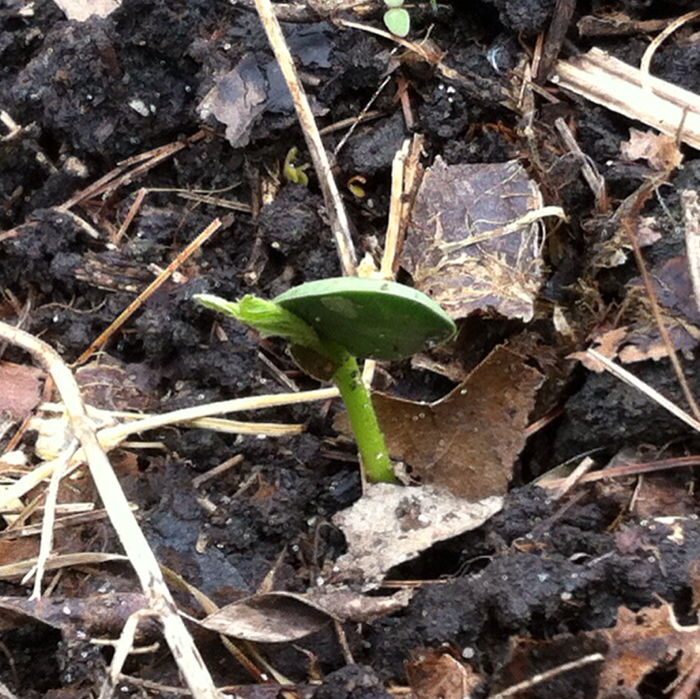
Here are the two vinegar jug squashes that were sown as pre-germinated seeds:

-
applestar
- Mod
- Posts: 30543
- Joined: Thu May 01, 2008 7:21 pm
- Location: Zone 6, NJ (3/M)4/E ~ 10/M(11/B)
Thanks, Cola.  It's a lot of fun and easy to do with the larger seeds.
I soaked beans overnight 5/17-18 and rinse/drained them yesterday. Today, the first group germinated and I sowed them. I have to admit I forgot to take pictures of the germinated beans before sowing them. So only took pics of mostly not yet germinated beans left in the sprouters:
I use salsa jars laid on their side as extra sprouters:
I soaked beans overnight 5/17-18 and rinse/drained them yesterday. Today, the first group germinated and I sowed them. I have to admit I forgot to take pictures of the germinated beans before sowing them. So only took pics of mostly not yet germinated beans left in the sprouters:
-
applestar
- Mod
- Posts: 30543
- Joined: Thu May 01, 2008 7:21 pm
- Location: Zone 6, NJ (3/M)4/E ~ 10/M(11/B)
Here are the pre-germinated pole beans I sowed today:
It's interesting to note that Good Mother Stallard was late to germinate but the one that germinated first, when left in the sprouter for and extra day for the others to catch up, immediately started to spoil -- Note the somewhat browned radicle. I think it was still OK and will sprout, but this temperamental behavior might explain the difficulty in growing evenly spaced row of Old Mother Stallards last time I tried to grow this variety.
- Christmas Lima, Good Mother Stallard, one Tiger Eye
- Scarlet Runner, Sunset a Runner, Kentucky Wonder, Purple Podded Pole Bean
OK, gotta ask, apple. Now, I haven't read through every word, don't mean snark in any way, but Why?! What is the mission statement?! Is this to get some things going a few days ahead of normal planting? Is this better than just starting in cups etc inside? In glancing looks like alot of time, rather lots of short bits on a regular basis.
It is interesting, thanks for sharing. Just missed the objective and mission statement in this project. Now science fair project for the kids, that's different and I hope never to see that again! Well, the 5 yr old g-son may take an interest in yarn dyeing or plants, please help him, and ask me for direction...but I digress...
It is interesting, thanks for sharing. Just missed the objective and mission statement in this project. Now science fair project for the kids, that's different and I hope never to see that again! Well, the 5 yr old g-son may take an interest in yarn dyeing or plants, please help him, and ask me for direction...but I digress...
-
applestar
- Mod
- Posts: 30543
- Joined: Thu May 01, 2008 7:21 pm
- Location: Zone 6, NJ (3/M)4/E ~ 10/M(11/B)
I did begin last year. I think it all started with the corn. I had saved some interesting corn by growing to maturity, drying and saving, but it had been a few years, so I wanted to know if they were viable. Corn being what it is, you need them to fill the rows, and in my limited space, I've had gappy rows of corn even when sowing freshly bought packaged for that year seeds.
So the question was would floating corn seeds indicate lack of viability. Then, I had all this soaked corn, I only wanted to sow viable seeds that would grow... and germination was really the only sure indicator/answer. Combined with hand pollinating, last year's corn experiment was a great success, letting me plant uniformly mature seedlings exactly in three variety blocks in an 8x12 garden bed with practically no empty spots.
I also tried with sunflowers, and although sunflowers ran into issues after sprouting, I had a handle on what to do to *not* repeat those mistakes.
Fast forward to this year, and I decided to pre-germinate peas because I was late with sowing them due to long winter! and I needed them to hurry up and get growing before our typical winter-skip spring - summer weather ruined the pea harvest. I'm pretty sure I was able to shave at least a week off the usual timeline.
I then repeated/reviewed the corn and sunflower experience, and expanded to cucurbits. Namely, I was always recommending that squash, melons, cucumbers, etc. should be directly sown and no transplanting. I tend to say to myself -- wait is that really true? So I wanted to see if I could quickly develop a workable method. Interesting thing about stuff like this is that most of these are things I've tried in the past -- tried and failed at some level or other that, looking back, was mostly due to inexperience.
Funny thing of it all is that I am positive I said sometime ago that I don't like the damp paper towel in a Baggie on the refrigerator method because then you are slave to the whims of the germinating seeds.
Small and tiny seeds will have to be another year's project, if ever.
...anyway, there might be more to it all (maybe my pre-planned planting maps have something to so with it, too -- it's so annoying when things don't grow where -in the map block- I wanted/intended it to....) but that is the long-winded gist of it.
-
applestar
- Mod
- Posts: 30543
- Joined: Thu May 01, 2008 7:21 pm
- Location: Zone 6, NJ (3/M)4/E ~ 10/M(11/B)
By the way, beans -like peas and sunflowers- are direct seeded when they have germinated -- ideally when the radicle root is no longer than 1/2 inch.
So far, my experience is that some peas and beans "crack" or fall apart when they are first soaked for the 4-6 hours. The ones that fall apart are the non-viable beans. So in fact, by soaking, you can eliminate the duds and near-duds. Remember, the "bean" is the two halves of the seed leaves.
Sometimes, they crack through the germ, and other times, the broken beans won't green up to become seed leaves and spoil easily. Some peas and beans take a while to germinate, and if you are patient, they WILL. But chances of spoilage increases, so it seems that there' same point when you should give up on the remaining ungerminated seeds because the maintenance required to keep them from spoiling becomes requires more work. Peas and beans should be drained completely after each rinsing. Excess moisture increases chance of spoilage, but this means you need to rinse/rewet them frequently, before any germinated radicle root dries out.
-
applestar
- Mod
- Posts: 30543
- Joined: Thu May 01, 2008 7:21 pm
- Location: Zone 6, NJ (3/M)4/E ~ 10/M(11/B)
OK, so if y'all have been reading all my posts, here's a pop quiz: Bullet list the reasons applestar is pre-germinating these seeds.... (Help me out here -- I can't seem to make a summarized list.  ). I'll use it to ref/link to when anyone asks in the future, instead of my long drawn out explanation.
-
skiingjeff

- Green Thumb
- Posts: 383
- Joined: Sun Apr 01, 2012 4:22 pm
- Location: Western Massachusetts Zone 6a
I've been reading along with interest to your post, Applestar. I found it interesting for the following reasons:
1. General knowledge of what works by pre-germinating and what doesn't work so well.
2. General procedures to pre-germinate. Sprouter/wide mouth jar; paper towel in baggie in refrigerator.
3. What a germinated seed actually looks like (normally we only see them when they pop out of the soil).
4. A great way to plant only viable seed (many folks don't have a lot of space for their garden and would like to plant only viable seed in order to maximize space usage. Nothing worse than plants a space and only getting 60% or less to grow )
)
5. Tips and tricks as you've gone along the process.
6. An understanding that you're on the seeds timeframe not your own. When they sprout, you plant
I don't know if this is the type of list you were looking for, but I've certainly enjoyed reading it. I'm thinking of trying it later in the year for a fall crop of snow peas and seeing how it goes. Thanks for the great info!
1. General knowledge of what works by pre-germinating and what doesn't work so well.
2. General procedures to pre-germinate. Sprouter/wide mouth jar; paper towel in baggie in refrigerator.
3. What a germinated seed actually looks like (normally we only see them when they pop out of the soil).
4. A great way to plant only viable seed (many folks don't have a lot of space for their garden and would like to plant only viable seed in order to maximize space usage. Nothing worse than plants a space and only getting 60% or less to grow
5. Tips and tricks as you've gone along the process.
6. An understanding that you're on the seeds timeframe not your own. When they sprout, you plant
I don't know if this is the type of list you were looking for, but I've certainly enjoyed reading it. I'm thinking of trying it later in the year for a fall crop of snow peas and seeing how it goes. Thanks for the great info!
-
applestar
- Mod
- Posts: 30543
- Joined: Thu May 01, 2008 7:21 pm
- Location: Zone 6, NJ (3/M)4/E ~ 10/M(11/B)
...still pre-germinating...
Since Baby Fweddy-Fwed did a number on the pole beans, I started some more, this time out of my saved mixed hot weather crops seeds bag. It had little round black BB sized seeds in it that I think are okra. Okra was the first to germinate in 1-2 days so I already sowed most of them in my Edible Landscaping Front Yard Fence Row. But here are a couple left, along with other beans. There were some corn in there too so they also went in the FYFR, along with some of the beans. The rest of the beans were distributed to re-seed where Baby Fweddy-Fwed decapitated them, as well as some other locations that are hopefully inaccessible to him,
Since Baby Fweddy-Fwed did a number on the pole beans, I started some more, this time out of my saved mixed hot weather crops seeds bag. It had little round black BB sized seeds in it that I think are okra. Okra was the first to germinate in 1-2 days so I already sowed most of them in my Edible Landscaping Front Yard Fence Row. But here are a couple left, along with other beans. There were some corn in there too so they also went in the FYFR, along with some of the beans. The rest of the beans were distributed to re-seed where Baby Fweddy-Fwed decapitated them, as well as some other locations that are hopefully inaccessible to him,
- A couple of okra and beans
-
skiingjeff
- Green Thumb
- Posts: 383
- Joined: Sun Apr 01, 2012 4:22 pm
- Location: Western Massachusetts Zone 6a
No worries 
So I tried to pre-germinate some bush beans but didn't do so good. So I have a quick question to clarify what I might have missed in the thread. You first soak the seeds you cover them in water about 12 hours (overnight), then you drain them and let them sit without any water for until the next night. Then that next night you soak them again overnight and then drain. Continuing to repeat until they germinate. Correct?
If so, I understand why a dish works better than wide mouth jars because there is less potential damage to the seed.
Again, thanks for the great thread!
-
applestar
- Mod
- Posts: 30543
- Joined: Thu May 01, 2008 7:21 pm
- Location: Zone 6, NJ (3/M)4/E ~ 10/M(11/B)
OK I see where you went wrong. After the initial soaking, the seeds/beans are rinsed twice only, no soaking. Also, in the summer heat,initial soak should be limited to 4-6 hrs.
If the temperature is warm (over 75°F) and/or air is dry, you need to rinse twice and drain more often so the delicate roots won't dry out. I really like this EasySprouter because it creates a thermal airflow between the inner cup with drainage slits and the outer solid cup. But I have made my own version with two plastic beverage cups that seem to work. Trick is to suspend the inner cup over the outer cup with a small gap in between when stacking them.
I've had some success with personal size salad spinner with the inner basket sitting on a jar lid to raise it a bit more from the collected water in the older bowl.
I really thought turning the salsa jar on its side worked pretty well too.
-
skiingjeff
- Green Thumb
- Posts: 383
- Joined: Sun Apr 01, 2012 4:22 pm
- Location: Western Massachusetts Zone 6a
Thanks! I guess I overwatered them 
Just like everything with seed starting, it seems to always be a matter of too much water or too little water....lol
I'll have to try again because putting the Carson yellow beans into the ground doesn't appear to be producing many plants and I want to check on the viability of the seed before contacting Territorial to express my displeasure with their seed as I bought them new for this year's planting.
Thanks for the clarification
-
applestar
- Mod
- Posts: 30543
- Joined: Thu May 01, 2008 7:21 pm
- Location: Zone 6, NJ (3/M)4/E ~ 10/M(11/B)
Bumping this thread as reminder to myself and others in my planting zone that it's almost time again to start pre-germinating corn and squash, etc.
Reviewing this thread, it looks like I also pre-germinated peas to direct sow about this time last year, but this year, I already started some inside that are a month old, 3-4" tall and ready to plant with several true leaves. (I'll add the link for that thread later)
It's good to know I can still sow some peas though (as long as the spring weather is going to be like last year) since I have a lot more seeds.
-
applestar
- Mod
- Posts: 30543
- Joined: Thu May 01, 2008 7:21 pm
- Location: Zone 6, NJ (3/M)4/E ~ 10/M(11/B)
I started the first variety of corn -- Glass Gem
I plan to grow at least one more variey... A third if I can work out the logistics and another location to plant them. It's a question of staggering the planting times based on days to maturity as well as planting on opposite sides of the house to effectively buffer/block accidental cross pollination by the wind and air currents.
-
applestar
- Mod
- Posts: 30543
- Joined: Thu May 01, 2008 7:21 pm
- Location: Zone 6, NJ (3/M)4/E ~ 10/M(11/B)
Last year, I found out that by pre-germinating and starting them inside for planting as early as possible, early maturing C.pepo variety and C.maxima, which are vulnerable to SVBs (squash vine borers) were able to mature fruits before SVBs took down the vines.
This year, I direct sowed the pre-germinated seeds in raised hills for warmed soil, etc. and it worked!
-- I harvested these Kakai hulless seed squash today (along with the one volunteer maxima) Almost all Kakai vines have collapsed due to SVB.
I only got two Guatemalan Blue fruits from two plants -- but par for the course since I had 6 Kakai plants -- but I believe they are also nearly ready to harvest -- there is corking starting in the fruit stems. Since the vines are not quite collapsed (supplied by secondary roots from nodes along the vines), even though they are infested by SVB's at the base, I'm going to give them another day or two before harvesting.
This is working out well since now, melon vines that are enjoying the hot weather can move into the space that had been occupied by Kakai, and I sowed pre-germinated edamame/soybean seeds in the Guatemalan Blue hill.
This year, I direct sowed the pre-germinated seeds in raised hills for warmed soil, etc. and it worked!
-- I harvested these Kakai hulless seed squash today (along with the one volunteer maxima) Almost all Kakai vines have collapsed due to SVB.
This is working out well since now, melon vines that are enjoying the hot weather can move into the space that had been occupied by Kakai, and I sowed pre-germinated edamame/soybean seeds in the Guatemalan Blue hill.
-
applestar
- Mod
- Posts: 30543
- Joined: Thu May 01, 2008 7:21 pm
- Location: Zone 6, NJ (3/M)4/E ~ 10/M(11/B)
FYI -- Subject: First Glass Gem Corn Harvest
...came back to this thread again to see if it's time to start pre-germinating corn for this year. Looks like I should start this week end or next week.
...came back to this thread again to see if it's time to start pre-germinating corn for this year. Looks like I should start this week end or next week.
-
applestar
- Mod
- Posts: 30543
- Joined: Thu May 01, 2008 7:21 pm
- Location: Zone 6, NJ (3/M)4/E ~ 10/M(11/B)
Subject: 2016 -- starting seeds and cuttings for the new season
Sat Apr 23, 2016 8:28 pm
Sat Apr 23, 2016 8:28 pm
applestar wrote:I have 2 or three different varieties of corn to grow this year. I'm going to try to be careful to stagger planting time for them and will also grow in beds that are located on two opposite sides of the house. I'm also learning to use isolation tassel and shoot/cob bags for corn seed saving.
First up, I started soaking my Mirai 350BC seeds yesterday. After soaking all morning, I drained the water and put them in my seed sprouter, and have been rinsing them at approx. 8 hour intervals.
...just a little while ago, I decided to give them another rinse, and was tsk- tsking that these shriveled up corn kernels had NOT plumped up with water and that some of them are STILL not sinking to the bottom, wondering if they are duds since I tend to think good seeds should sink. Then did a double-take because I realized one of the floaters had a rather long radicle/seedroot growing already.-- Time to sow!
I started sowing them in the 1/2 gal rice milk carton. For this, I stand it up on one of the long narrow side like this, which provides 4.5 inch depth. I can comfortably fit two 10 seed rows = 20 per carton, and could squeeze in another 4 in between for even two dozen per carton.
-- today, there were actually only 16 germinated seeds, though. So I left space for 4 more seeds.
