
OK talk to me about replacing fluorescent light tubes. I never have. My set up has been expanded over time, so some are newer, but some of the original ones are over a decade old. How do you know when they need to be replaced? I've been worrying about it this year, because in some ways I'm not getting as good of results as I'm used to. But there are several variables, seeds I bought cheap in bulk from a company I've never tried before (I'm suspecting the seed for some low germination rate issues), homemade potting soil, and aging light tubes.
But you can't recycle the tubes and I hate to be throwing them out, it seems so wasteful. They still light up and look the same.
-
rainbowgardener

- Super Green Thumb
- Posts: 25279
- Joined: Sun Feb 15, 2009 6:04 pm
- Location: TN/GA 7b
-
applestar

- Mod
- Posts: 30550
- Joined: Thu May 01, 2008 7:21 pm
- Location: Zone 6, NJ (3/M)4/E ~ 10/M(11/B)
I base my need to replace decision on dark shadows developing at the ends of the tubes, but dedicated people replace them every year or after each "run" regardless. New tubes definitely are brighter, so you may want to keep a "test tube" to compare against existing ones.
FIY I bought wrong tubes -- a 10 tube pack of Phillips "Natural Light" (5000K) T-8. I don't know what was going through my head except that I was concentrating on lumens for brightness for some reason and these are marked 2850 lumens
Life: 30,000 hrs
Color Rendering Index: 82
I did become concerned that I was mistaken and also picked up a 2-tube pack of
"Daylight Deluxe" which is marked 6500K and 2750 lumens.
Life: 36,000 hrs
Color Rendering Index: 78
But they also sell "Daylight" which I believe was 6000K.
Standing in front the huge aisle of f. Tubes, I got confused.
After coming home, I reviewed my notes and asked around, and you do definitely want 6500K or higher for starting seeds (blue lights) for good foliage growth. I also mistakenly thought 5000K would be good enough for the "warm" range for blooming/fruiting, but I was told that this color range doesn't do much/as well for plants and they need the 4100K (red lights) -- Actualy called "Cool White".
In addition, last time I was poking around the web, I read that you could put T-8 tubes in T-12 fixtures and still have them work. But last night, I dug a little further and stumbled on an electrical contractor's forum. In a discussion there, consensus was that T-8 tubes/bulbs used with T-12 ballasts shorten the bulb life (and T-12 tubes/bulbs used with T-8 ballasts shorten the ballast life) -- uh oh. One contractor cleverly remarked that mistakes like this by maintenance crew means more extra work orders for them.
In addition, one person commented that T-12 ballasts last forever (longer than T-8) so one idea wod be to stock up on T-12 tubes before they stop selling them.... But another idea would be to replace the T-12 ballasts with T-8 ballasts which I read once before elsewhere that it is not difficult to do ...then again, T-12's are not as bright as T-8's nor as energy saving. So what to do?
Anyhow, back to the store I go to exchange the T-8's and get some T-12's also. I wonder if you can exchange/return items bought at another Home Depot store at a store closer to my house?
P.S. recycling -- I suppose you could offer them for freecycle/Craig's as used but still usable tubes? Mean they'd be fine for general lighting until they burn out (tube ends turn black and they don't turn on, start flickering or tracering). When they do burn out I take them to my township's hazardous collection site. I did mean to ask if they had a collection box for the tubes at Home Depot (or other big box stores) like they do for CFL bulbs. I'll do that when I go back.
P.P.S. Maybe you could have a sun-loving seed starting section where you would keep replacing the tubes, and shade-loving seed starting section where you can keep using the older tubes.
FIY I bought wrong tubes -- a 10 tube pack of Phillips "Natural Light" (5000K) T-8. I don't know what was going through my head except that I was concentrating on lumens for brightness for some reason and these are marked 2850 lumens
Life: 30,000 hrs
Color Rendering Index: 82
I did become concerned that I was mistaken and also picked up a 2-tube pack of
"Daylight Deluxe" which is marked 6500K and 2750 lumens.
Life: 36,000 hrs
Color Rendering Index: 78
But they also sell "Daylight" which I believe was 6000K.
Standing in front the huge aisle of f. Tubes, I got confused.
After coming home, I reviewed my notes and asked around, and you do definitely want 6500K or higher for starting seeds (blue lights) for good foliage growth. I also mistakenly thought 5000K would be good enough for the "warm" range for blooming/fruiting, but I was told that this color range doesn't do much/as well for plants and they need the 4100K (red lights) -- Actualy called "Cool White".
In addition, last time I was poking around the web, I read that you could put T-8 tubes in T-12 fixtures and still have them work. But last night, I dug a little further and stumbled on an electrical contractor's forum. In a discussion there, consensus was that T-8 tubes/bulbs used with T-12 ballasts shorten the bulb life (and T-12 tubes/bulbs used with T-8 ballasts shorten the ballast life) -- uh oh.
In addition, one person commented that T-12 ballasts last forever (longer than T-8) so one idea wod be to stock up on T-12 tubes before they stop selling them.... But another idea would be to replace the T-12 ballasts with T-8 ballasts which I read once before elsewhere that it is not difficult to do
Anyhow, back to the store I go to exchange the T-8's and get some T-12's also. I wonder if you can exchange/return items bought at another Home Depot store at a store closer to my house?
P.S. recycling -- I suppose you could offer them for freecycle/Craig's as used but still usable tubes? Mean they'd be fine for general lighting until they burn out (tube ends turn black and they don't turn on, start flickering or tracering). When they do burn out I take them to my township's hazardous collection site. I did mean to ask if they had a collection box for the tubes at Home Depot (or other big box stores) like they do for CFL bulbs. I'll do that when I go back.
P.P.S. Maybe you could have a sun-loving seed starting section where you would keep replacing the tubes, and shade-loving seed starting section where you can keep using the older tubes.
-
IndyGerdener

- Green Thumb
- Posts: 392
- Joined: Thu Jun 21, 2012 12:32 pm
- Location: Greenwood, Indiana
-
applestar
- Mod
- Posts: 30550
- Joined: Thu May 01, 2008 7:21 pm
- Location: Zone 6, NJ (3/M)4/E ~ 10/M(11/B)
Wow that's difficult to compare --
- 48" tubes are brighter than 24" tubes
- T-5's are brighter than T-12's
- 6500K is supposed to be significantly better/ideal for leaf and root growth and I'm not sure how much 2700K color range benefits plants (I was told to choose 4100K for blooming/fruiting) I'll see if I can find an appropriate graph to link to.
-
IndyGerdener
- Green Thumb
- Posts: 392
- Joined: Thu Jun 21, 2012 12:32 pm
- Location: Greenwood, Indiana
-
applestar
- Mod
- Posts: 30550
- Joined: Thu May 01, 2008 7:21 pm
- Location: Zone 6, NJ (3/M)4/E ~ 10/M(11/B)
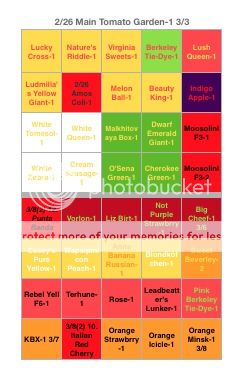
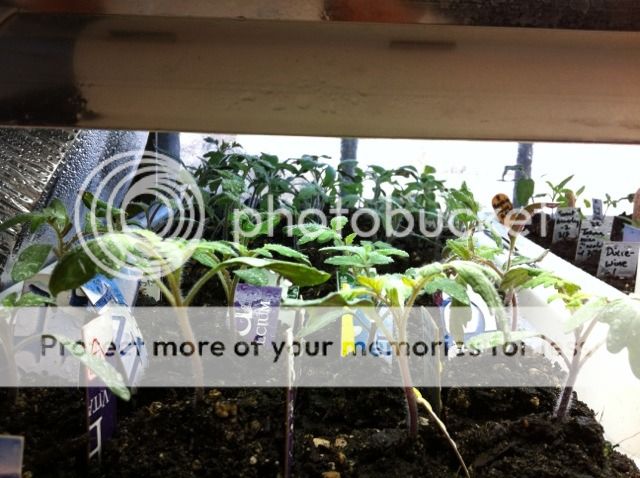
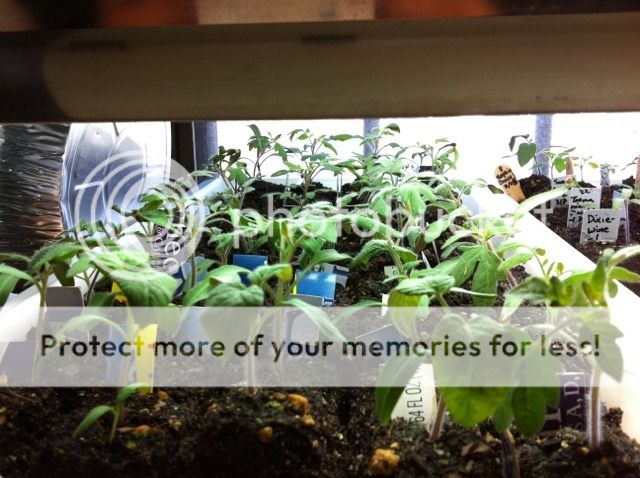
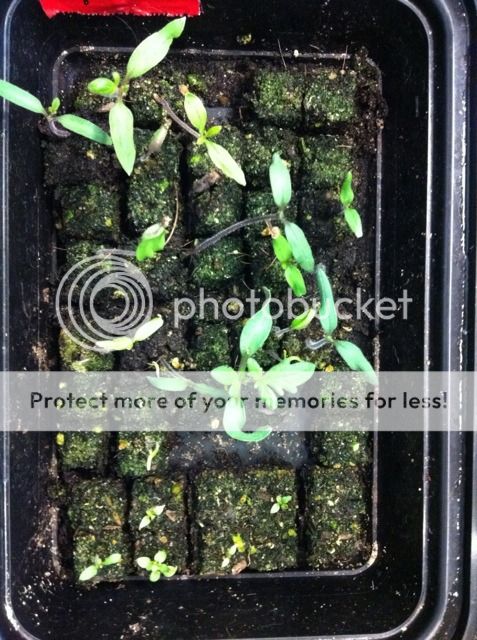
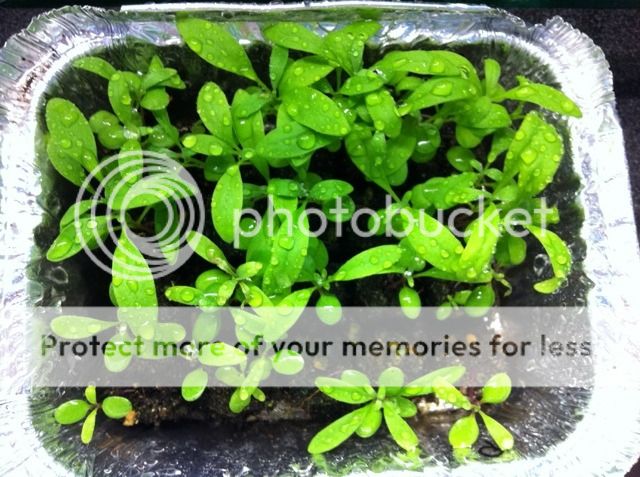
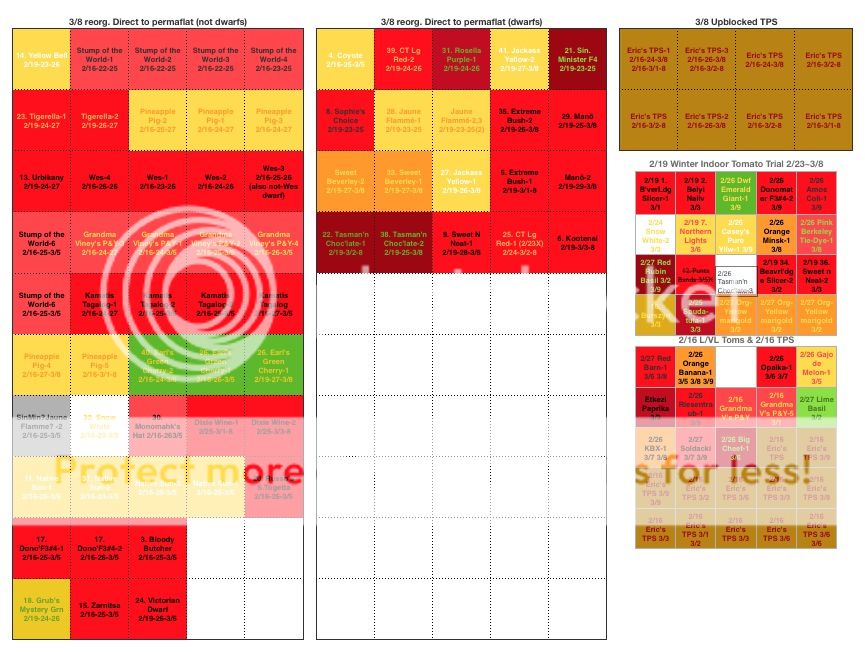
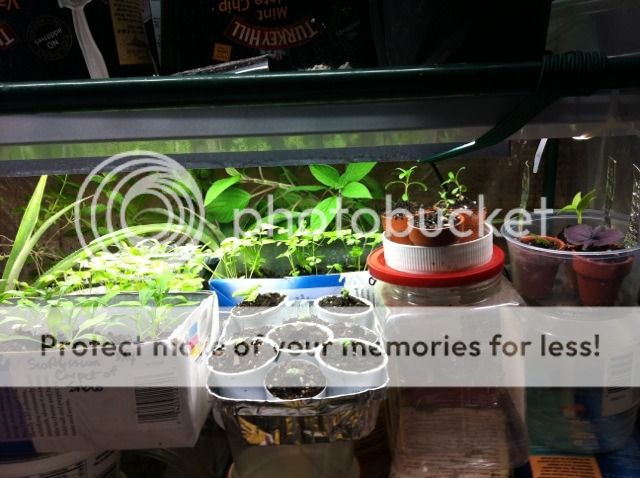
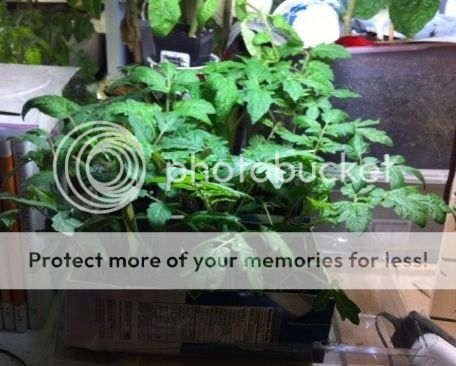
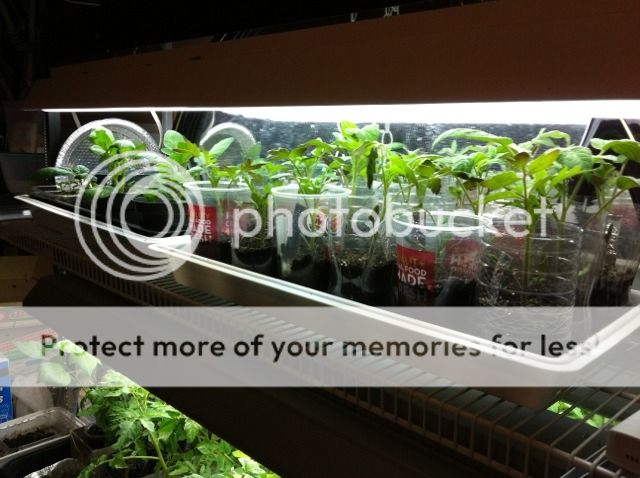
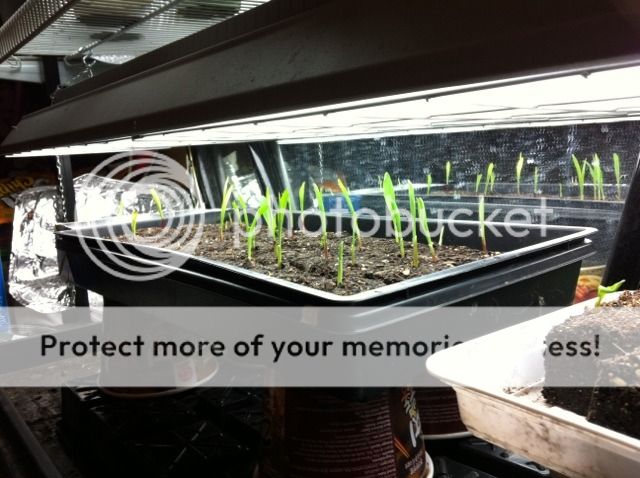
Finally made room and upblocked 24 more:
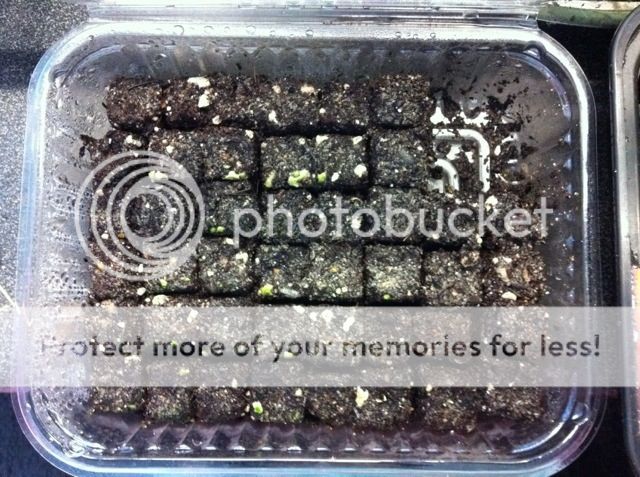
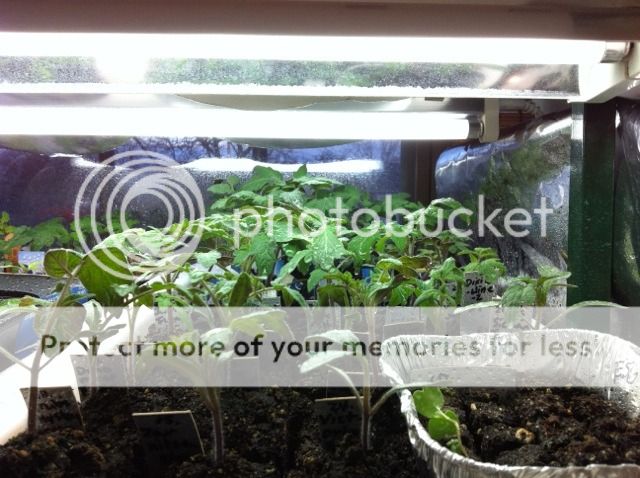
Here are some of them:
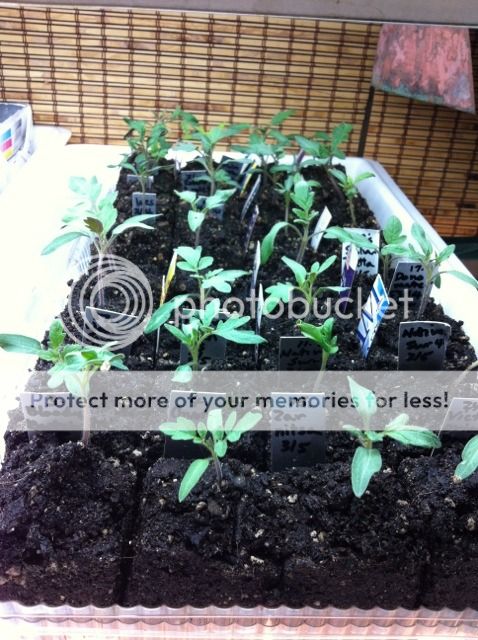
Right now, there are 32 in the tray, but if I take them out of the square bakery containers, the tray would hold more.
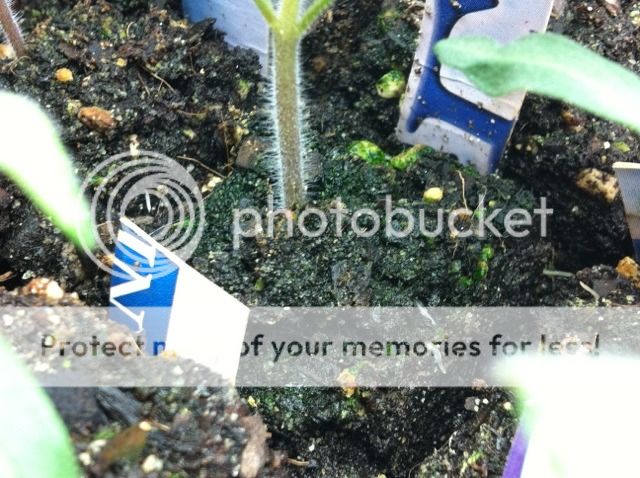
Here's a microblock being snuggled into the square hole in the miniblock:
...and it's in:
...this is weird to me because I usually bury up to the base of seed leaves, but the soilblocks are supposed to encourage dense root systems so I'm going to follow through and see how they do.
Here are some of them:
Right now, there are 32 in the tray, but if I take them out of the square bakery containers, the tray would hold more.
Here's a microblock being snuggled into the square hole in the miniblock:
...and it's in:
...this is weird to me because I usually bury up to the base of seed leaves, but the soilblocks are supposed to encourage dense root systems so I'm going to follow through and see how they do.
-
applestar
- Mod
- Posts: 30550
- Joined: Thu May 01, 2008 7:21 pm
- Location: Zone 6, NJ (3/M)4/E ~ 10/M(11/B)
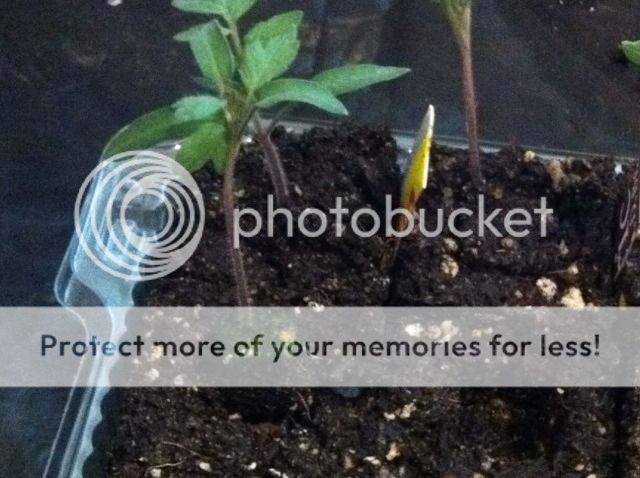
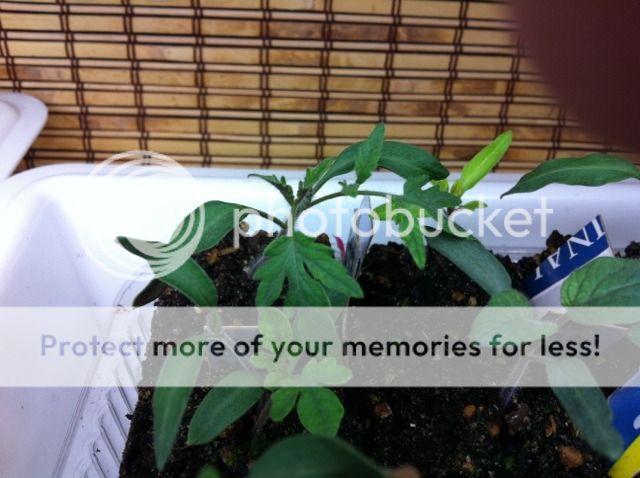
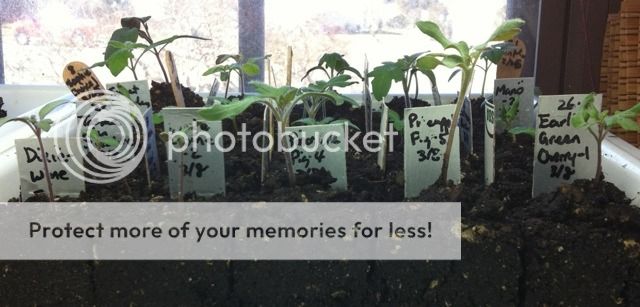
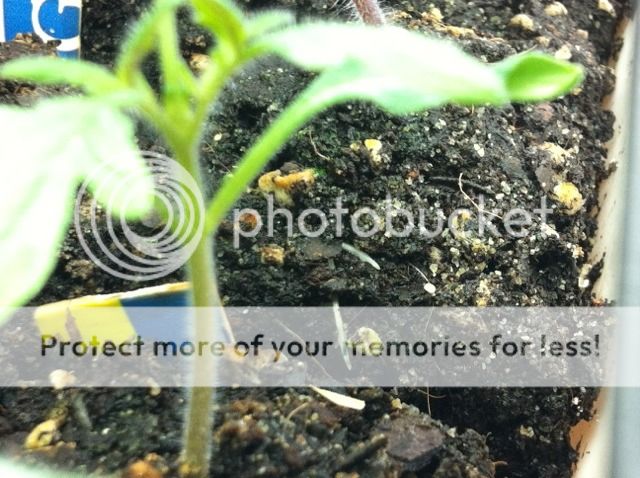
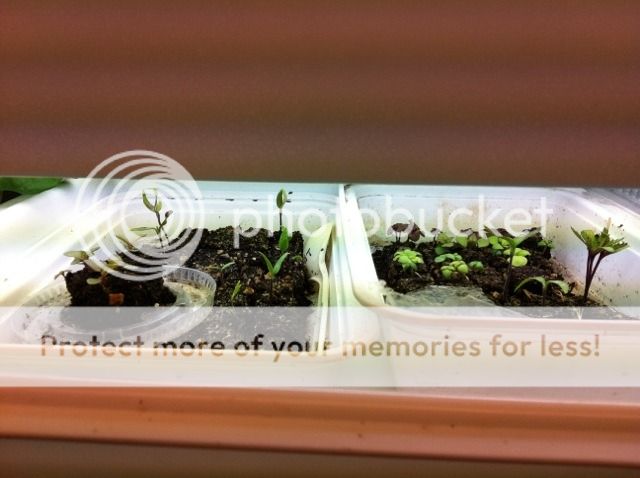
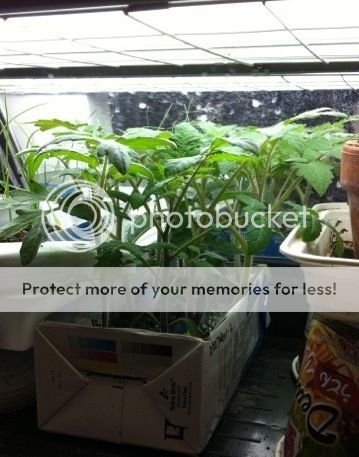
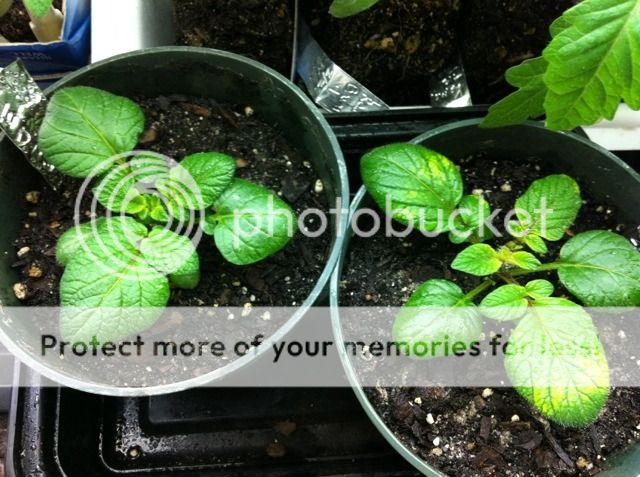
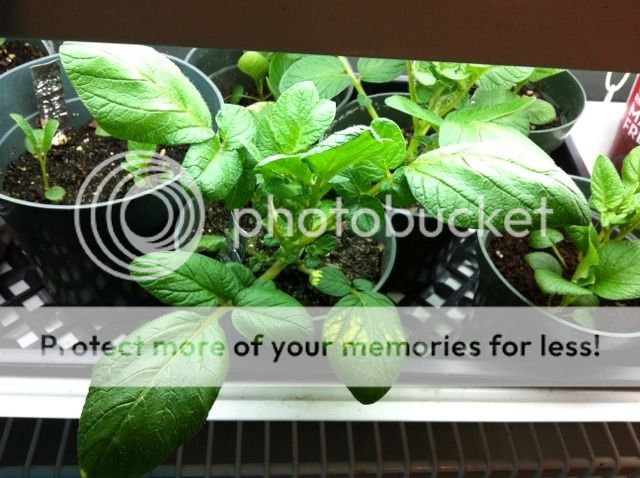
One fun aspect of growing so many different varieties is in noticing the differences in the seedlings:
Victorian Dwarf (right) -- looks like it has mitten potato leaf:
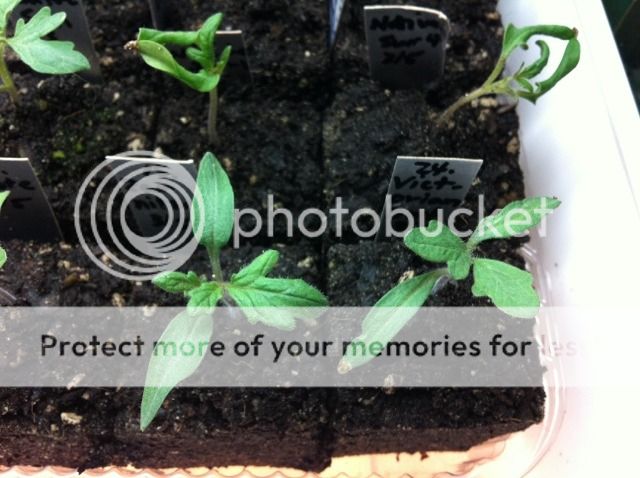
Wes (left two) -- wispy leaf stands out
Cherokee Tiger Lrge Red (back right) -- chartreuse foliage
Grub's Mystery Green (front right) -- potato leaf
Victorian Dwarf (right) -- looks like it has mitten potato leaf:
Wes (left two) -- wispy leaf stands out
Cherokee Tiger Lrge Red (back right) -- chartreuse foliage
Grub's Mystery Green (front right) -- potato leaf
-
gixxerific

- Super Green Thumb
- Posts: 5889
- Joined: Fri Jun 26, 2009 5:42 pm
- Location: Wentzville, MO (Just West oF St. Louis) Zone 5B
-
Jardin du Fort

- Senior Member
- Posts: 243
- Joined: Thu Dec 13, 2012 2:59 pm
- Location: Fort Wayne, IN
-
rainbowgardener
- Super Green Thumb
- Posts: 25279
- Joined: Sun Feb 15, 2009 6:04 pm
- Location: TN/GA 7b
So, if I'm reading your thread right, you planted tomato seeds on 2/18 and 2/20?
I planted mine on 2/22 and yours are visibly ahead of mine, possibly more than 4 days can account for.
Most of them are putting out their first true leaves now. I moved the first ones from crowded in cells on heat mat to one/cell off mat. Those were Wayaheads and they are noticeably ahead. They were also seeds from 2007 and had a better germ. rate than some of the new seeds.
The next to get moved off the mat will be the Sophie's choice, another early variety. So even at this stage the early varieties are getting off to a quicker start.
-
applestar
- Mod
- Posts: 30550
- Joined: Thu May 01, 2008 7:21 pm
- Location: Zone 6, NJ (3/M)4/E ~ 10/M(11/B)
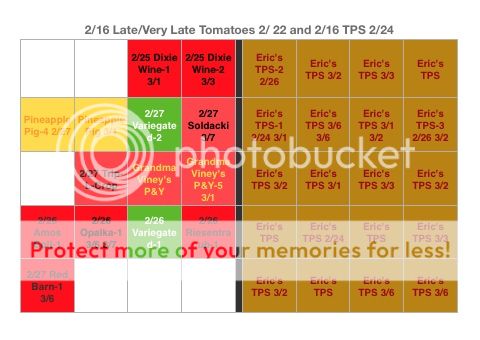
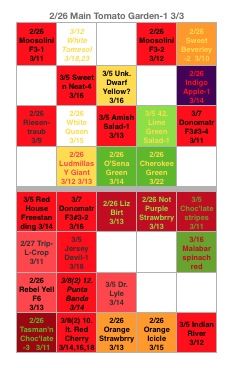
Huh, there's a discrepancy in my notes -- 4 Late/Very Late varieties (Kamatis Tagalog, Grandma Viney,s Pink and Yellow, Pineapple Pig, and Wes) were started on either 2/16 or 2/17. Winter Indoor Trial varieties were started on 2/19. More varieties were started as microblocks were Upblocked.
I started the main garden varieties on 2/26 (did I not mention that?) and the last batch (I think!) of tomatoes yesterday.
Temperature may explain it too -- many early varieties grow well at lower temps. On the other hand, the middle shelf of the "Tropical Paradise" (inside the pvc covered shelves) is upper 60’s to low 70's during the day and low-mid 60's overnight. -- this is a temp range in which tomatoes grow very well, sometimes too lanky. Humidity level is higher.
I prefer to grow them somewhat slower and stockier, so the Upblocked seedlings in 2" microblocks are moved to the top of the Tropical Paradise -- no more cozy indoor "greenhouse" and temps will be upper 60's by day and low 60's by night with occasional drop down to upper 50's.
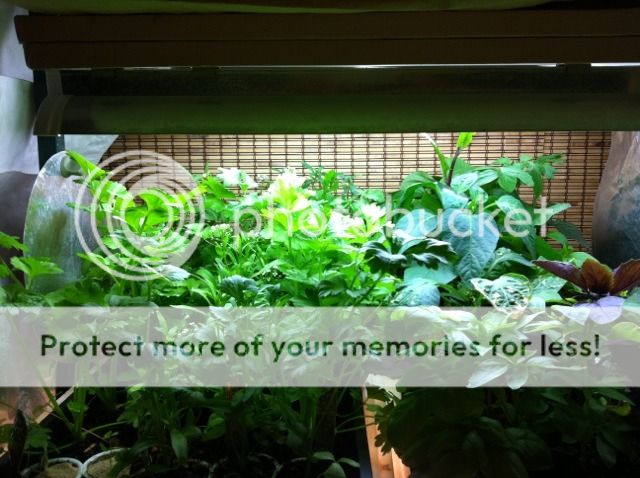
 @Jardin du Fort -- V8 NURSERY
  -- I LOVE it!!
I haven't been able to re-configured the V8 Nursery with the new lights and replaced the bulbs yet, but once that's done and if overnight temps stay above 50, upper 40's at lowest, then these older Upblocked tomato seedlings -- especially the Winter Indoor Trial varieties will start moving out. Tough love
I started the main garden varieties on 2/26 (did I not mention that?) and the last batch (I think!) of tomatoes yesterday.
Temperature may explain it too -- many early varieties grow well at lower temps. On the other hand, the middle shelf of the "Tropical Paradise" (inside the pvc covered shelves) is upper 60’s to low 70's during the day and low-mid 60's overnight. -- this is a temp range in which tomatoes grow very well, sometimes too lanky. Humidity level is higher.
I prefer to grow them somewhat slower and stockier, so the Upblocked seedlings in 2" microblocks are moved to the top of the Tropical Paradise -- no more cozy indoor "greenhouse" and temps will be upper 60's by day and low 60's by night with occasional drop down to upper 50's.
I haven't been able to re-configured the V8 Nursery with the new lights and replaced the bulbs yet, but once that's done and if overnight temps stay above 50, upper 40's at lowest, then these older Upblocked tomato seedlings -- especially the Winter Indoor Trial varieties will start moving out. Tough love
-
Jardin du Fort
- Senior Member
- Posts: 243
- Joined: Thu Dec 13, 2012 2:59 pm
- Location: Fort Wayne, IN
Applestar,
A question: I assume you are saving the seed from at least some of your many varieties of tomatoes. You said that for many of those varieties you only grow one plant. So, here's the Q: how do you prevent all these tomatoes from cross-pollinating? Do you use a cover for each plant, and if so what kind of cover? When do you put the cover(s) on? Do you have to hand pollinate? I assume you also save last year's seeds just in case this year's tomato plant has a casualty....
OK, so that's more than just one question, but hey, who's counting anyway!
-
applestar
- Mod
- Posts: 30550
- Joined: Thu May 01, 2008 7:21 pm
- Location: Zone 6, NJ (3/M)4/E ~ 10/M(11/B)
Tomato flowers have conical structure of fused anthers called an "anther cone." The pollen is released INSIDE this structure. Excess pollen comes out of the opening at the point of the cone. Most tomato flower's pistil (female receptive part which catches the pollen) does not grow longer than the cone and does not emerge, so that when the flower releases the pollen, it's own pistil catches the pollen and are pollinated.
This means that most of the time, a non-hybrid genetically stable open pollinated or heirloom tomato plant can make uncrossed seeds that are true to type.
Some varieties do have protruding pistil that are more susceptible to cross pollination by wind as well as by insect activity. And insects, especially ones that tear open the anther cone to get to the pollen and maybe nectar too, can introduce pollen from other flowers. I suspect hummingbirds may also have a hand -- beak -- in the process since they visit tomato flowers while visiting my garden.
To be completely sure, I should BAG the blossoms, and I may bag some, but probably not all. Last time I tried bagging tomato blossoms, it was an exercise in frustration. The nylon bags (drawstring wedding/party favor bags) tended to overheat the trusses and/or caused excess moisture humidity, resulting in every truss BUT the bagged ones to set fruit. I'll try again since obviously, I don't have the technique down. Also, I want to try intentionaly crossing some of these myself by hand pollinating -- and those will need to be bagged to prevent unwanted help by outside sources.
This means that most of the time, a non-hybrid genetically stable open pollinated or heirloom tomato plant can make uncrossed seeds that are true to type.
Some varieties do have protruding pistil that are more susceptible to cross pollination by wind as well as by insect activity. And insects, especially ones that tear open the anther cone to get to the pollen and maybe nectar too, can introduce pollen from other flowers. I suspect hummingbirds may also have a hand -- beak -- in the process since they visit tomato flowers while visiting my garden.
To be completely sure, I should BAG the blossoms, and I may bag some, but probably not all. Last time I tried bagging tomato blossoms, it was an exercise in frustration. The nylon bags (drawstring wedding/party favor bags) tended to overheat the trusses and/or caused excess moisture humidity, resulting in every truss BUT the bagged ones to set fruit.

-
applestar
- Mod
- Posts: 30550
- Joined: Thu May 01, 2008 7:21 pm
- Location: Zone 6, NJ (3/M)4/E ~ 10/M(11/B)
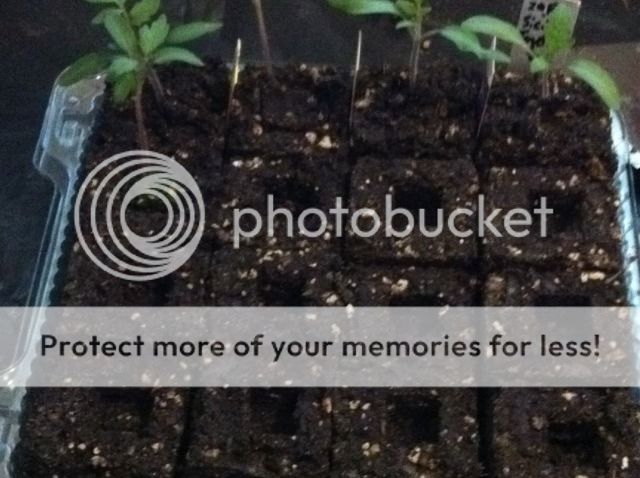
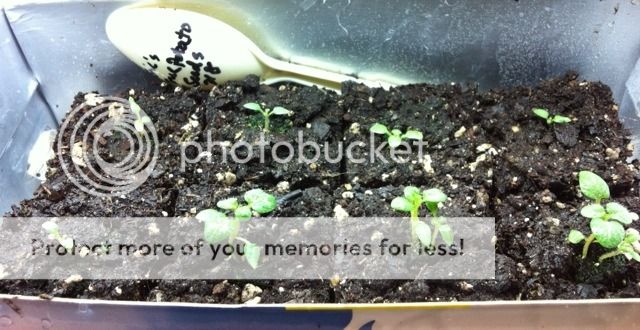
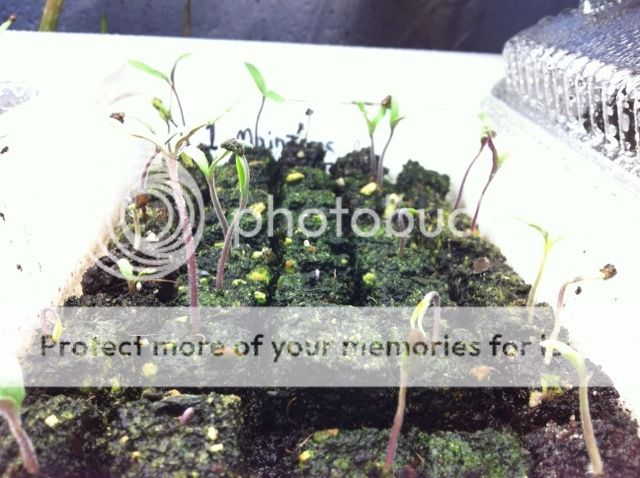
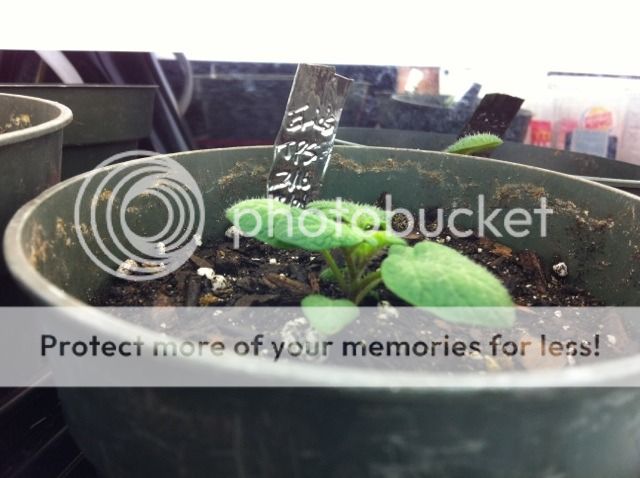
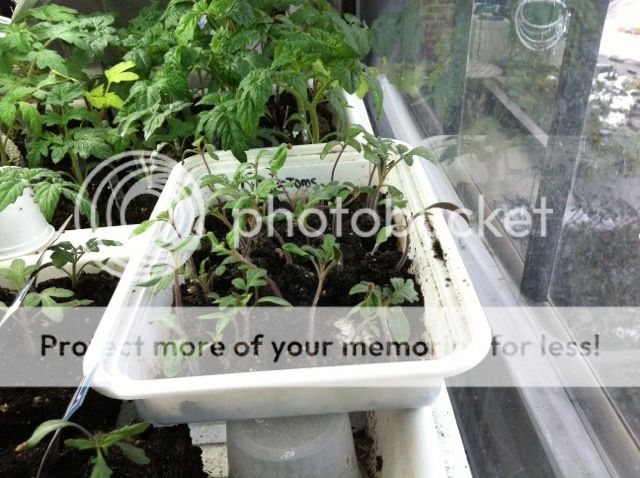
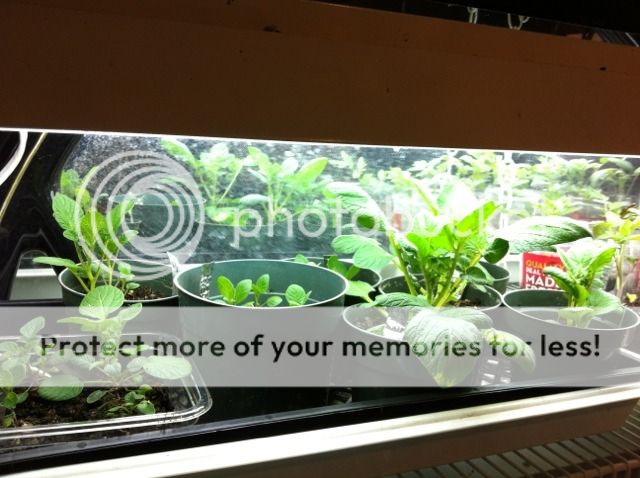
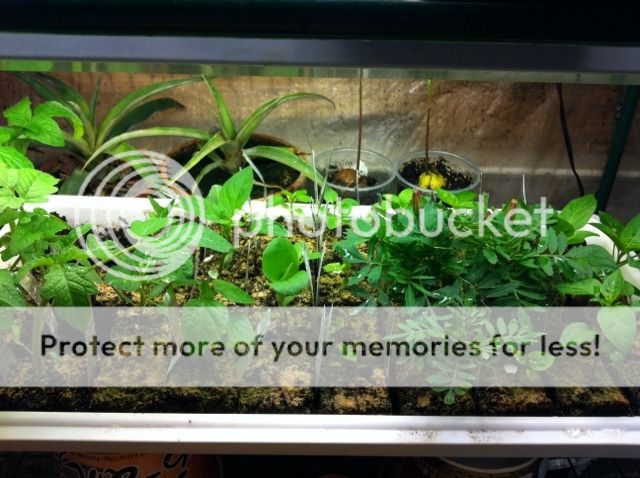
One more --
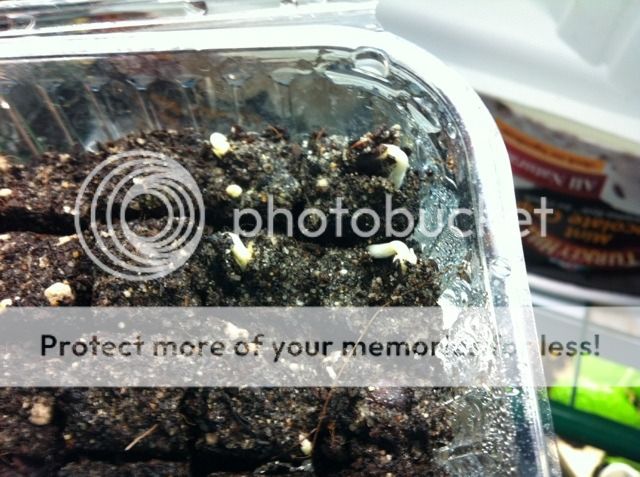
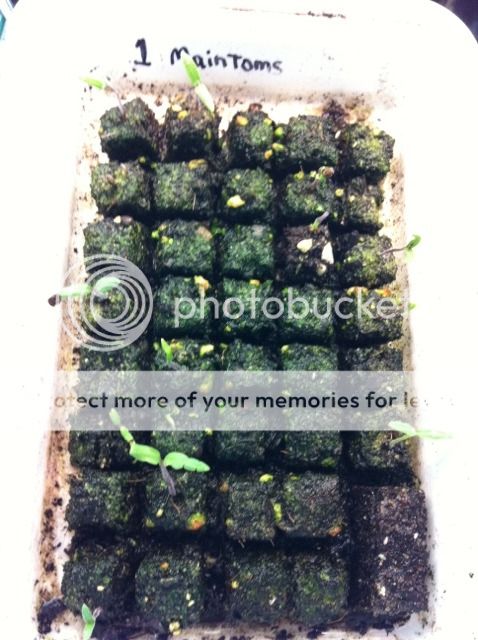
We're looking at Eric's True Potato Seeds on the right side of the tray:
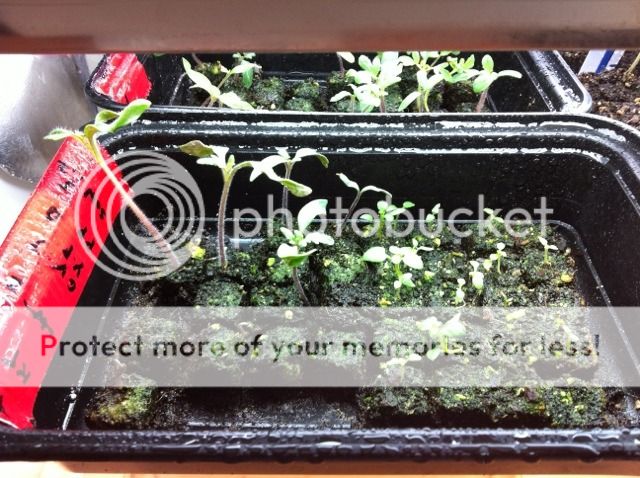
They took longer to sprout and to grow, although if you look close almost all of the microblocks have sprouted now. I think next time, I'll start these earlier with the onions in January. I'll upblock those bigger ones within the next couple of days when I upblock those bigger tomato seedlings.
We're looking at Eric's True Potato Seeds on the right side of the tray:
They took longer to sprout and to grow, although if you look close almost all of the microblocks have sprouted now. I think next time, I'll start these earlier with the onions in January. I'll upblock those bigger ones within the next couple of days when I upblock those bigger tomato seedlings.
-
applestar
- Mod
- Posts: 30550
- Joined: Thu May 01, 2008 7:21 pm
- Location: Zone 6, NJ (3/M)4/E ~ 10/M(11/B)
Still  and wondering what I've gotten myself into....
Started re-organizing the 2" miniblocks. A 1020 tray holds 50 blocks each.
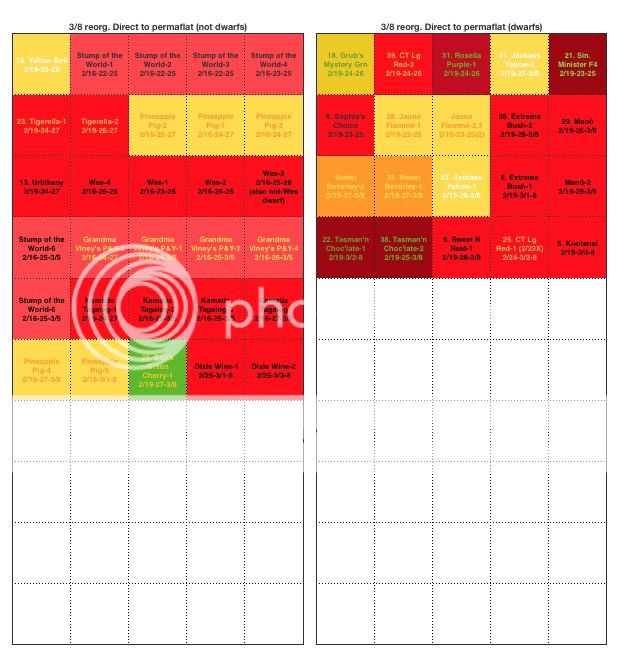
...on my way to 100 tomato plants...
Re-organized the microblocks into not quite ready to upblock seedlings (cooler top of the Tropical Paradise) and unsprouted tomatoes seeds started earlier plus the last bunch that were just started (middle shelf 83-5°F inside Tropical Paradise) -- will ultimately total more than 100 (but I have one more tray so we're OK ) also upblocked some of Eric's TPS:
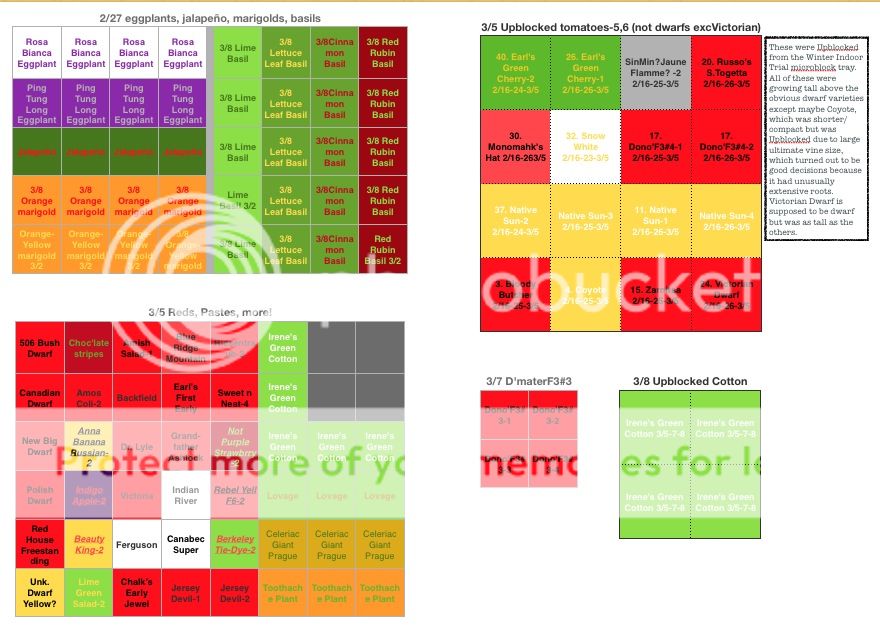
...Upblocked sprouted cotton. Reseeded basils and marigolds that didn't sprout.
BTW, found another perfect container for the microblocks
Started re-organizing the 2" miniblocks. A 1020 tray holds 50 blocks each.
...on my way to 100 tomato plants...
Re-organized the microblocks into not quite ready to upblock seedlings (cooler top of the Tropical Paradise) and unsprouted tomatoes seeds started earlier plus the last bunch that were just started (middle shelf 83-5°F inside Tropical Paradise) -- will ultimately total more than 100 (but I have one more tray so we're OK
...Upblocked sprouted cotton. Reseeded basils and marigolds that didn't sprout.
BTW, found another perfect container for the microblocks
Last edited by applestar on Sat Mar 09, 2013 6:50 am, edited 1 time in total.
-
applestar
- Mod
- Posts: 30550
- Joined: Thu May 01, 2008 7:21 pm
- Location: Zone 6, NJ (3/M)4/E ~ 10/M(11/B)
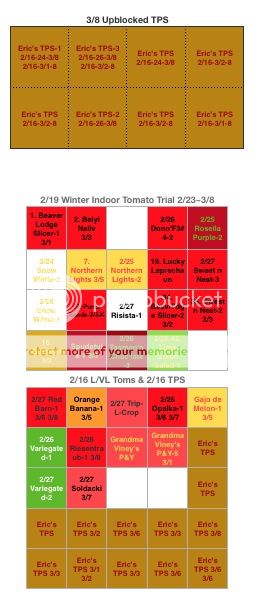
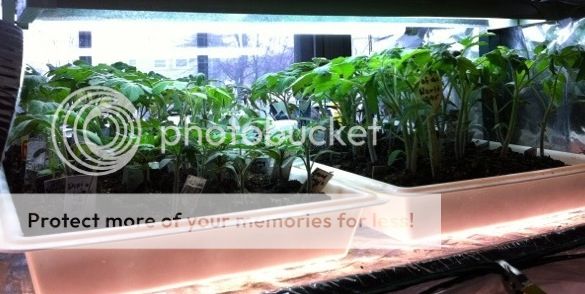
Tomato jungle -- 46 miniblocks in the left tray.
View from the other end:
(Yeah, when I get the chance, I'm going to turn those labels around)
More upblocked tomatoes -- you can see the side of the block in the front... By next week, there will be roots peeking out :
:
Roots about to be air-pruned:
Upblocked True Potato Seeds... My experience from last time I grew them is that they take longer to get going compared to tomatoes, but they do grow into sturdy seedlings much like tomato seedlings:
Winter Indoor/Late-Very Late/TPS consolidated microblocks tray:
Celery microblocks:
Sweet alyssum microblocks:
...finding some aphids in celery and alyssum
View from the other end:
(Yeah, when I get the chance, I'm going to turn those labels around
More upblocked tomatoes -- you can see the side of the block in the front... By next week, there will be roots peeking out
Roots about to be air-pruned:
Upblocked True Potato Seeds... My experience from last time I grew them is that they take longer to get going compared to tomatoes, but they do grow into sturdy seedlings much like tomato seedlings:
Winter Indoor/Late-Very Late/TPS consolidated microblocks tray:
Celery microblocks:
Sweet alyssum microblocks:
...finding some aphids in celery and alyssum
-
applestar
- Mod
- Posts: 30550
- Joined: Thu May 01, 2008 7:21 pm
- Location: Zone 6, NJ (3/M)4/E ~ 10/M(11/B)
...so far, the healthy seedlings reminds me of my impression that seedlings grown in traditional clay pots exhibited much more vigorous and sturdy growth compared to plastic pots, containers, or drink cups a couple of years ago when I compared, and concluding then that it must be the "breathable" clay walls and that I would like to switch over completely to clay pots.
That particular ambition kind of dwindled due to excessive weight of a tray of little clay pot seedlings, the tedium of cleaning them, and easy loss to frost and freeze when accidentally left out. So I'm finding that the soilblocks are ideal alternative so far.
I'm quick to notice faulty design so when a set of tools is well thought out and designed, I'm very happy. What I received was a "set" with 3/4" and 2" blockers, replacement nubs and cube imprints for the 2" blockers, and 2 pairs of flat-faced serving tongs exactly 3/4" wide and 2" wide that really are perfect for the job. I added metal paint scrapers of various widths to help separate and push the blocks around, and am trying to decide if I want to "make" a block lifter out of a mason's trowel (Eliot Coleman design) or buy a manufactured one that is based on the modified mason's trowel deign.
-
applestar
- Mod
- Posts: 30550
- Joined: Thu May 01, 2008 7:21 pm
- Location: Zone 6, NJ (3/M)4/E ~ 10/M(11/B)
Oh yeah, I just posted an update yesterday.
...well...
Upblocking these overgrown microblocks today:
Sprouted tomato seeds and more seeds:

...well...
Upblocking these overgrown microblocks today:
Sprouted tomato seeds and more seeds:
Last edited by applestar on Thu Mar 14, 2013 4:21 am, edited 1 time in total.
-
applestar
- Mod
- Posts: 30550
- Joined: Thu May 01, 2008 7:21 pm
- Location: Zone 6, NJ (3/M)4/E ~ 10/M(11/B)
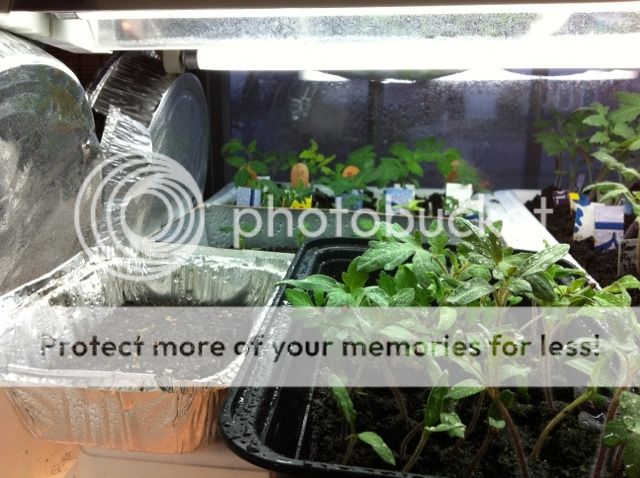
I ran out of room in the house.
The garage is barely warm enough (mid-50's during the day and while the lights are on, mid- to low-40's and have dipped to 38°F and 39°F overnight) but I had to Uppot more tomatoes that were growing in 3/4" microblocks beyond the size that could be Upblocked to 2" mini-blocks.
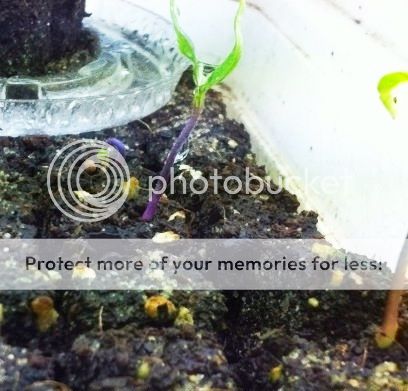
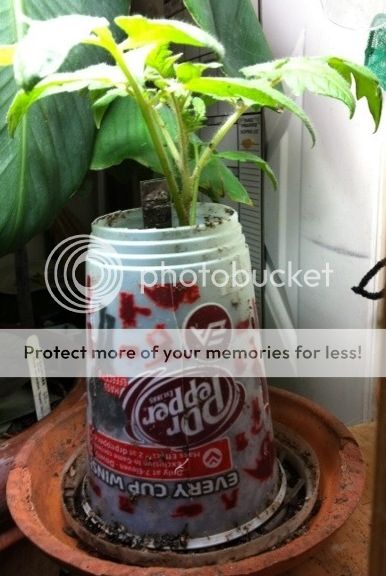
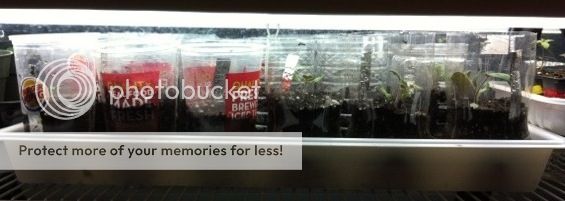
So here is my -- hopefully viable -- solution:
Since the outdoor temp can get higher in the sun, I'm going to try to set these outside as much as possible (an aspect of the "Dense Planting" technique) I also used the dry planting in loose potting mix method borrowed from "Dense Planting"
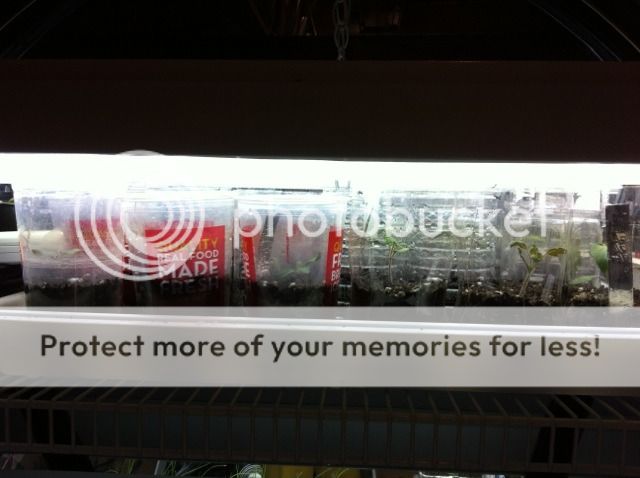
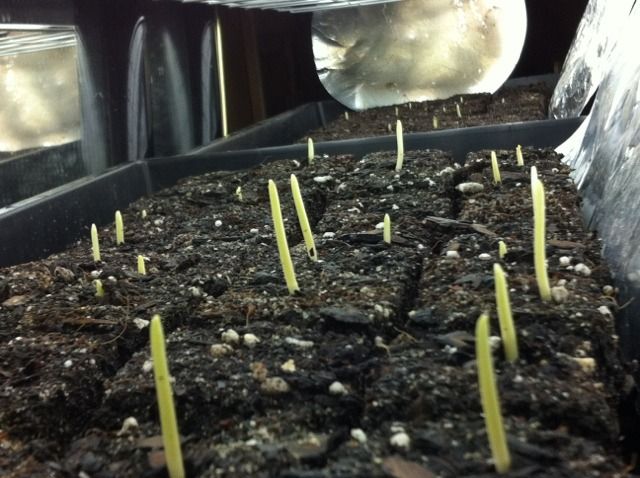
Since they are half way down the clear cut off clear bottles and beverage cups, when positioned under the lights like this, they have extra warmth. The clear plastic channels the light so I think it will work even though the lights are higher up than ideal. But if it seems like they need more ligh than these 3-tube T-12's, I'll move them to the lower shelf which has a 4-tube T-8 fixture.
I will have to guard against damping off, but I also borrowed another technique from a soilblock growing blog, which is to cut vertical slits in the sides of these containers. This iis intended to allow the soil to breath more and prevent roots from circling.
I think it was Ozark Lady who mentioned several years ago that she fills the cups with more soil mix as they grow -- I'll be doing that with these.
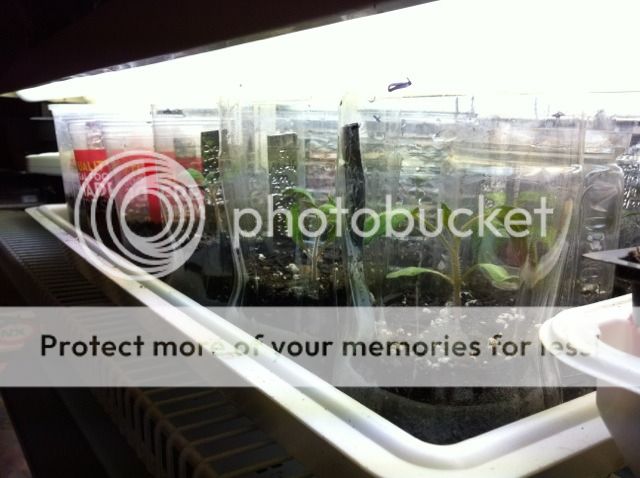
Here's another picture. 18 of these cut off 1L and 1L 33 fl oz (?) bottles and 20 oz cups fit exactly in a Permanest Tray:
The garage is barely warm enough (mid-50's during the day and while the lights are on, mid- to low-40's and have dipped to 38°F and 39°F overnight) but I had to Uppot more tomatoes that were growing in 3/4" microblocks beyond the size that could be Upblocked to 2" mini-blocks.
So here is my -- hopefully viable -- solution:
Since the outdoor temp can get higher in the sun, I'm going to try to set these outside as much as possible (an aspect of the "Dense Planting" technique) I also used the dry planting in loose potting mix method borrowed from "Dense Planting"
Since they are half way down the clear cut off clear bottles and beverage cups, when positioned under the lights like this, they have extra warmth. The clear plastic channels the light so I think it will work even though the lights are higher up than ideal. But if it seems like they need more ligh than these 3-tube T-12's, I'll move them to the lower shelf which has a 4-tube T-8 fixture.
I will have to guard against damping off, but I also borrowed another technique from a soilblock growing blog, which is to cut vertical slits in the sides of these containers. This iis intended to allow the soil to breath more and prevent roots from circling.
I think it was Ozark Lady who mentioned several years ago that she fills the cups with more soil mix as they grow -- I'll be doing that with these.
Here's another picture. 18 of these cut off 1L and 1L 33 fl oz (?) bottles and 20 oz cups fit exactly in a Permanest Tray:
Last edited by applestar on Fri Mar 22, 2013 10:32 pm, edited 5 times in total.
-
applestar
- Mod
- Posts: 30550
- Joined: Thu May 01, 2008 7:21 pm
- Location: Zone 6, NJ (3/M)4/E ~ 10/M(11/B)
My onions are in the lower shelf right now. (32 miniblocks)

Although they go outside every day, we're still not quite past the lows in the upper 20's. I'd like the lows to stay in the 30's before planting.
Eric's True Potato Seeds are also in the garage "V8 Nursery"
I uppotted two biggest seedlings that were growing in 2" miniblocks to 4" pots today:
I have eight more smaller seedlings in miniblocks and tiny clay pots:
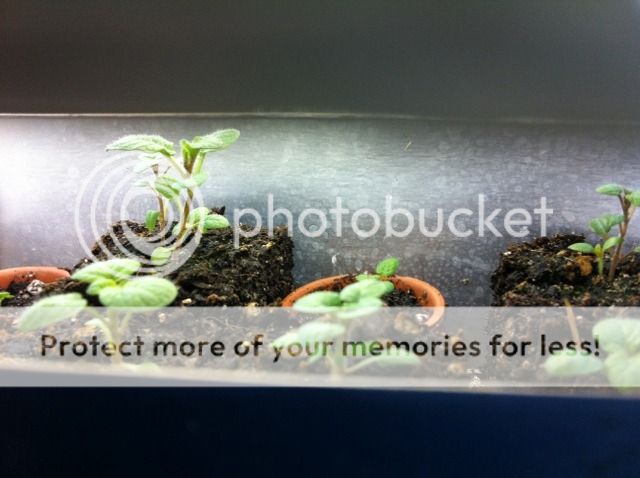
And two more in-between size seedlings are in those other two 4" pots.
Although they go outside every day, we're still not quite past the lows in the upper 20's. I'd like the lows to stay in the 30's before planting.
Eric's True Potato Seeds are also in the garage "V8 Nursery"
I uppotted two biggest seedlings that were growing in 2" miniblocks to 4" pots today:
I have eight more smaller seedlings in miniblocks and tiny clay pots:
And two more in-between size seedlings are in those other two 4" pots.
-
applestar
- Mod
- Posts: 30550
- Joined: Thu May 01, 2008 7:21 pm
- Location: Zone 6, NJ (3/M)4/E ~ 10/M(11/B)
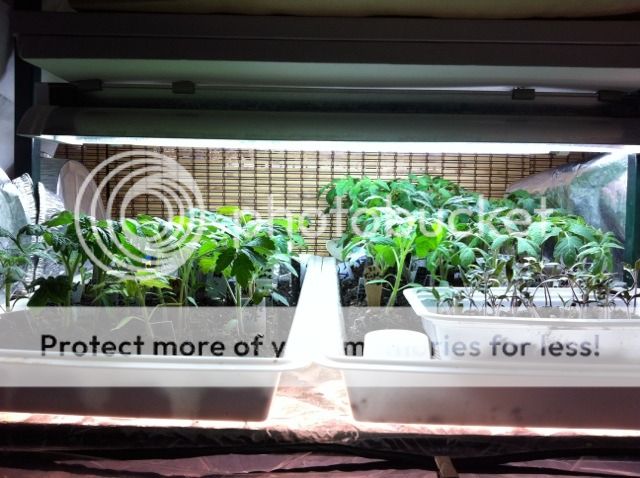
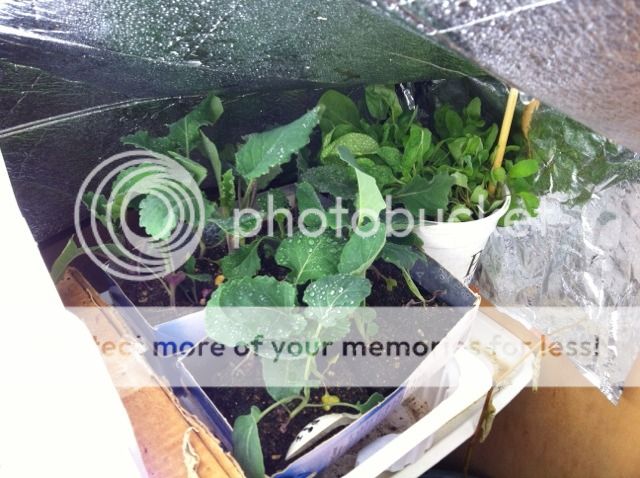
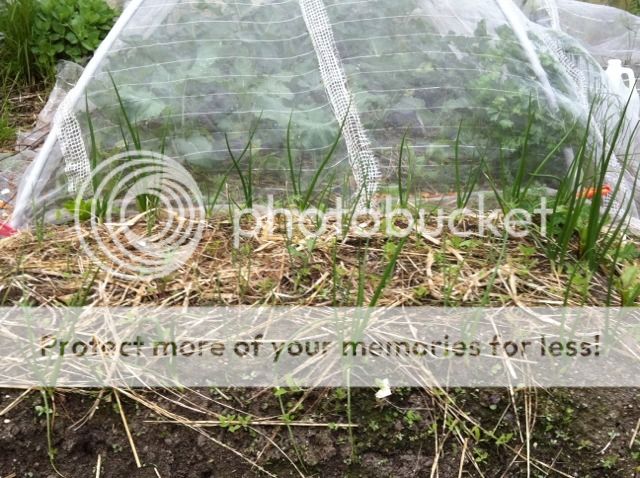
These broccoli seedlings -- "Outer Banks" ... Garage outpost near the door, lit 24/7 with two tube T-12 fixture standing sideways and reflected by the mylar windshield cover on opposite side and above -- need to be planted out. They also have been going outside every day, but coming back in at night.
I may wait until this weekend's upper 20's low forecast is past to finish hardening off since, typically, my garden is 2-3° colder than forecast, which may mean mid-20's.
I'm harvesting from the other container of spinach and other greens.
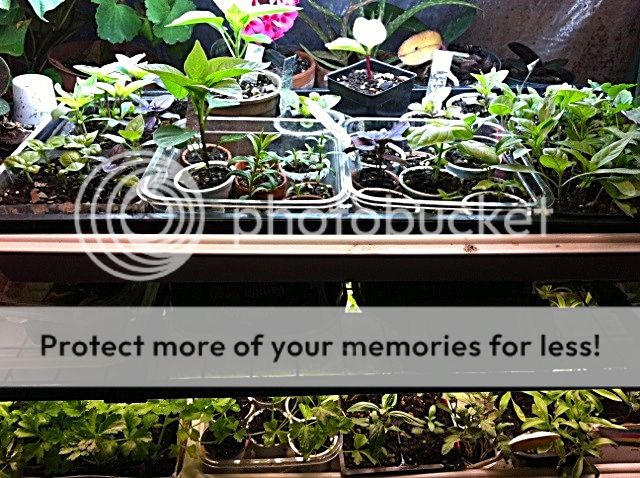
Other seedlings that prefer minimum upper 50's to 60's and above temperatures are inside in the "Winter Paradise"
Peppers and Basil, etc.
Misc.
I think the sweet alyssums and celery will be moving out to the V8 Nursery as soon as the onions move out.
I may wait until this weekend's upper 20's low forecast is past to finish hardening off since, typically, my garden is 2-3° colder than forecast, which may mean mid-20's.
I'm harvesting from the other container of spinach and other greens.
Other seedlings that prefer minimum upper 50's to 60's and above temperatures are inside in the "Winter Paradise"
Peppers and Basil, etc.
Misc.
I think the sweet alyssums and celery will be moving out to the V8 Nursery as soon as the onions move out.
-
applestar
- Mod
- Posts: 30550
- Joined: Thu May 01, 2008 7:21 pm
- Location: Zone 6, NJ (3/M)4/E ~ 10/M(11/B)
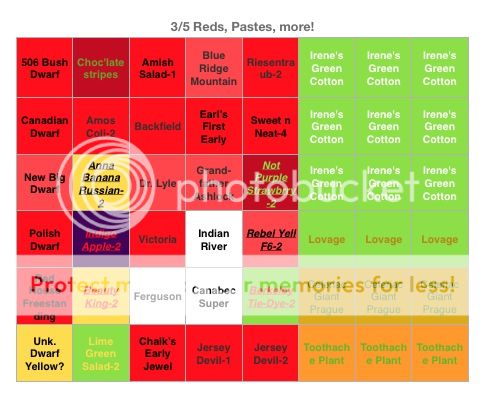
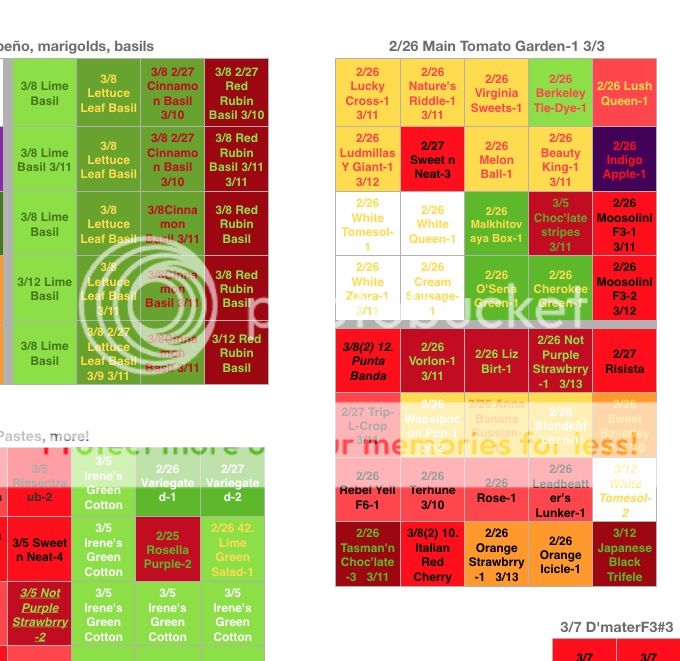
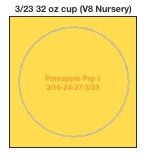
Snowy day today... I decided to count how many seedling Tomatoes I have so far....
1 extra tall fast and big Pineapple Pig in a 30oz super large drink cup plus 18 in 3-1/2" approx 20 oz recycled soda and large drink cups =19
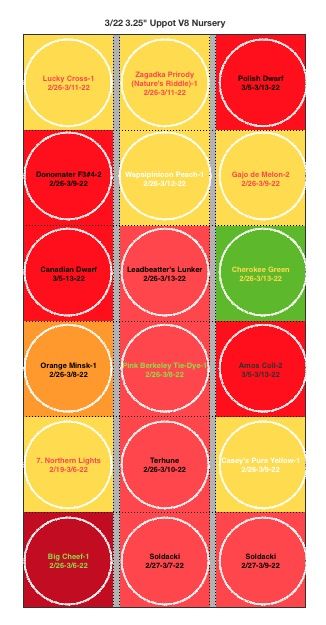
Plus 8x3=24 tallest 2" miniblocks and 30+40 permatray 2" miniblocks = 113 but subtract non-tomato basil and the 3 marigolds as well as that defective Victorian Dwarf = 108

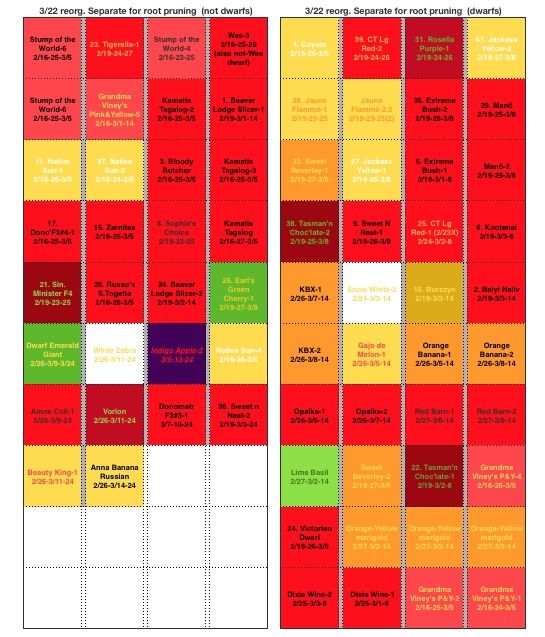
Plus 34 seedlings in 3/4" microblock Main tray and 2 more sprouted in the seed germination tray (marked with a diamond) = 144

Quite a few seeds didn't germinate (Too hot? Too wet?) Microblocks marked with stars are seeds that I was thinking about re-seeding since they are very early to mid season varieties and I might still have time to grow them. I did decide to give up on most 2nds (labeled -2) for which I already have a seedling and late season varieties that haven't germinated by this time... But New Big Dwarf and Variegated are Late to Very Late varieties that I'm still thinking about trying to get at least one of each to grow....
...update...
When I moved the two sprouted seedlings in the germination tray to the main tray, I found that Japanese Black Trifele and Blondköfchen had sprouted since this morning, along with one of the Lovage. So the current total is now 146
...another update...
Melon Ball was up this (Tues) morning (SO glad because I definitely wanted to try this one ==> 147
Also, Gixx recommended I definitely re-seed New Big Dwarf and Malachite Box.
1 extra tall fast and big Pineapple Pig in a 30oz super large drink cup plus 18 in 3-1/2" approx 20 oz recycled soda and large drink cups =19
Plus 8x3=24 tallest 2" miniblocks and 30+40 permatray 2" miniblocks = 113 but subtract non-tomato basil and the 3 marigolds as well as that defective Victorian Dwarf = 108
Plus 34 seedlings in 3/4" microblock Main tray and 2 more sprouted in the seed germination tray (marked with a diamond) = 144
Quite a few seeds didn't germinate (Too hot? Too wet?)
...update...
When I moved the two sprouted seedlings in the germination tray to the main tray, I found that Japanese Black Trifele and Blondköfchen had sprouted since this morning, along with one of the Lovage. So the current total is now 146
...another update...
Melon Ball was up this (Tues) morning (SO glad because I definitely wanted to try this one
Also, Gixx recommended I definitely re-seed New Big Dwarf and Malachite Box.
Last edited by applestar on Tue Mar 26, 2013 11:01 am, edited 2 times in total.
-
applestar
- Mod
- Posts: 30550
- Joined: Thu May 01, 2008 7:21 pm
- Location: Zone 6, NJ (3/M)4/E ~ 10/M(11/B)
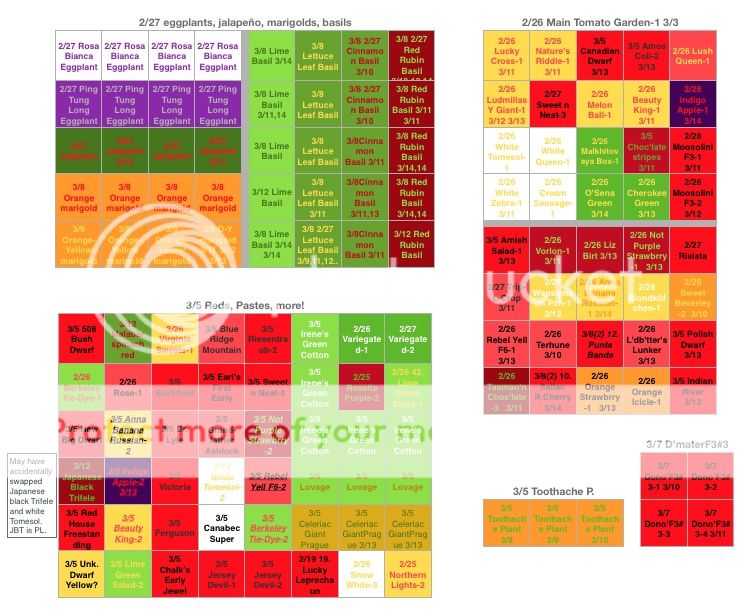
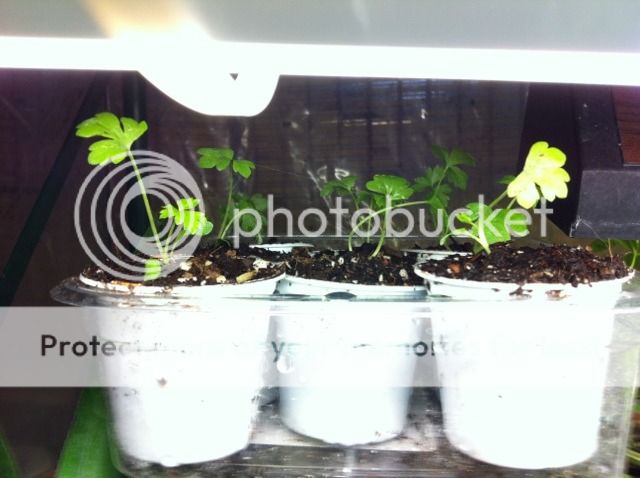
More update pics:
Herbs up above (basil mix, Mexican mint marigold/Texas Tarragon with a couple of Etkezi Paprika, toothache plants in the back with a red stem Malabar spinach, more basil, then densely planted 6 cell of Corno Di Toro pepper, eggplant mix, some Early Jersey Wakefield cabbage, parsley, Purple Vienna Kohlrabi on the right)
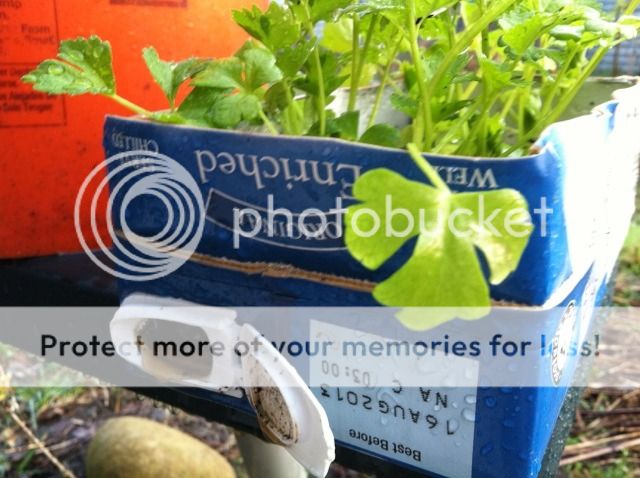
Tango and Ventura celery, celeriac, Summer Savory, and alyssums down below with one densely planted Black Cherry tomato K-cup:
Close-up of the celery in 2" miniblcks:
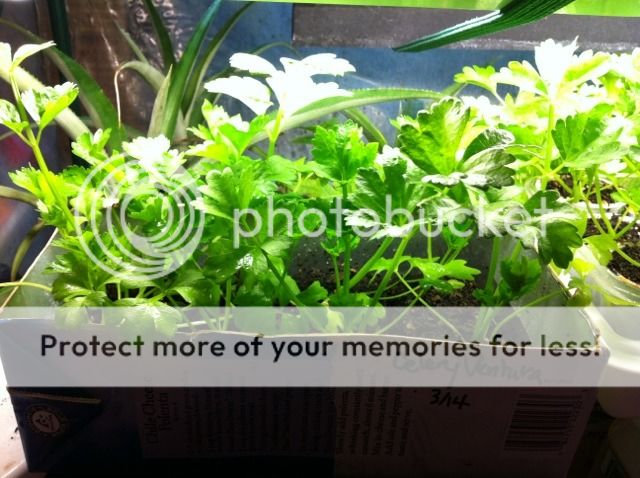
It really helped that these UHP containers come with a built-in drain spout after these seedlings were left out in a heavy rain:
Herbs up above (basil mix, Mexican mint marigold/Texas Tarragon with a couple of Etkezi Paprika, toothache plants in the back with a red stem Malabar spinach, more basil, then densely planted 6 cell of Corno Di Toro pepper, eggplant mix, some Early Jersey Wakefield cabbage, parsley, Purple Vienna Kohlrabi on the right)
Tango and Ventura celery, celeriac, Summer Savory, and alyssums down below with one densely planted Black Cherry tomato K-cup:
Close-up of the celery in 2" miniblcks:
It really helped that these UHP containers come with a built-in drain spout after these seedlings were left out in a heavy rain:
-
applestar
- Mod
- Posts: 30550
- Joined: Thu May 01, 2008 7:21 pm
- Location: Zone 6, NJ (3/M)4/E ~ 10/M(11/B)
Corn and sunflowers pre-germinated in kitchen seed sprouters and then sown in 2" mini blocks are up. They are pale-looking because I was busy last couple of days with the Tomato Spiral and didn't check on the web flats covered with empty potting mix bags in the garage.
The tall corn are in 4"x6" deep pots and were under the lights already.
We had about 1" of rain today, just what we needed since the ground was starting to dry out. I plan on planting the sprouted corn and sunflowers tomorrow if it doesnt rain again, or day after tomorrow.
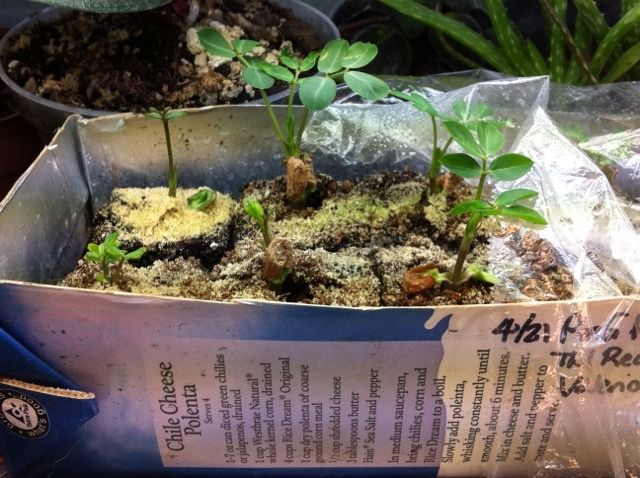
Peanuts were also pre-germinated (in a DIY sprouter made from McDonalds sundae cups ) and planted in 2" mini blocks. They have been inside with the peppers and eggplant seedlings.
The tall corn are in 4"x6" deep pots and were under the lights already.
We had about 1" of rain today, just what we needed since the ground was starting to dry out. I plan on planting the sprouted corn and sunflowers tomorrow if it doesnt rain again, or day after tomorrow.
Peanuts were also pre-germinated (in a DIY sprouter made from McDonalds sundae cups
-
applestar
- Mod
- Posts: 30550
- Joined: Thu May 01, 2008 7:21 pm
- Location: Zone 6, NJ (3/M)4/E ~ 10/M(11/B)
Planted one tray of corn seedling miniblocks plus another 16 miniblocks and two 4"x6" high pots.
The corn seedlings grown in 6" deep loose potting soil had 6" or longer roots. They were harder to plant than the 2" mini blocks with no more than 2" stray roots sticking out. If I had planted both trays it would have been 72 miniblocks. As it was, I think I still planted something like 70 seedlings at exact distance apart I wanted. If any of these fail for some reason, I have a whole another tray, plus 8 more miniblocks and two more 6" pots....
I planted the corn seed blocks like this.
-
applestar
- Mod
- Posts: 30550
- Joined: Thu May 01, 2008 7:21 pm
- Location: Zone 6, NJ (3/M)4/E ~ 10/M(11/B)
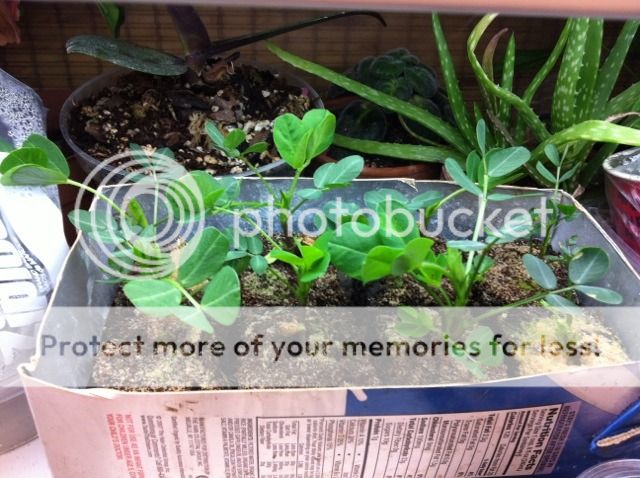
I also planted the true potato seed (TPS) seedlings. They were way overcrowded in their 4" round pots (3/4" microblocks >> 2" miniblocks >> 4" pots) and needing to be watered every day. Plus they were getting root bound so much that the roots had stopped up the drainage holes.
These two have burgundy red stems and veins:
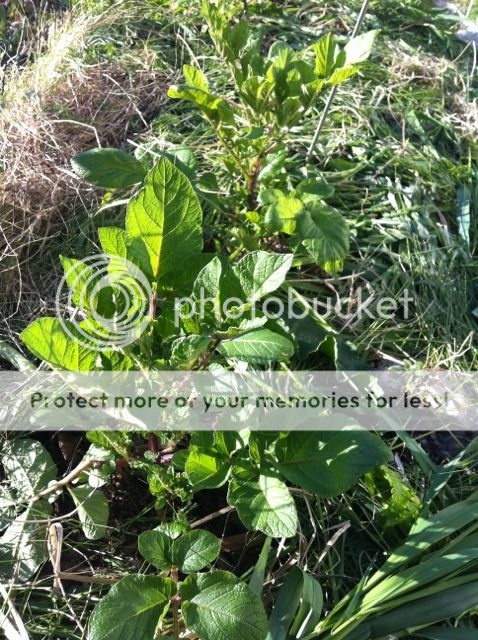
These have some color to the stems but not as much:
And these appear to be just green:
The seed potatoes that were planted in the ground are just barely starting to emerge.
These two have burgundy red stems and veins:
These have some color to the stems but not as much:
And these appear to be just green:
The seed potatoes that were planted in the ground are just barely starting to emerge.
-
applestar
- Mod
- Posts: 30550
- Joined: Thu May 01, 2008 7:21 pm
- Location: Zone 6, NJ (3/M)4/E ~ 10/M(11/B)
Almost all 36 sunflower seedlings are up and ready to be planted....

...this has been my biggest "problem" with the soilblocker method -- I'm ending up with way too many plants and I really don't think I have room for all these sunflowers.... these are Mammoth Russian and came from my saved sunflower head I grew in... was it 2010?
...yep. 2010 https://www.helpfulgardener.com/forum/vi ... 81#p156181
...this has been my biggest "problem" with the soilblocker method -- I'm ending up with way too many plants and I really don't think I have room for all these sunflowers....
...yep. 2010
-
applestar
- Mod
- Posts: 30550
- Joined: Thu May 01, 2008 7:21 pm
- Location: Zone 6, NJ (3/M)4/E ~ 10/M(11/B)
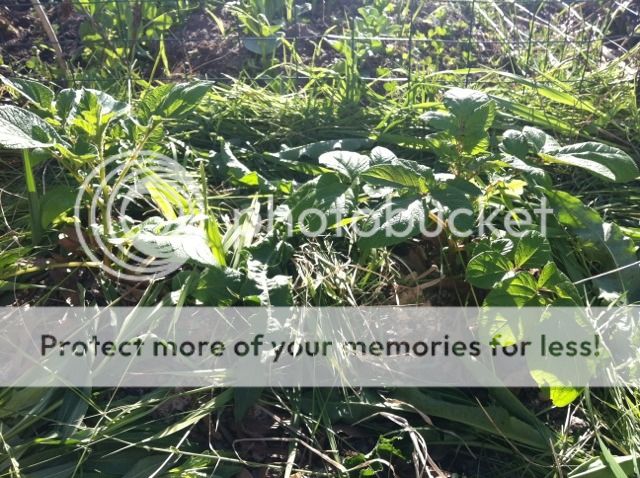
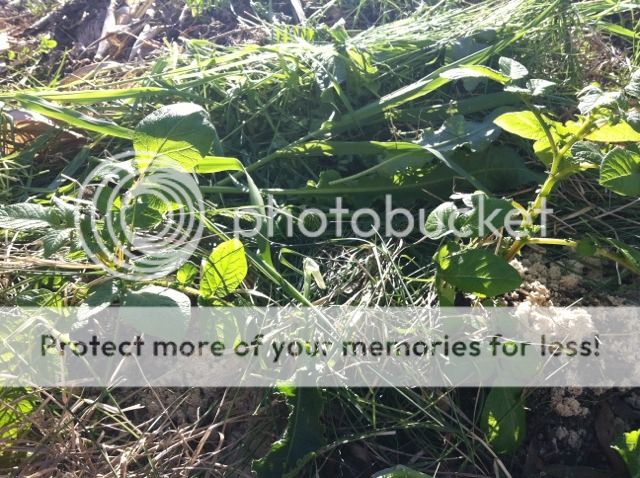
Another view of TPS plants. Red tomato cages on their sides are for holding up the floating row cover at night:
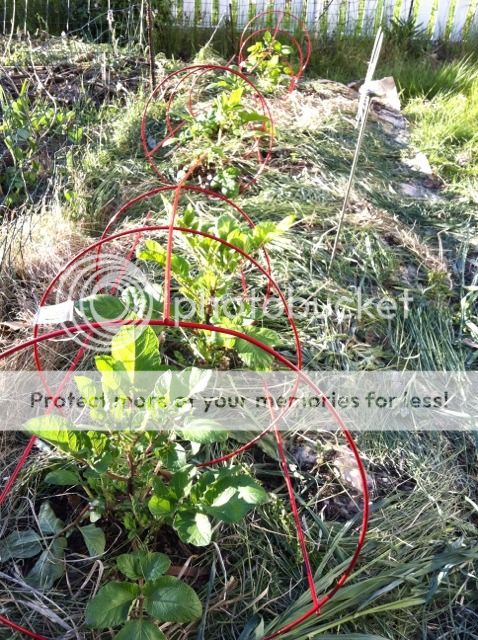
I protect the trays of biggest tomato seedlings in here during the cold nights (low 40's and below):
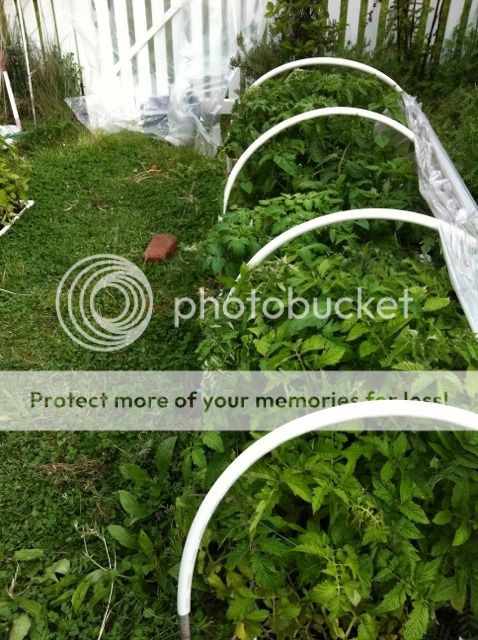
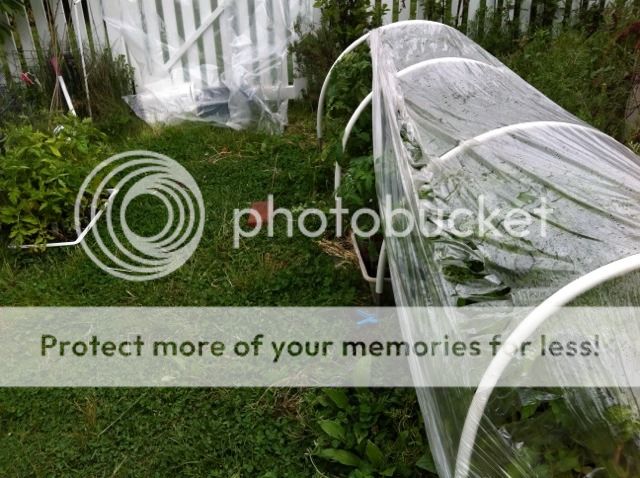
The 3 mil sheeting on the gate is used to double-cover when temps are forecast to fall in the 30's.
I protect the trays of biggest tomato seedlings in here during the cold nights (low 40's and below):
The 3 mil sheeting on the gate is used to double-cover when temps are forecast to fall in the 30's.
-
applestar
- Mod
- Posts: 30550
- Joined: Thu May 01, 2008 7:21 pm
- Location: Zone 6, NJ (3/M)4/E ~ 10/M(11/B)
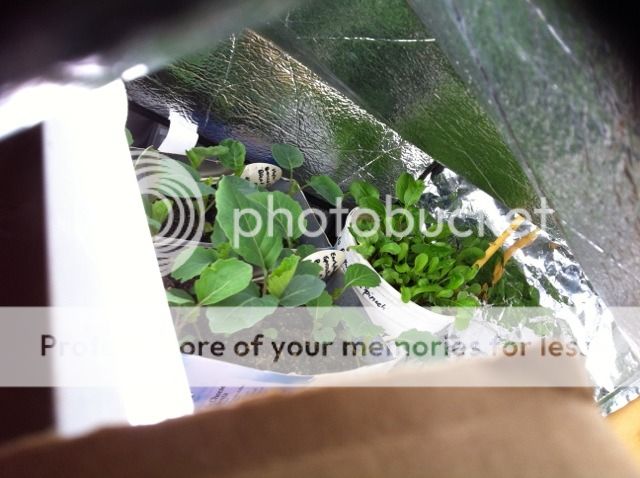
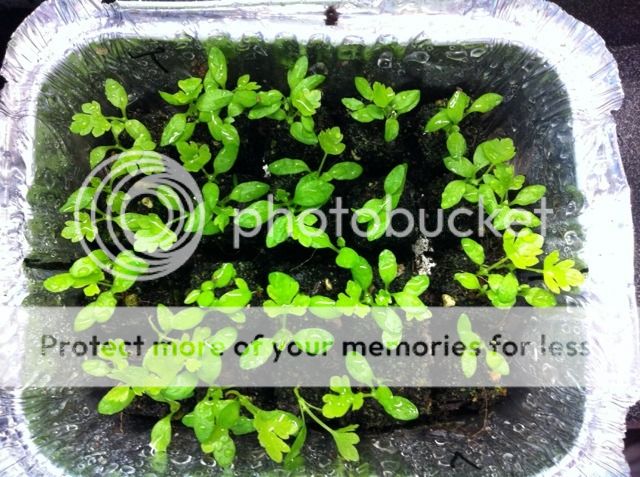
Update photos of some of the seedlings that are still inside --
peanuts:
Tray of Celery and alyssums, summer savory on the left;Tray of Basils, toothache plants, Mexican Mint Marigolds, Malabar spinach, densely planted and still waiting to be uppotted peppers and eggplants on the right (they sometimes go outside during the day):
Main pepper tray which is having a lot of problems and is looking very delayed compared to the healthy densely planted peppers above Planning to uppot them once the tomatoes and the rest of the corn are planted out. Overall, peppers don't seem to like growing in soilblocks like tomatoes, though some of them are doing better than others.
peanuts:
Tray of Celery and alyssums, summer savory on the left;Tray of Basils, toothache plants, Mexican Mint Marigolds, Malabar spinach, densely planted and still waiting to be uppotted peppers and eggplants on the right (they sometimes go outside during the day):
Main pepper tray which is having a lot of problems and is looking very delayed compared to the healthy densely planted peppers above
-
6sparkpug6
- Cool Member
- Posts: 62
- Joined: Thu Aug 01, 2013 5:30 pm
- Location: Zone 6b
Hi! applestar: I am still kind of confused about the upblocking... would you mind explaining it?
I would also love to hear how this garden is doing! I have been reading about your indoor tomato experiment and am fascinated!
I am also curious about, did you mention, peanuts?
And also, about the corn... how many plants did you grow? I got some corn seeds (a potted variety) for Christmas, but they got lost somewhere... I guess they will just have to be part of next year's plants...
Thanks so much apple!
-
applestar
- Mod
- Posts: 30550
- Joined: Thu May 01, 2008 7:21 pm
- Location: Zone 6, NJ (3/M)4/E ~ 10/M(11/B)
This year, I'm combining the soilblock method with the pre-sprouting in seed zip bag method
Subject: Starting pepper seeds >> spoon in zip bag germination
Subject: Starting pepper seeds >> spoon in zip bag germination
applestar wrote:Tomato seeds love this. They demonstrated one objection I have wirh this kind of pre-germination method. I was busy yesterday and today -- this evening, came home to a mess of sprouted, cotyledons fully extended... MUST BE POTTED seedlings
This meant starting my first tray of 2" mini soil blocks
...I also already have three 8 miniblocks @ 2 1/2 gal rice milk containers of peppers and eggplants, another 4 and 6 miniblocks of tomatoes, plus one more block... 30 tomatoes in miniblocks and 17 peppers and eggplants.