SQWIB
Greener Thumb
Posts: 970
Joined: Tue Feb 16, 2016 9:21 am
Location: Zone 7A - Philadelphia, PA

Indoor Garden 2018-2019 Revisited

Indoor Garden 2018-2019 Revisited

Testing phase


I decide to give indoor gardening another shot this winter, it's a bit late in the year but this will be a trial run for next year, if it is a success I will expand on it next winter 2019-2020.

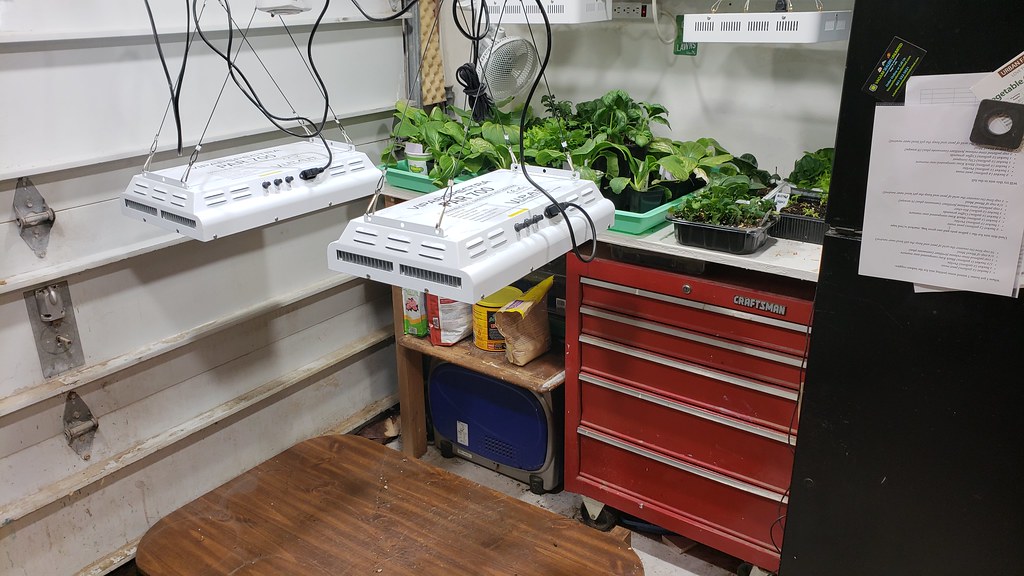
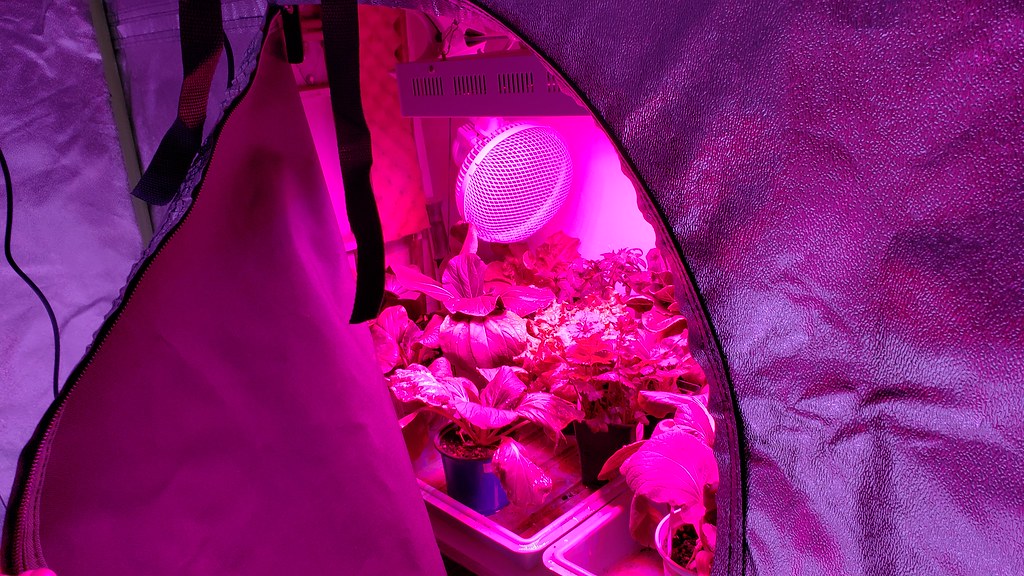
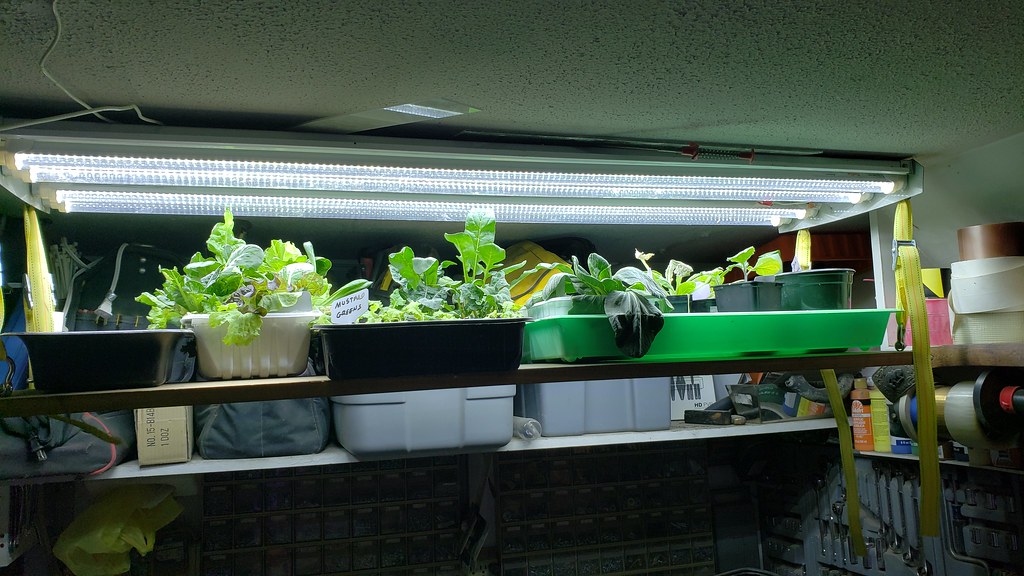
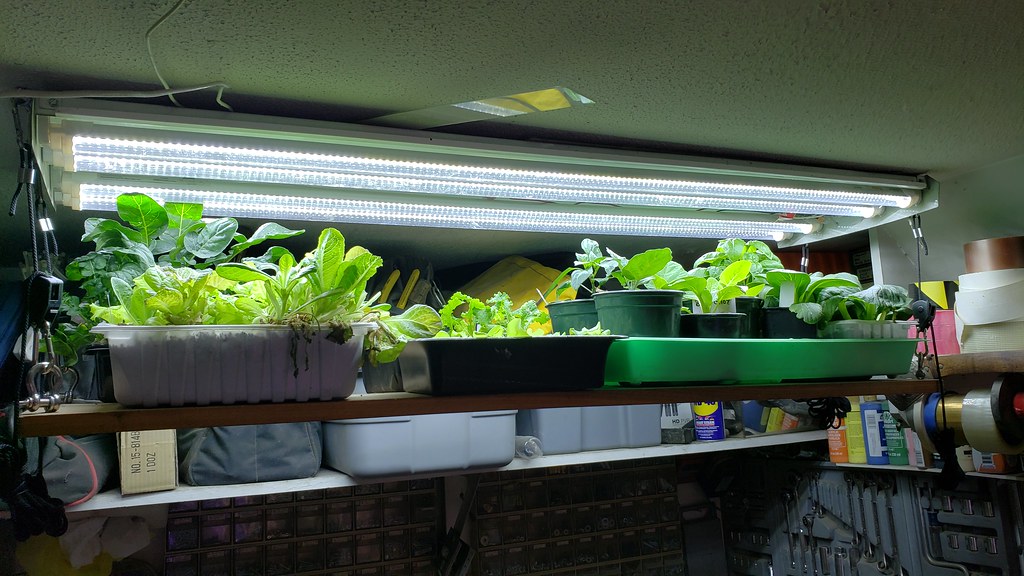
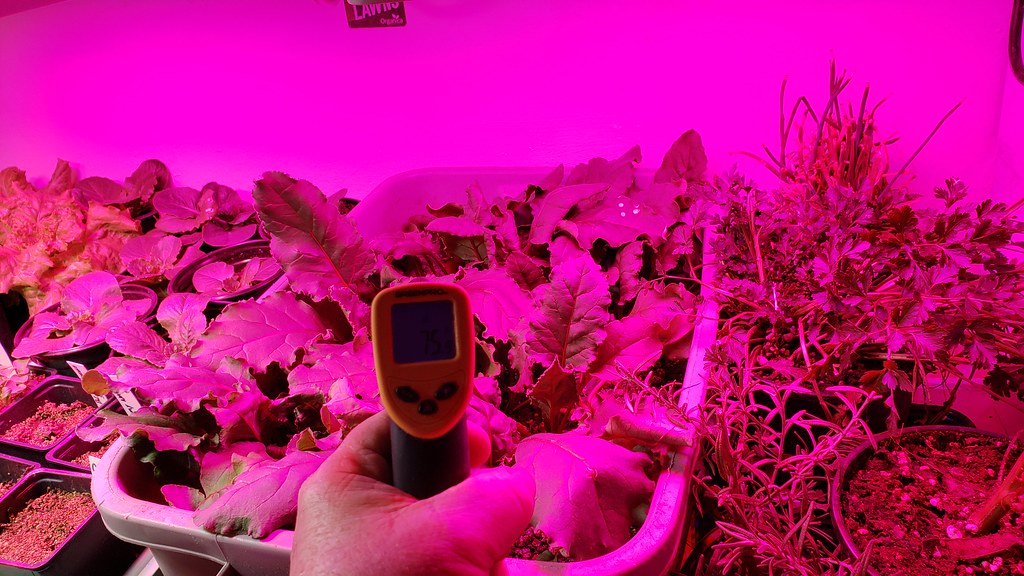
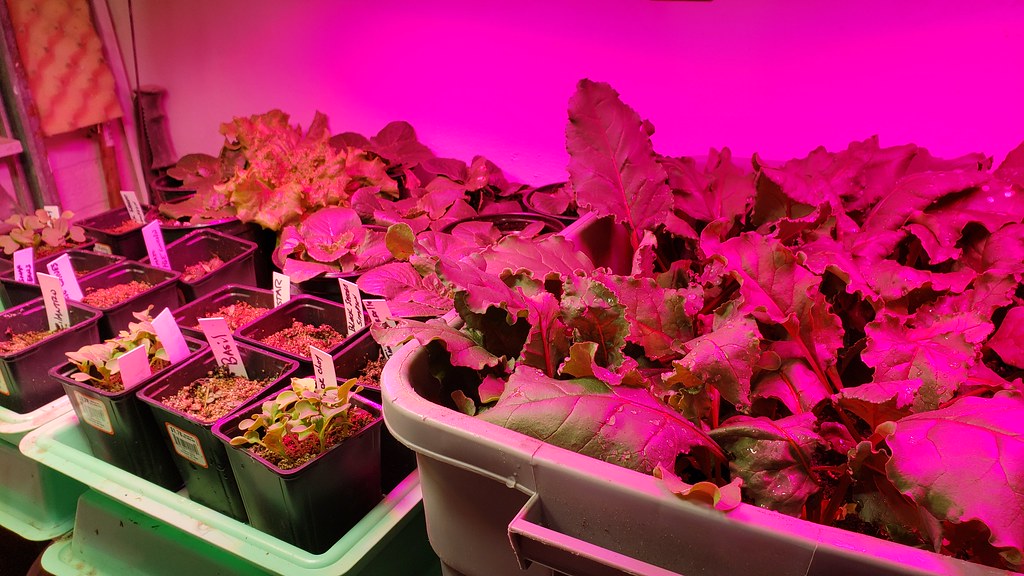
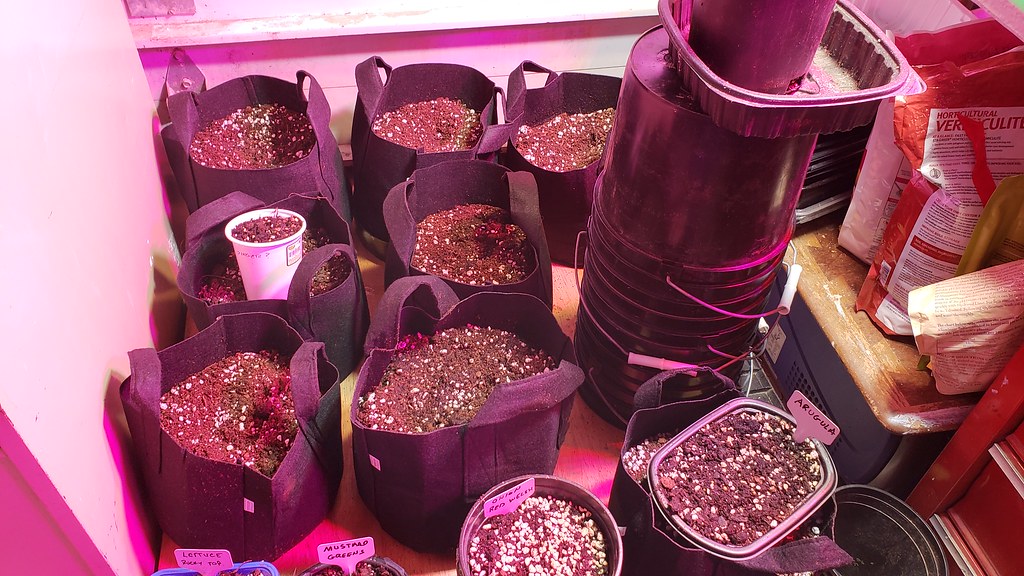
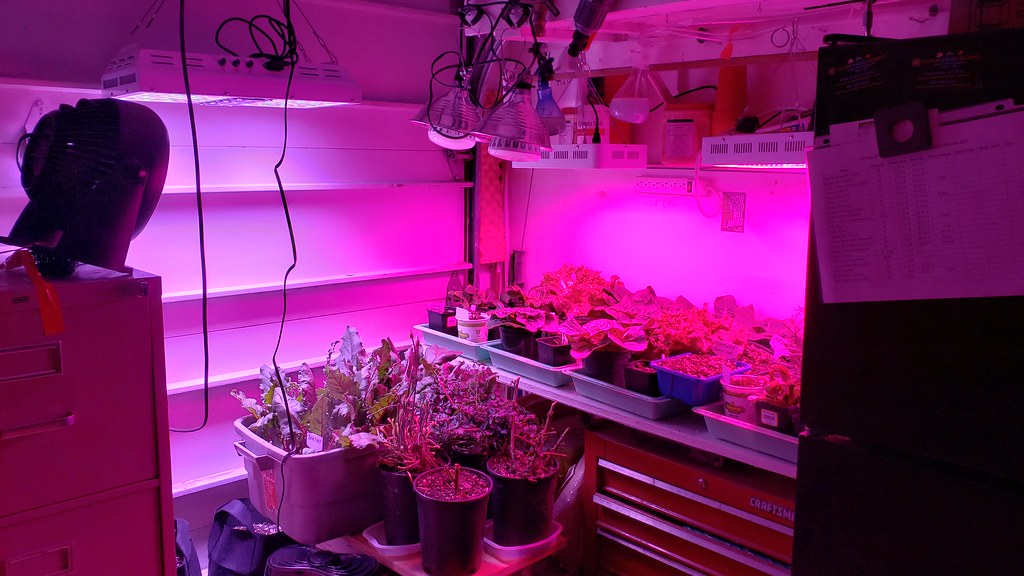
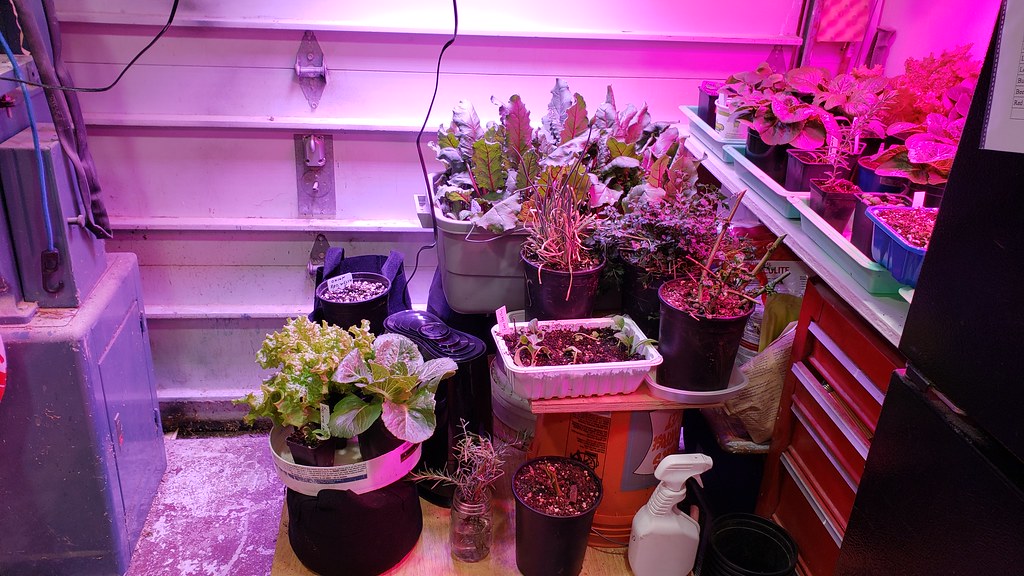
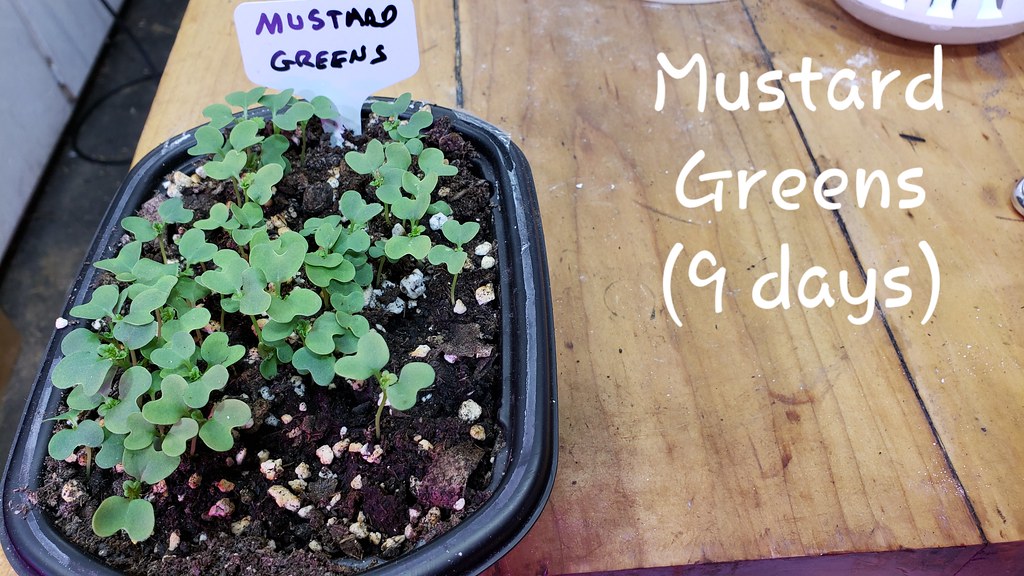
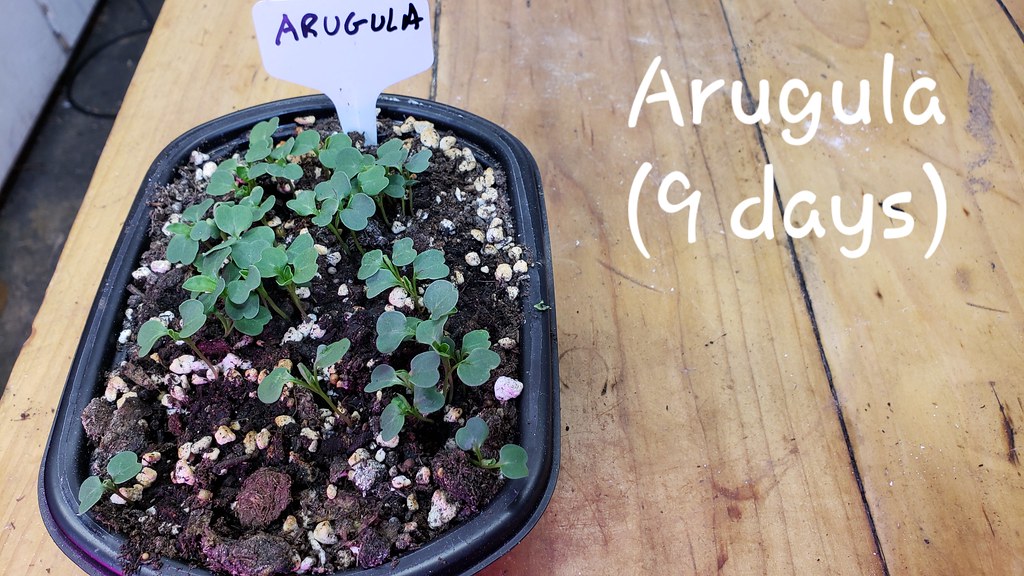
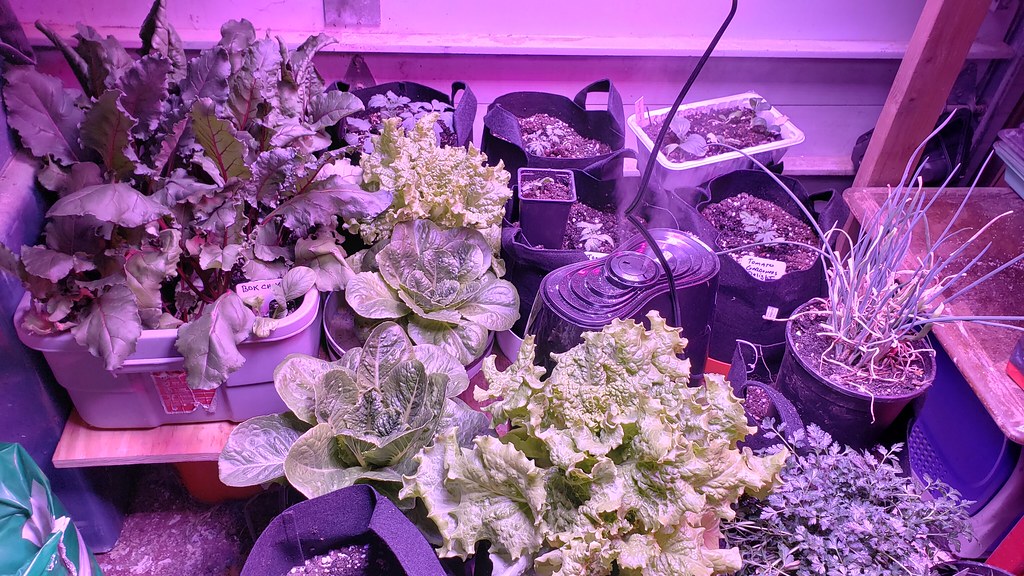
I will be using my existing grow area to start the seeds and grow some herbs and leafy greens.

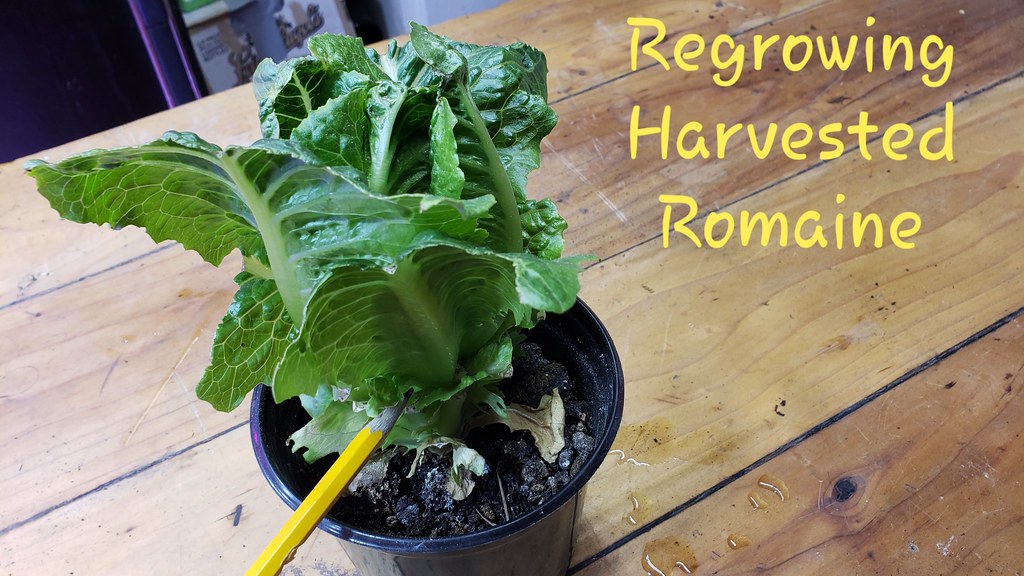
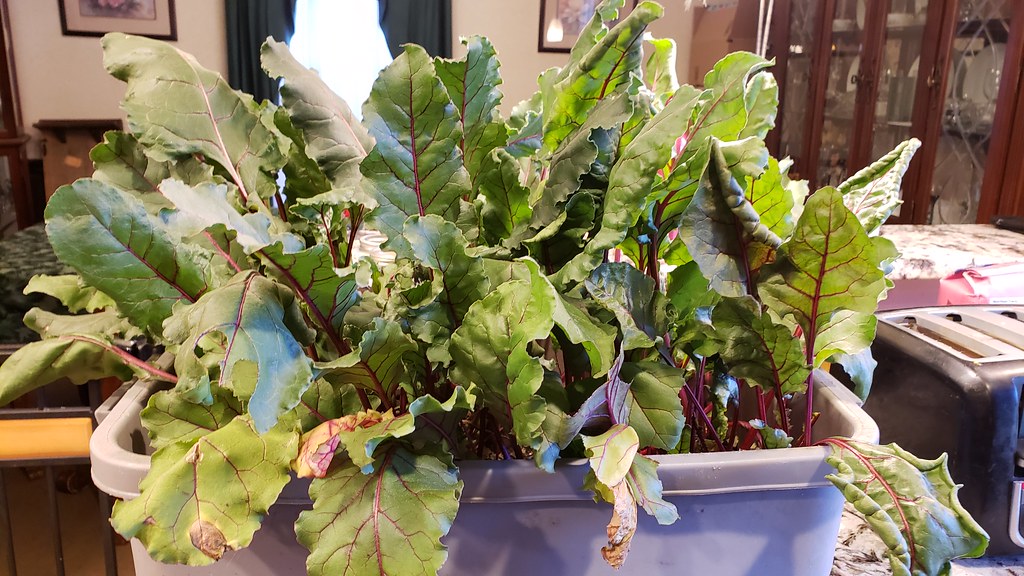
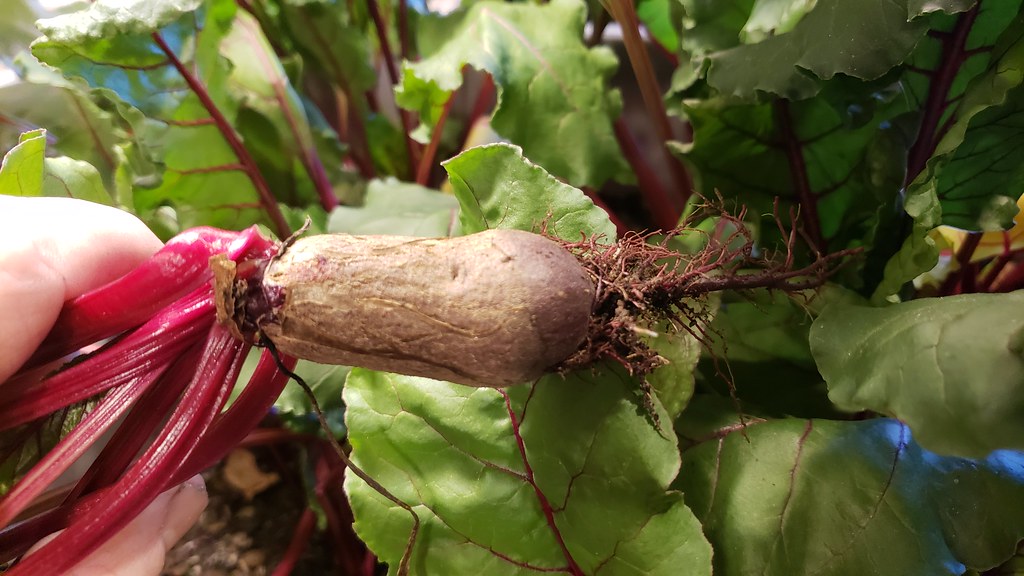
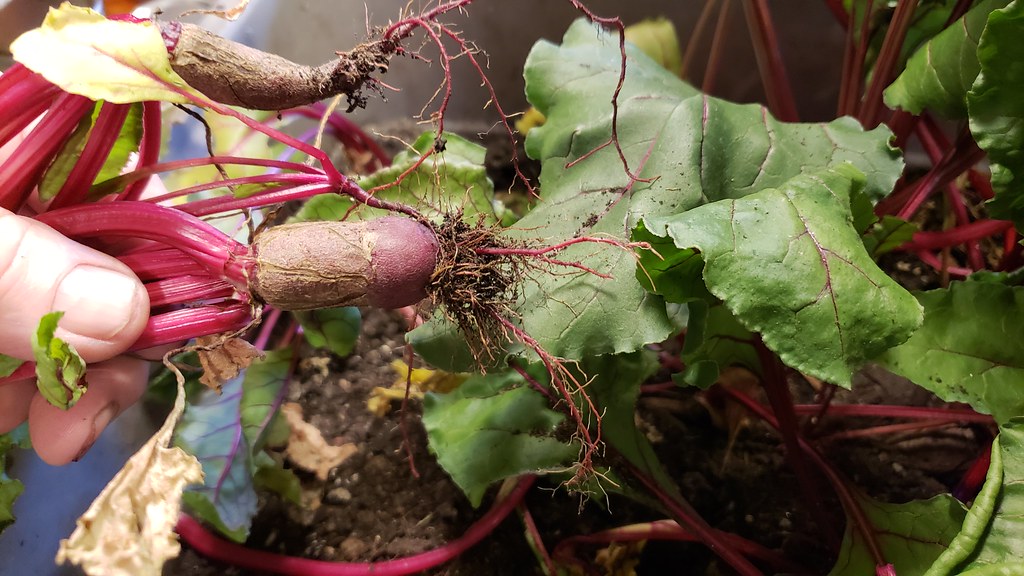
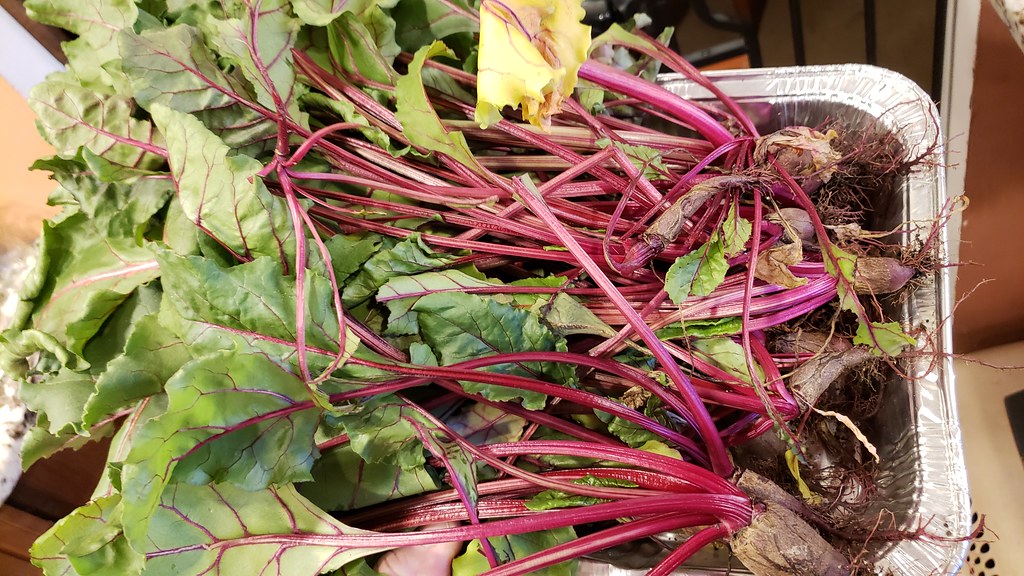
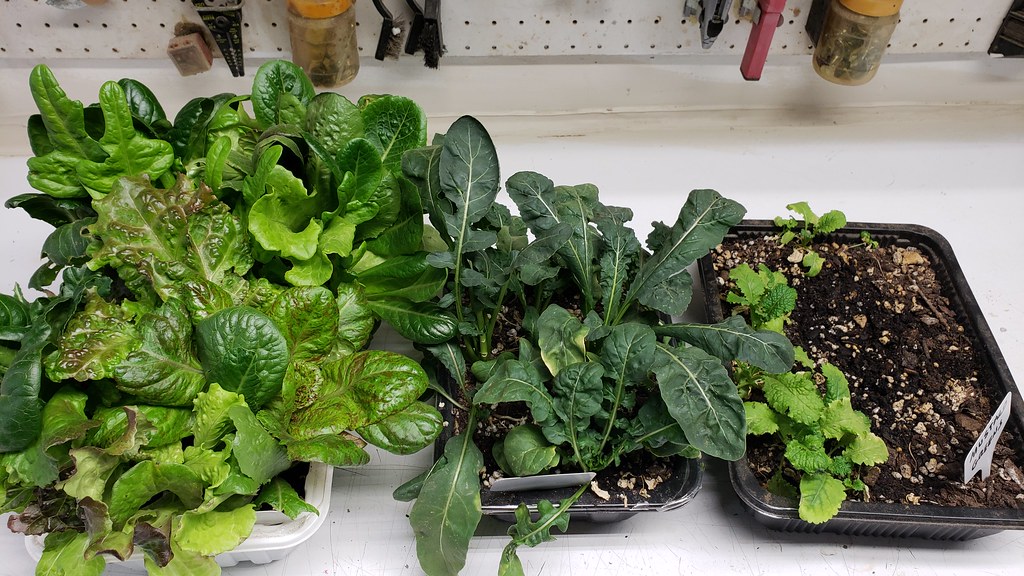
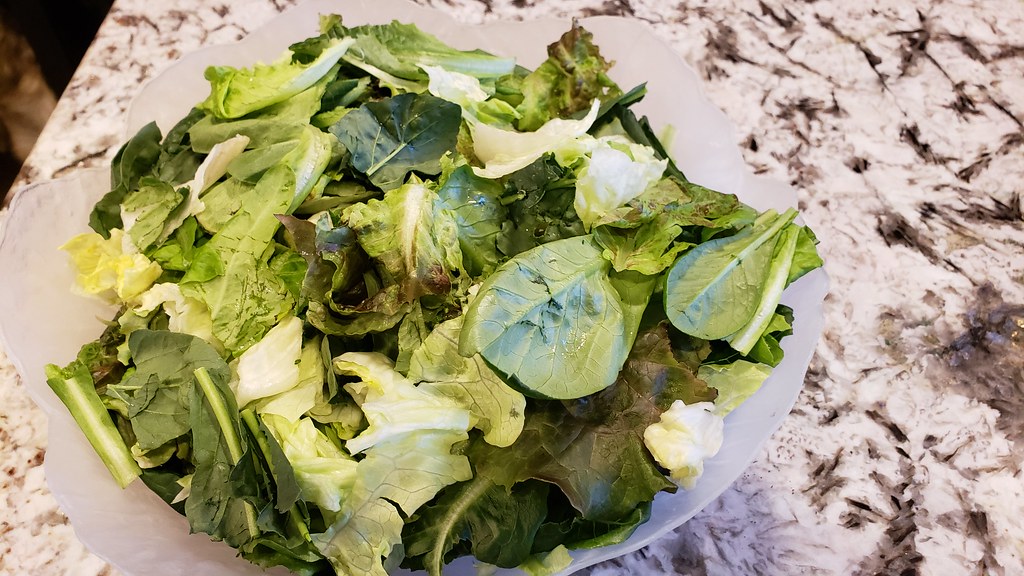
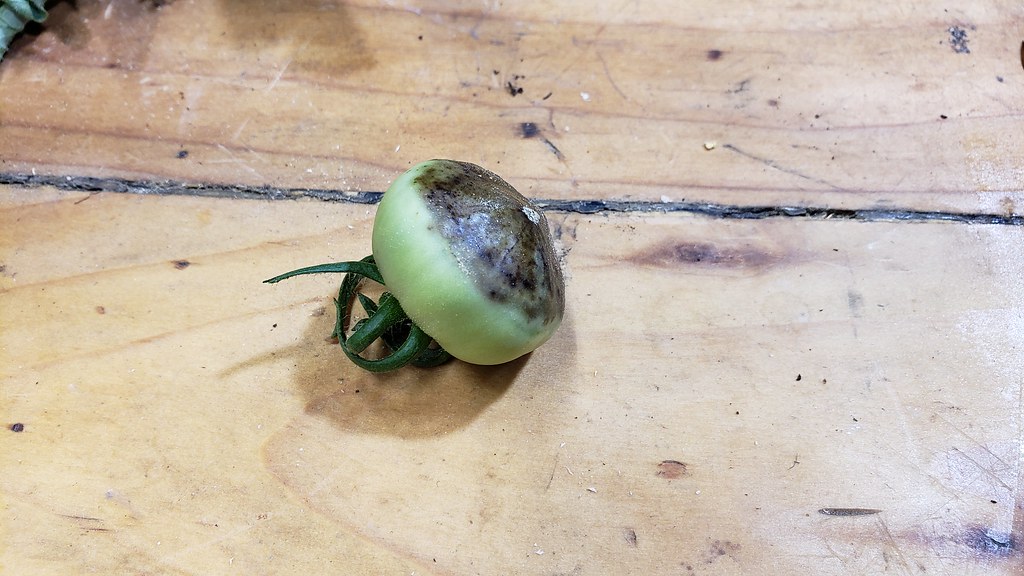
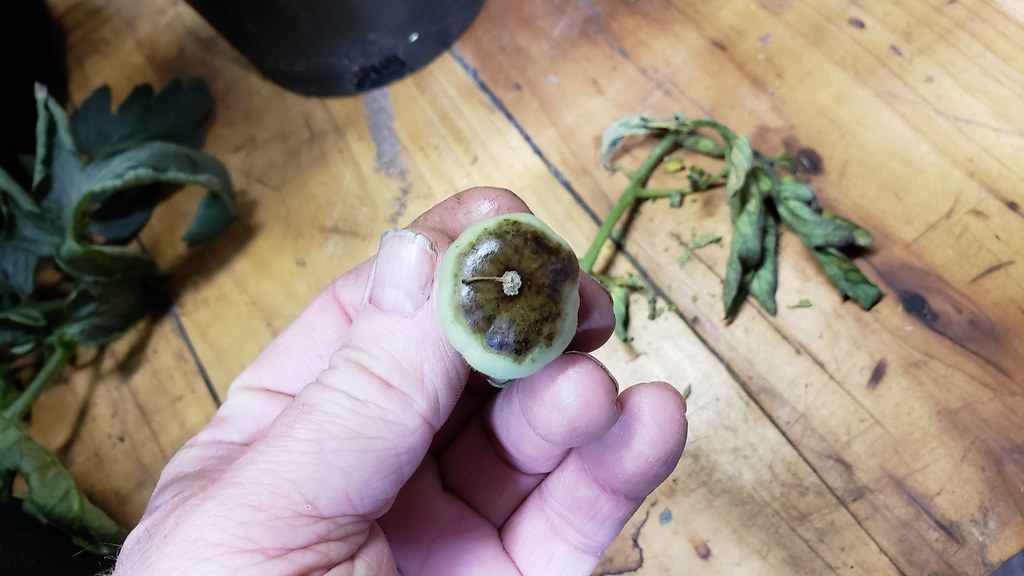
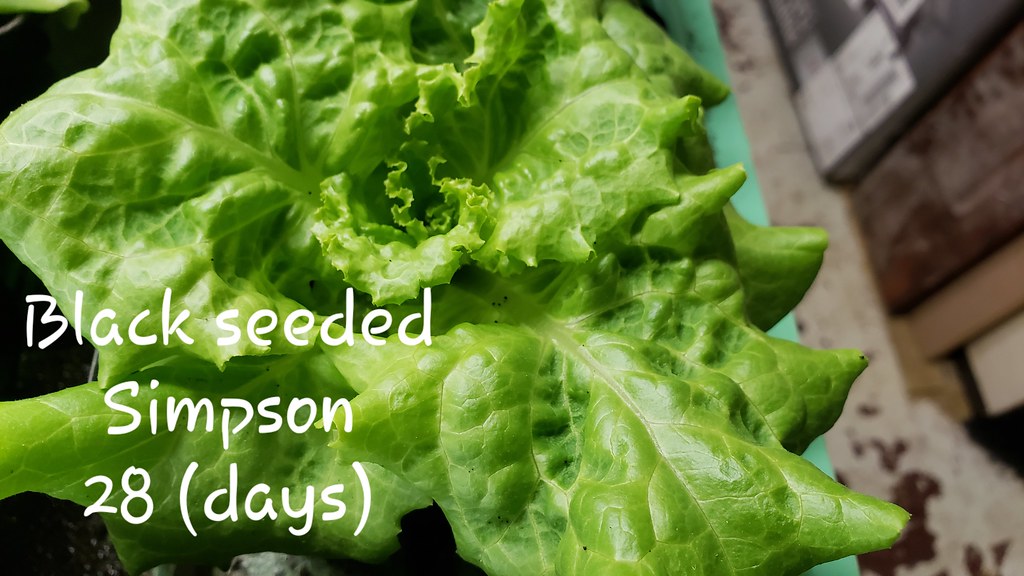
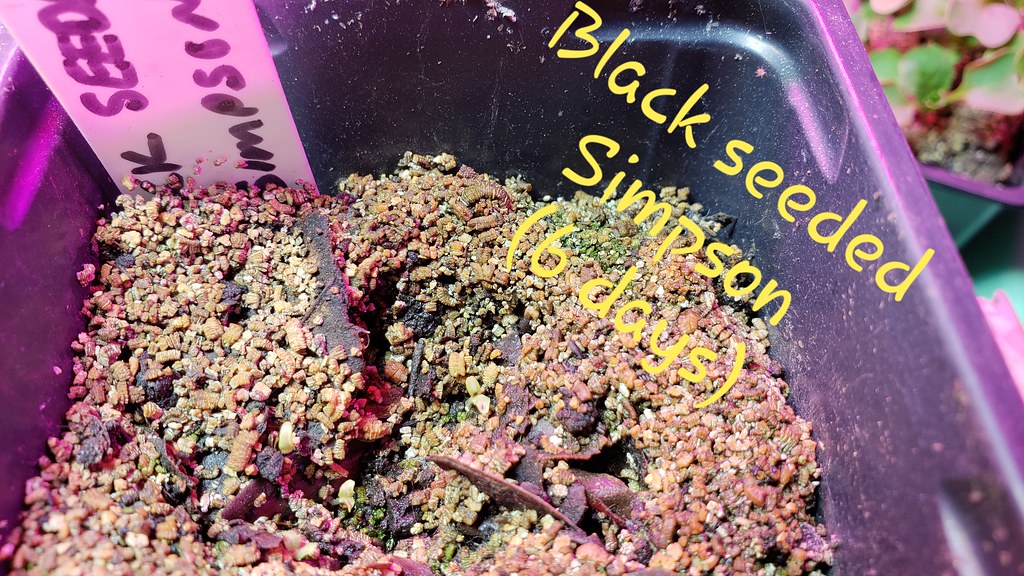
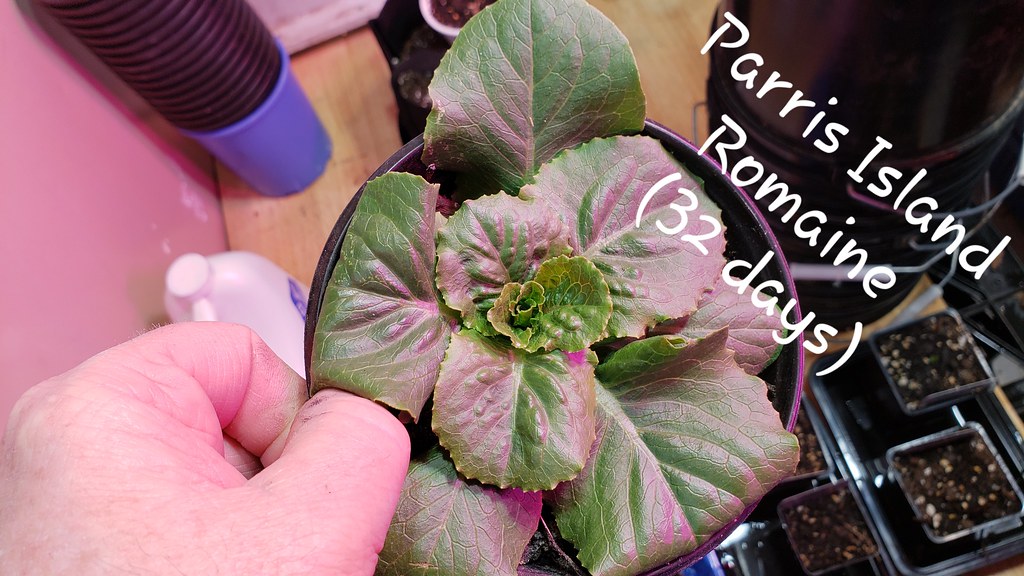
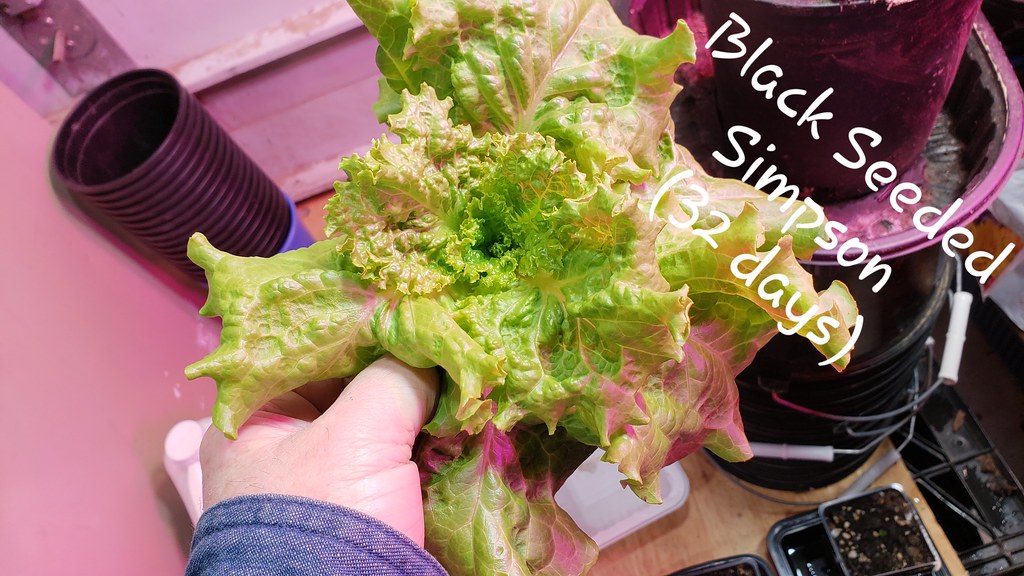
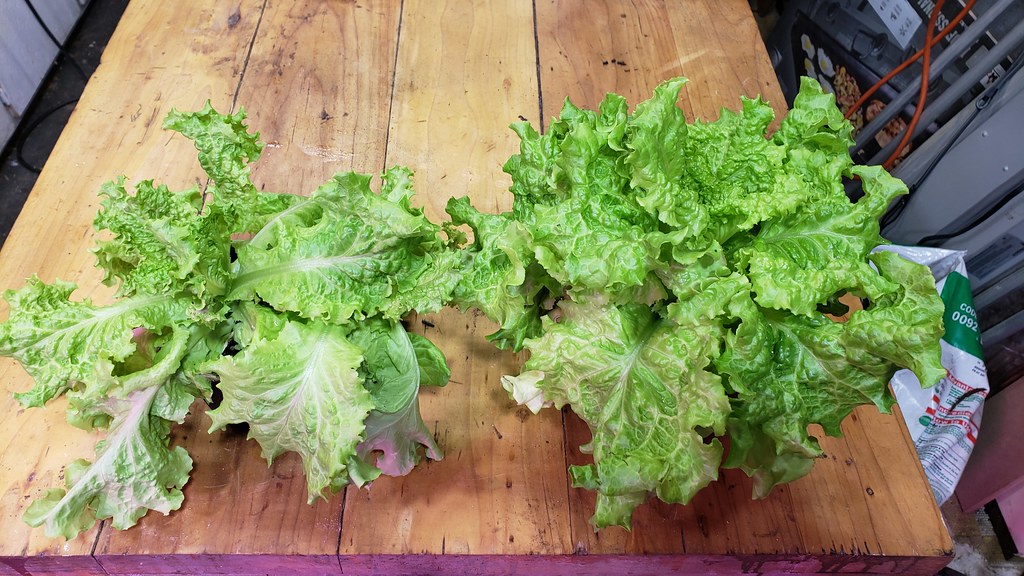
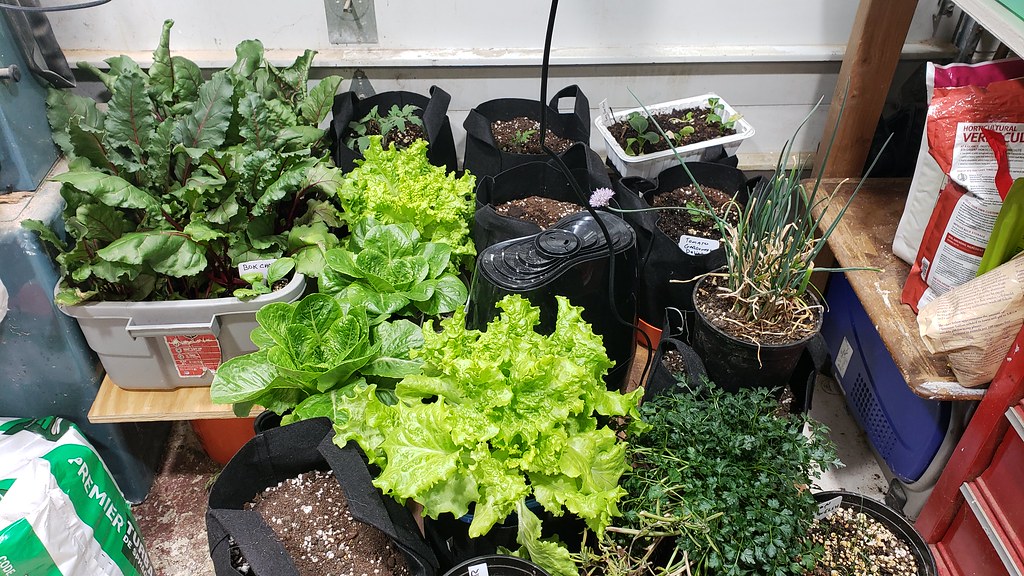
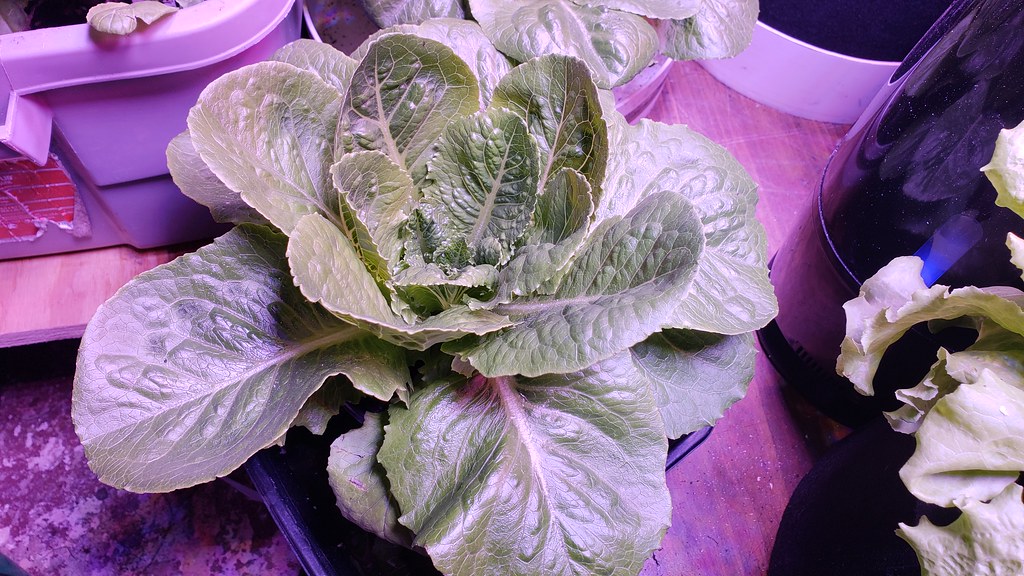
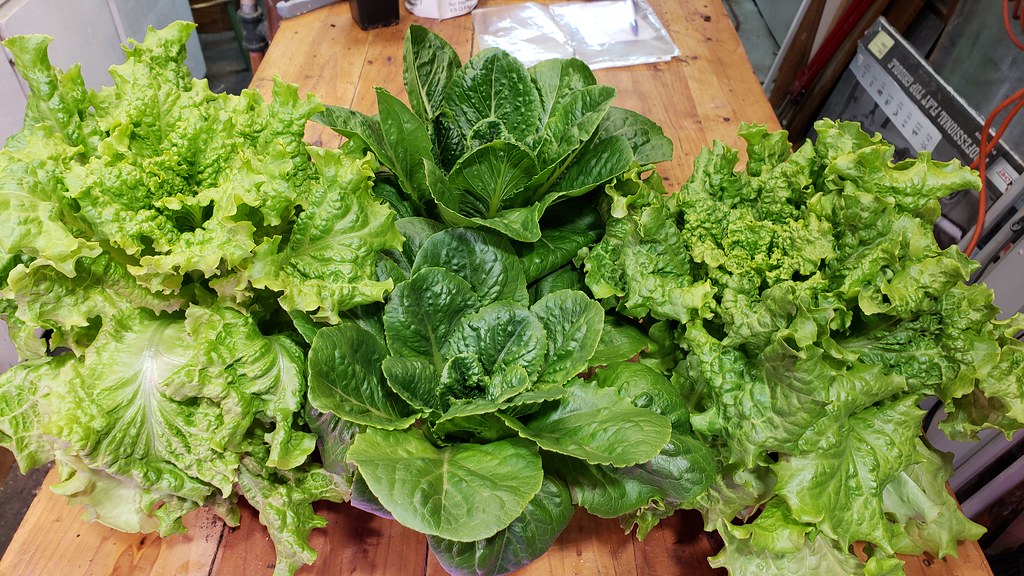
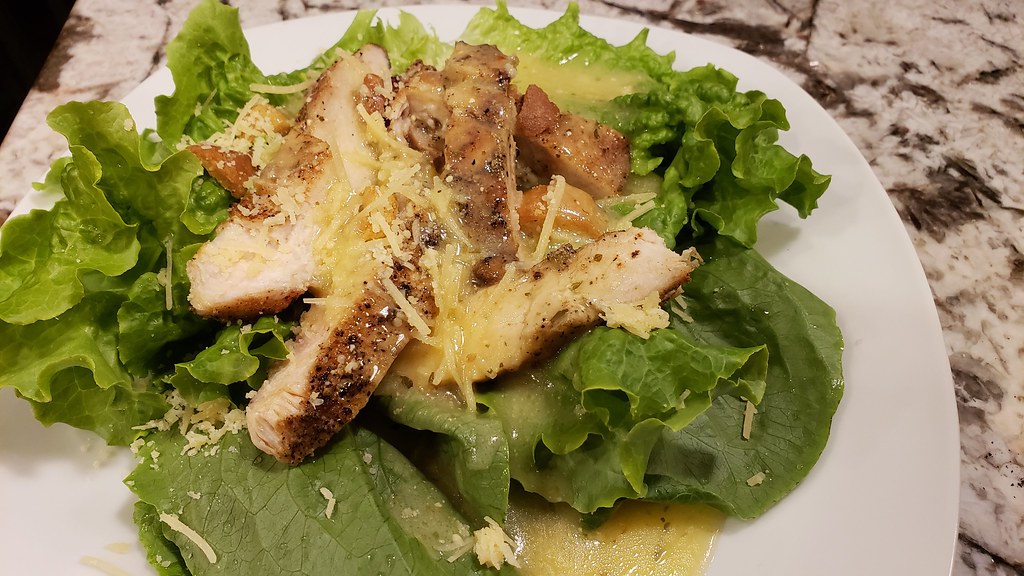
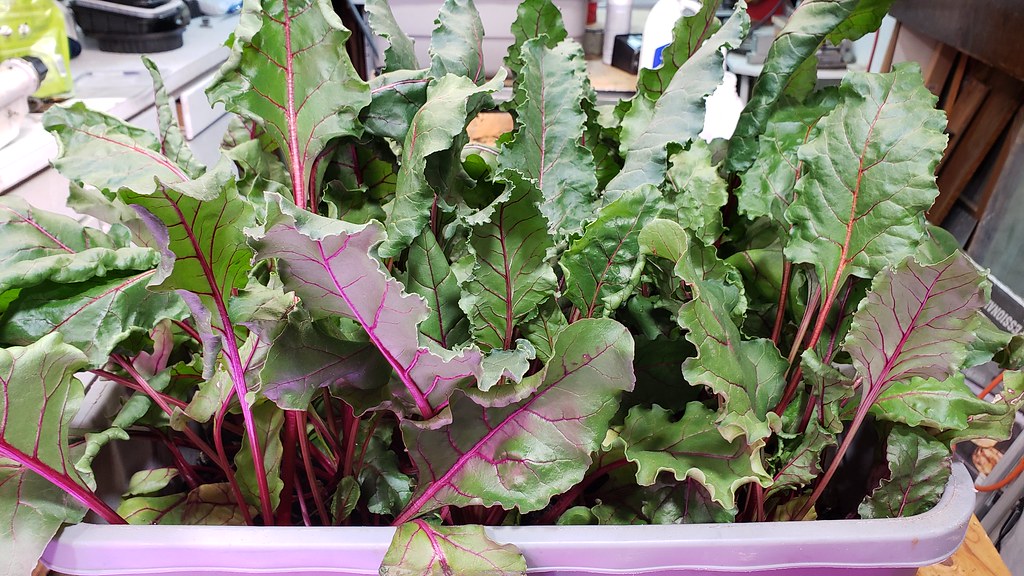
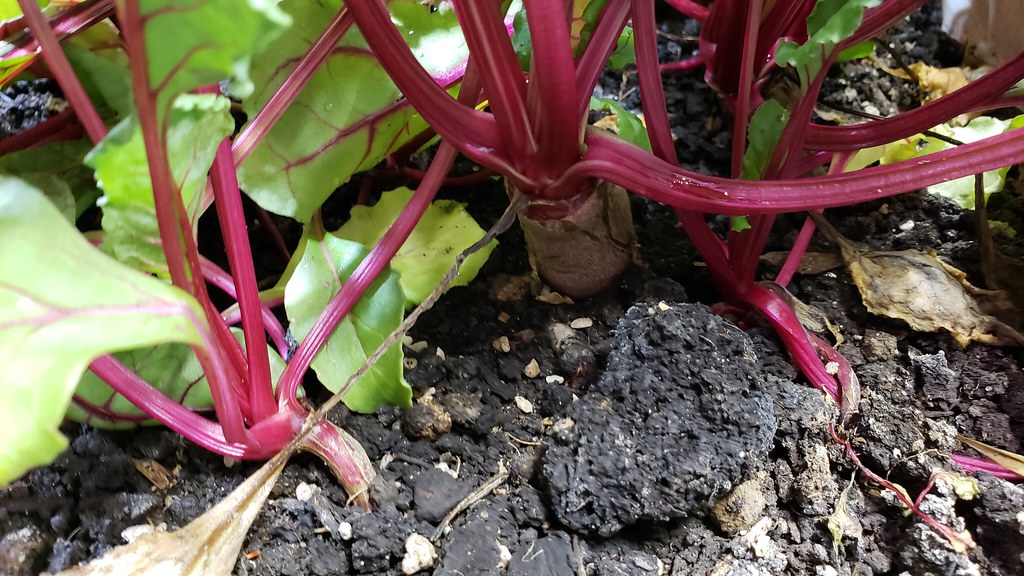
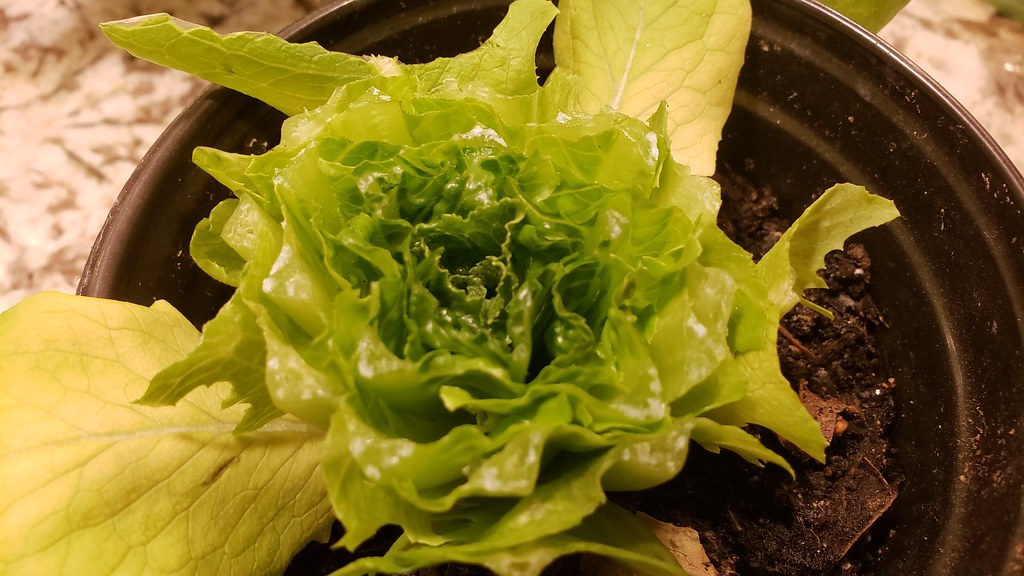
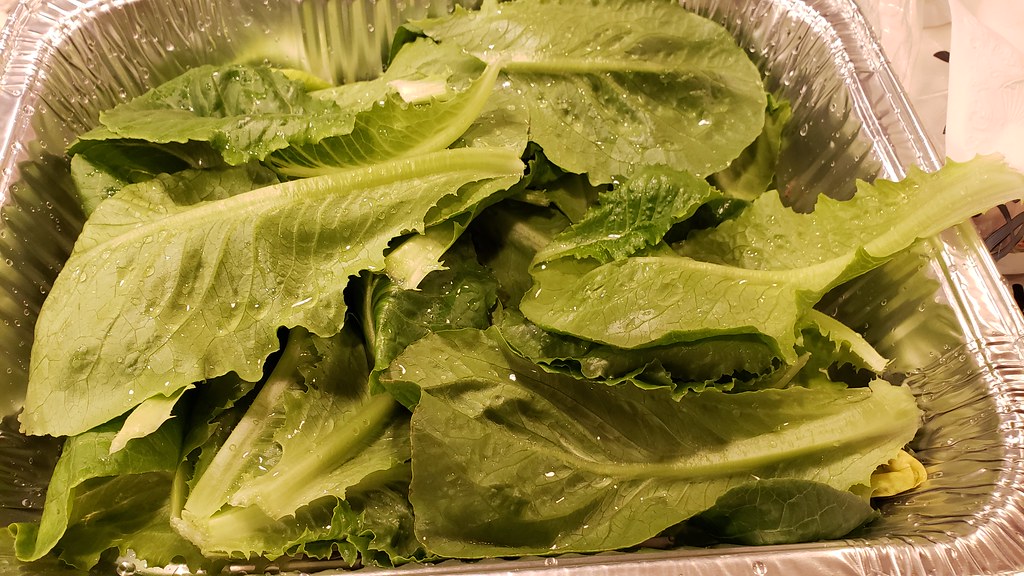
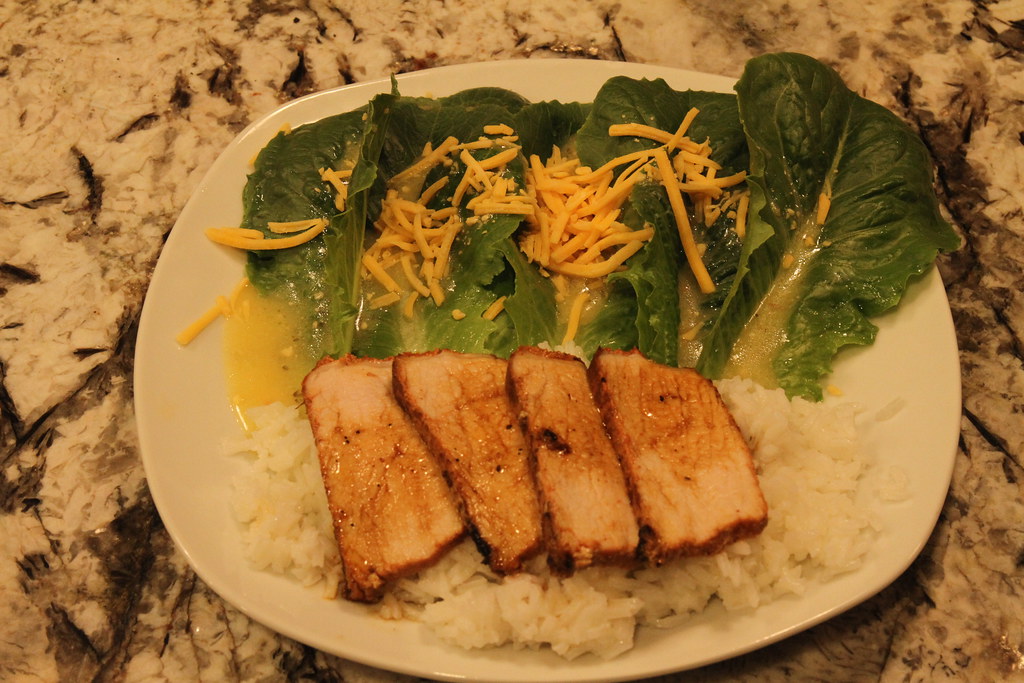
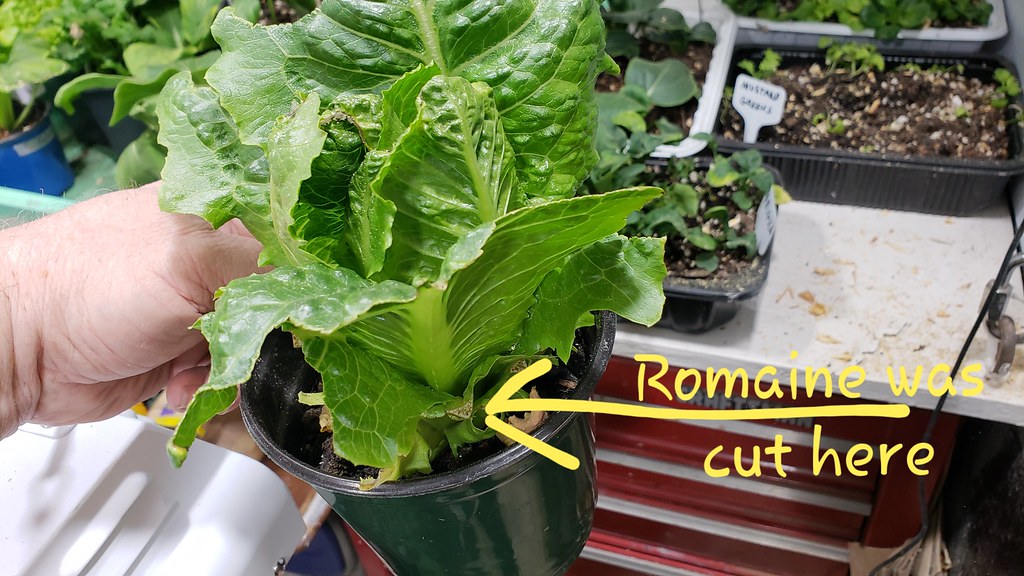
I planted some Black seeded Simpson and Parris Island Romaine for my wife, I felt bad for her, she loves romaine but has gotten sick from it twice so she won't ever buy it again, last time she got sick we ended up in the emergency room. I also tossed in some Beets to hopefully get a beet harvest so I can make some pickled red beets, but I'm not holding my breath.


November 24th, 2018

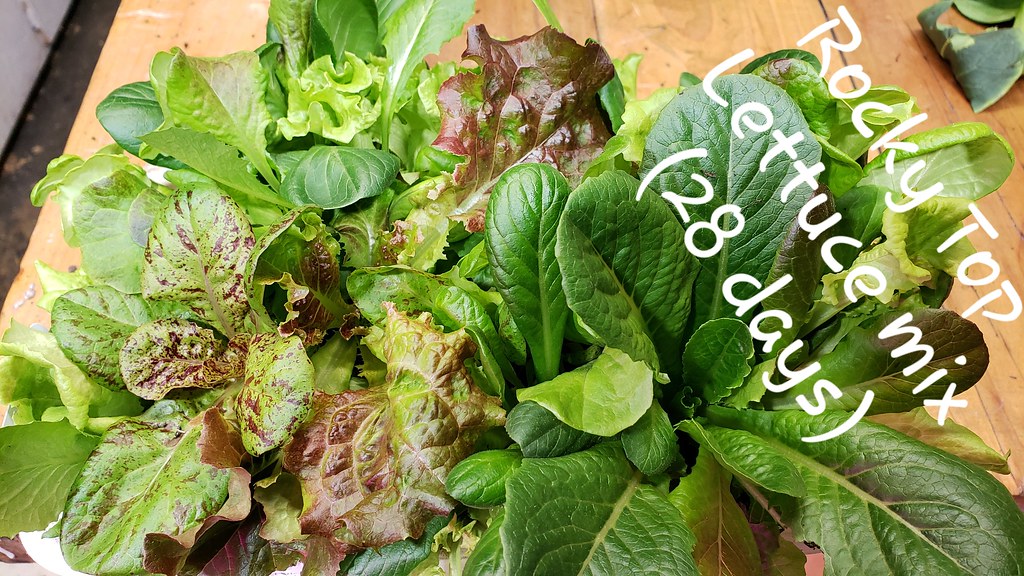
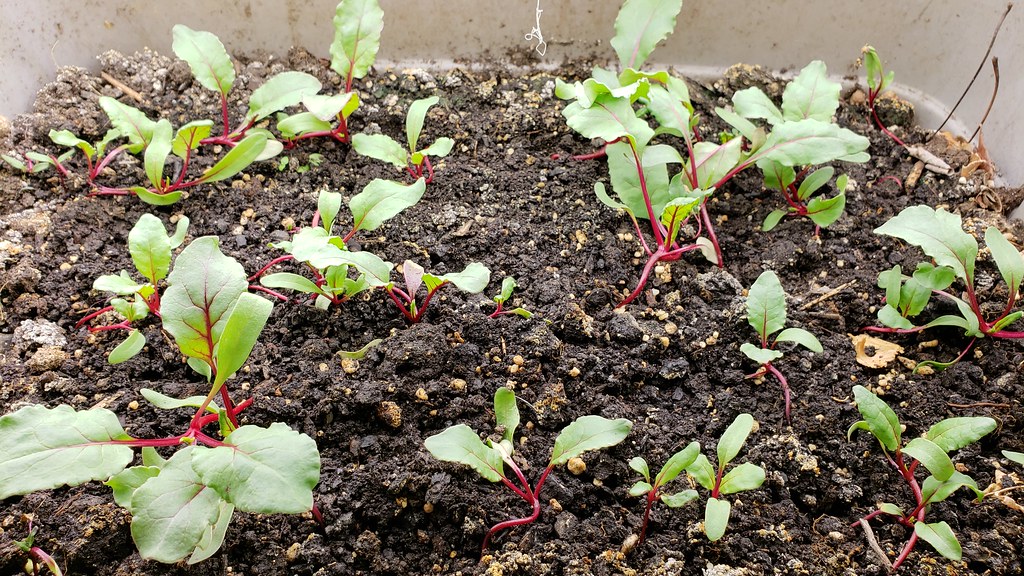
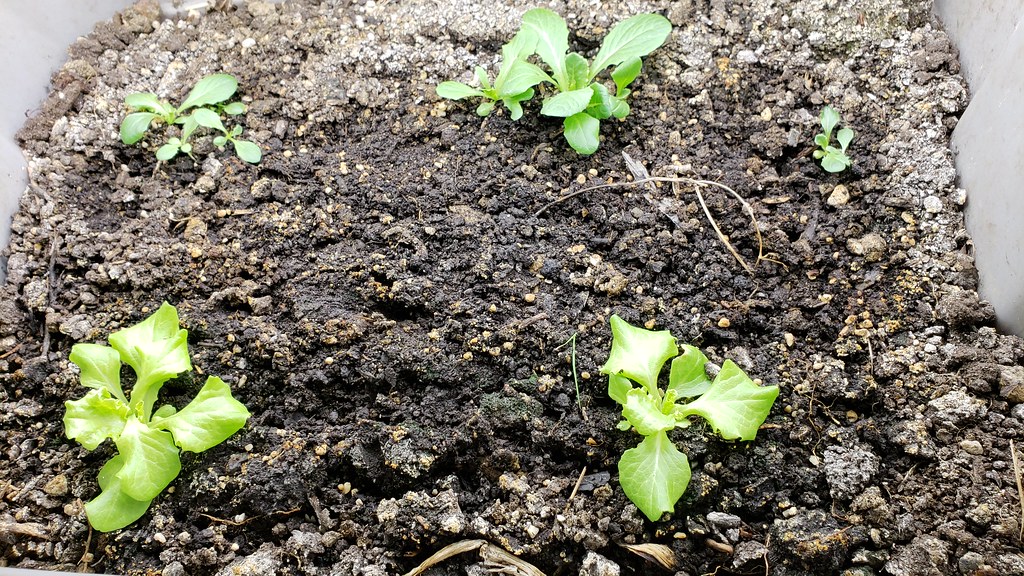
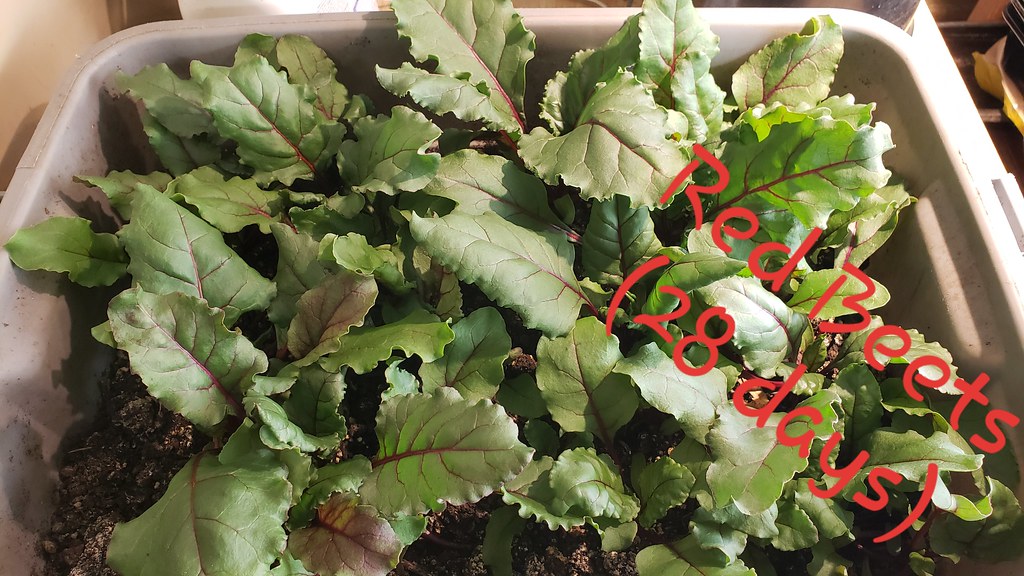
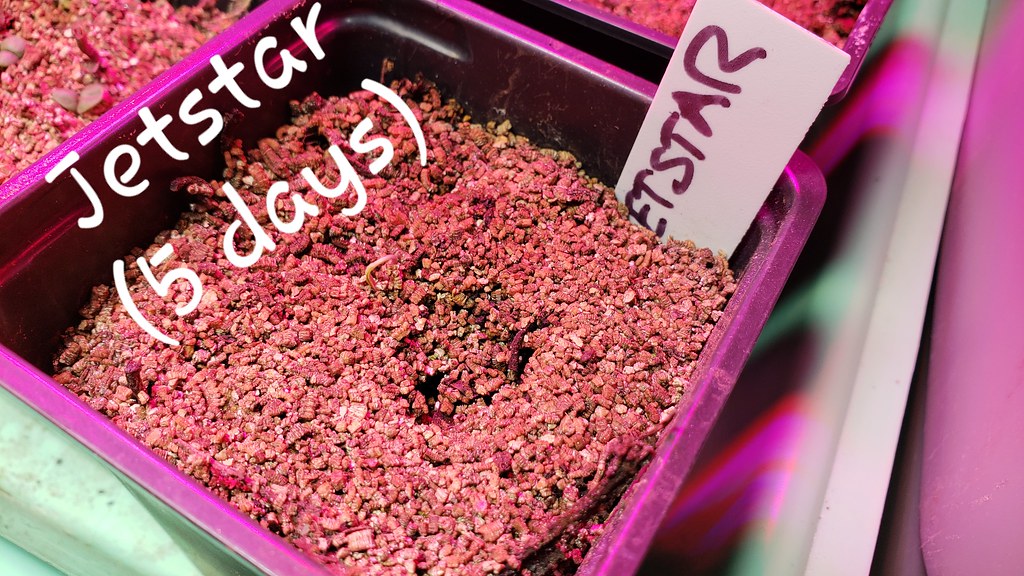
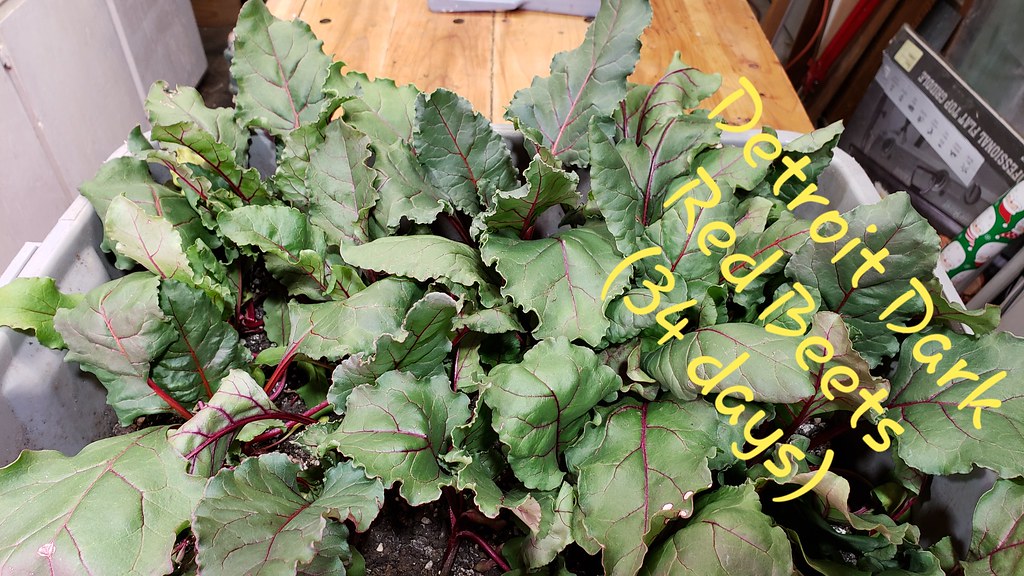
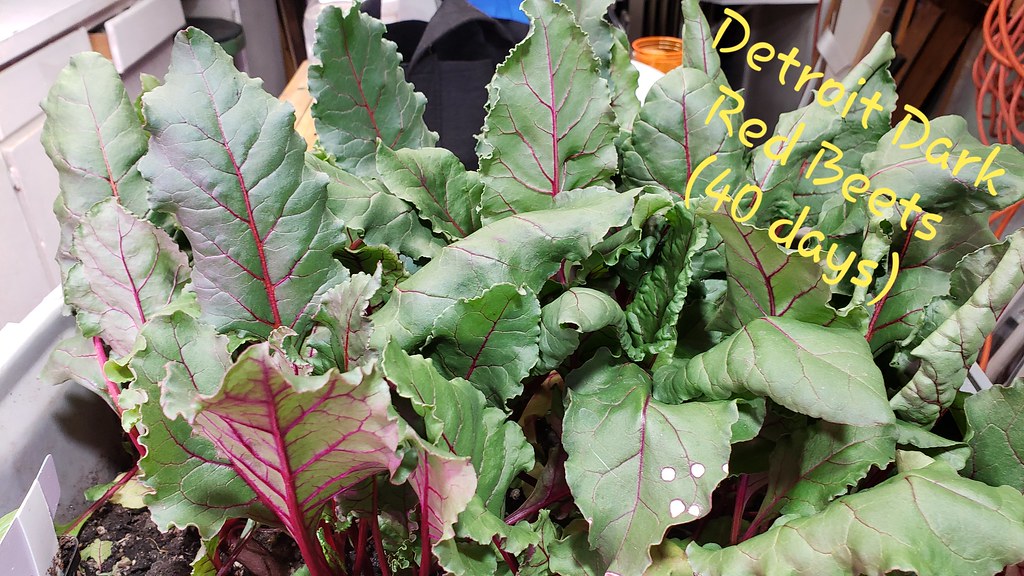
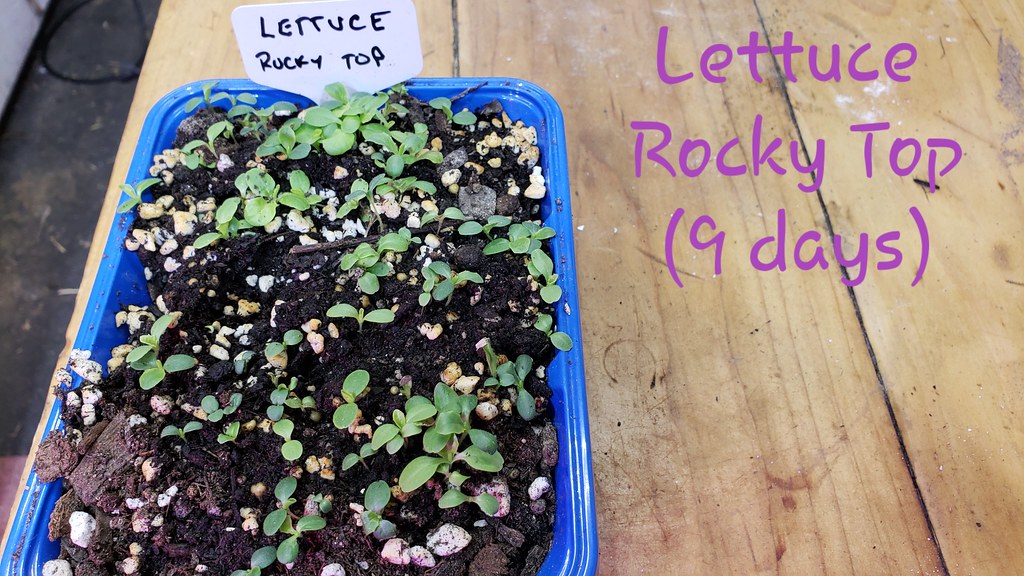
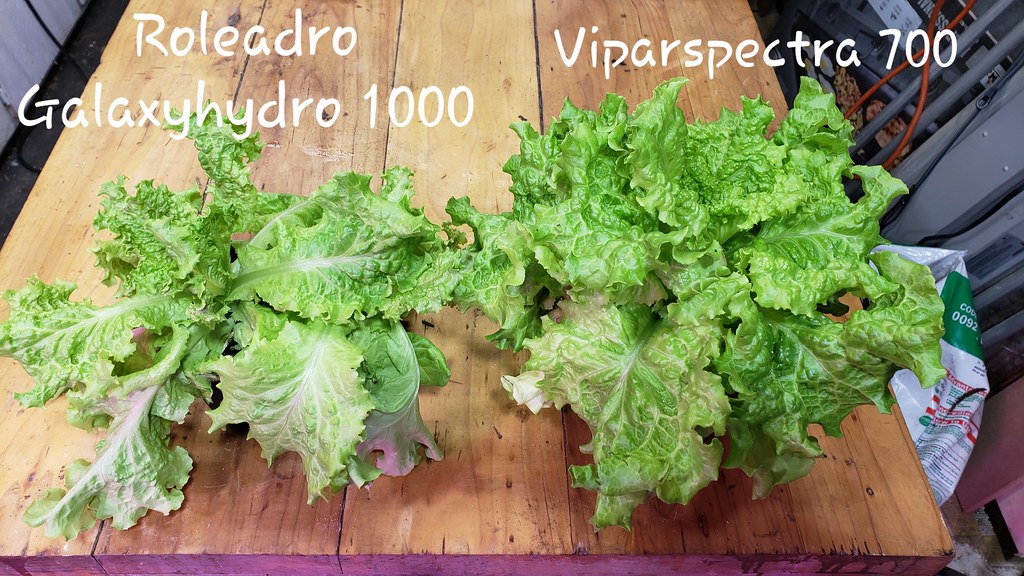
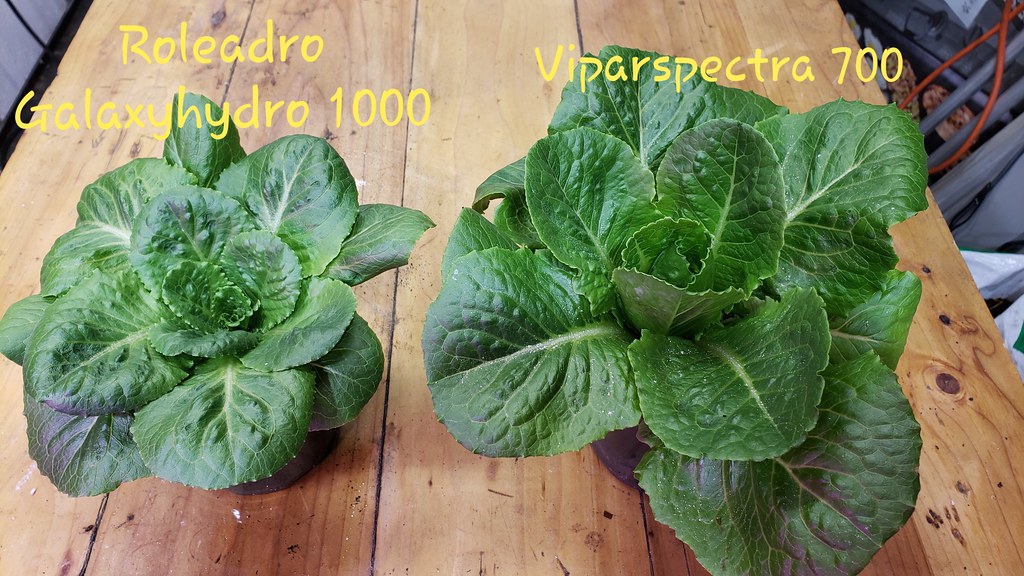
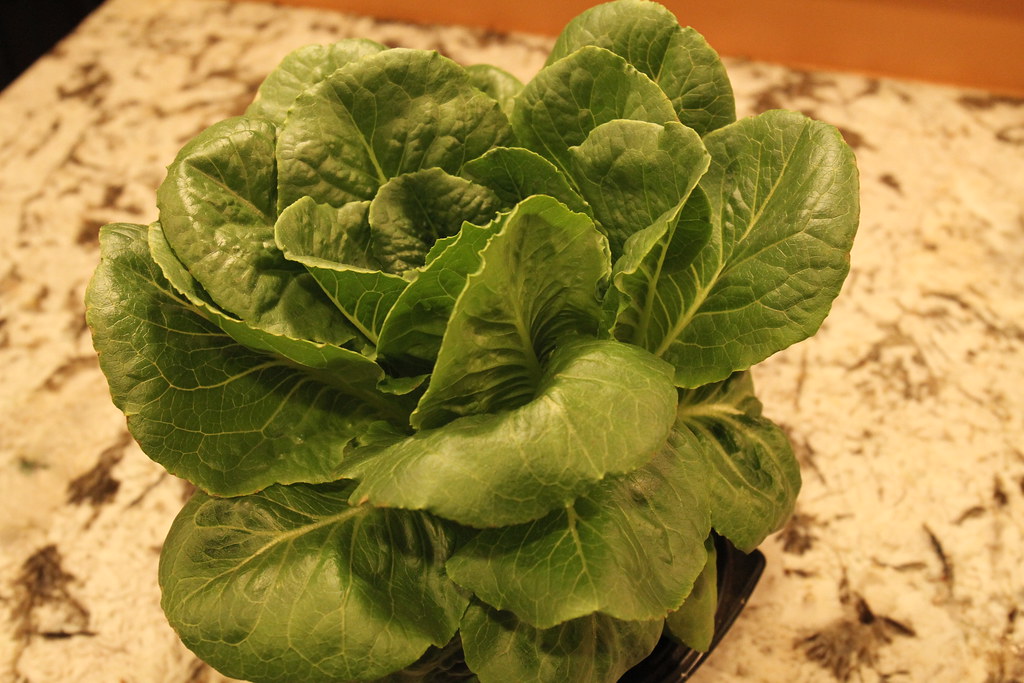
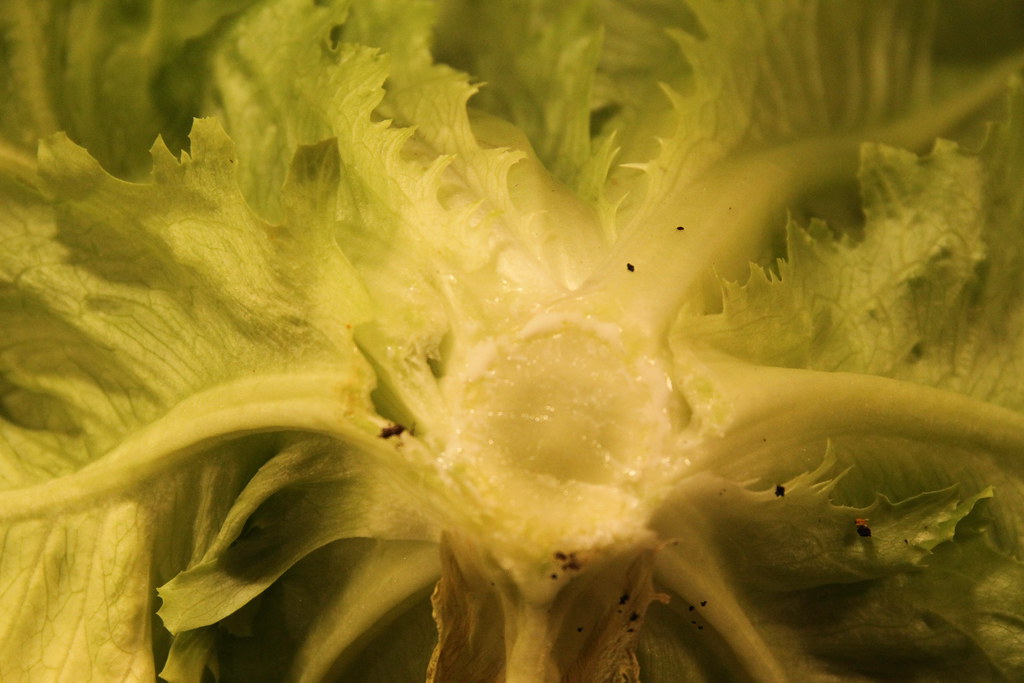
Beets - Detroit Dark Red (59 days), Romaine - Parris Island (70 days) and Lettuce - Black Seeded Simpson (45 days).
Image


November 27th, 2018
Image


December 13th, 2018
Image

Image


December 16th 2018

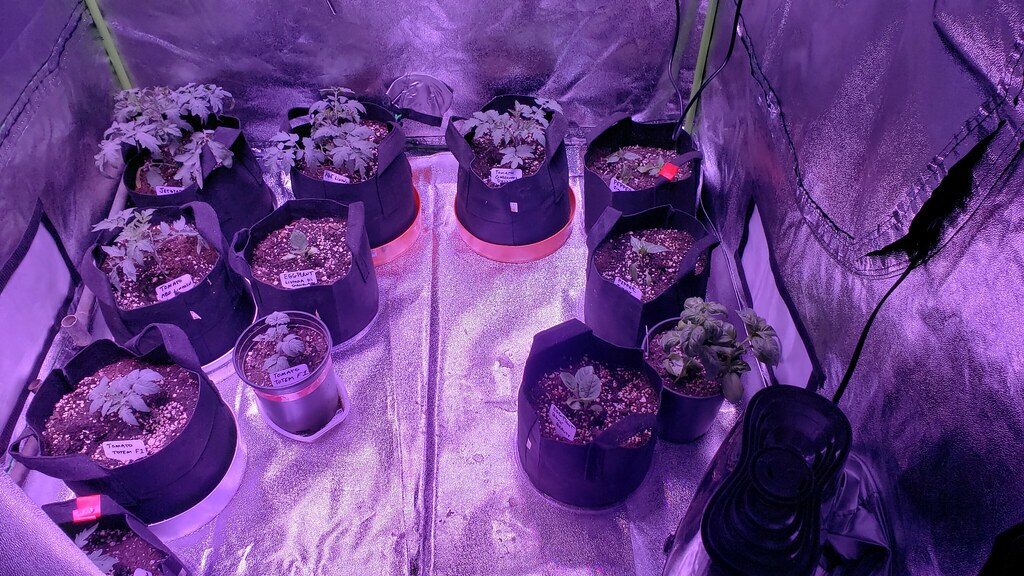
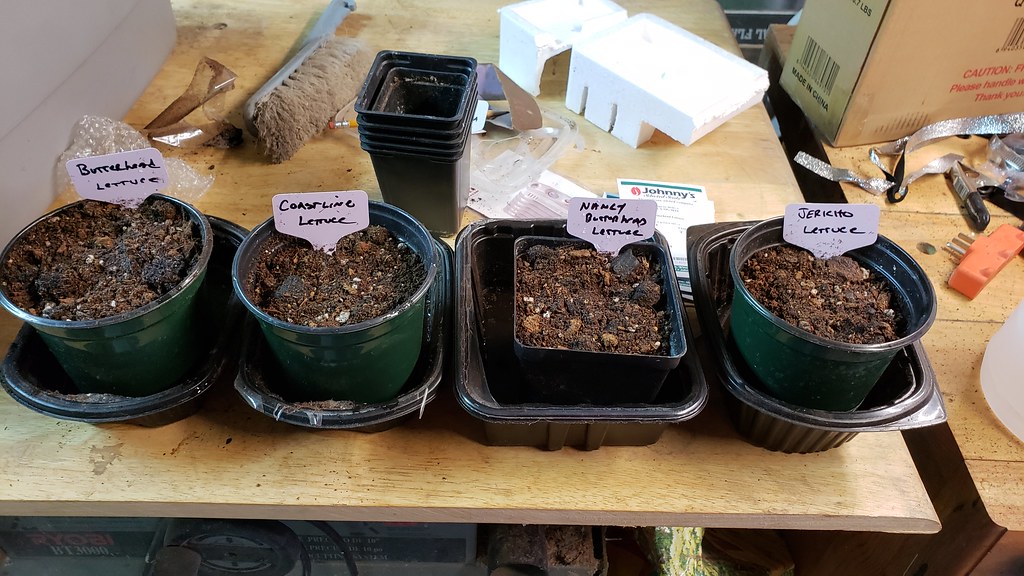
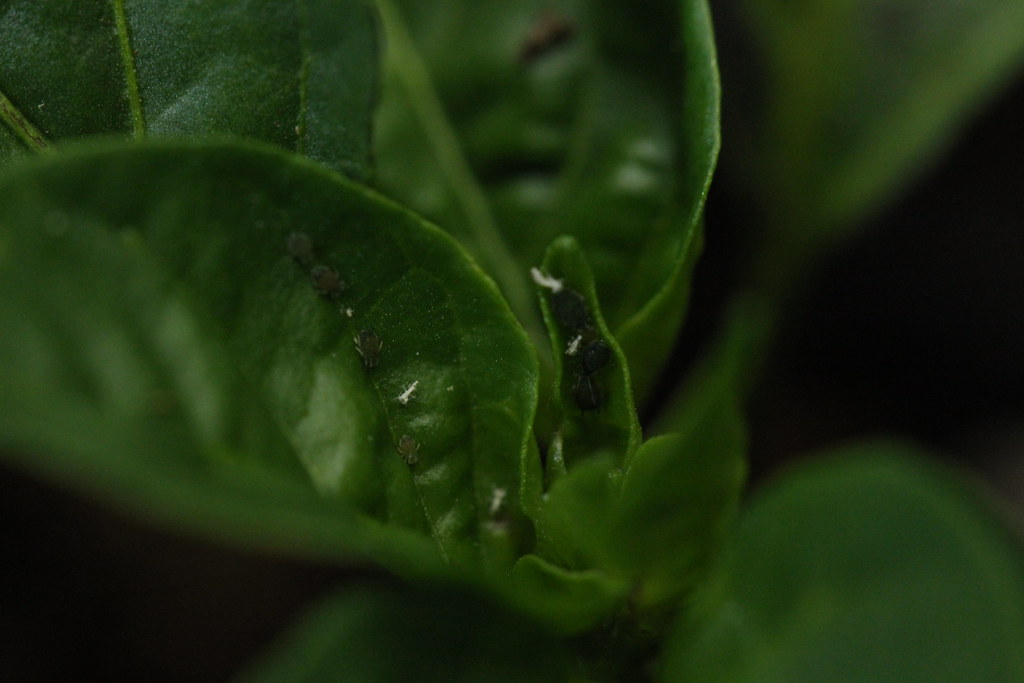
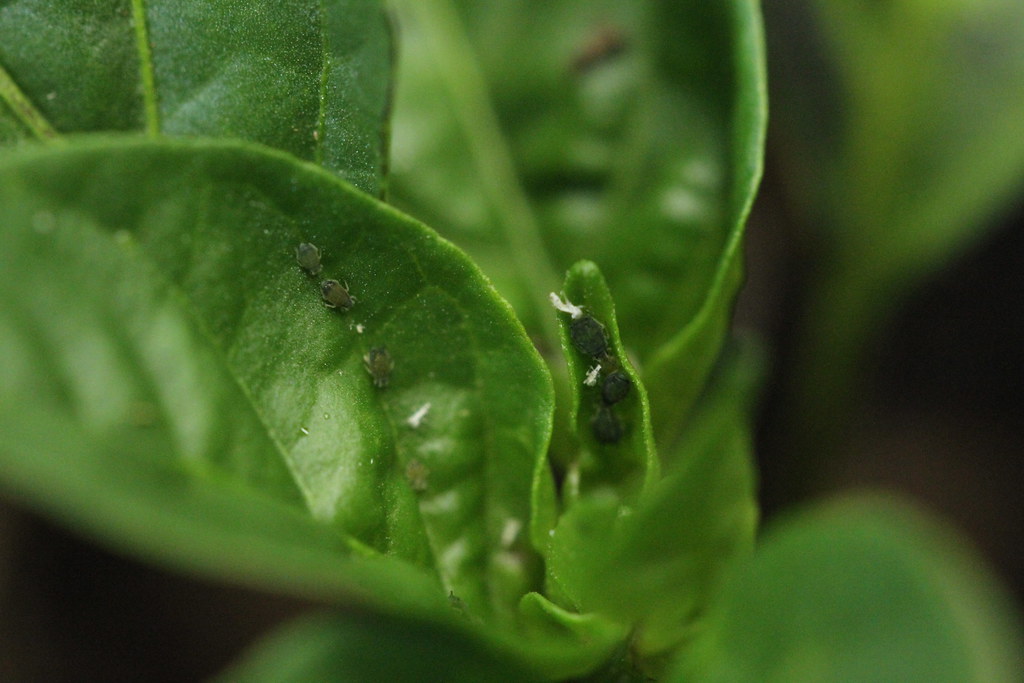
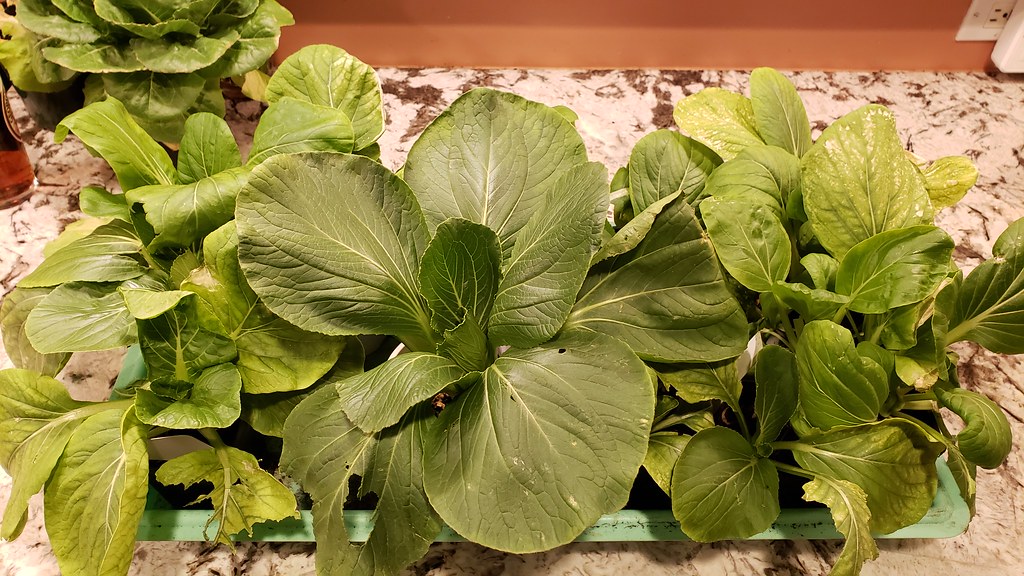
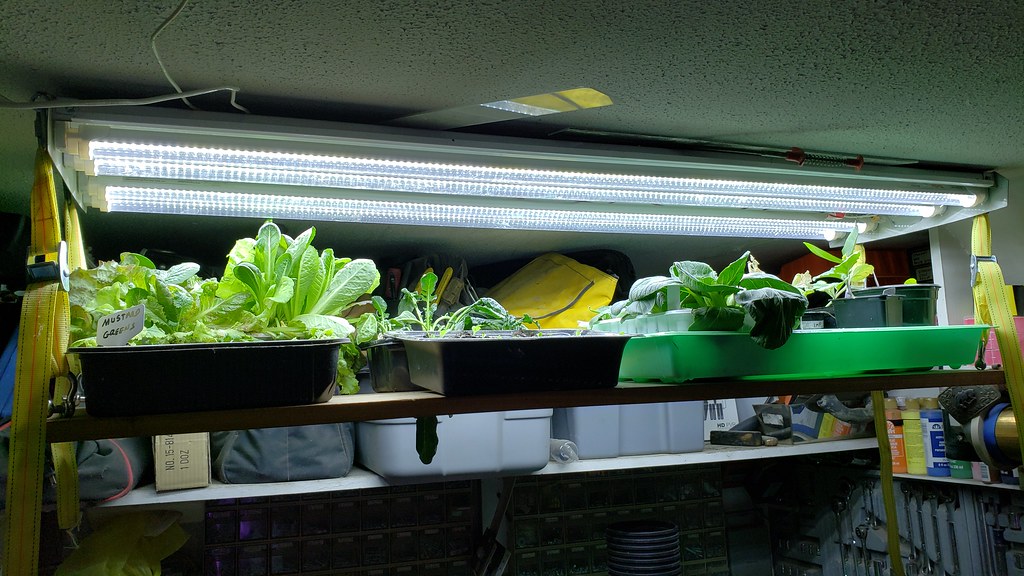
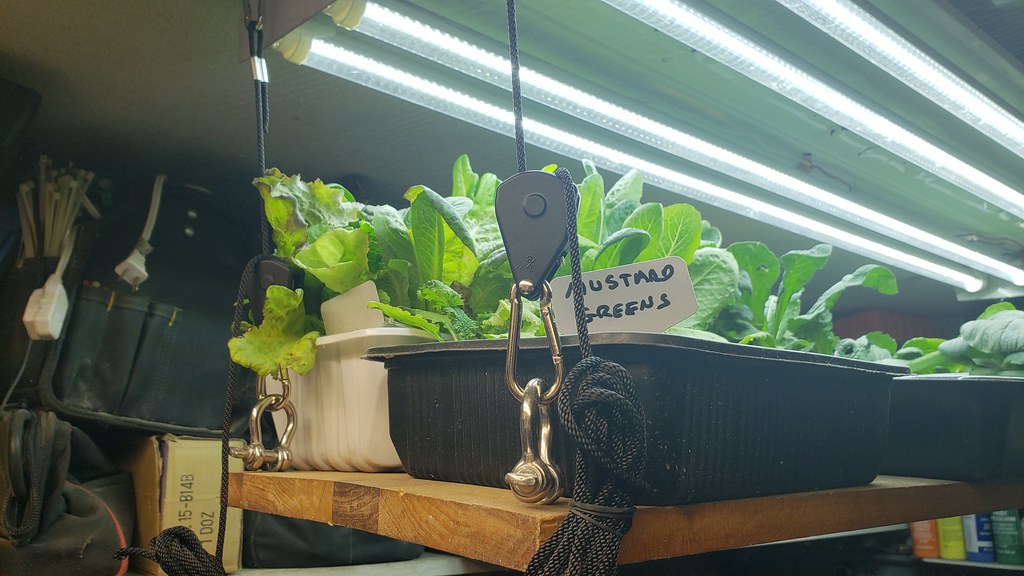
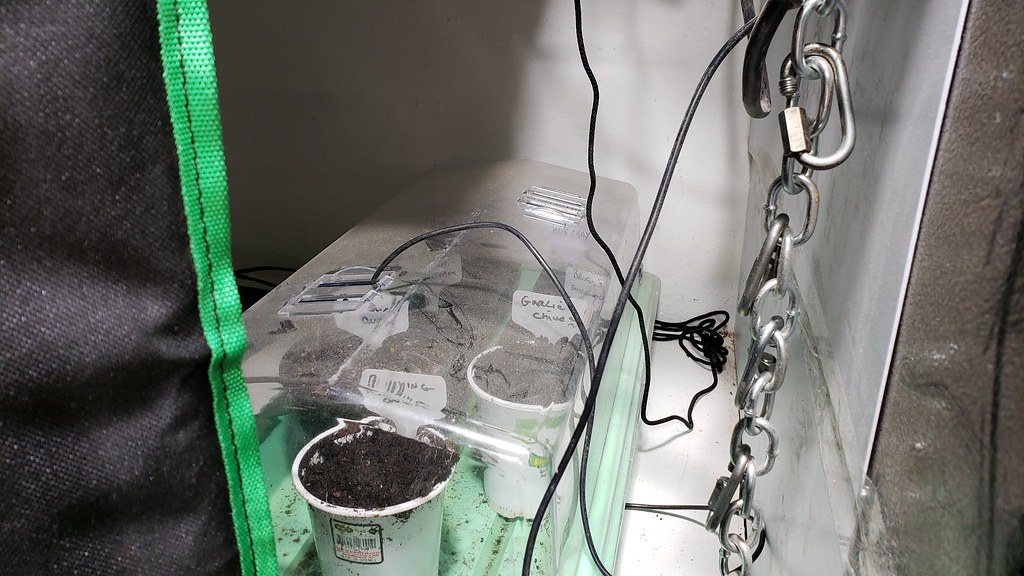
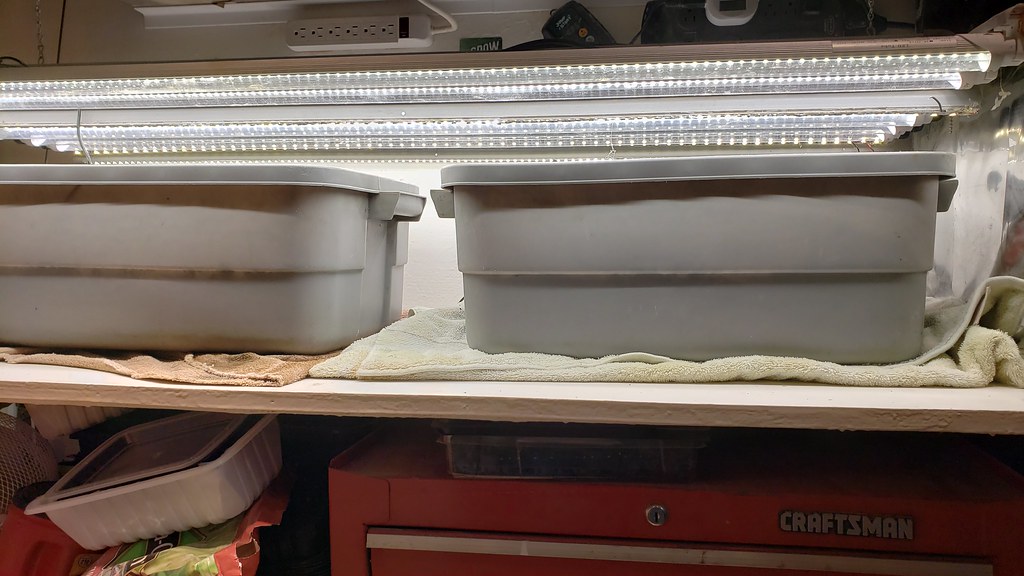
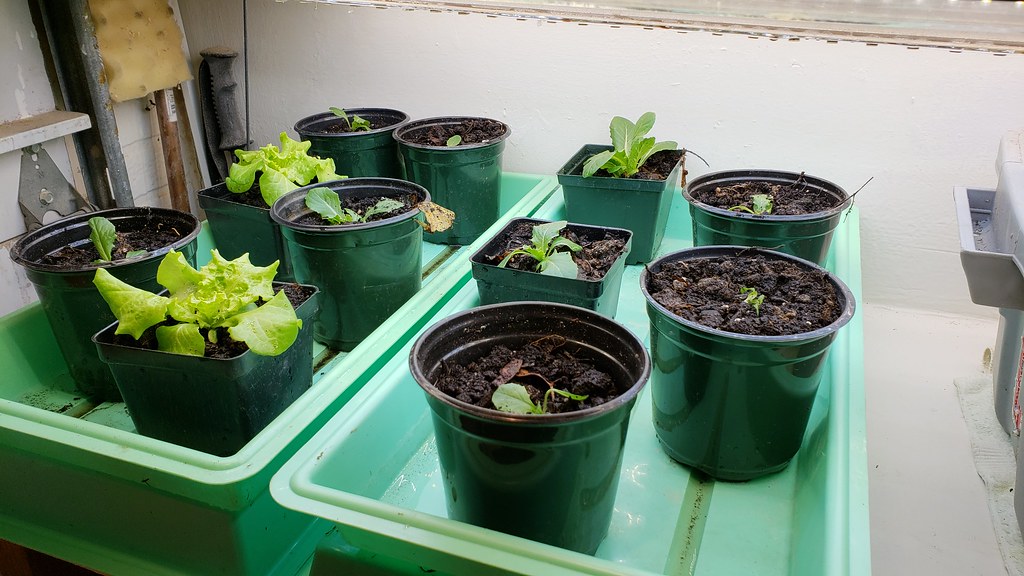
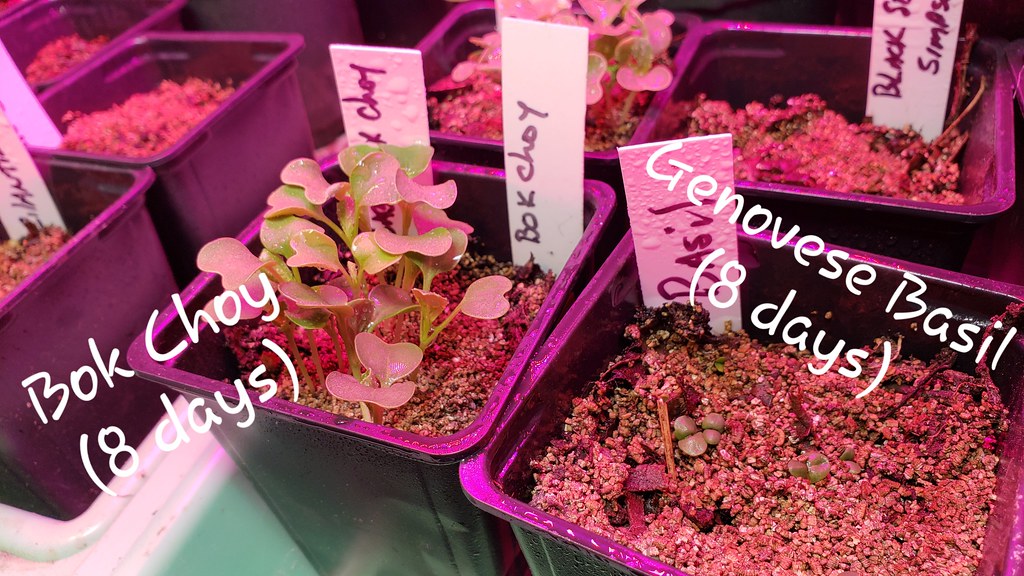
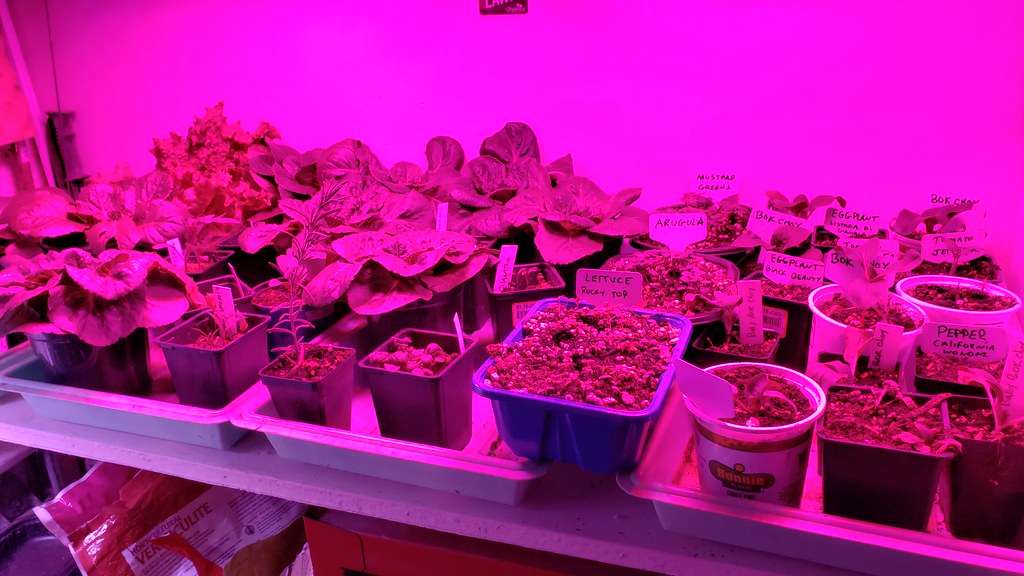
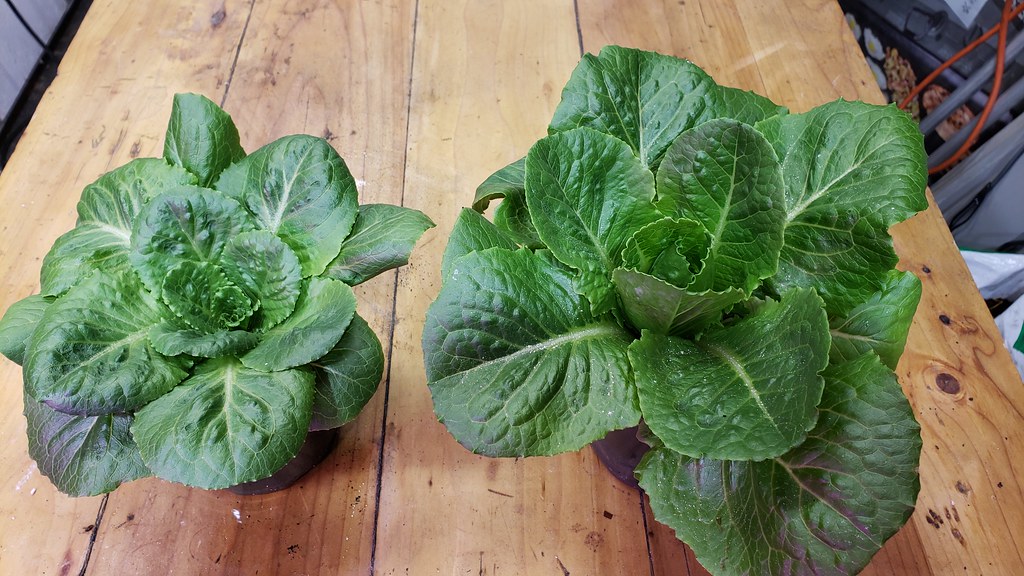
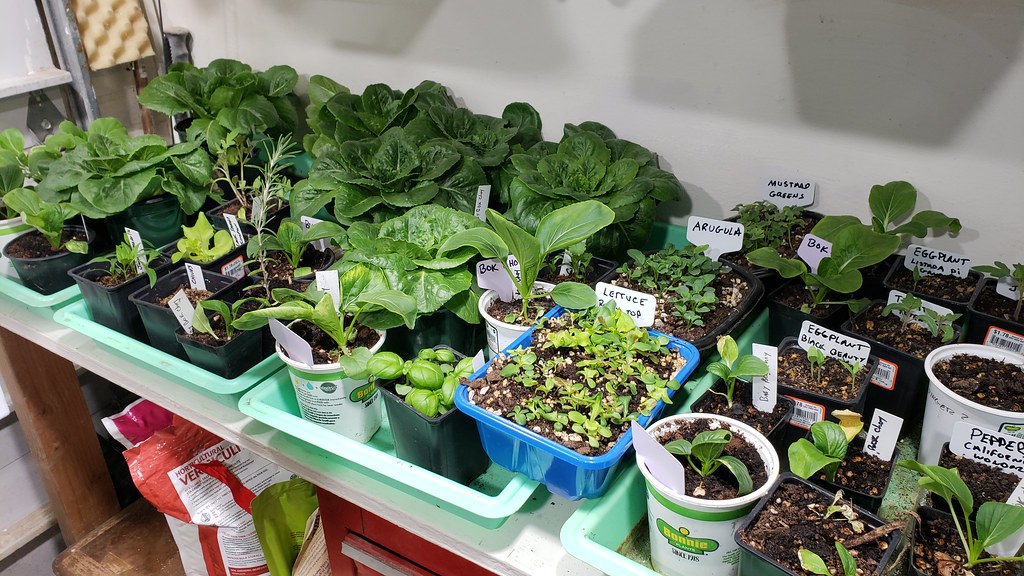
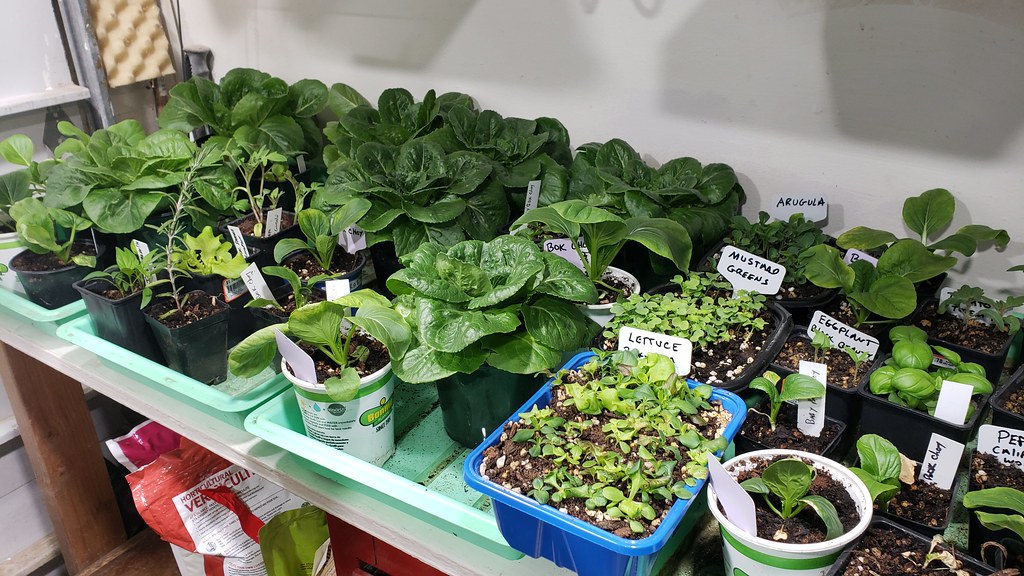
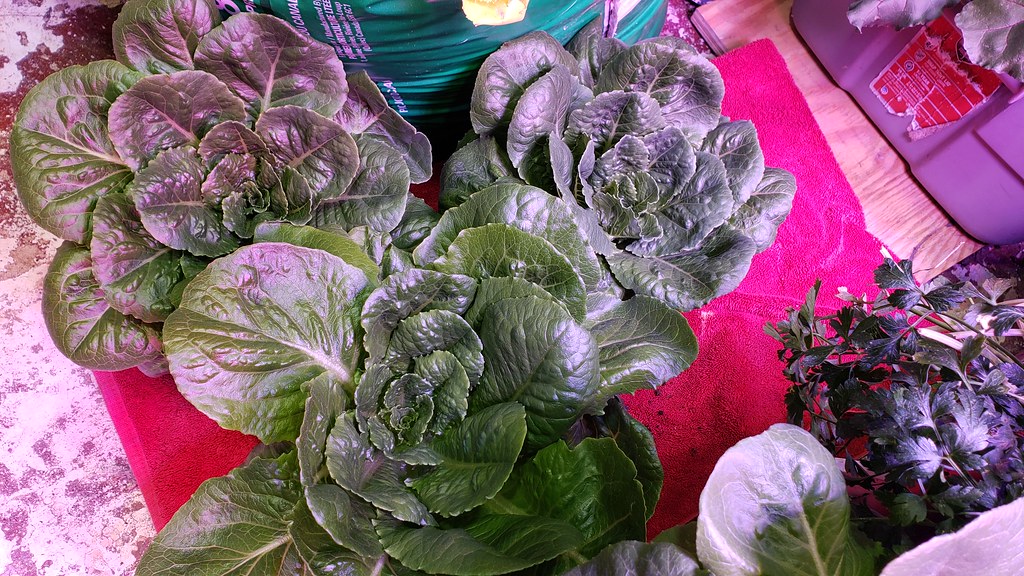
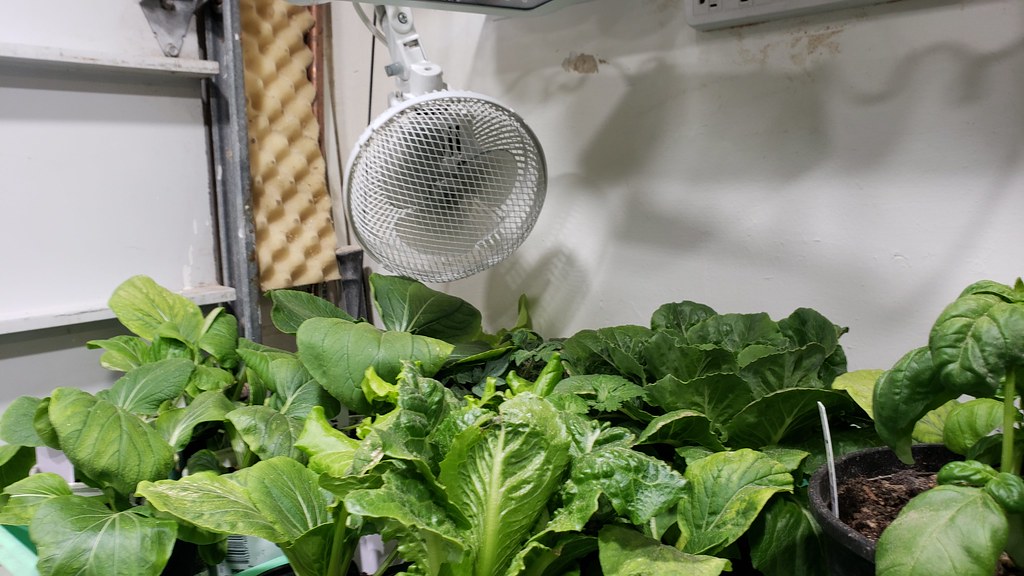
Moved lettuces to individual pots.
Image


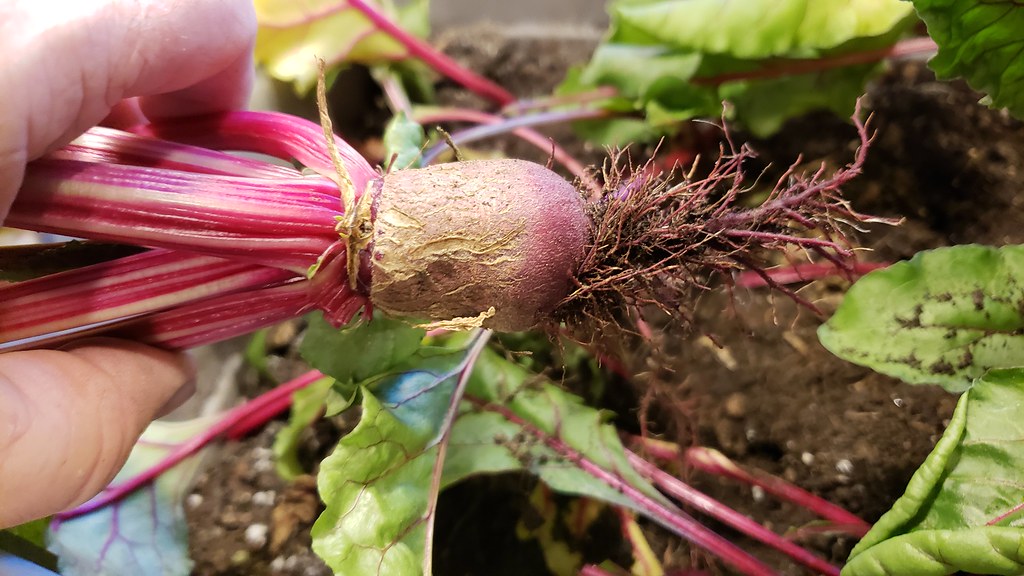
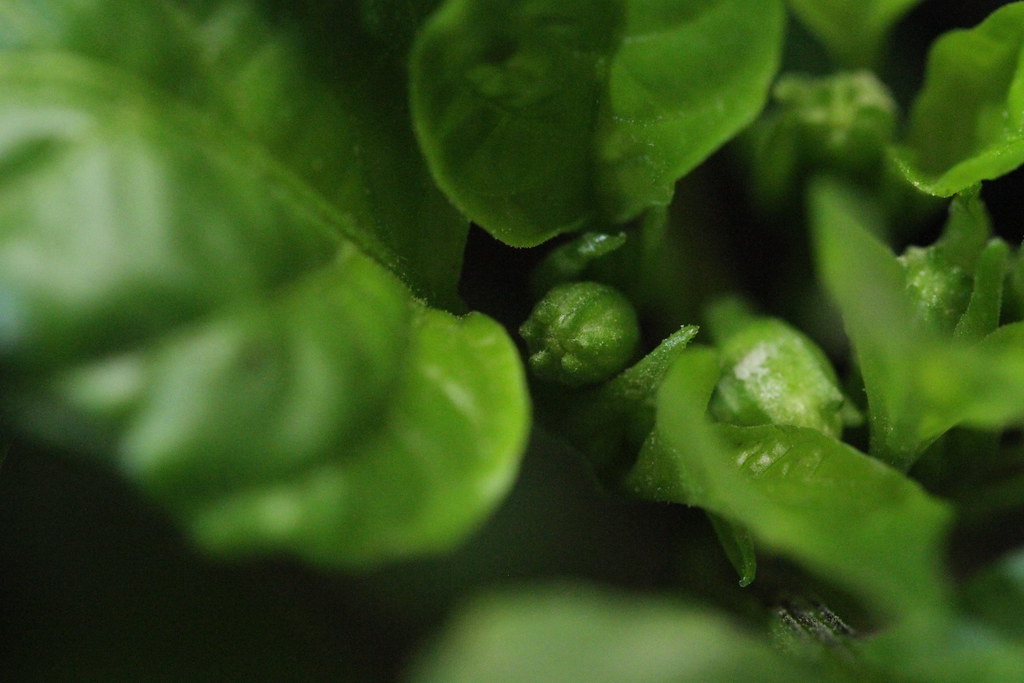
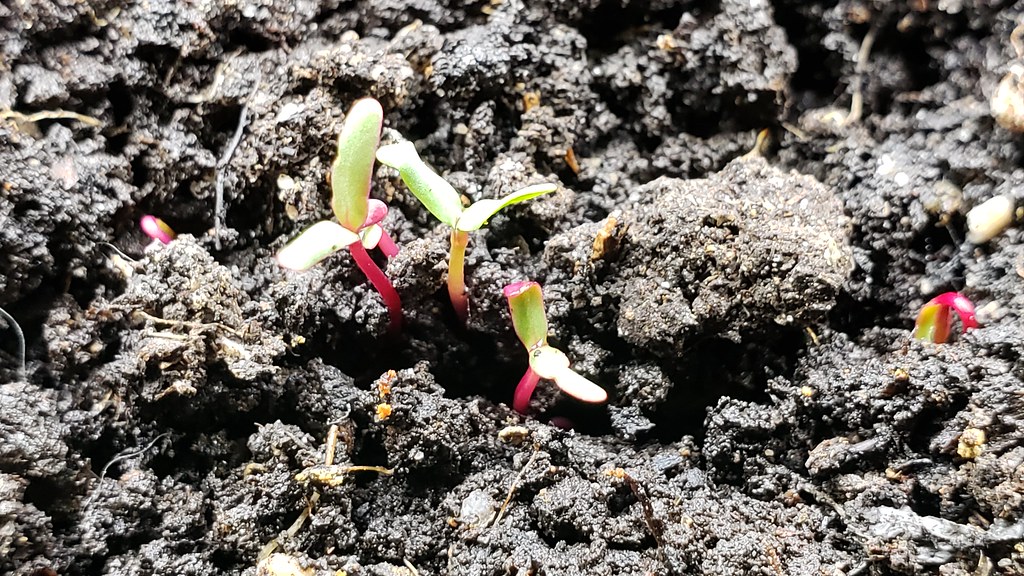
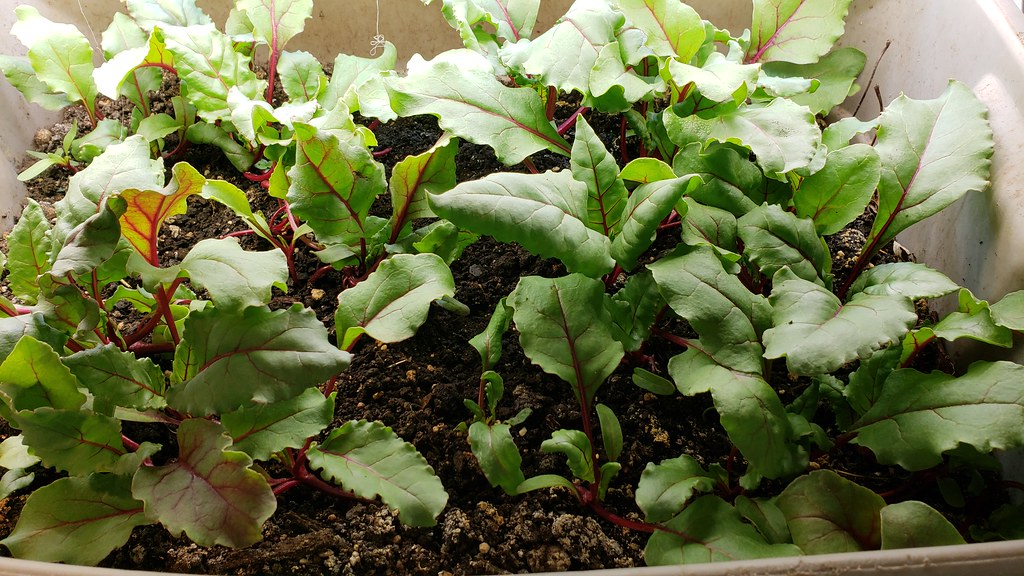
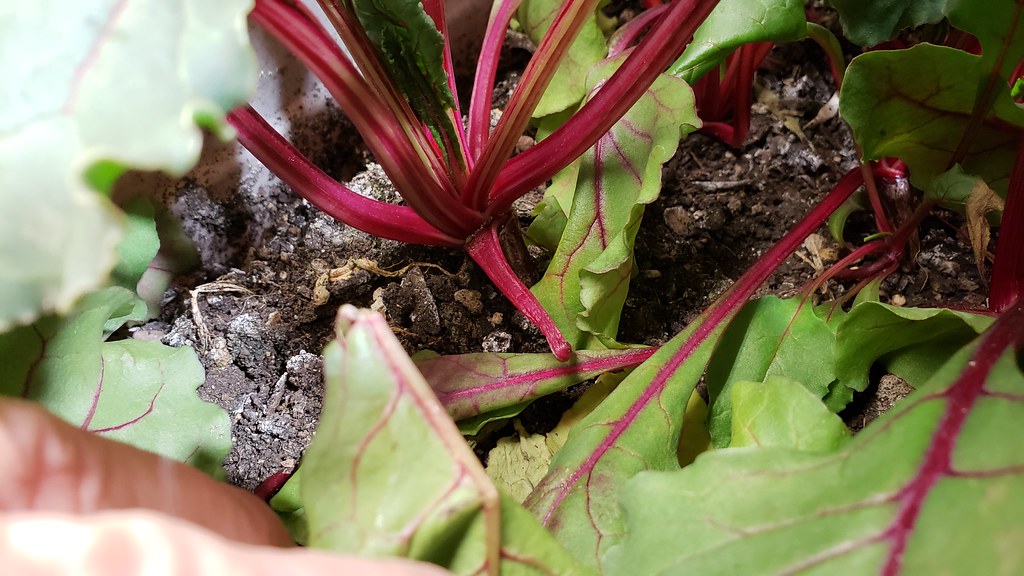
Beets seem to be doing well
Image


December 17th, 2018


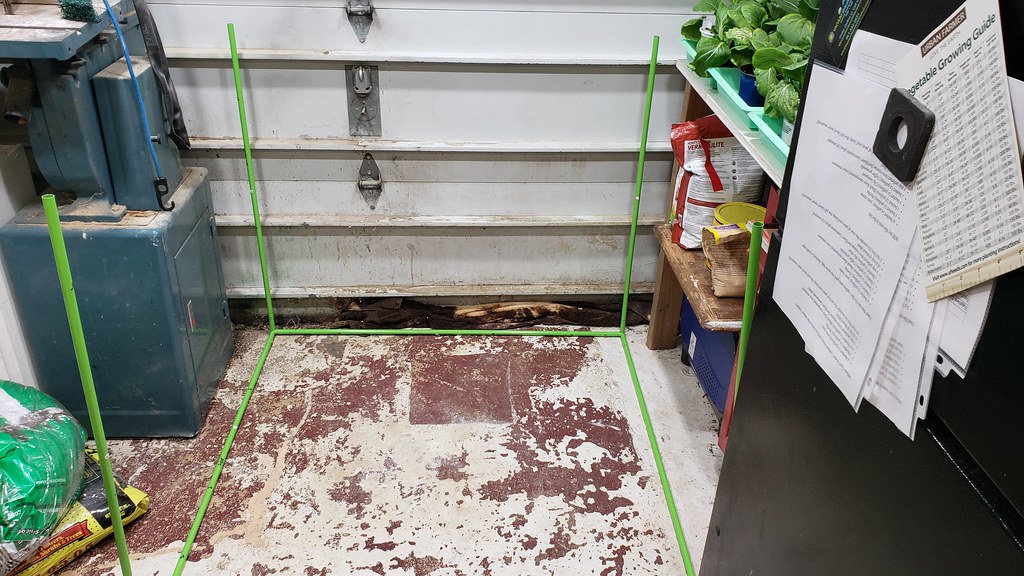
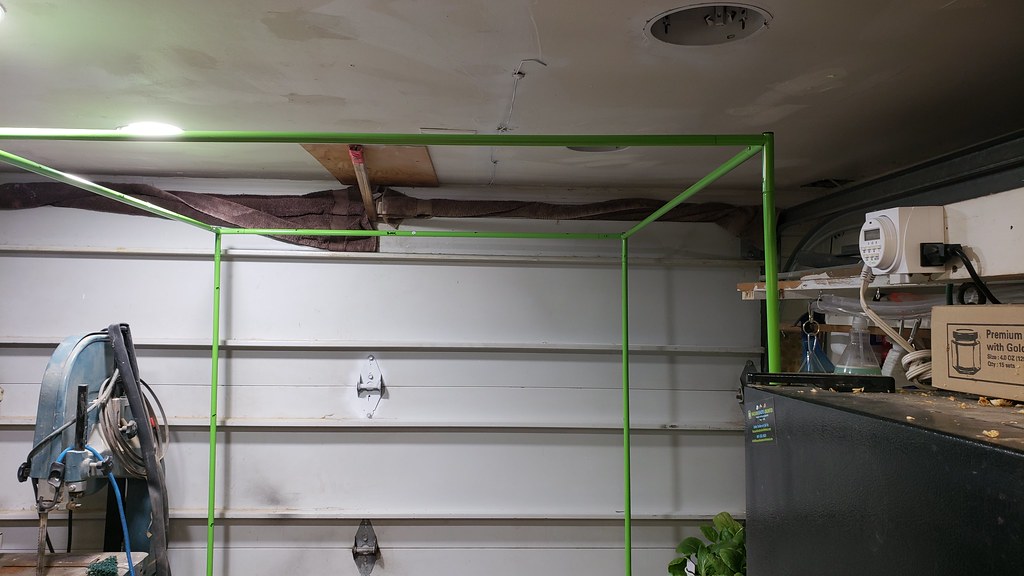
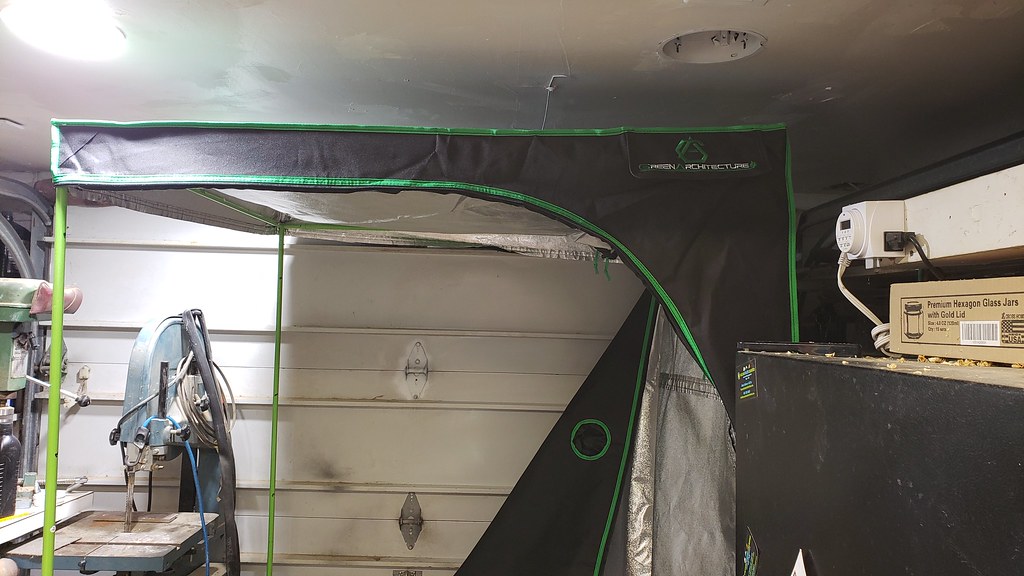
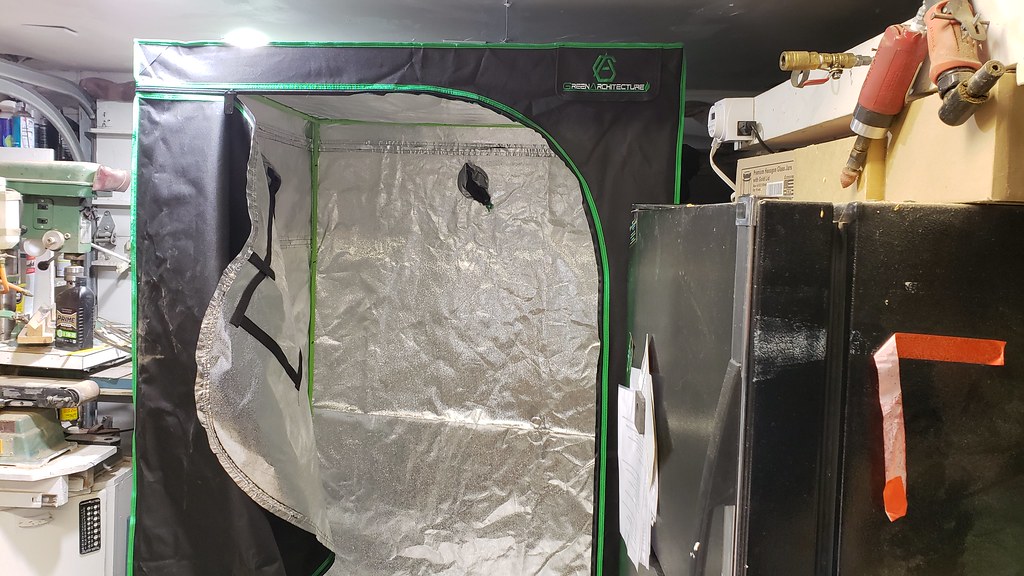
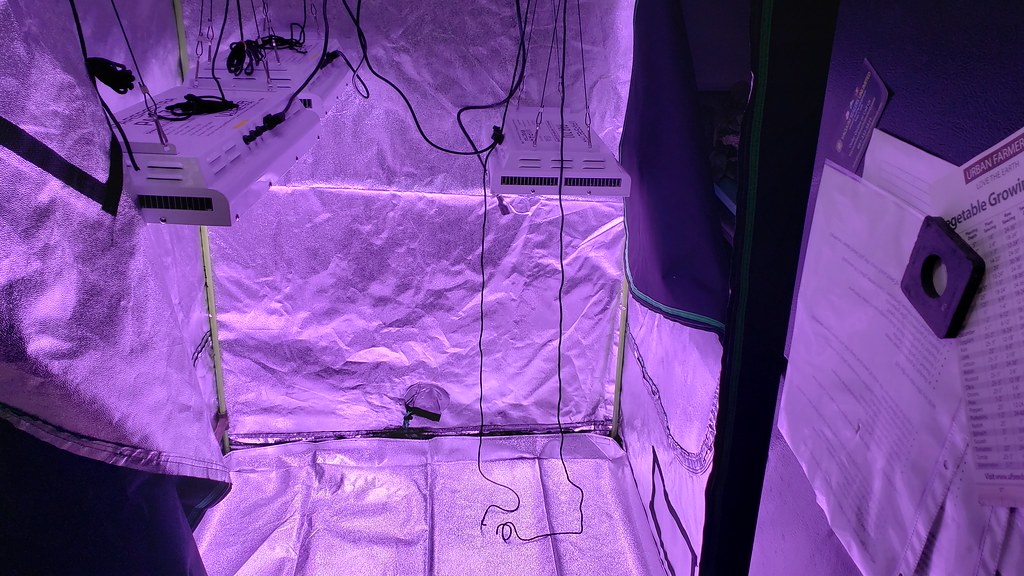
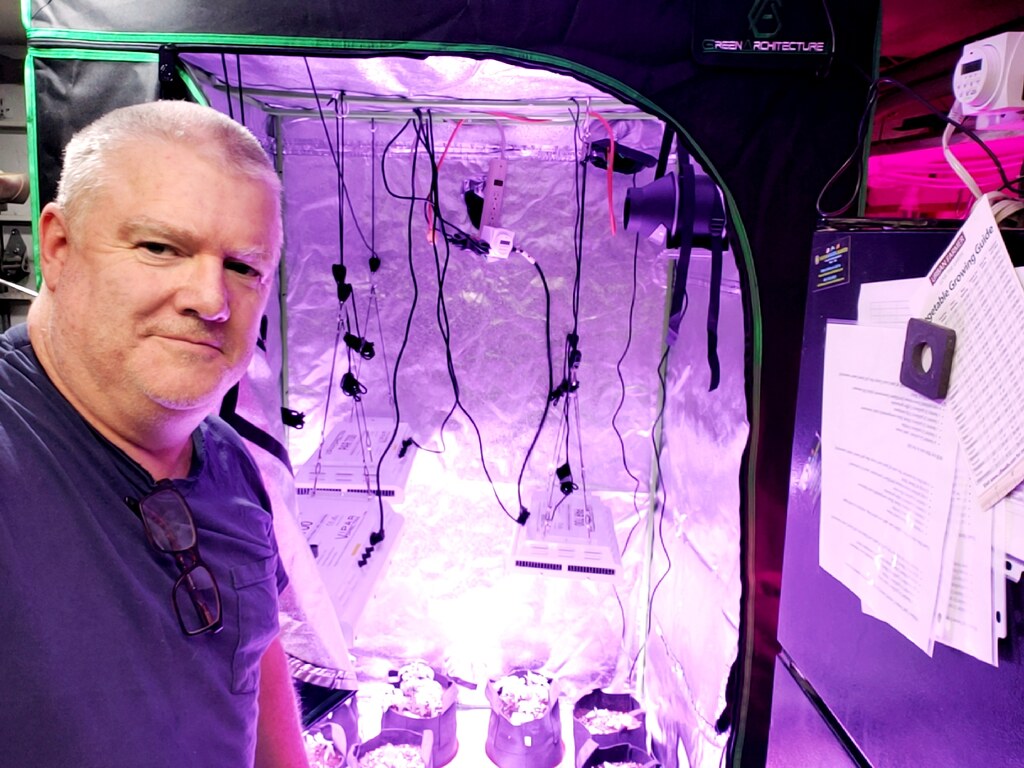
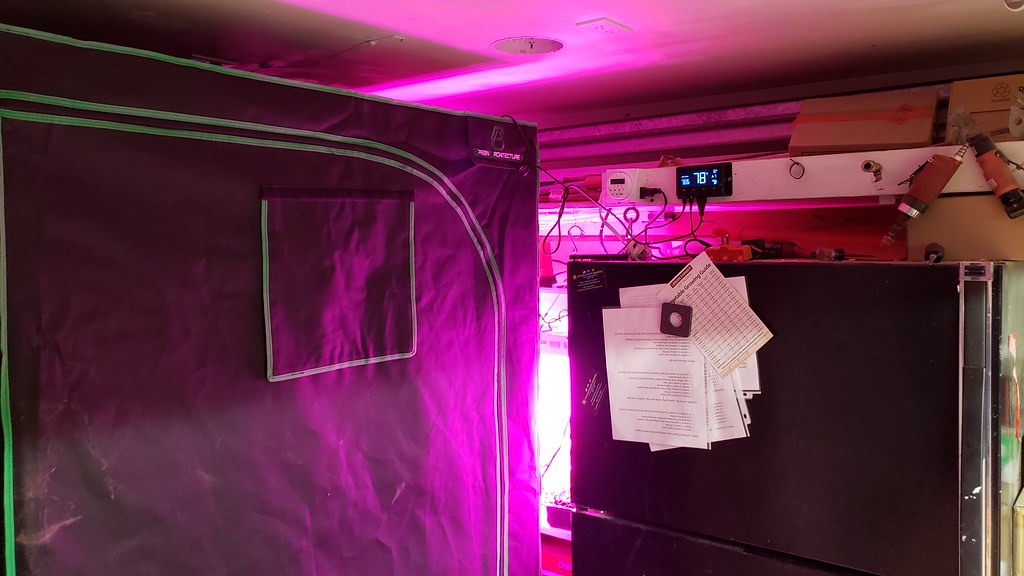
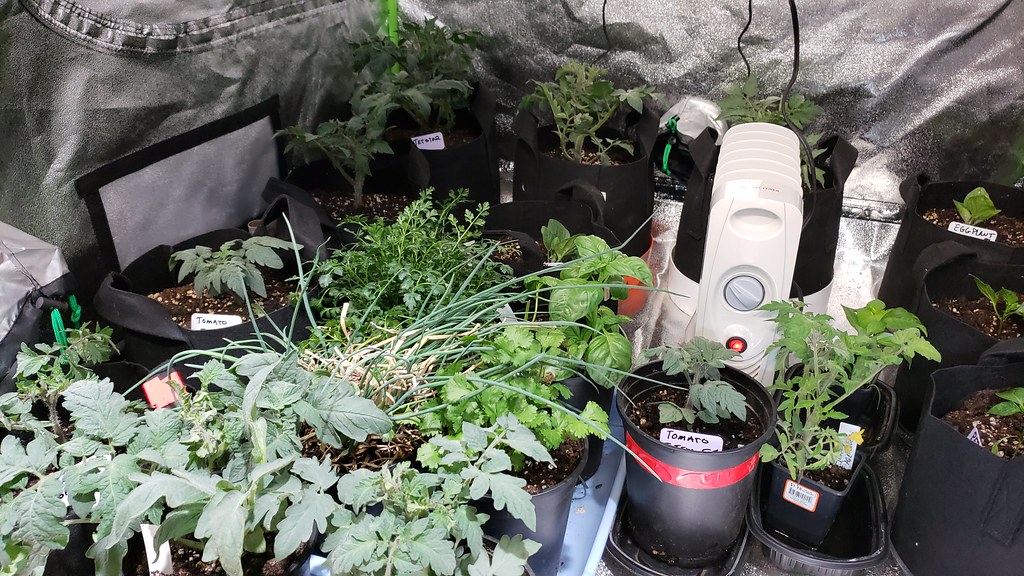
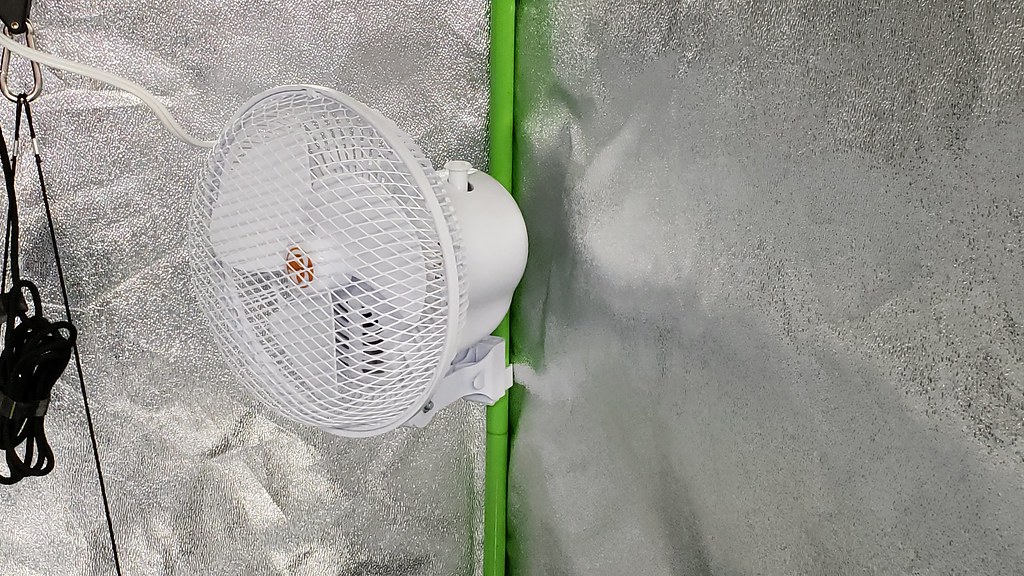
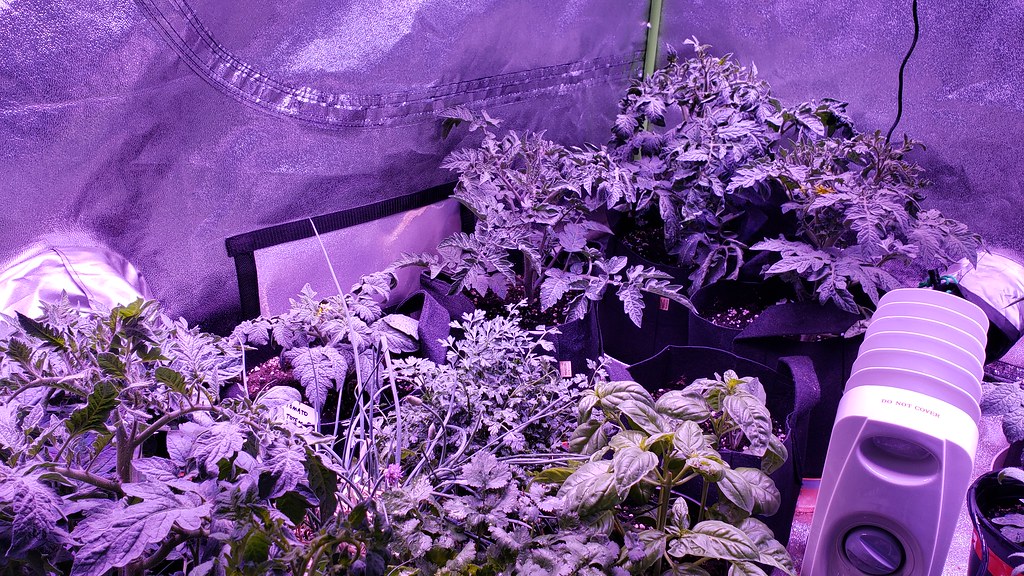
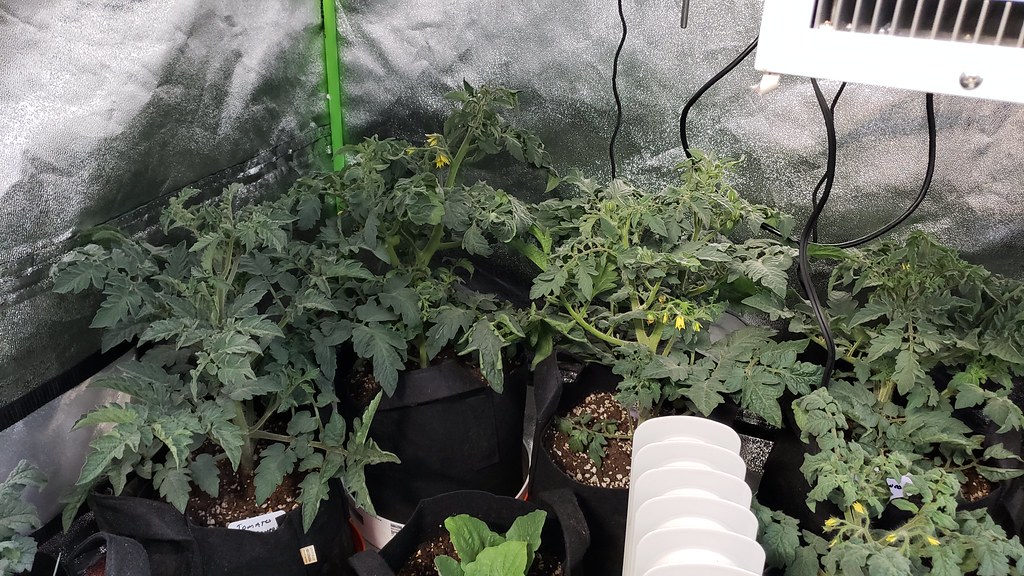
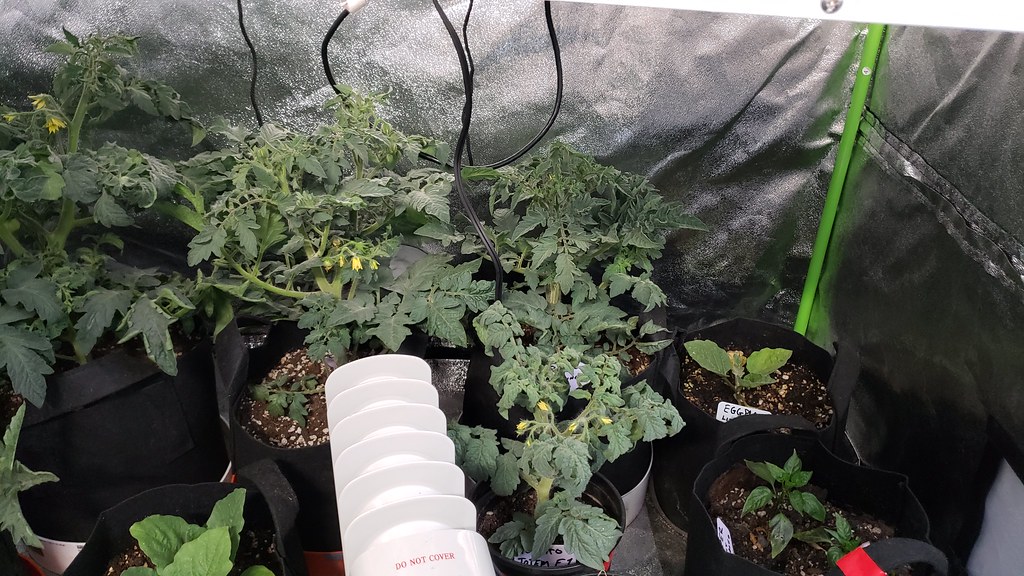
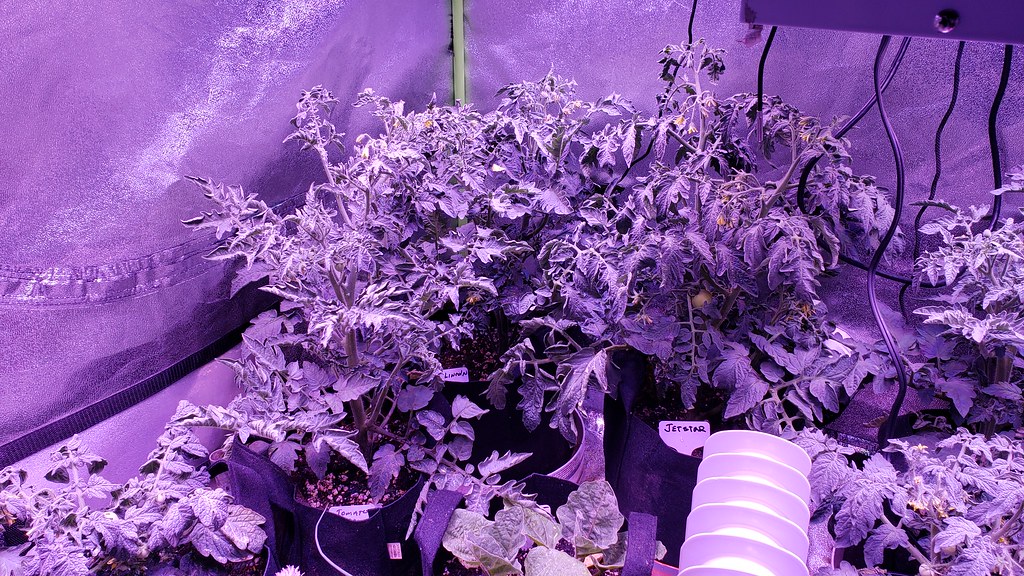
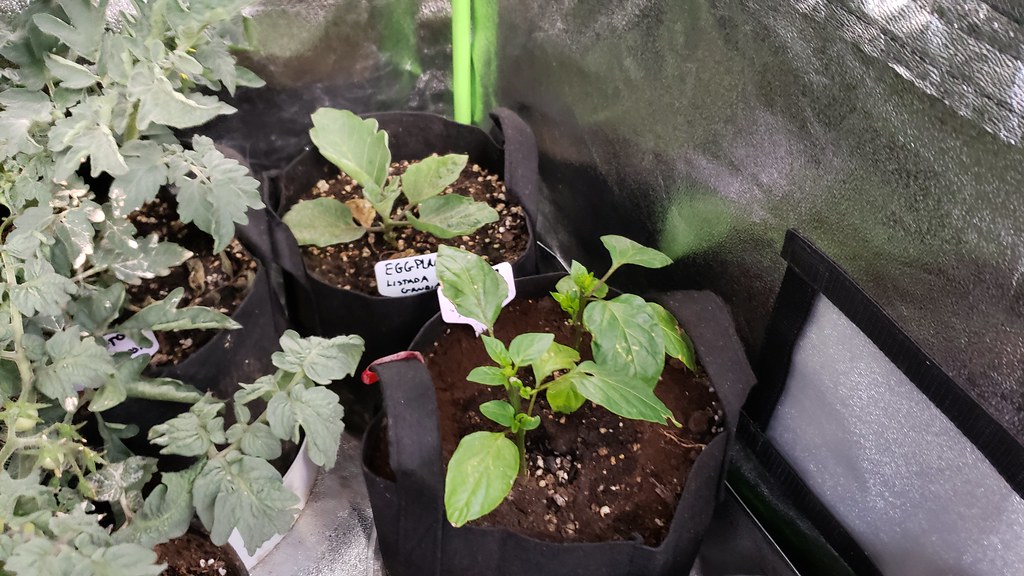
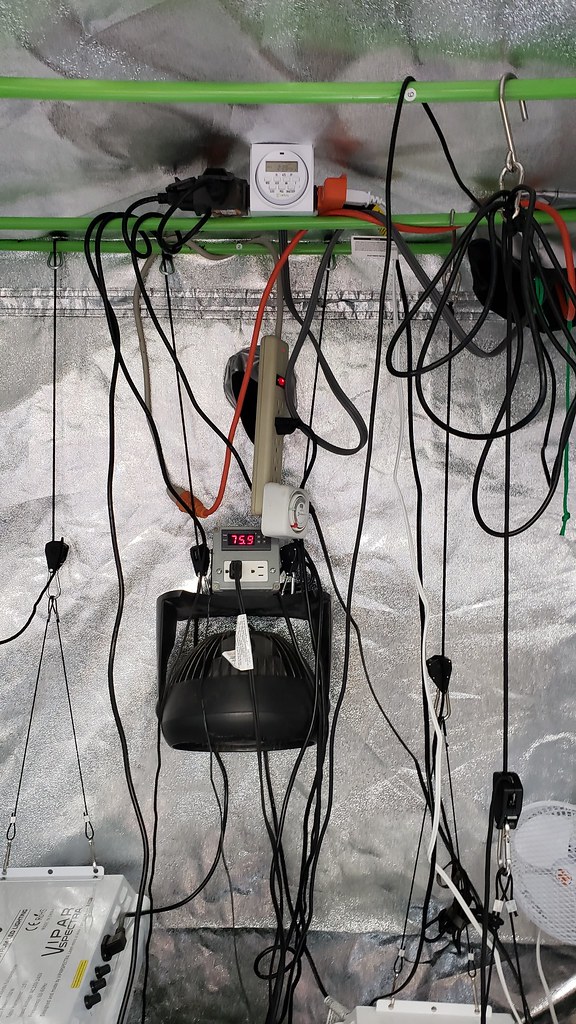
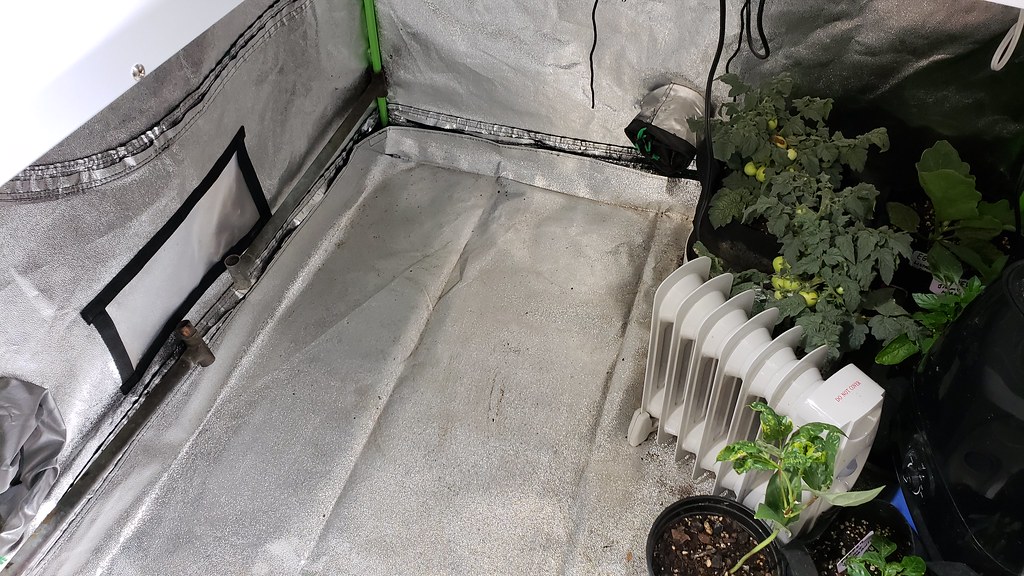
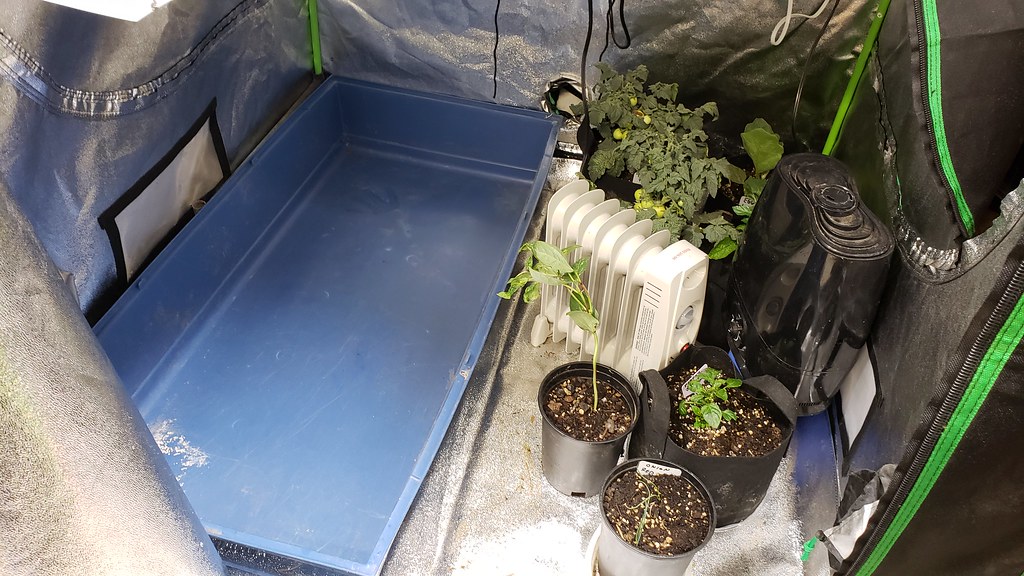
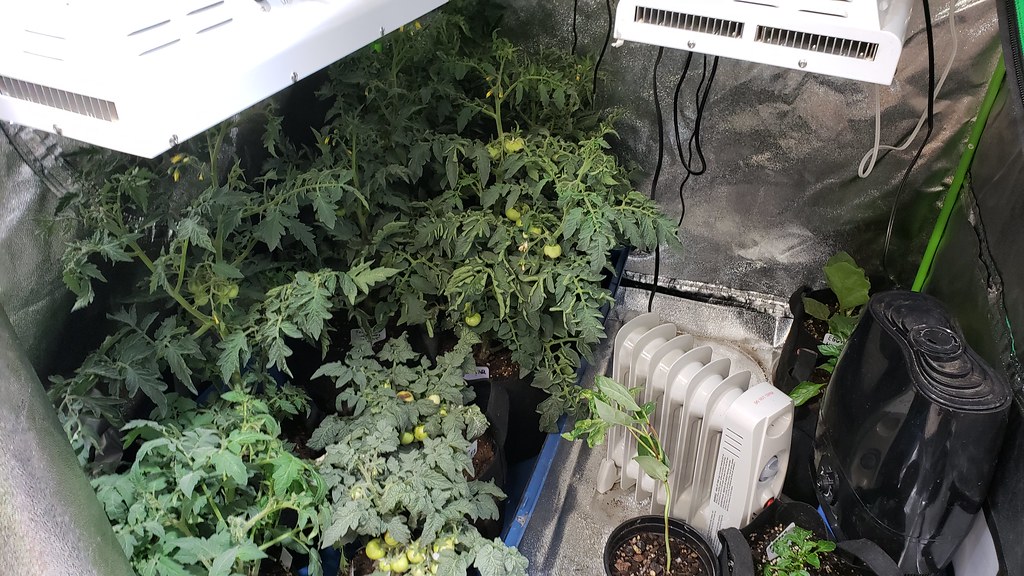
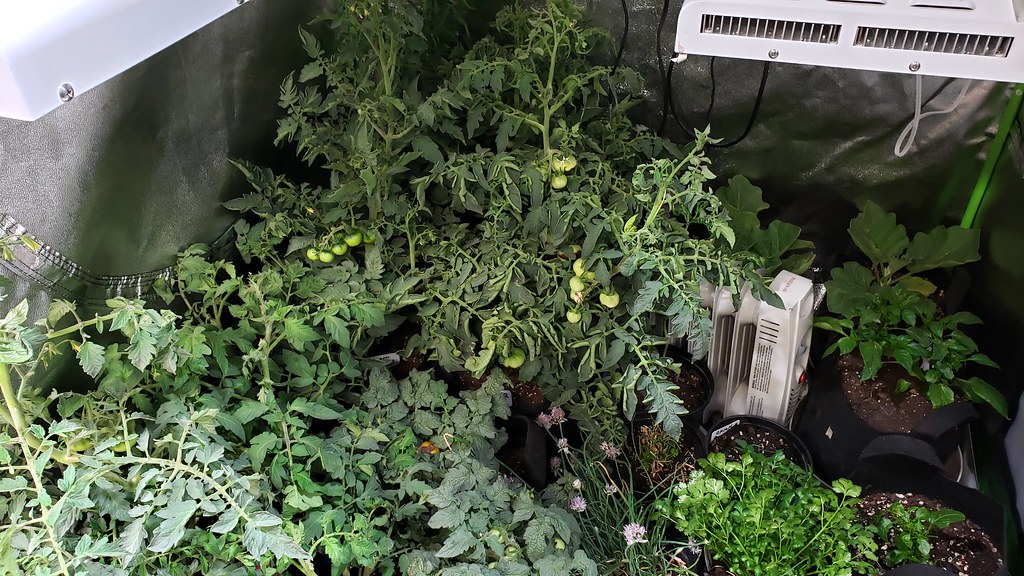
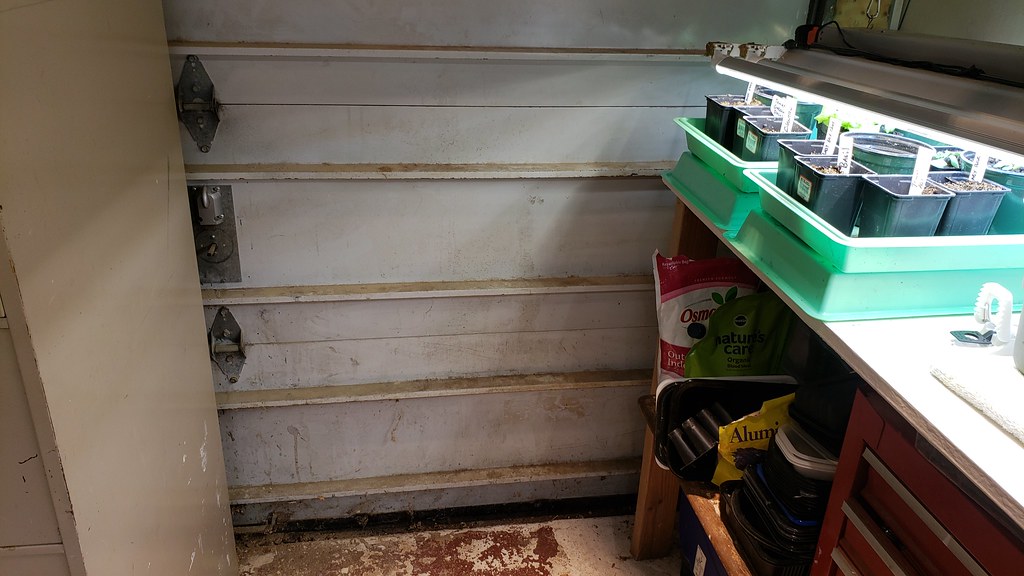
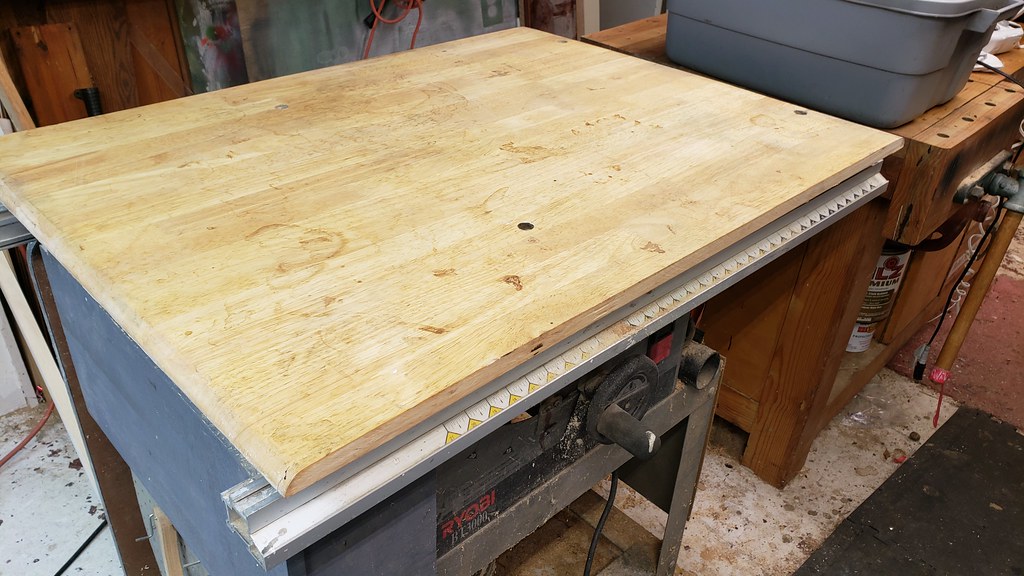
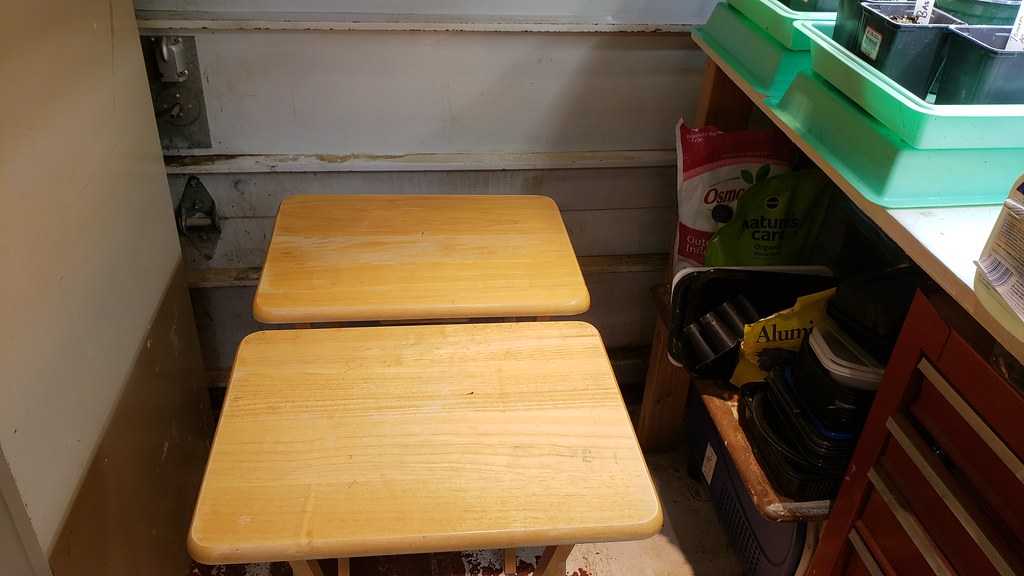
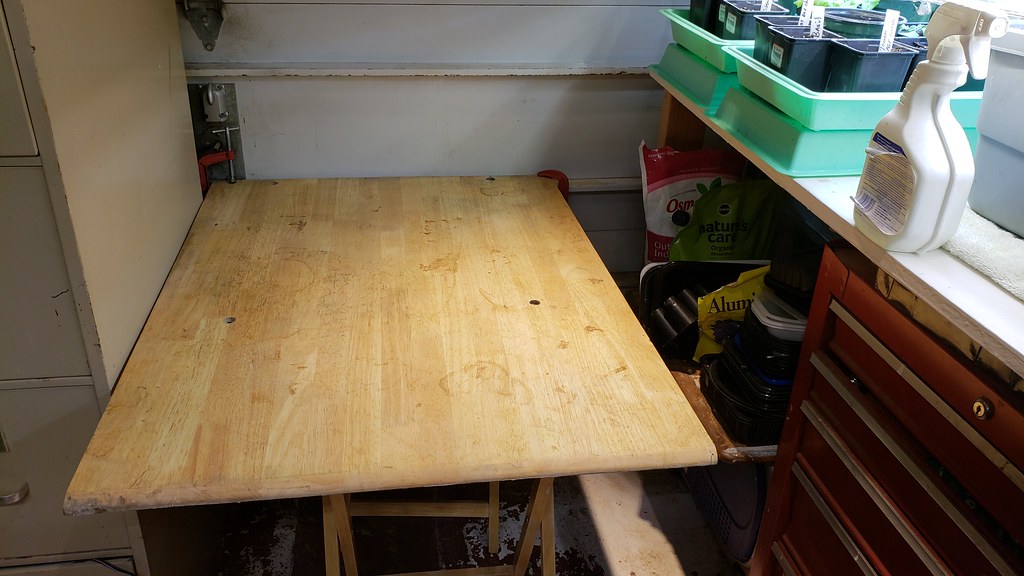
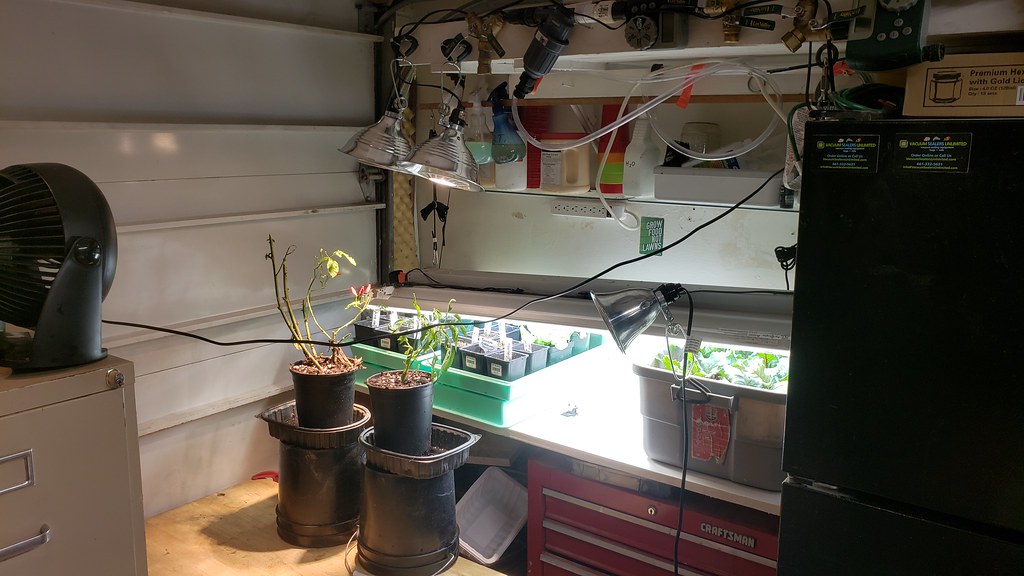
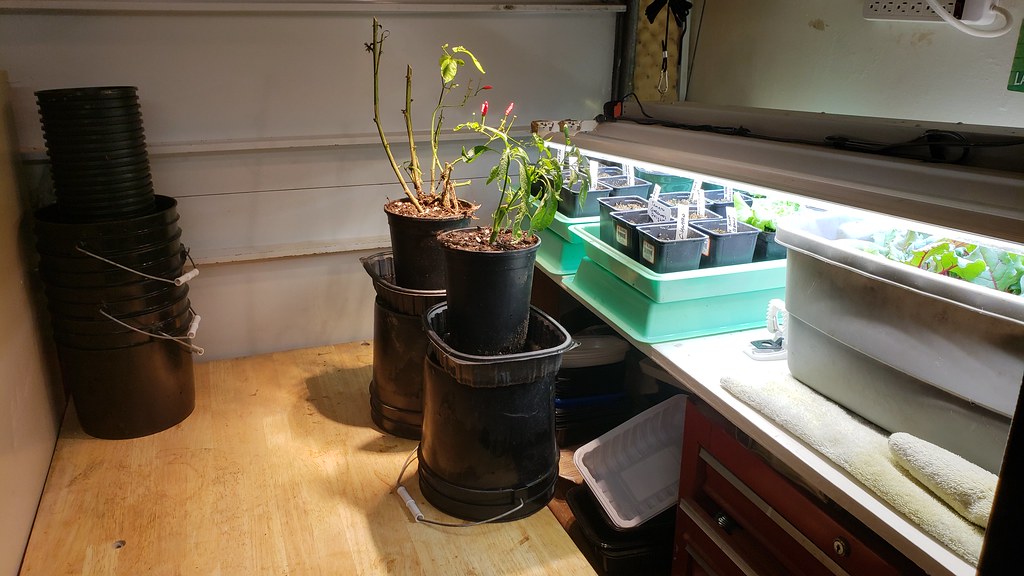
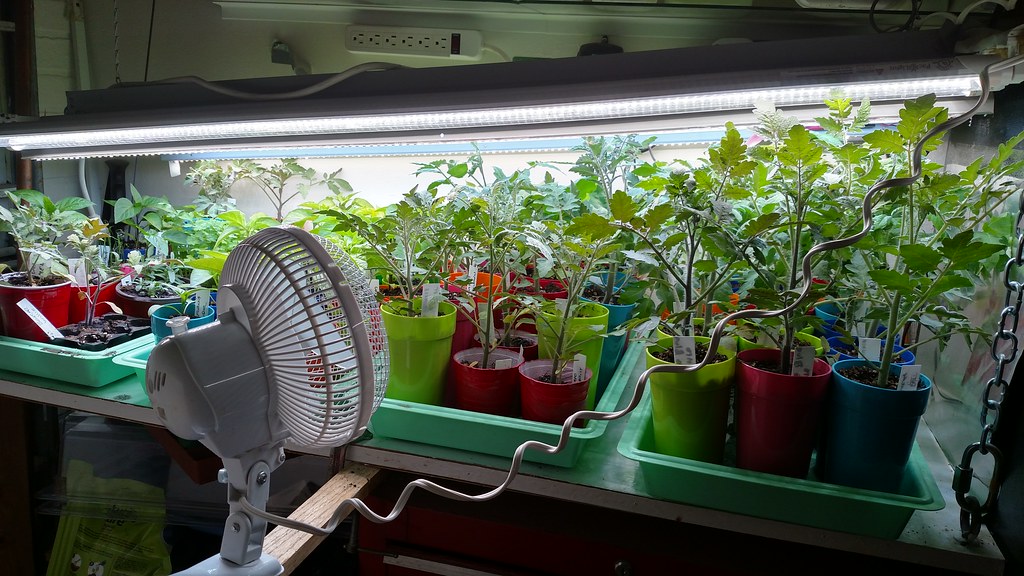
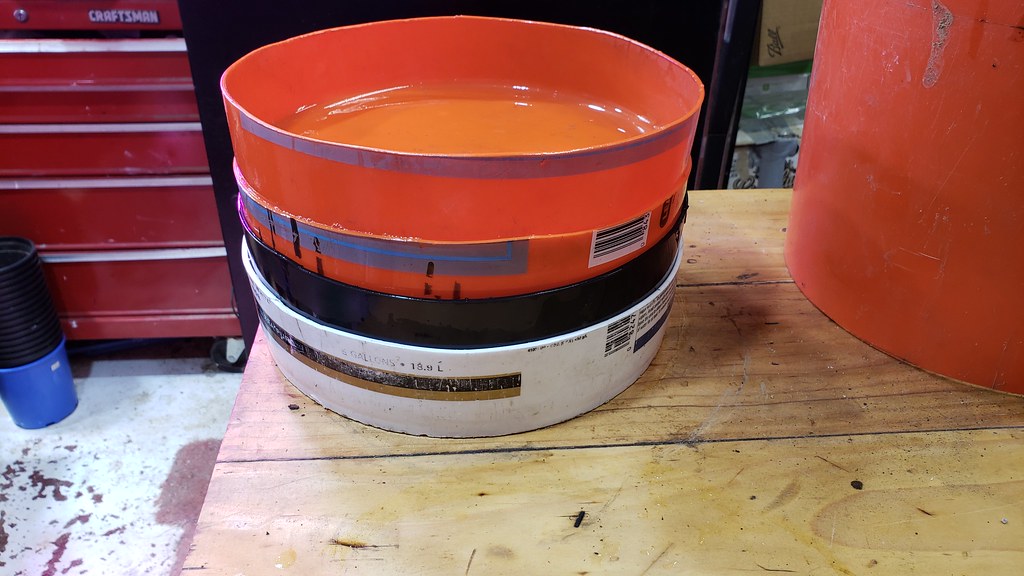
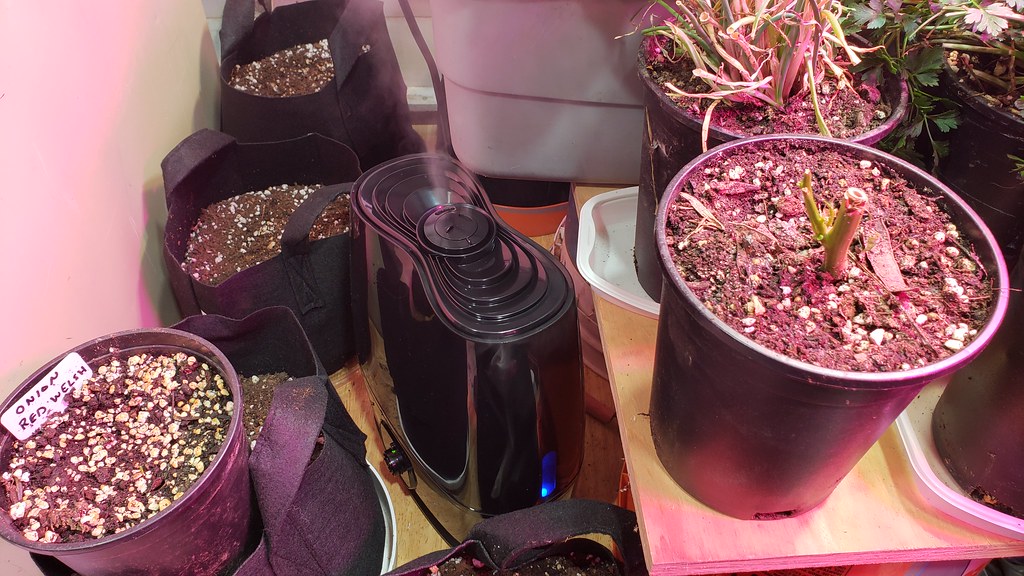
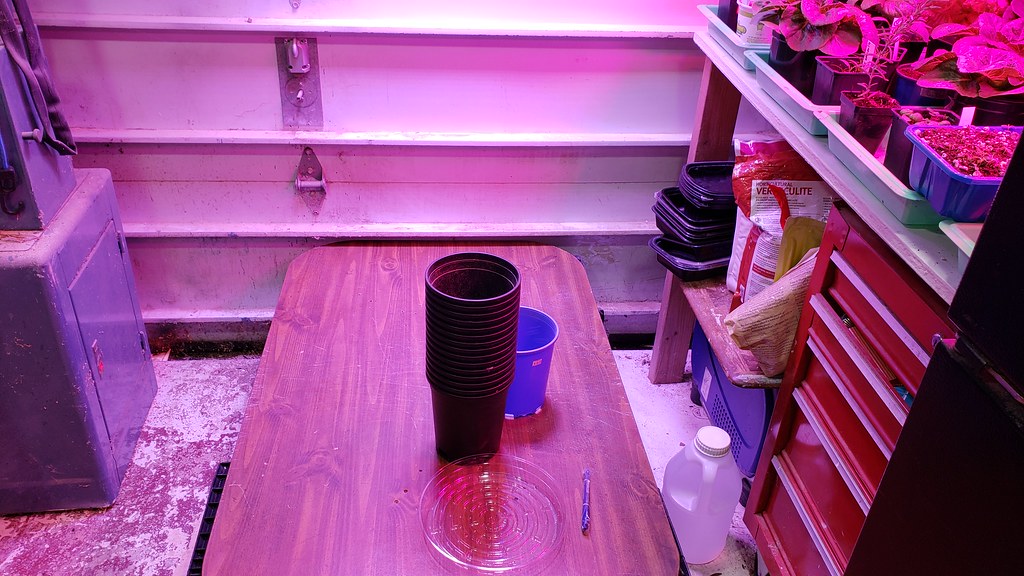
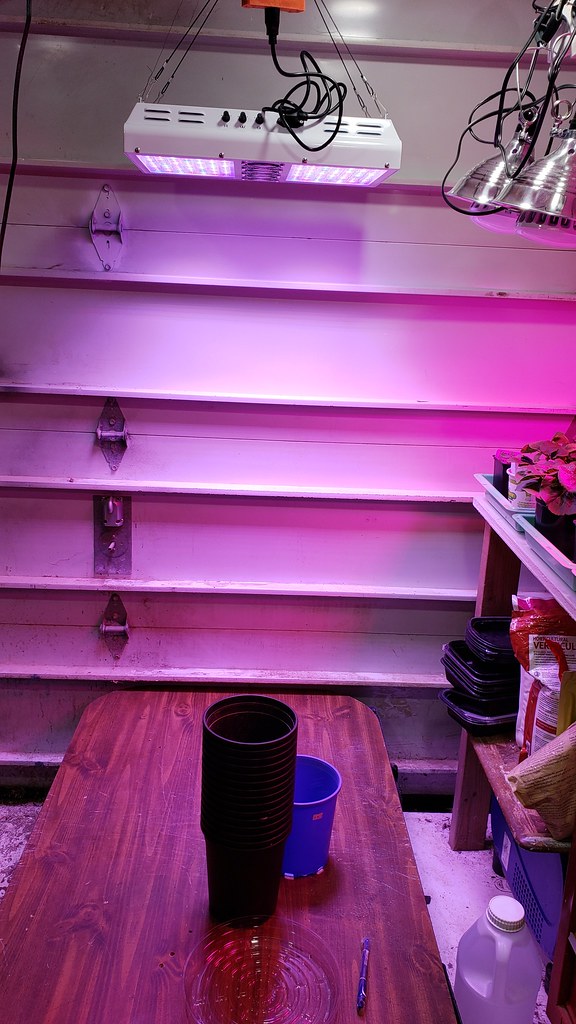
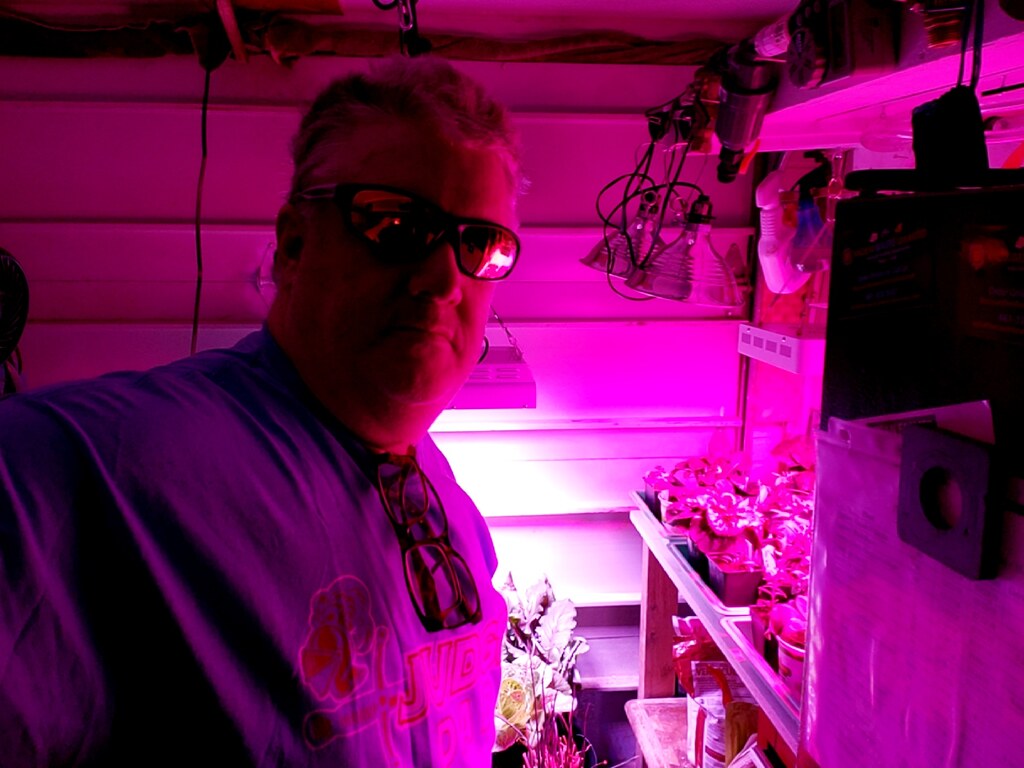
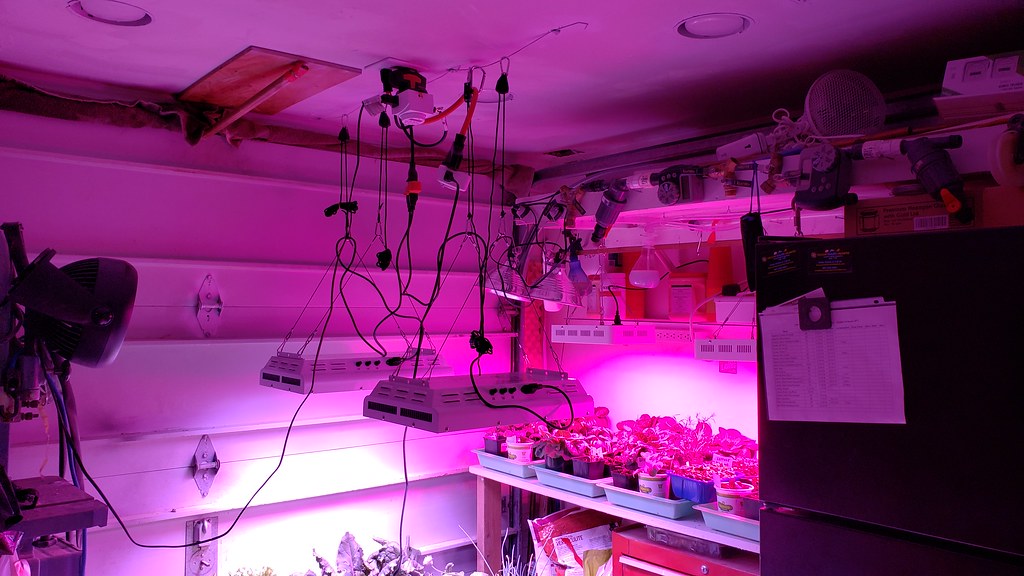
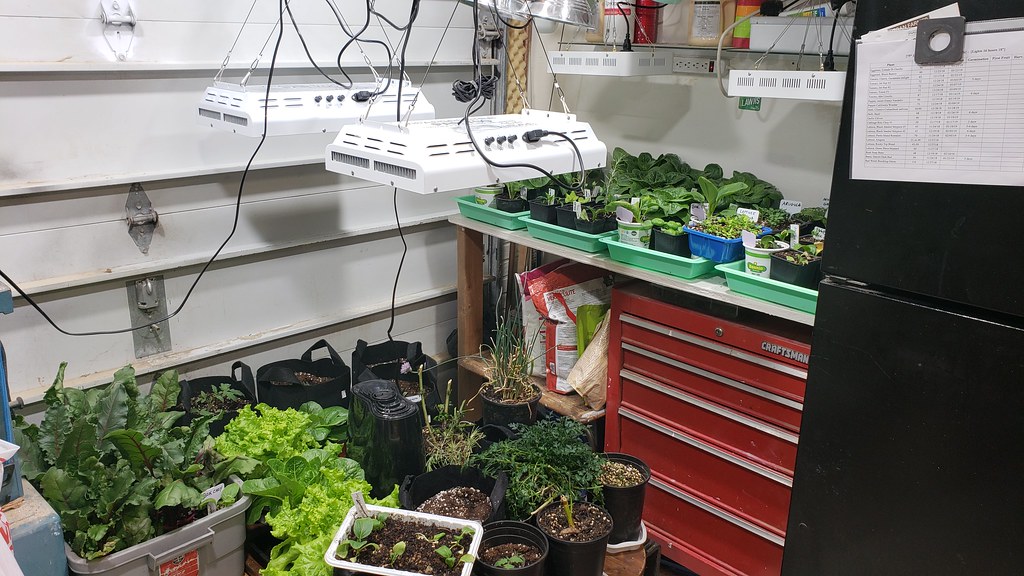
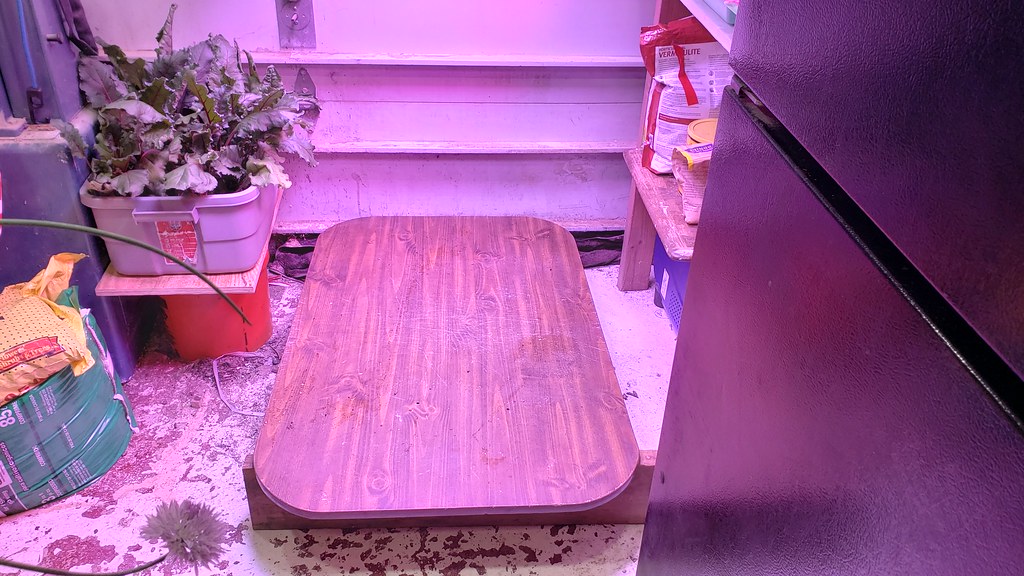
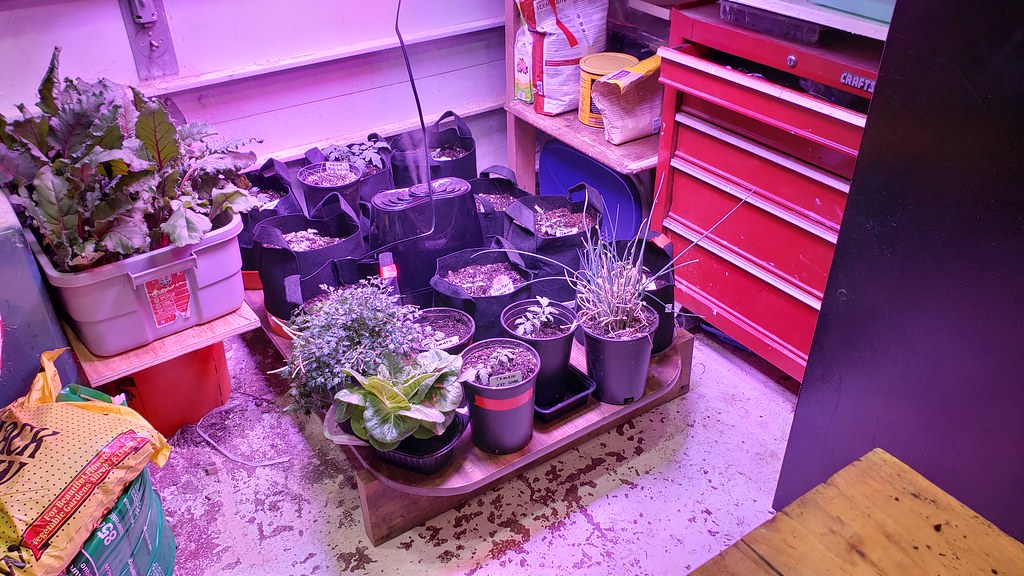
New grow area setup and trials


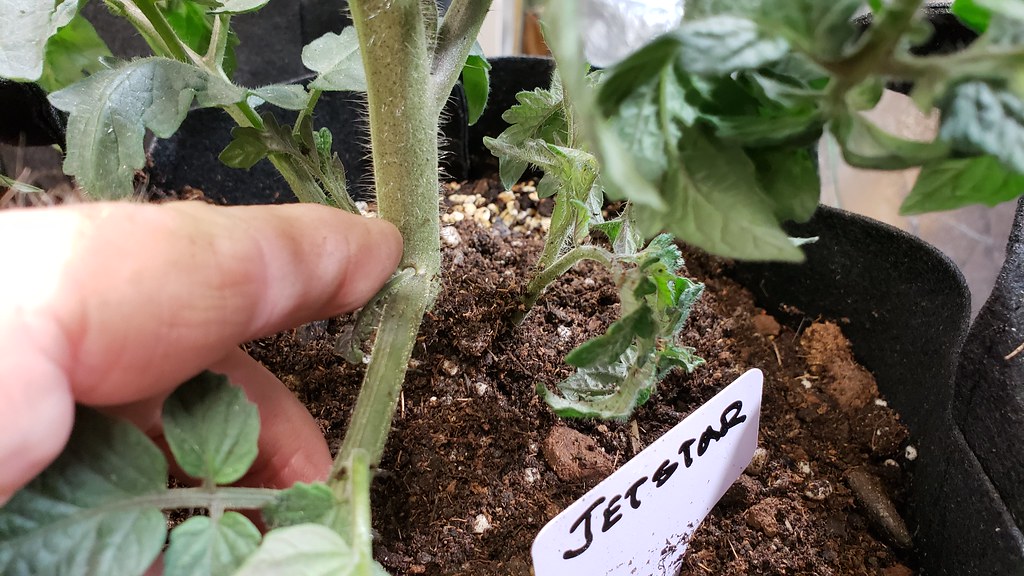
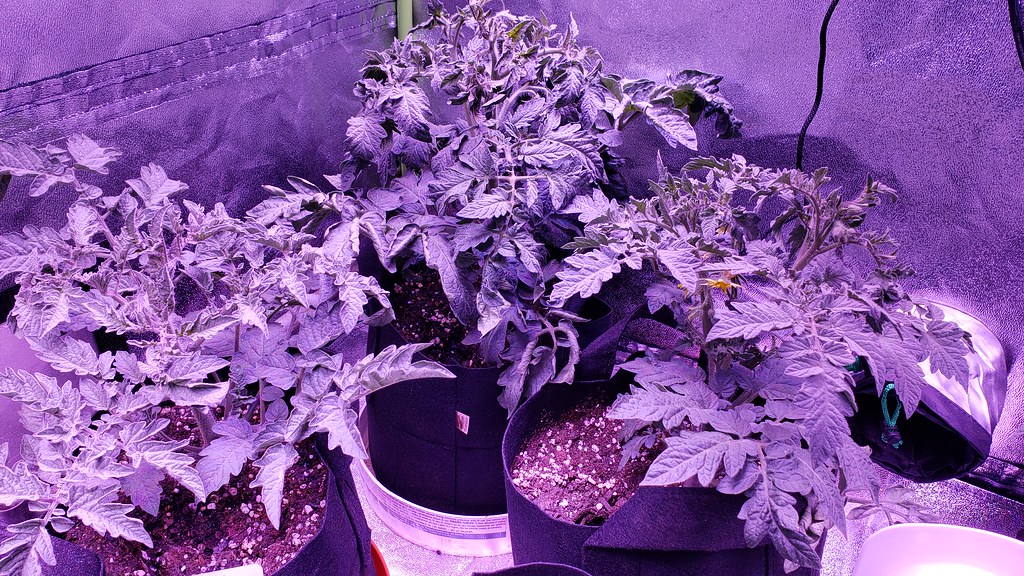
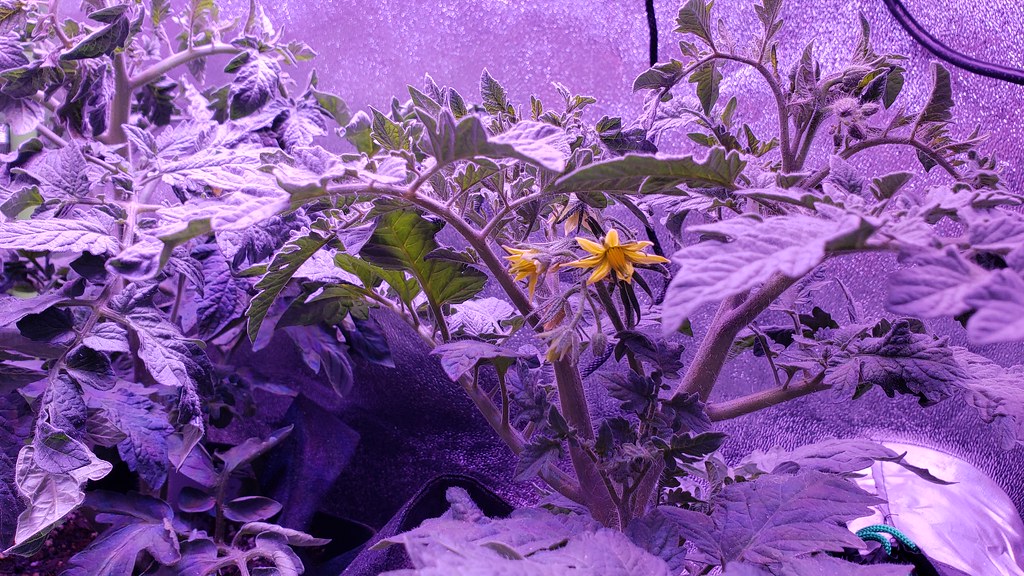
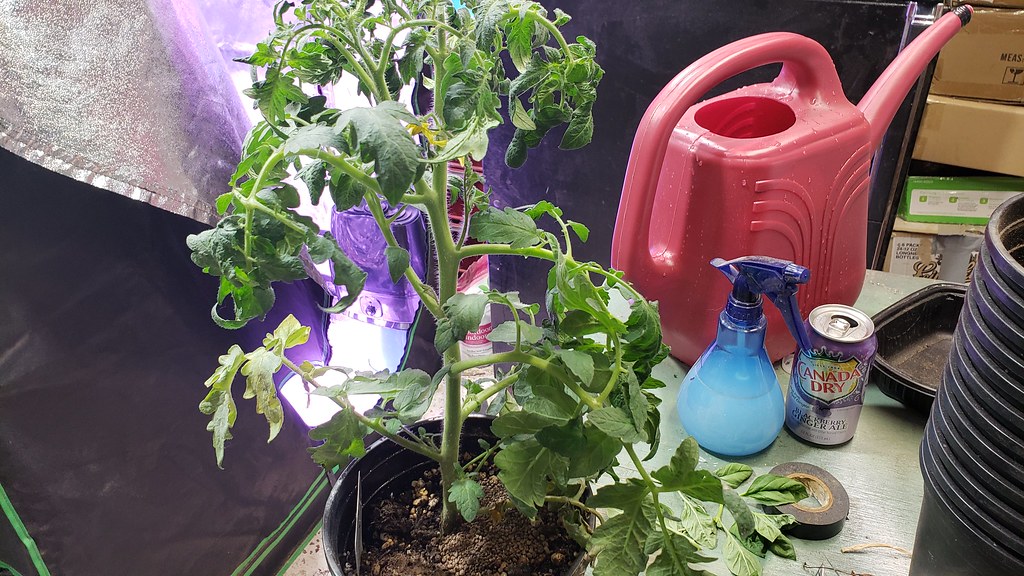
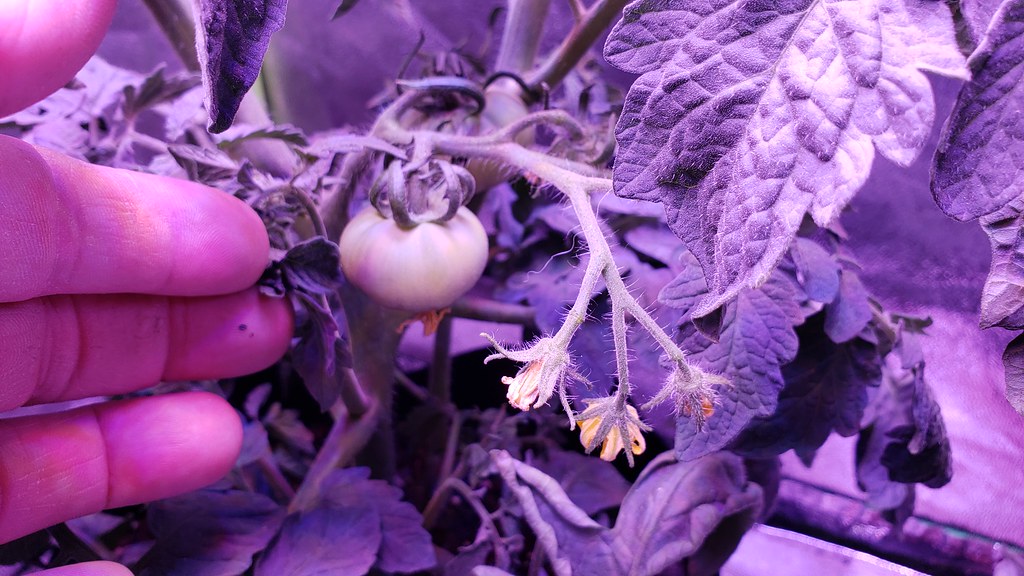
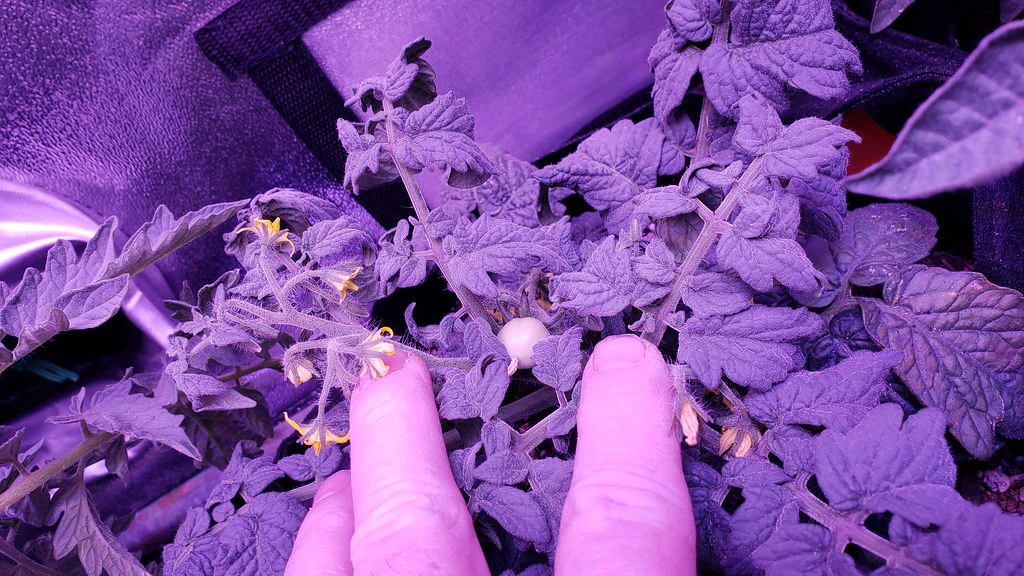
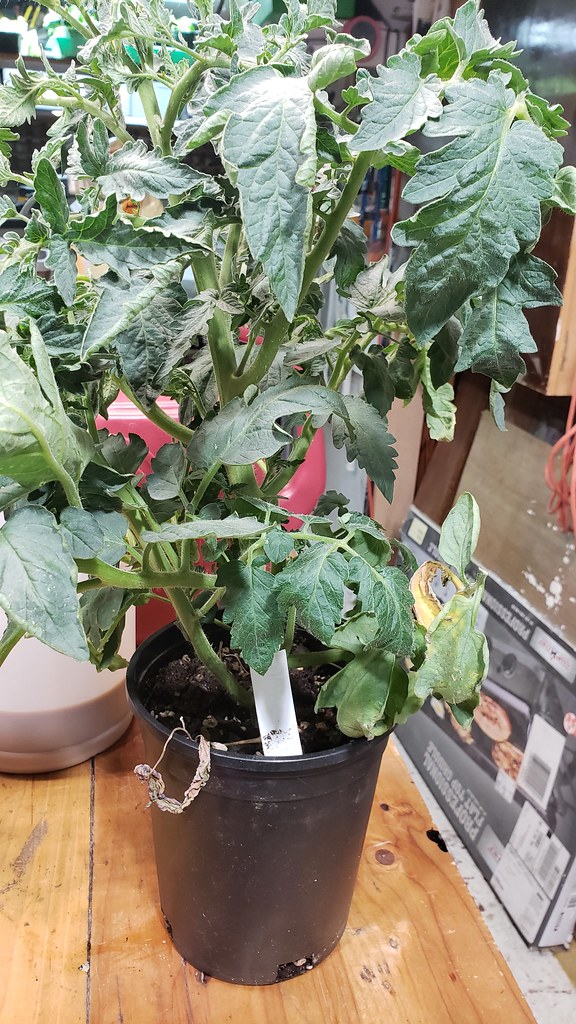
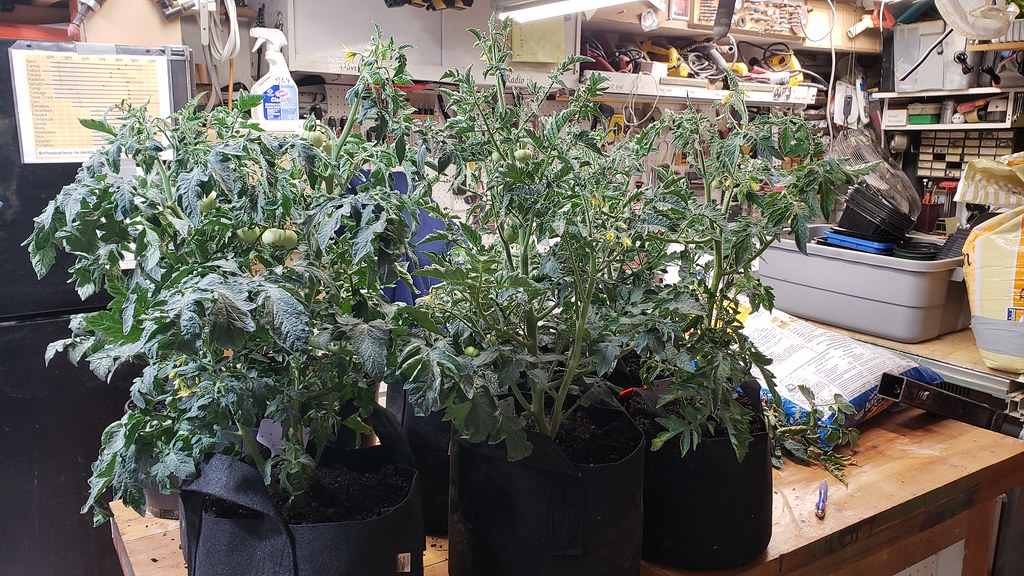
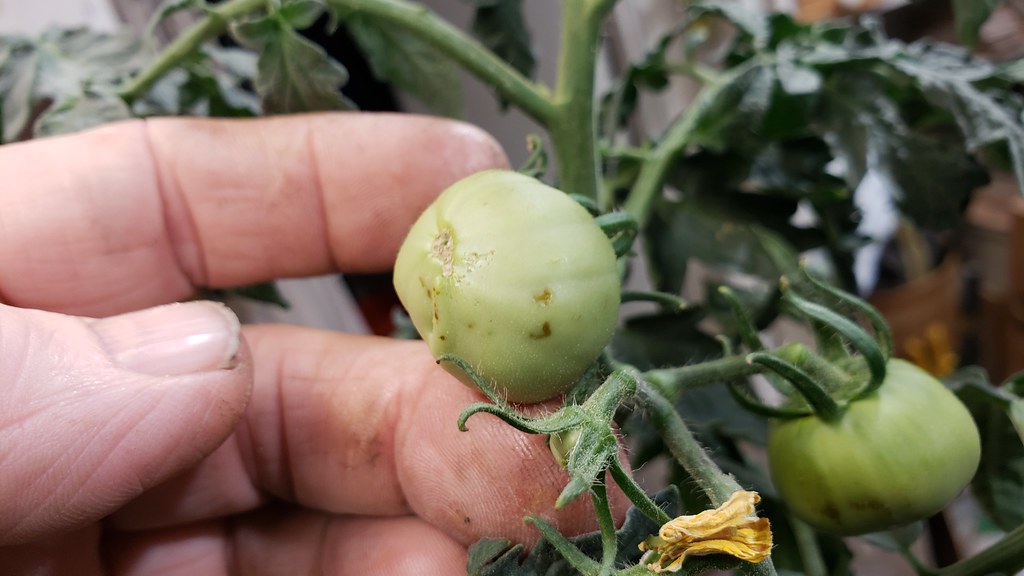
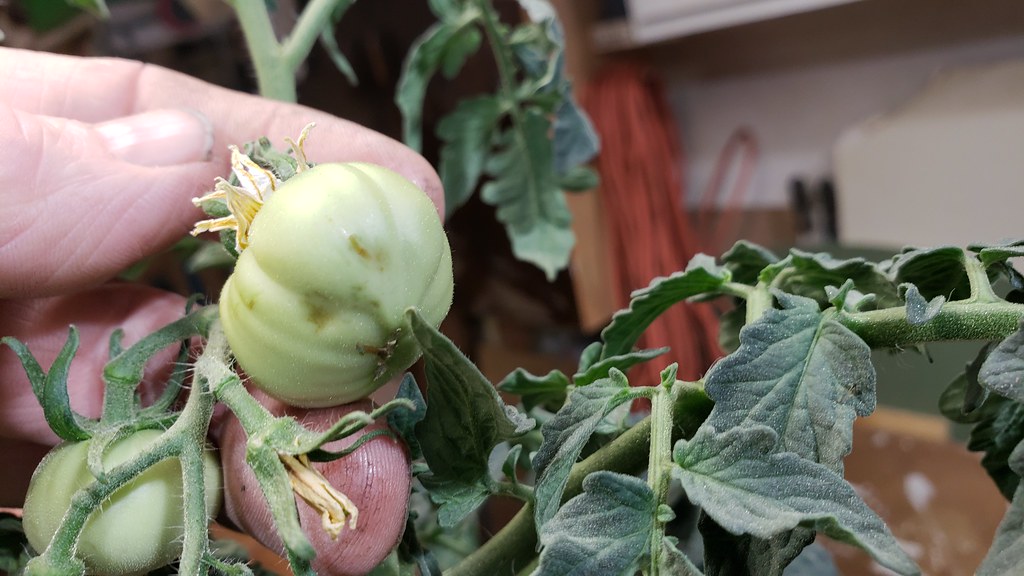
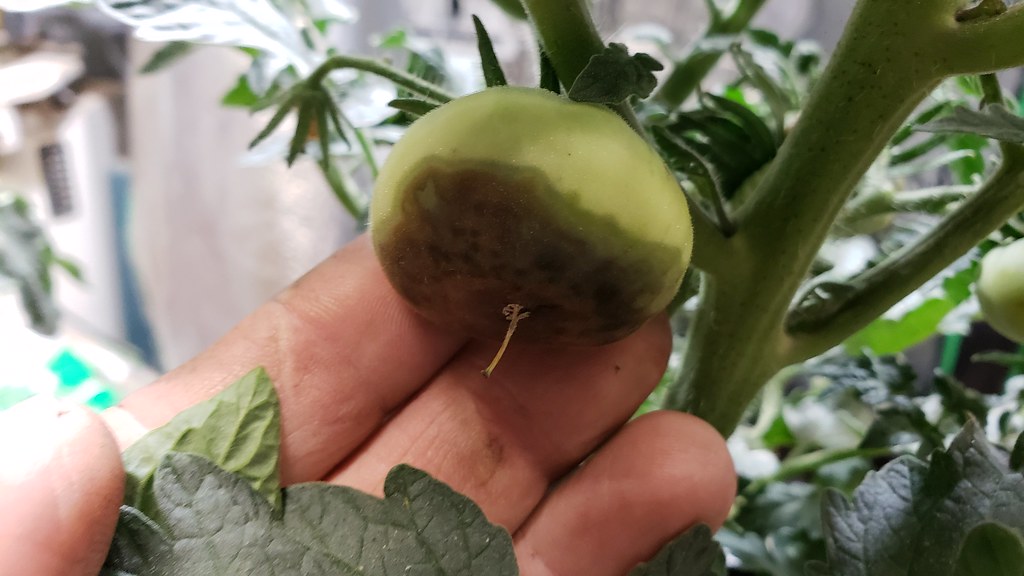
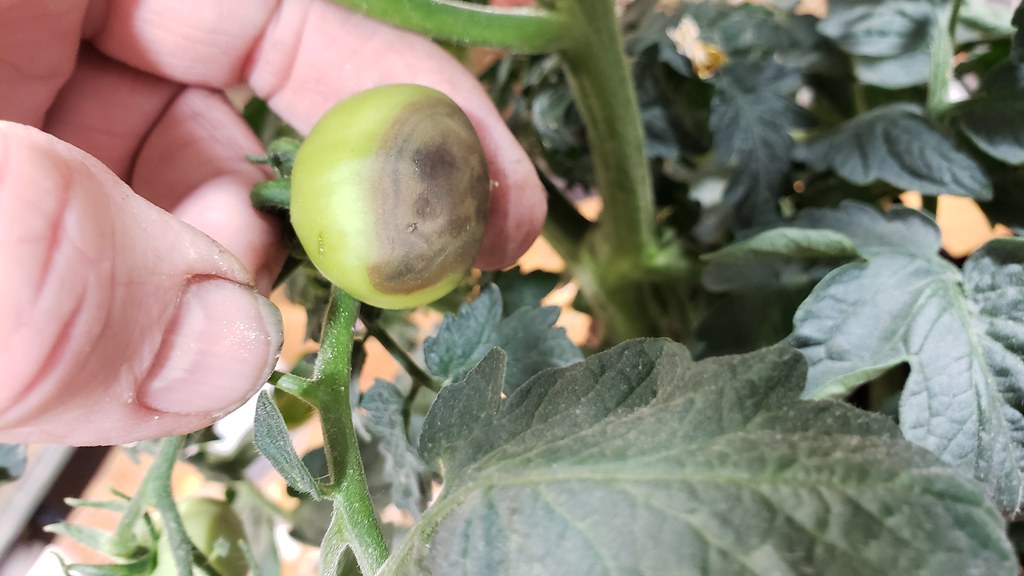
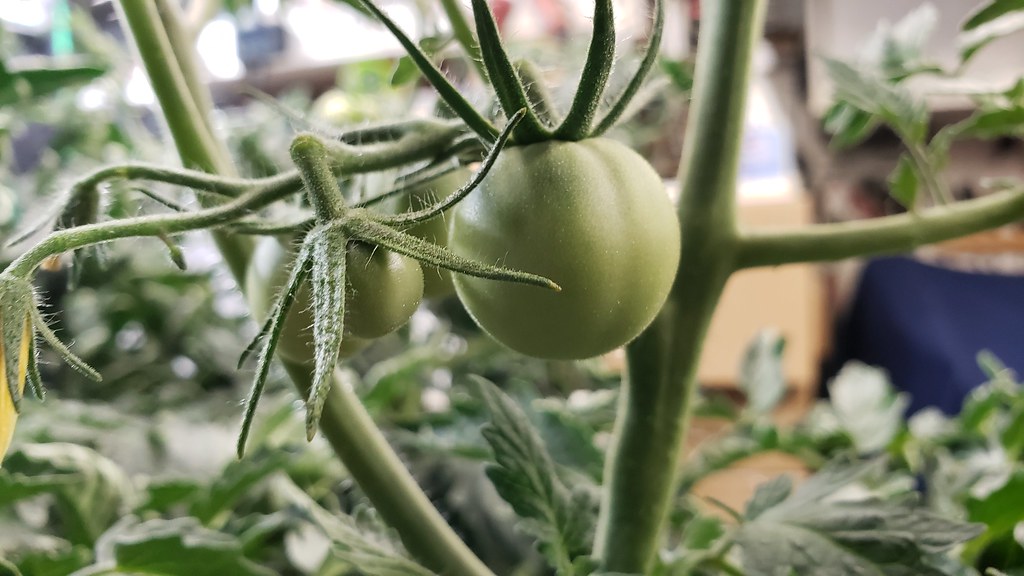
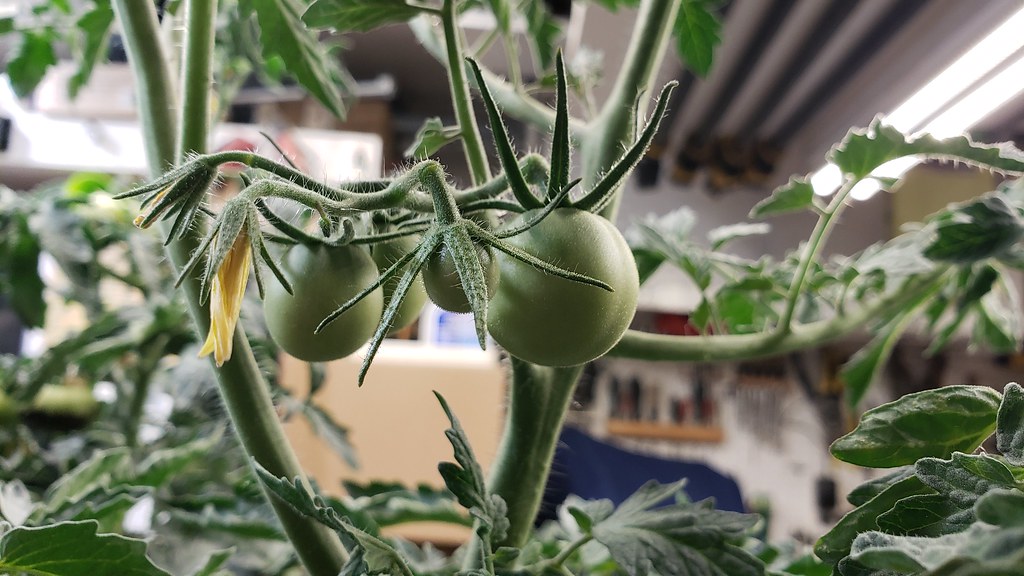
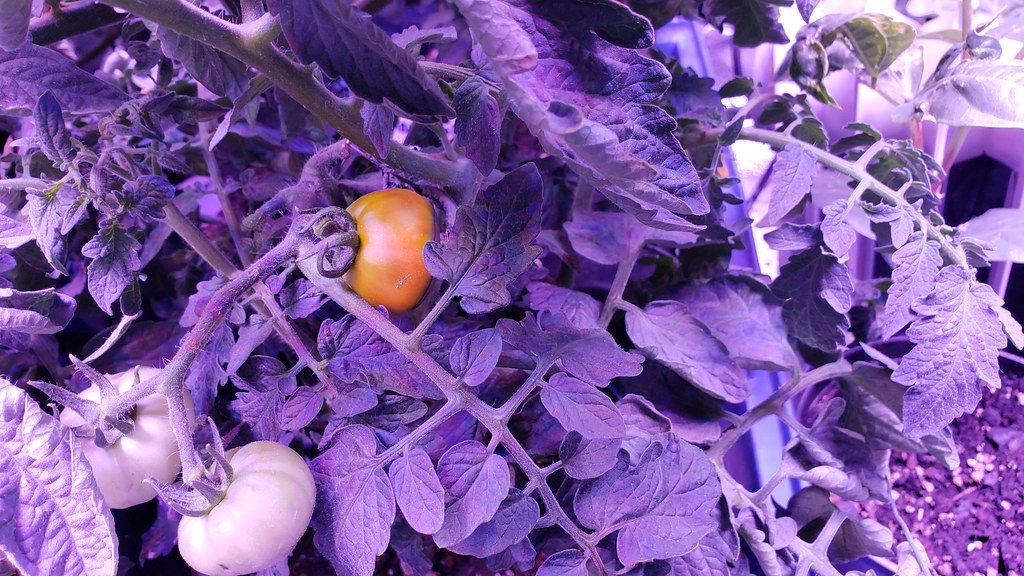
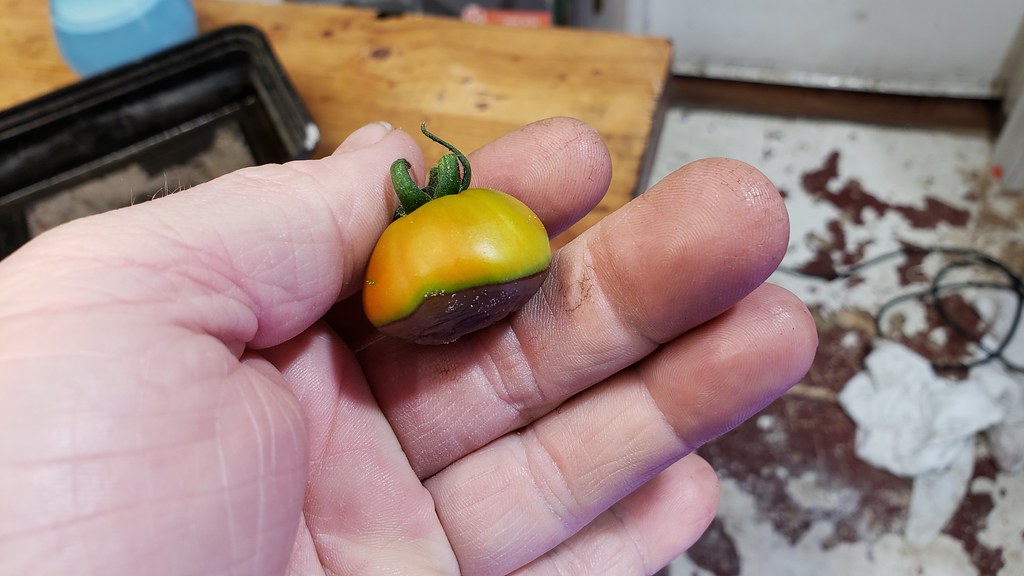
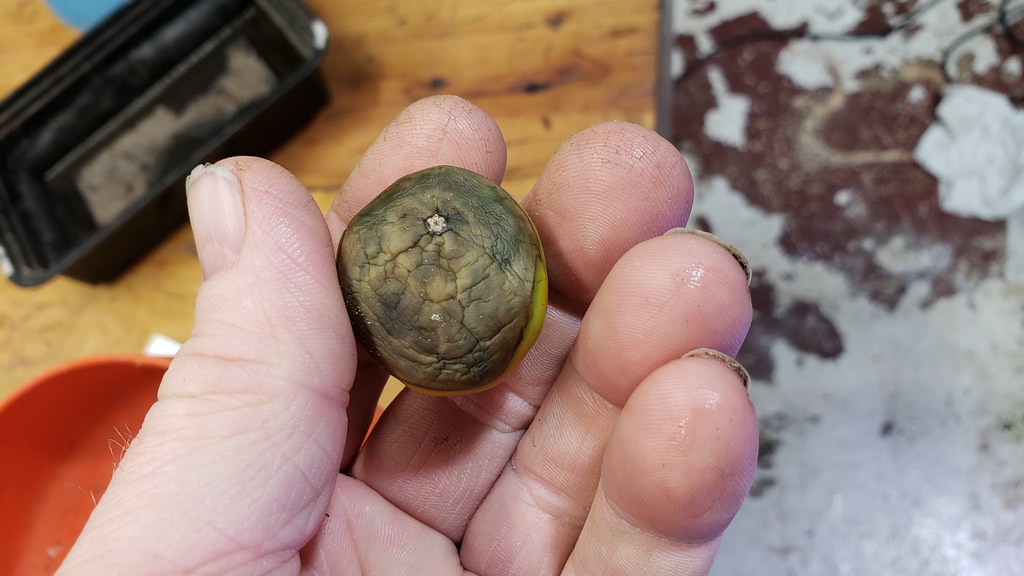
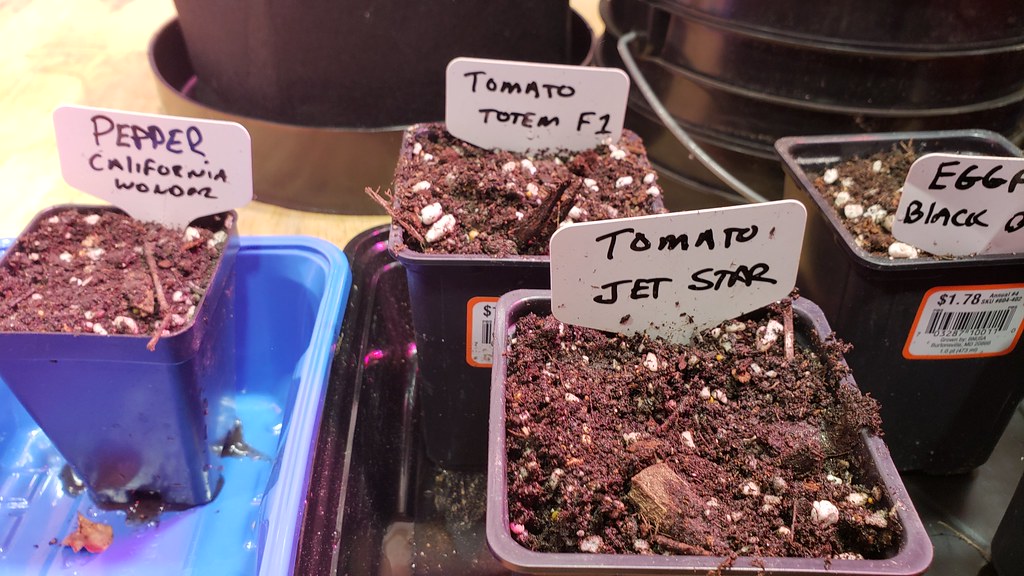
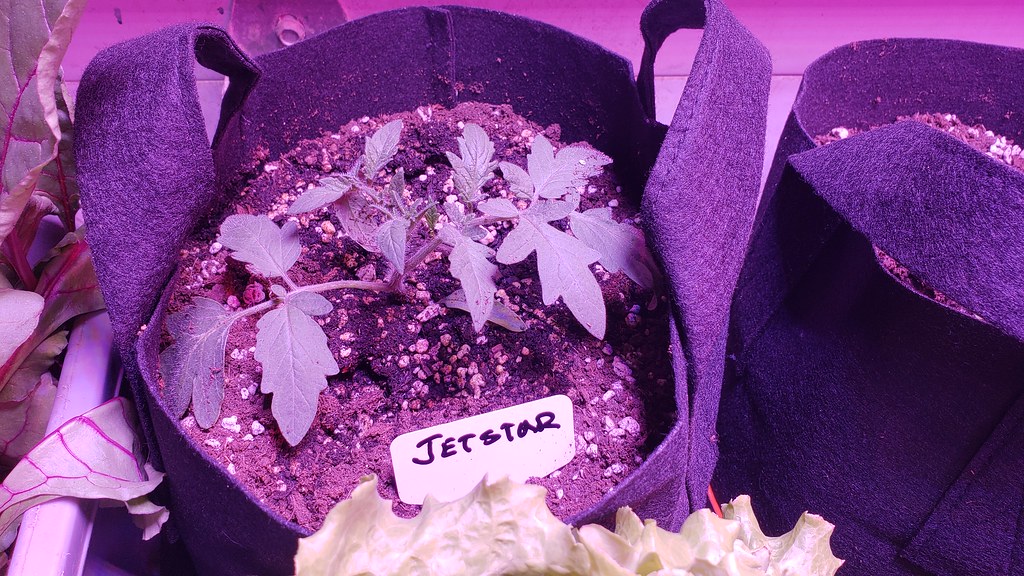
I was able to squeeze a bit more out of my Grow Area and will attempt at growing tomatoes and peppers along with my greens, the grow table will be for the herbs and greens and the new grow area will be for fruiting plants... this should be fun.

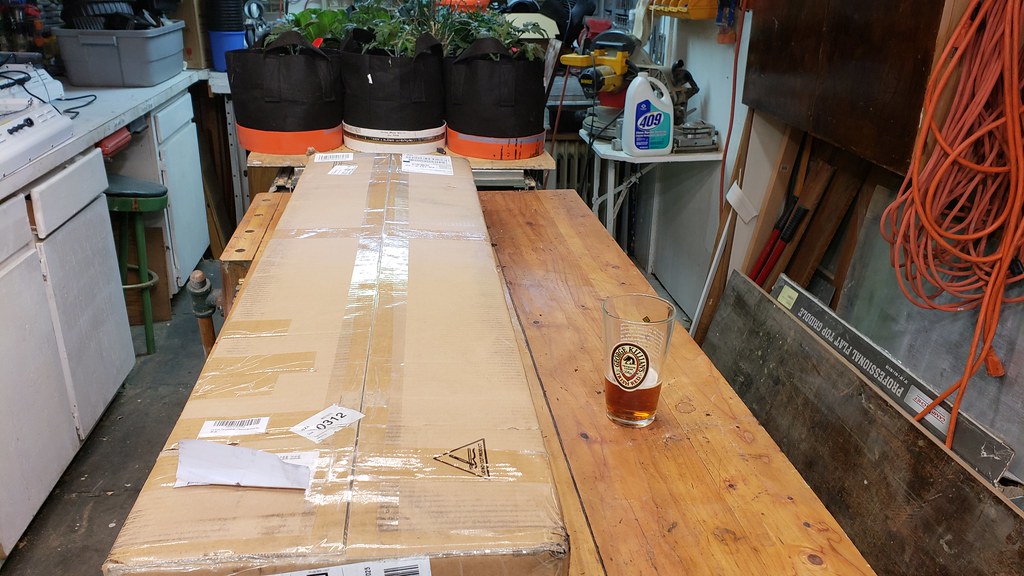
The hard part was finding a table for the new grow area, I didn't want to make another table, I just don't have the room, so I looked around the work shop and think I have a solution, but first let me get some more seeds started.

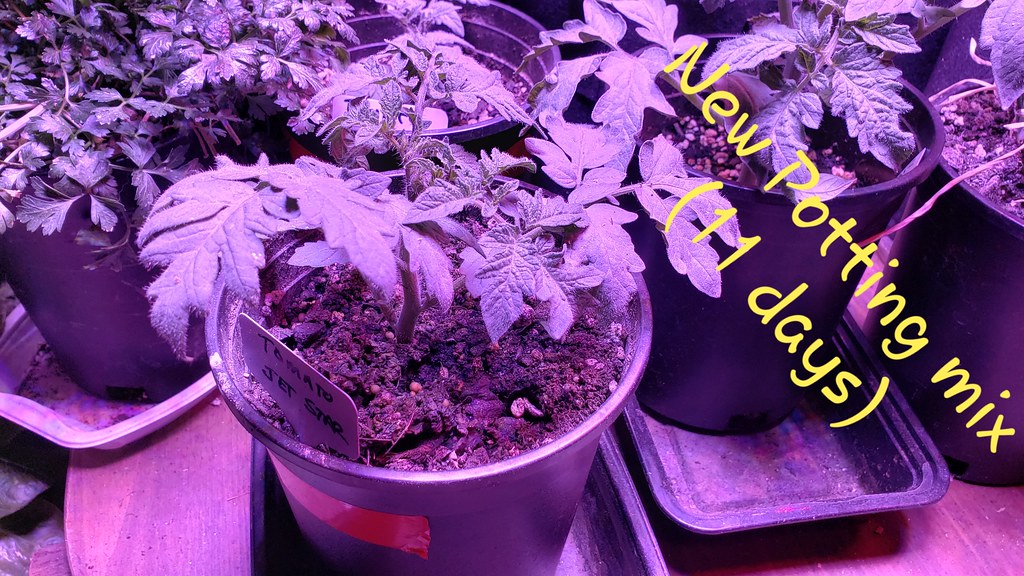
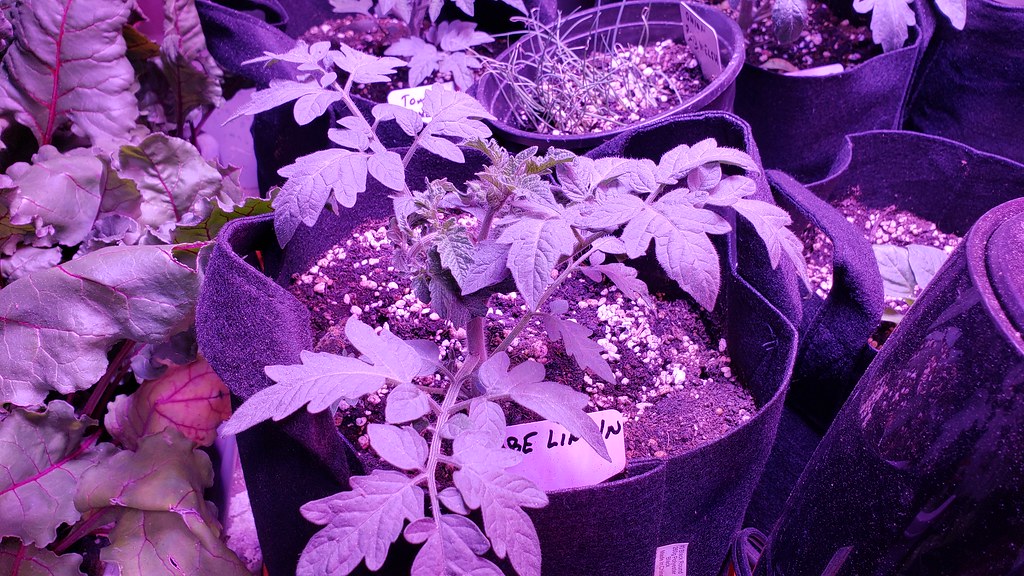
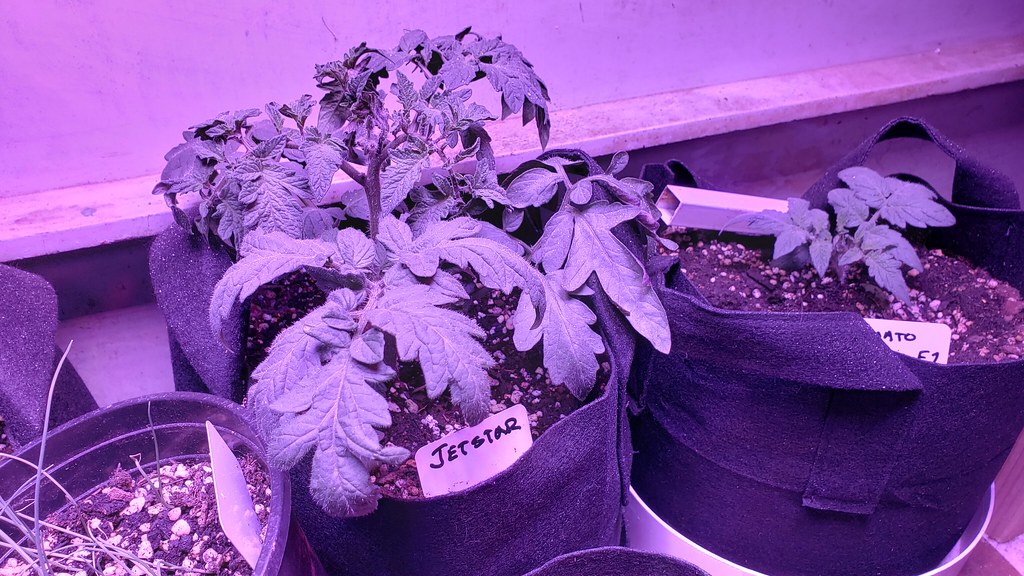
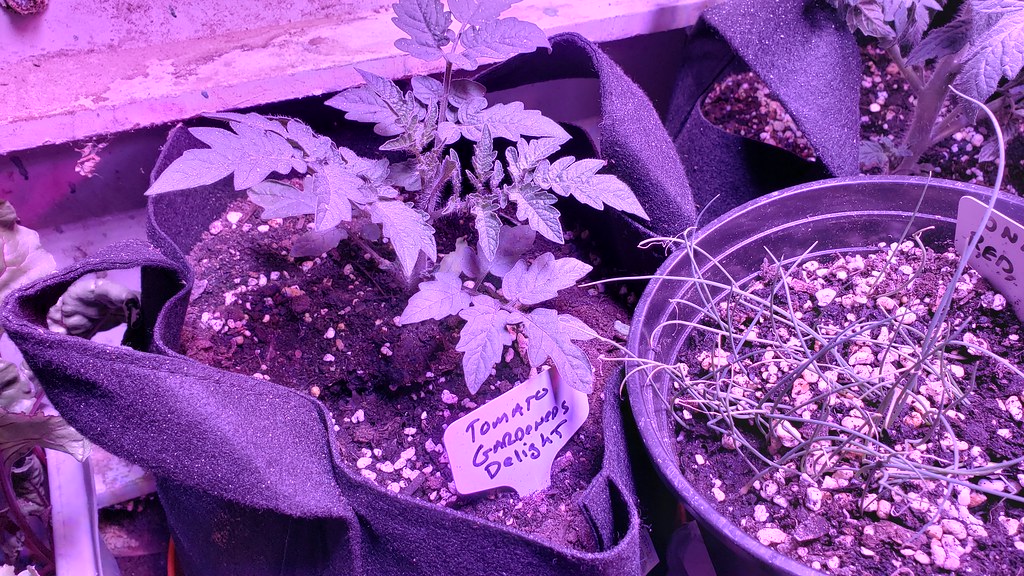
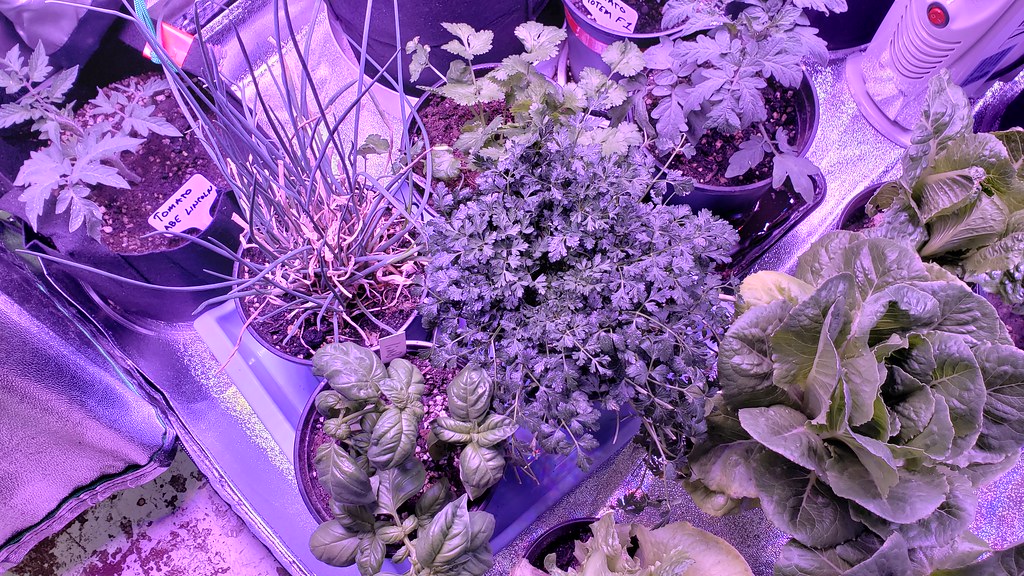
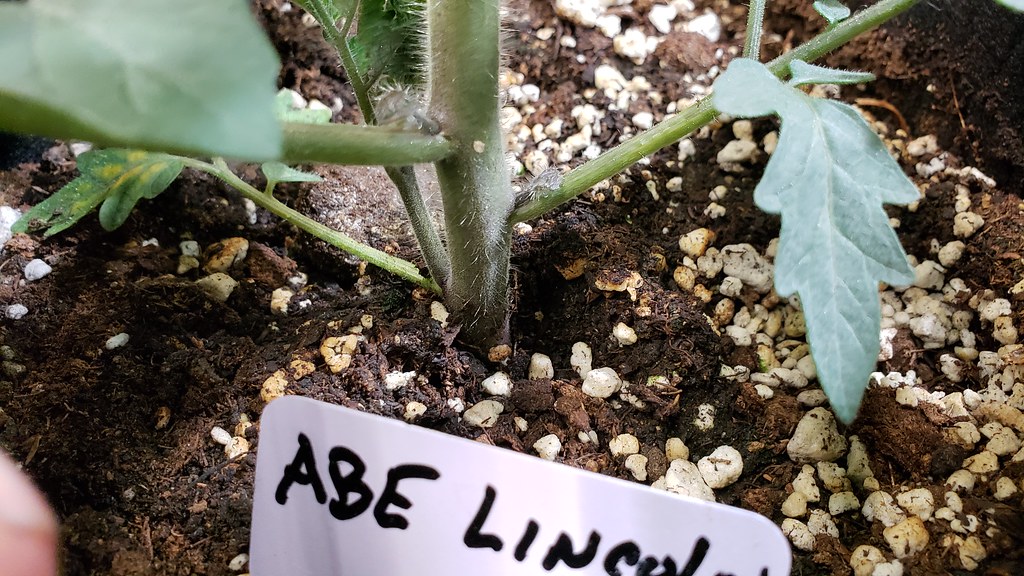
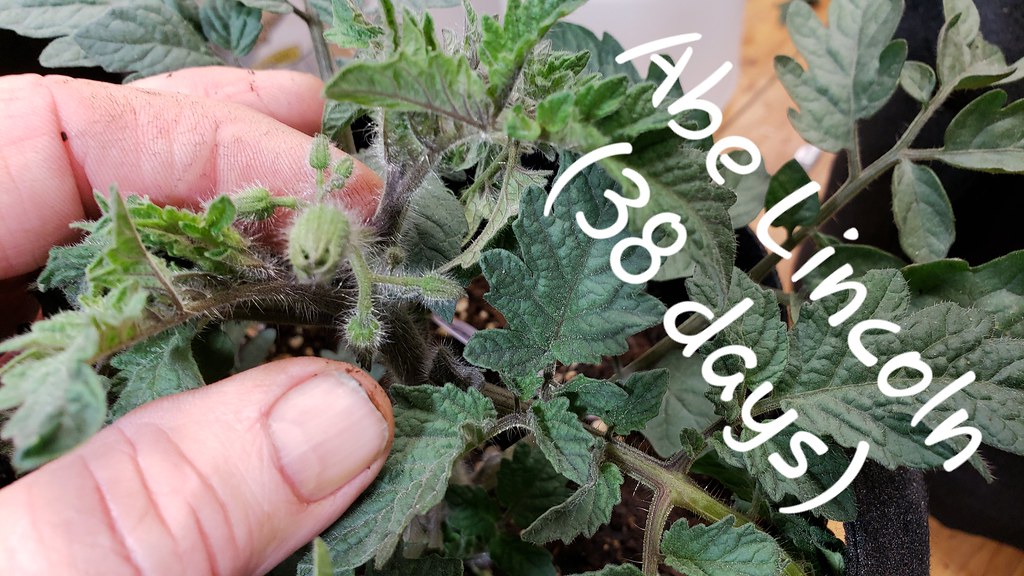
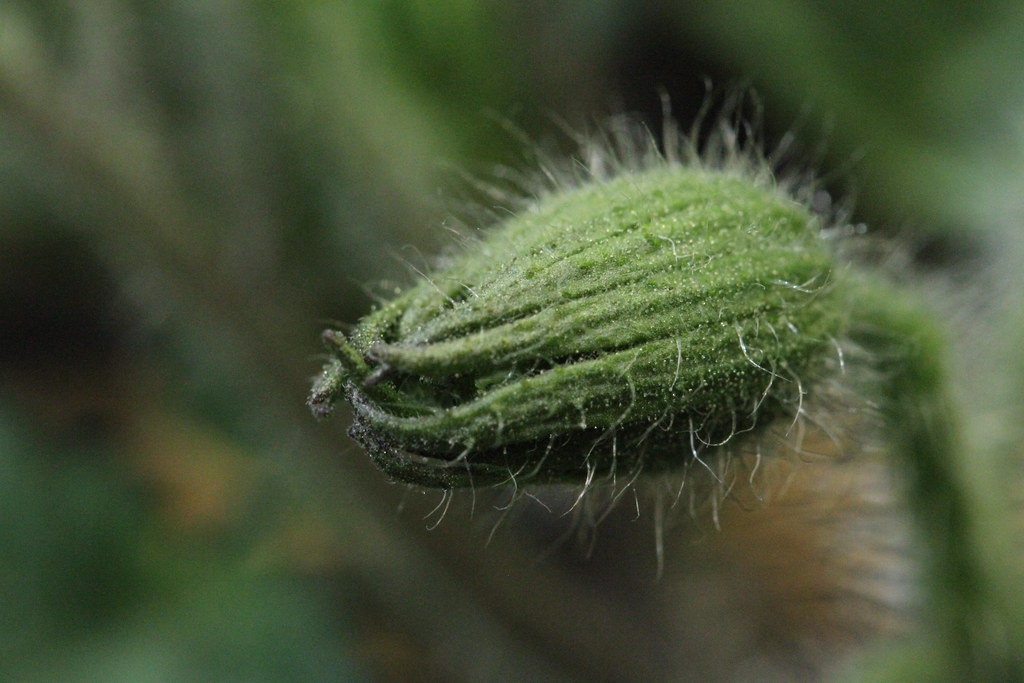
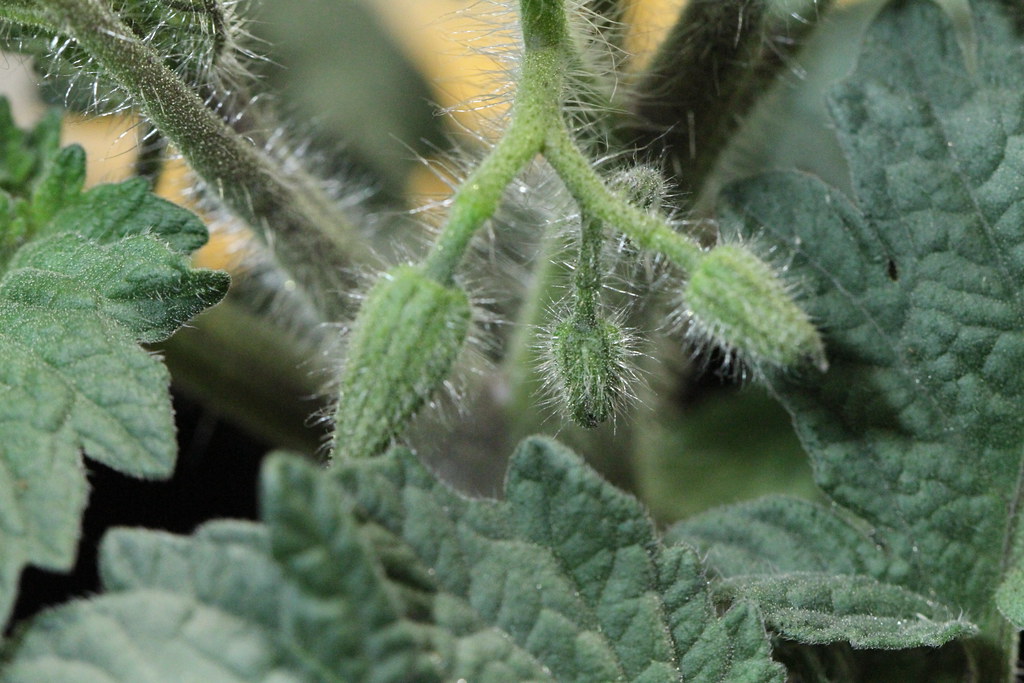
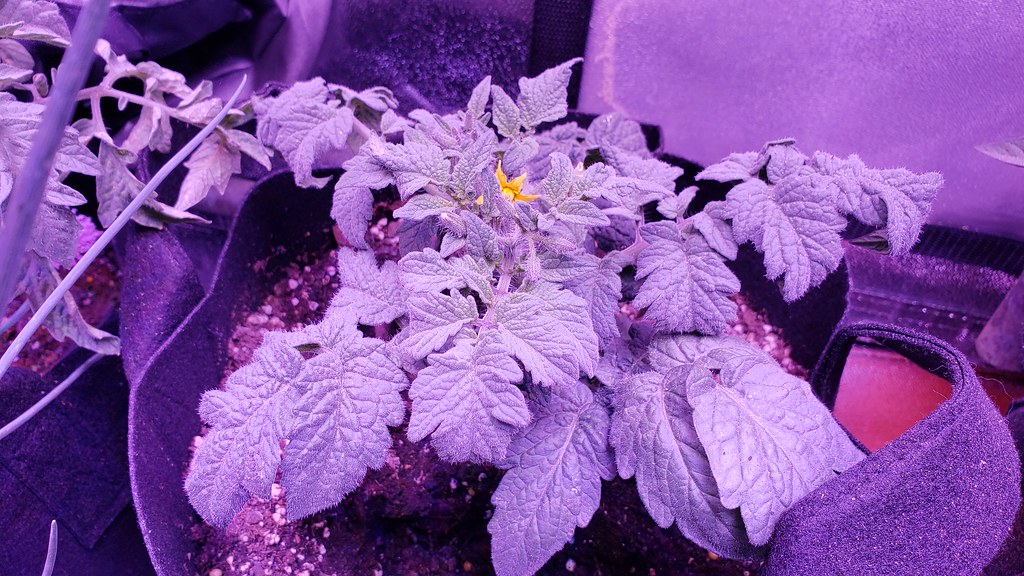
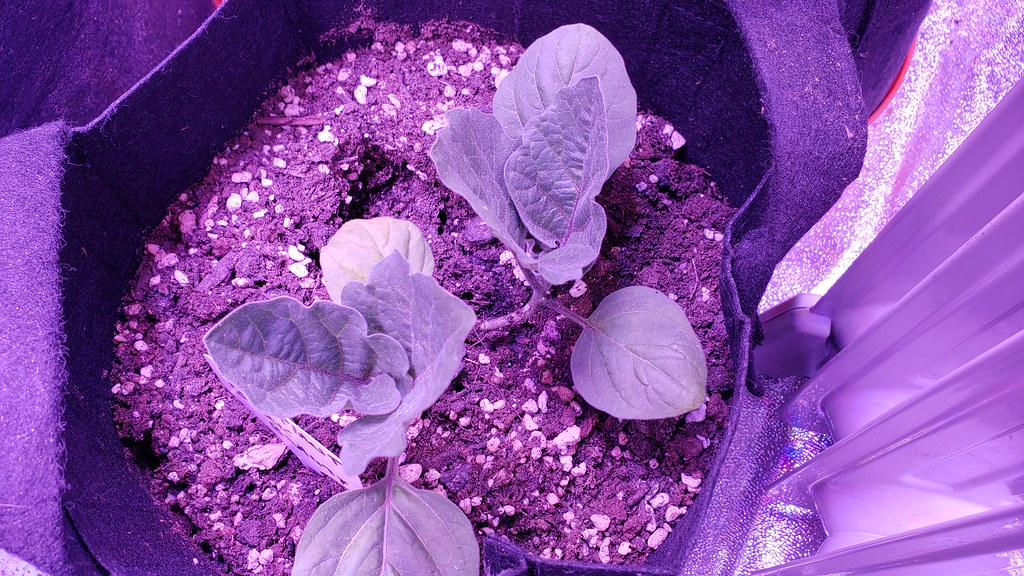
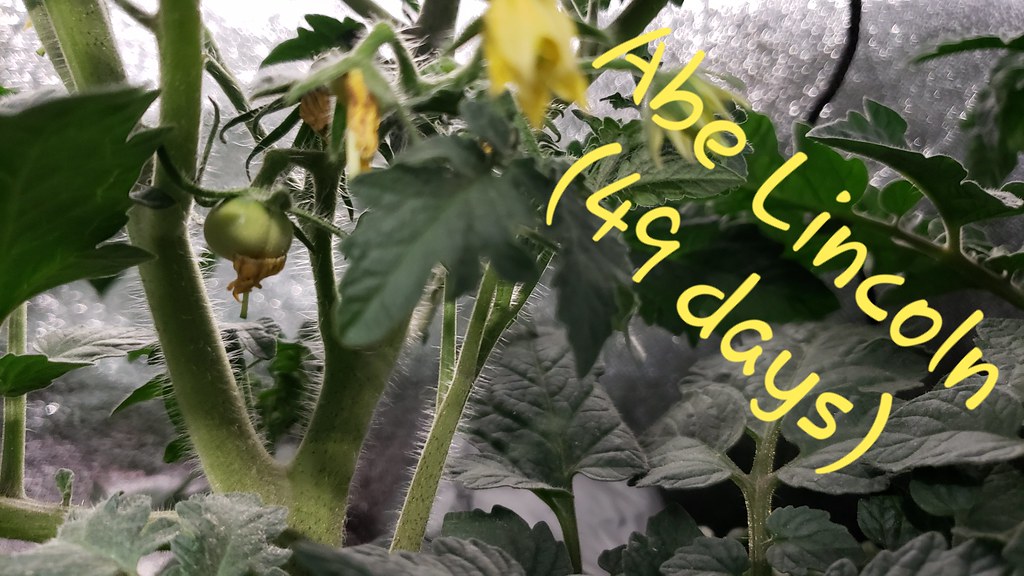
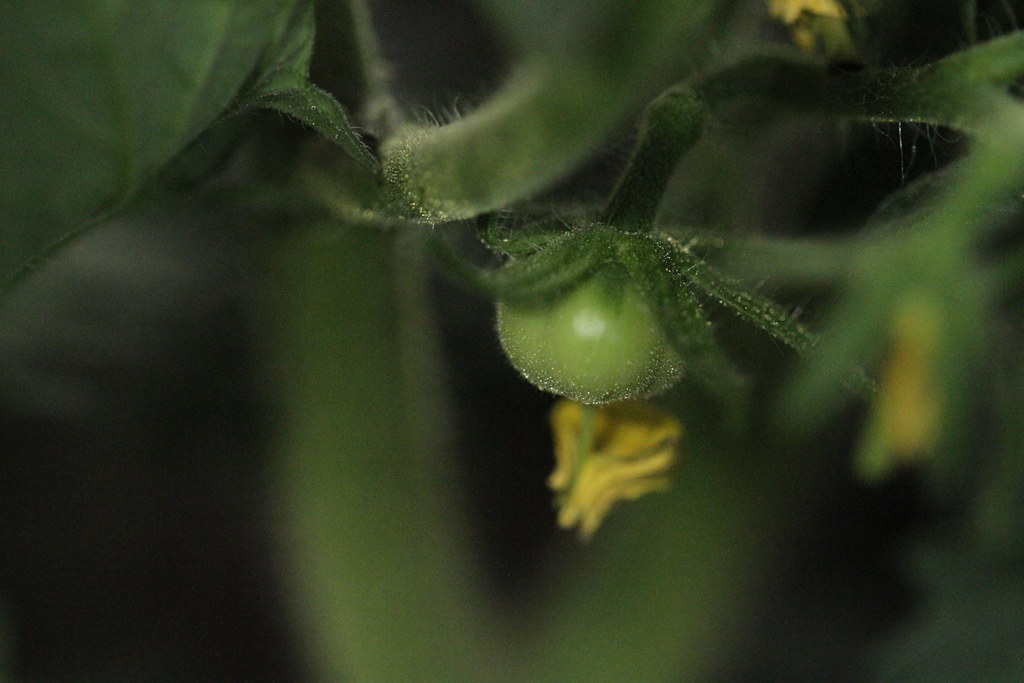
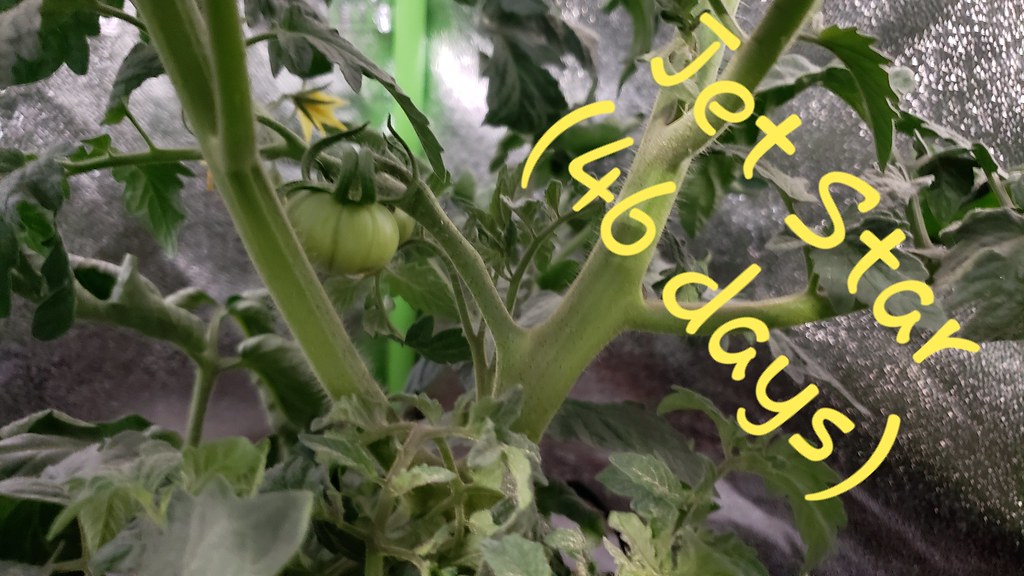
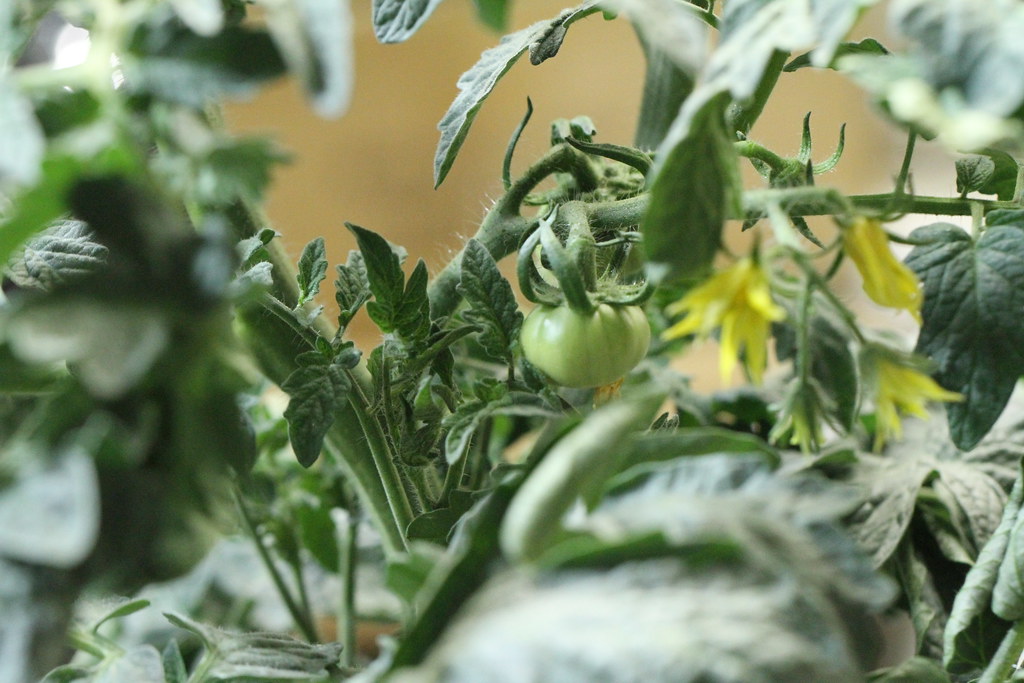
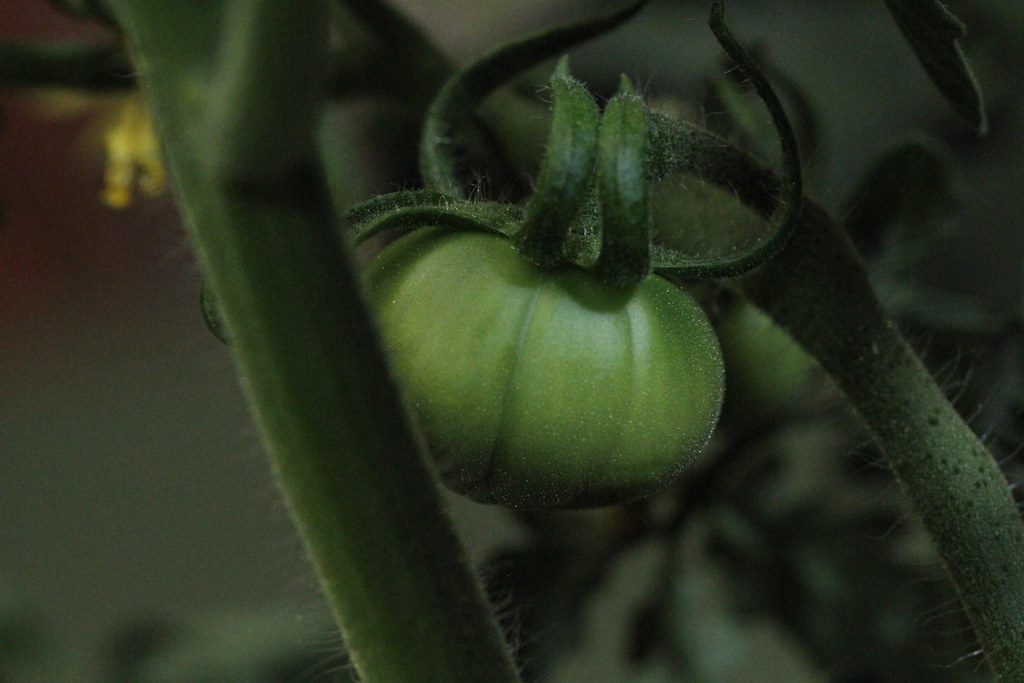
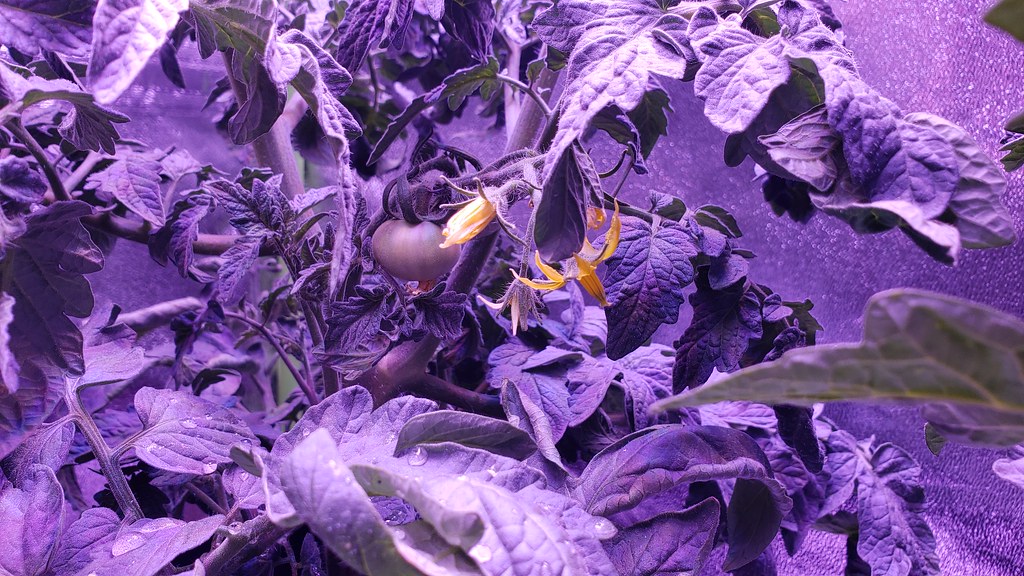
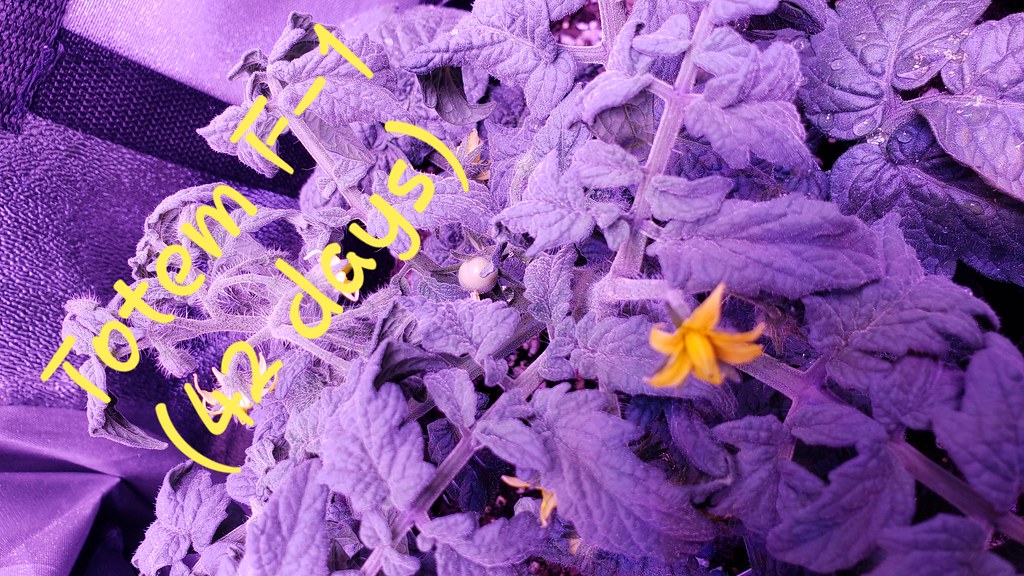
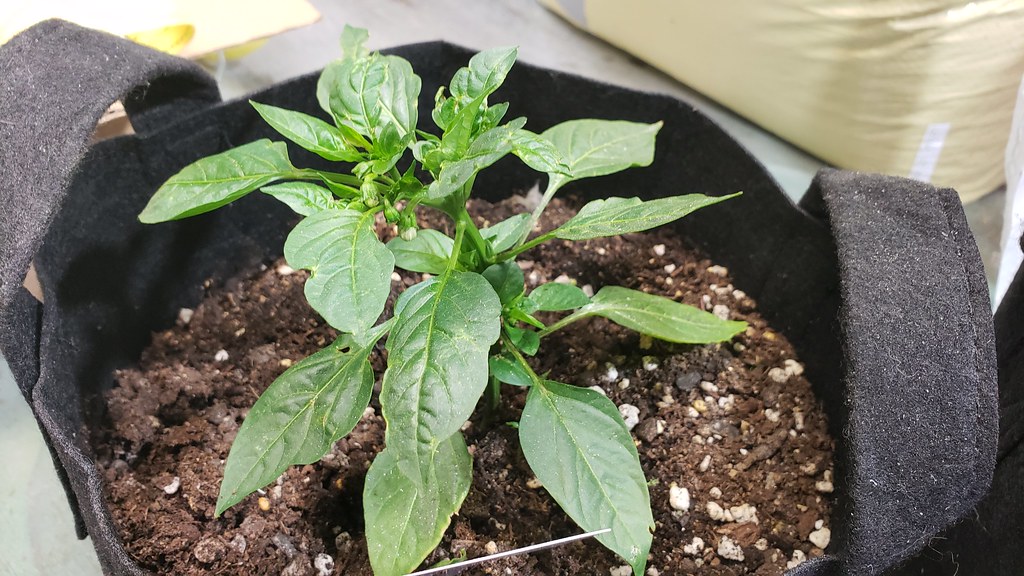
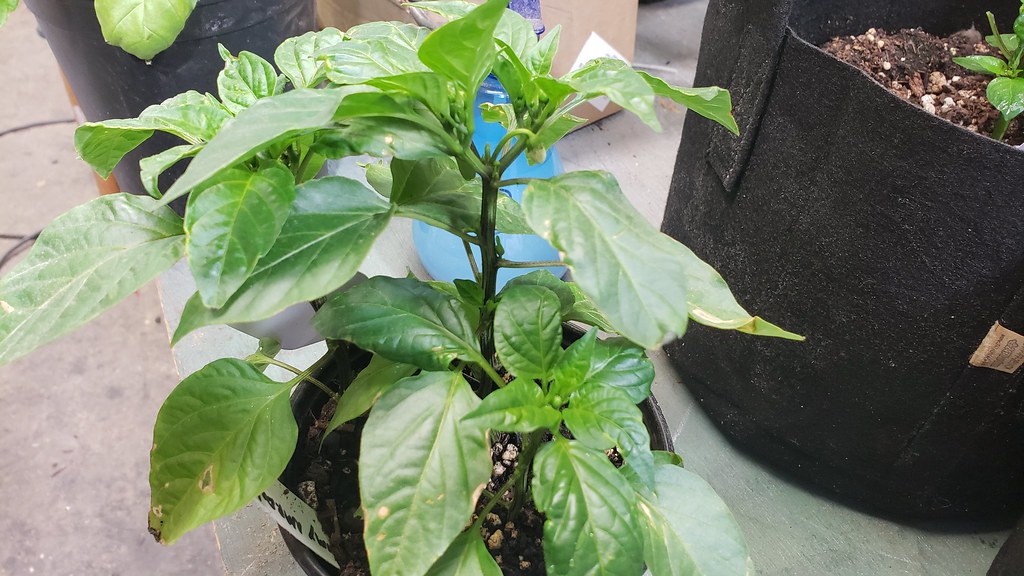
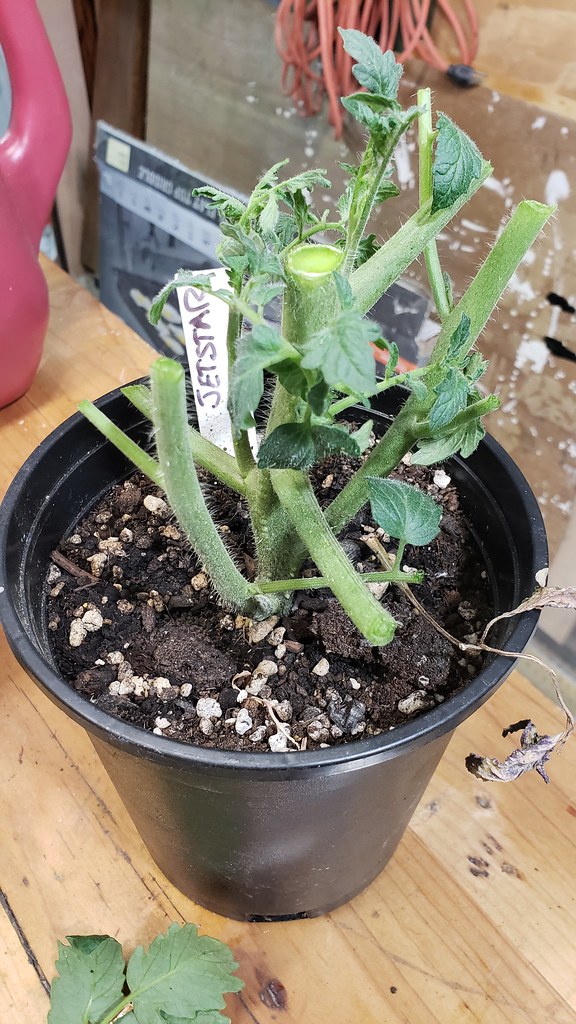
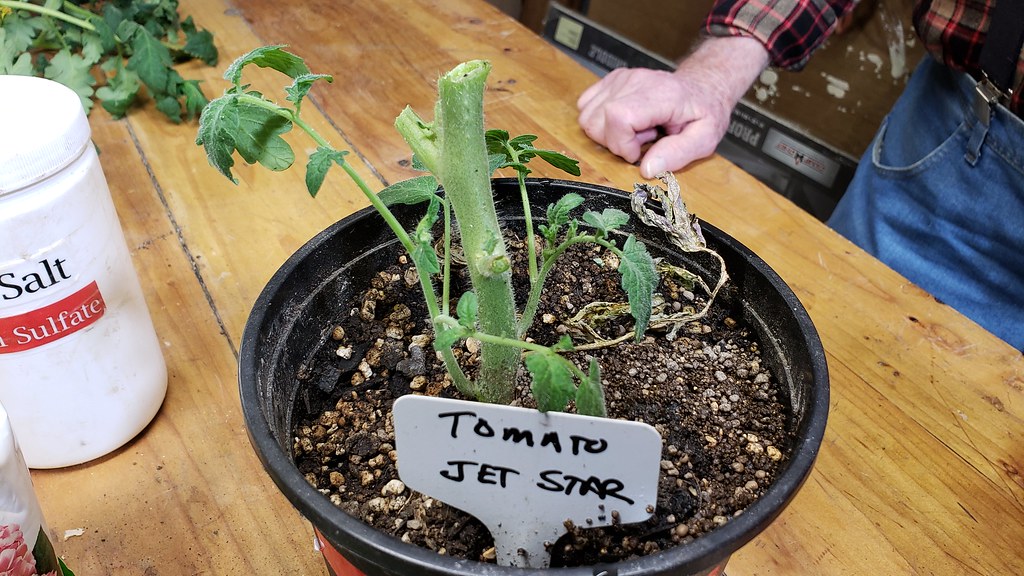
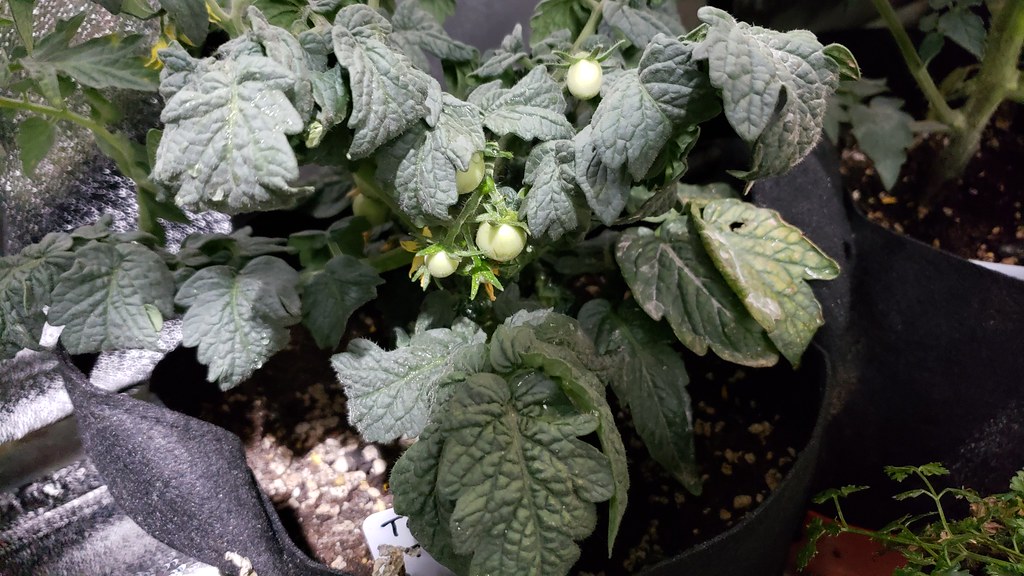
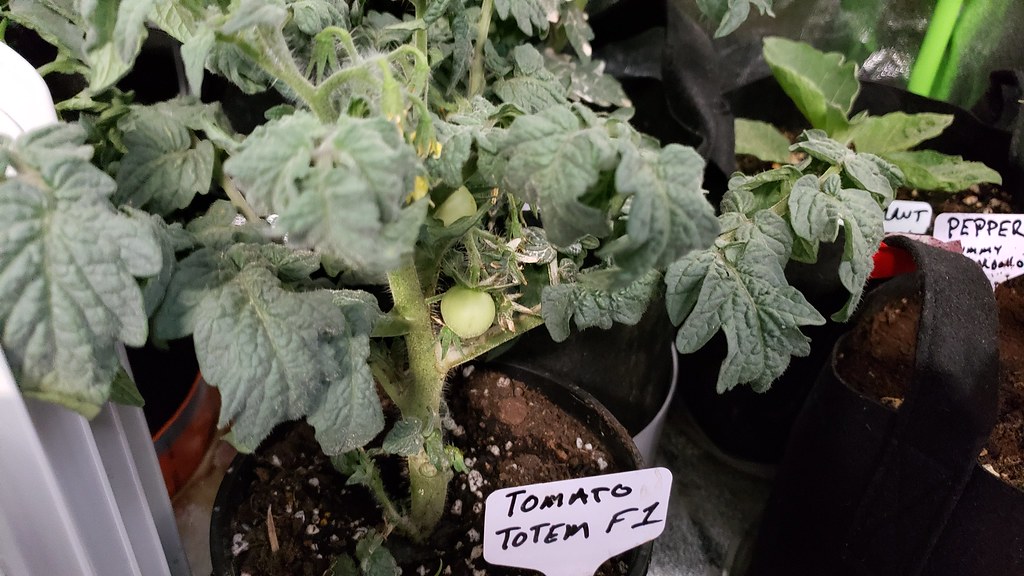
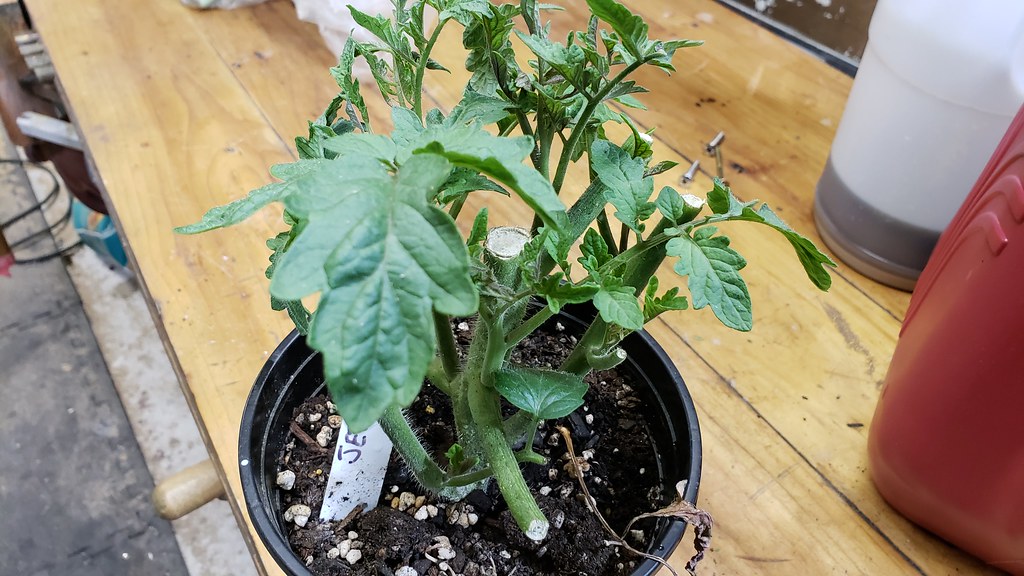
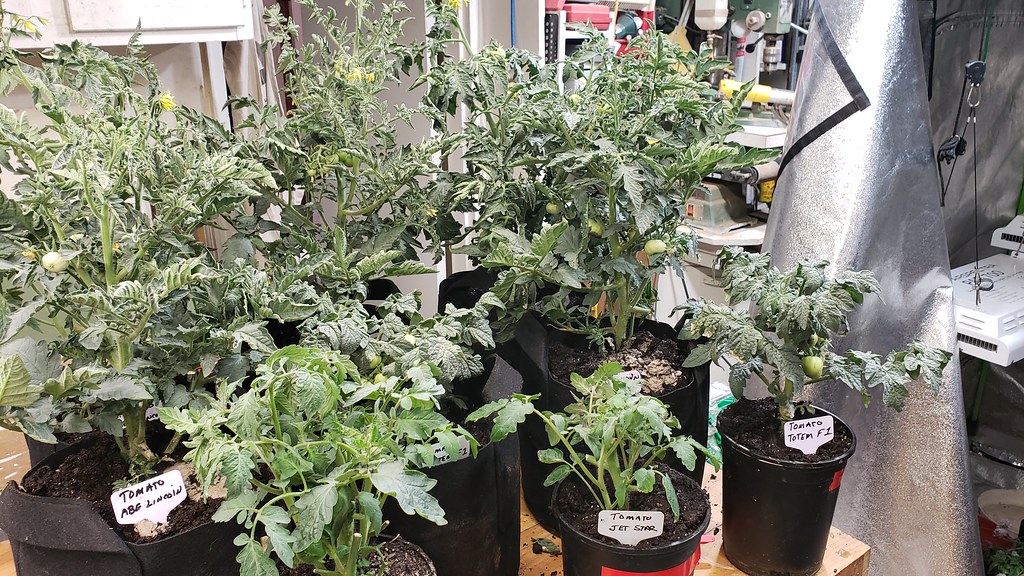
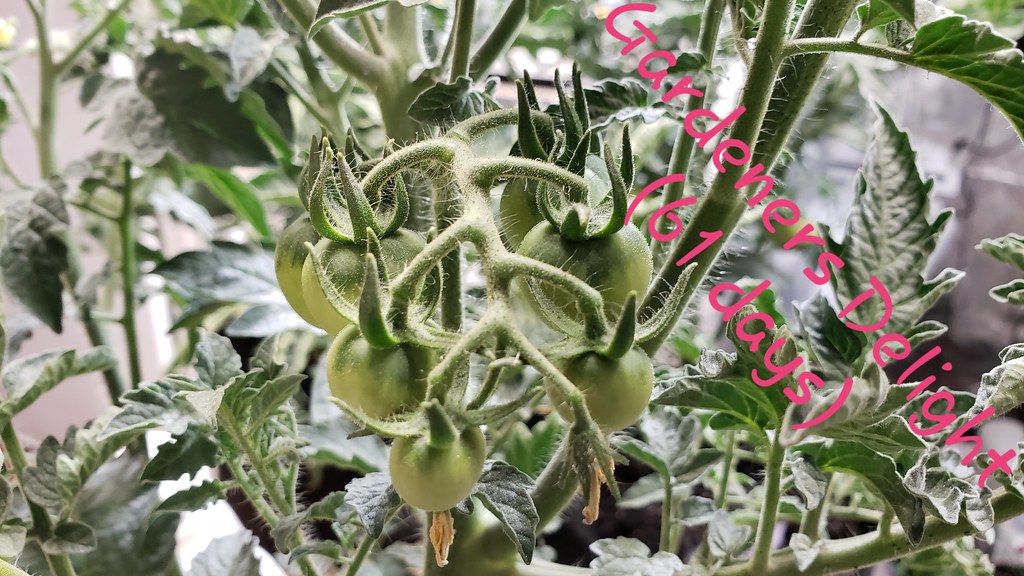
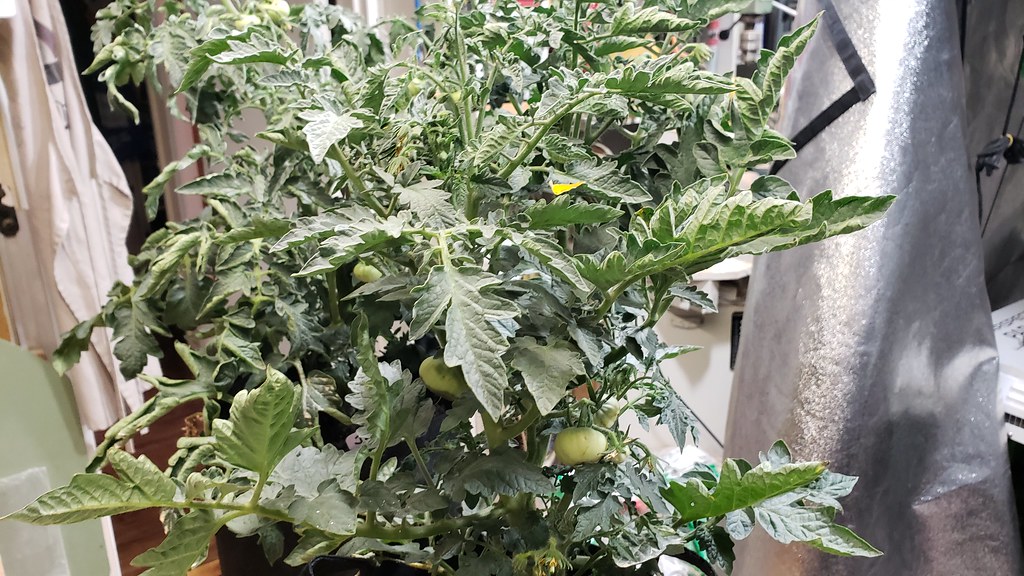
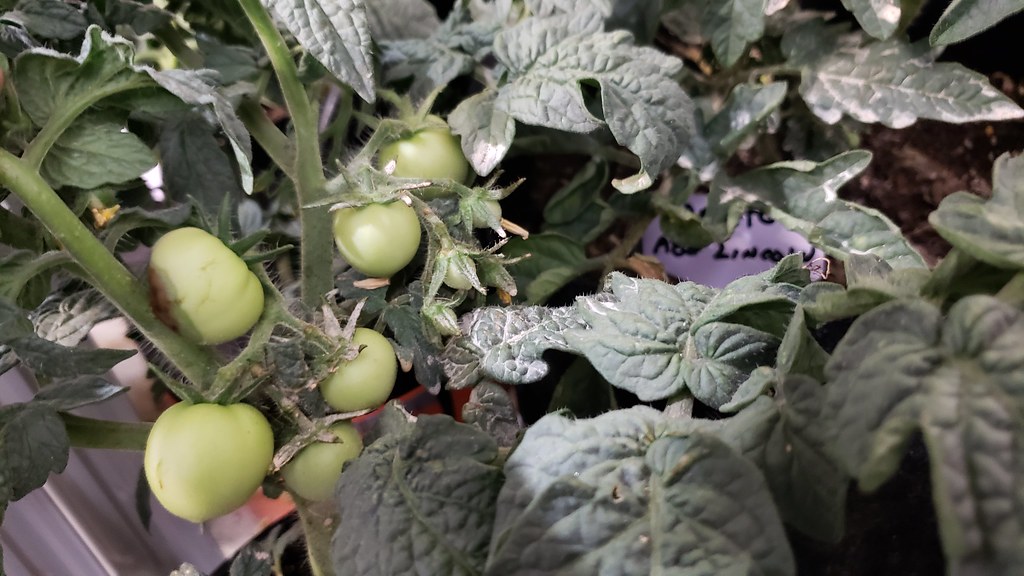
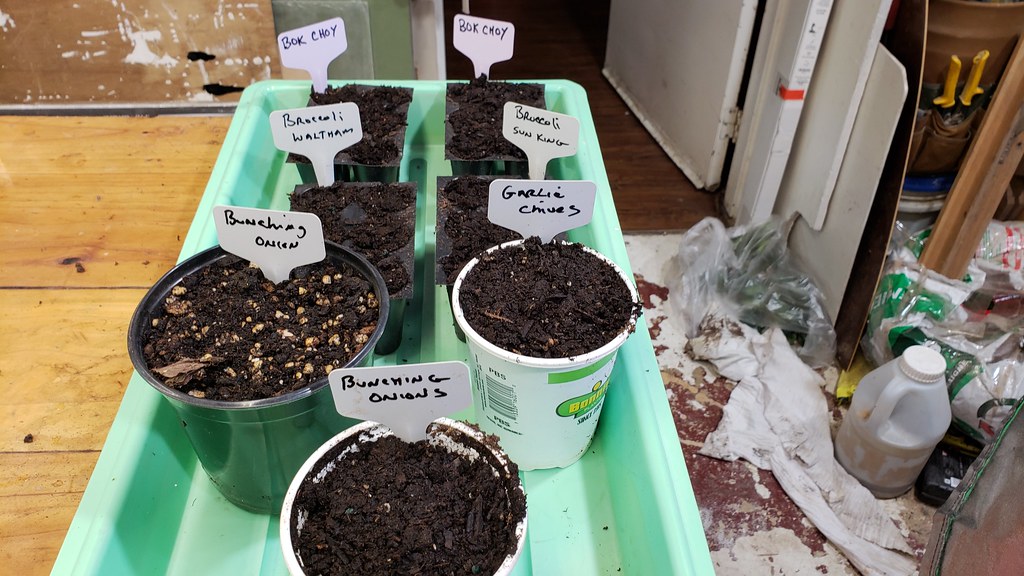
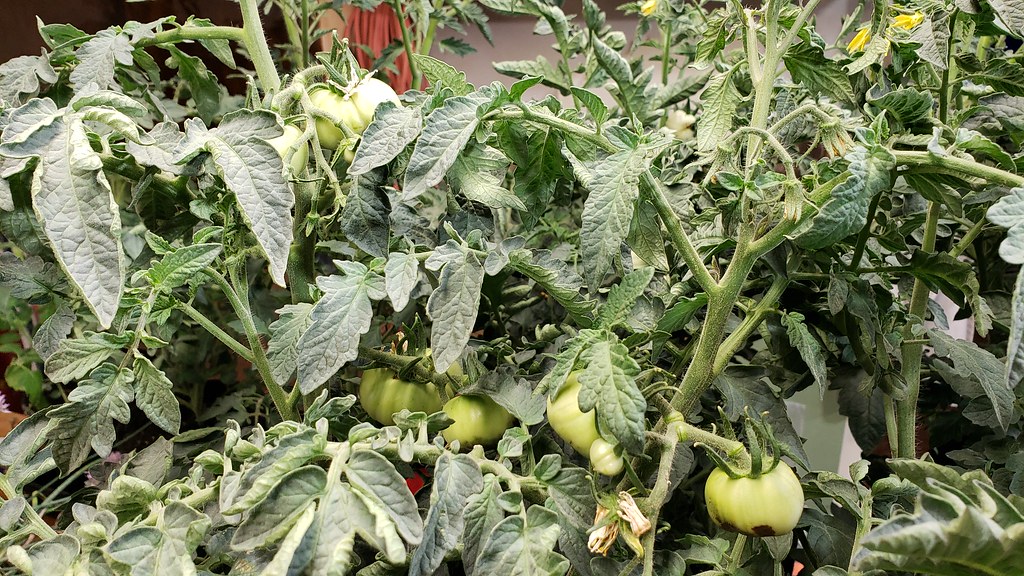
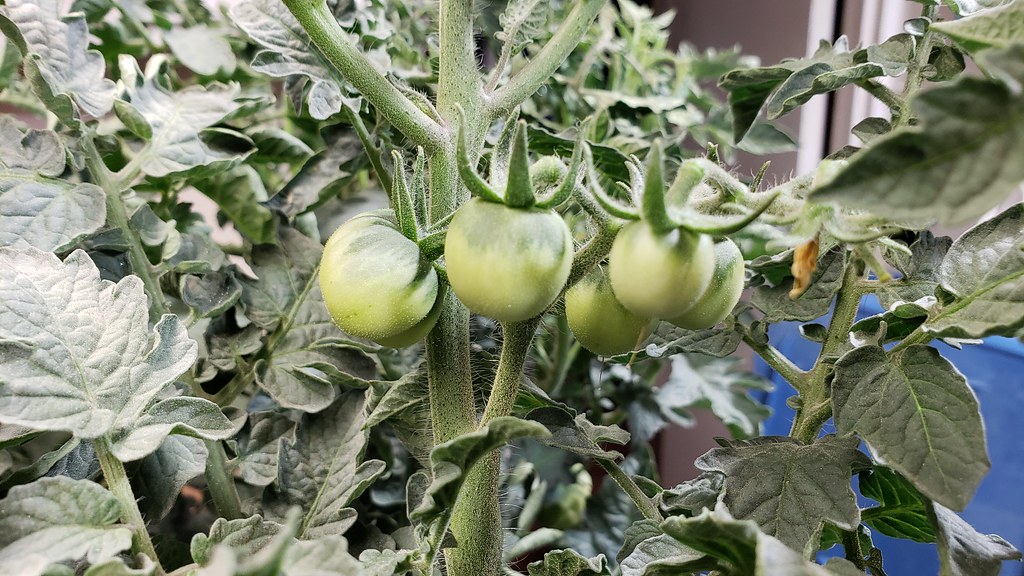
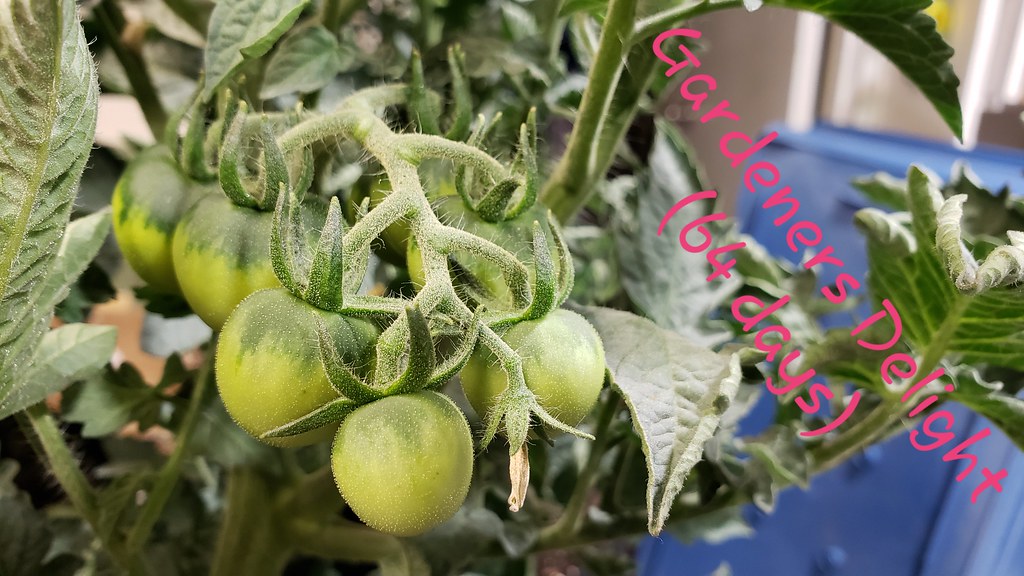
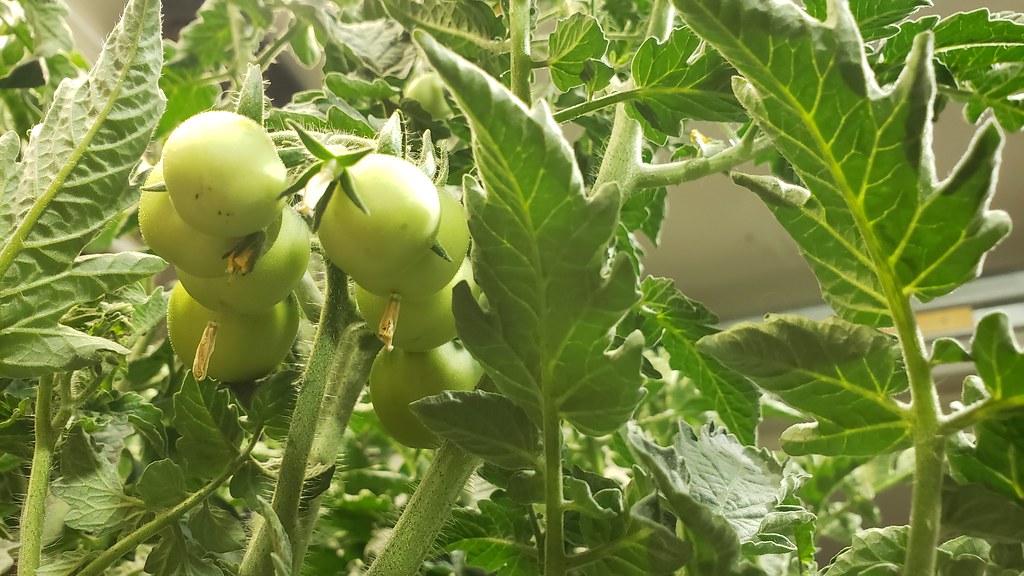
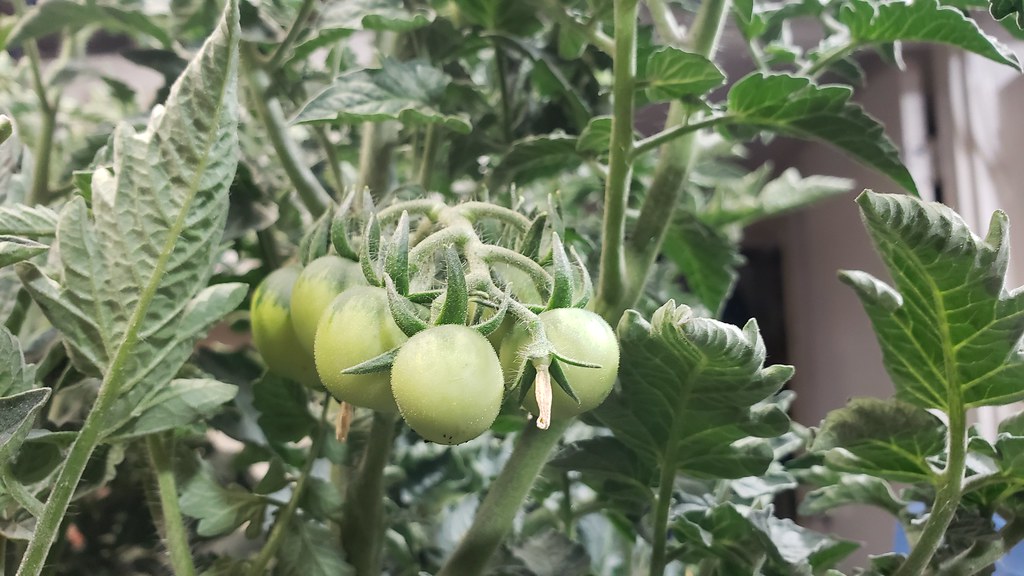
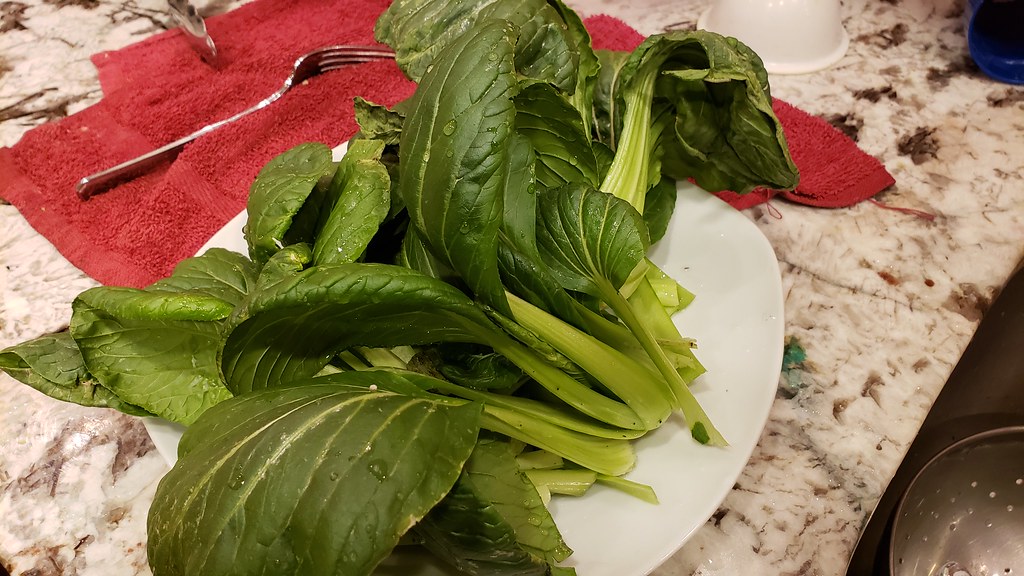
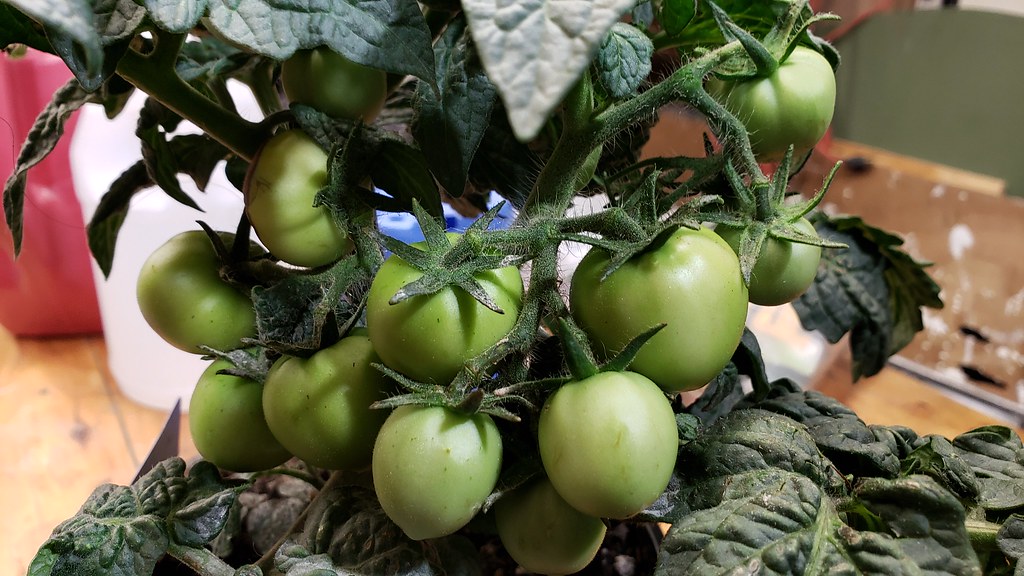
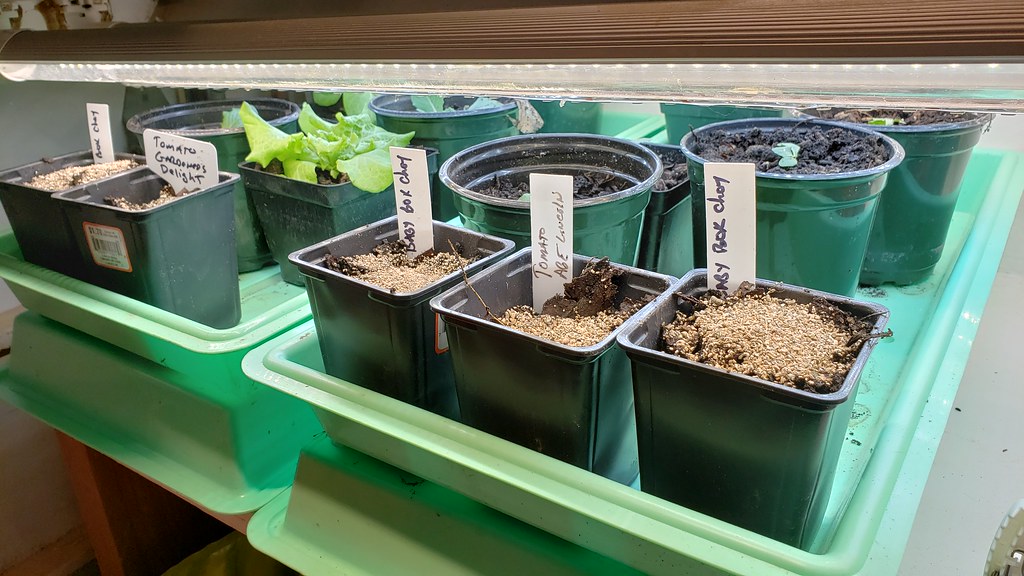
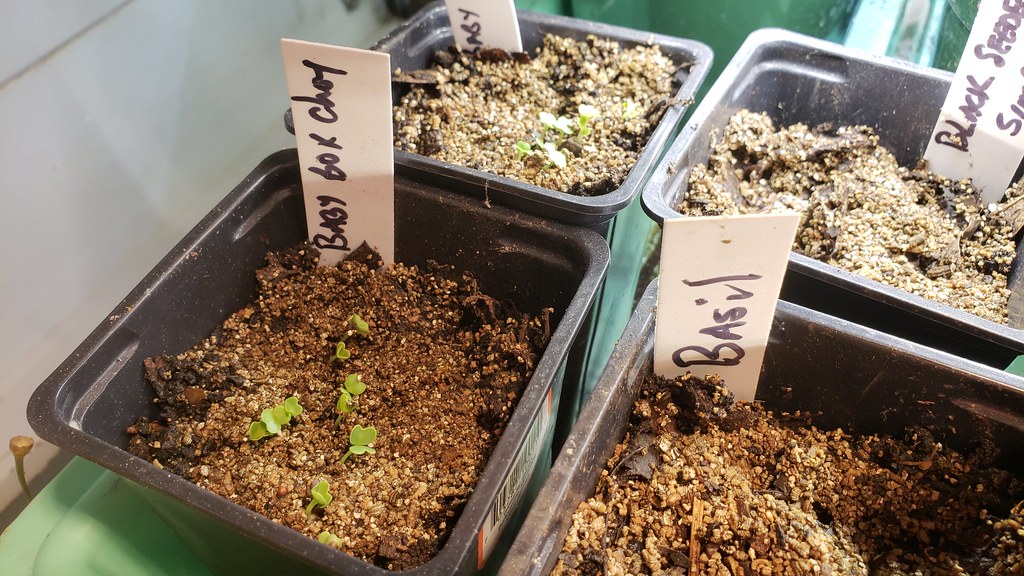
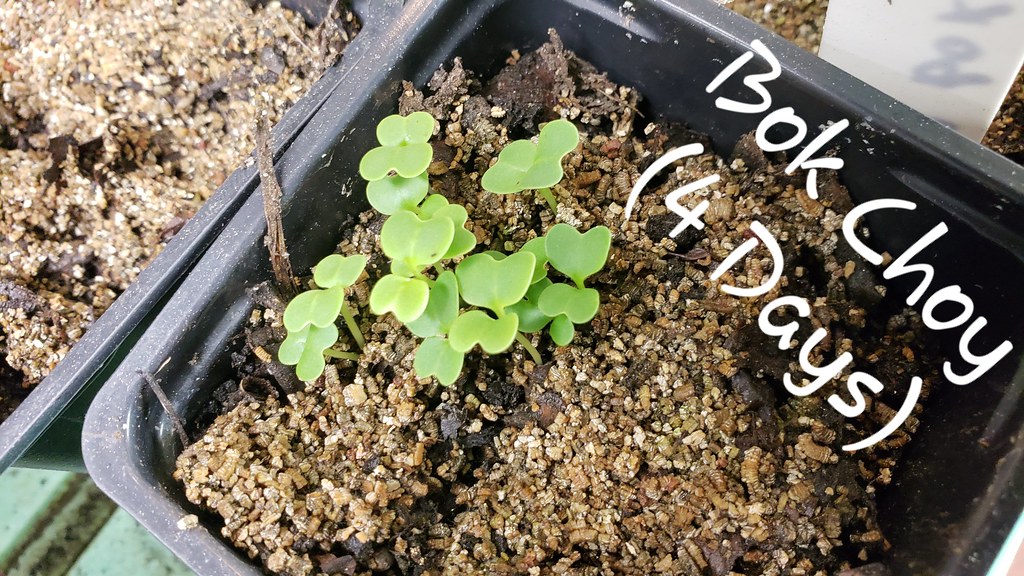
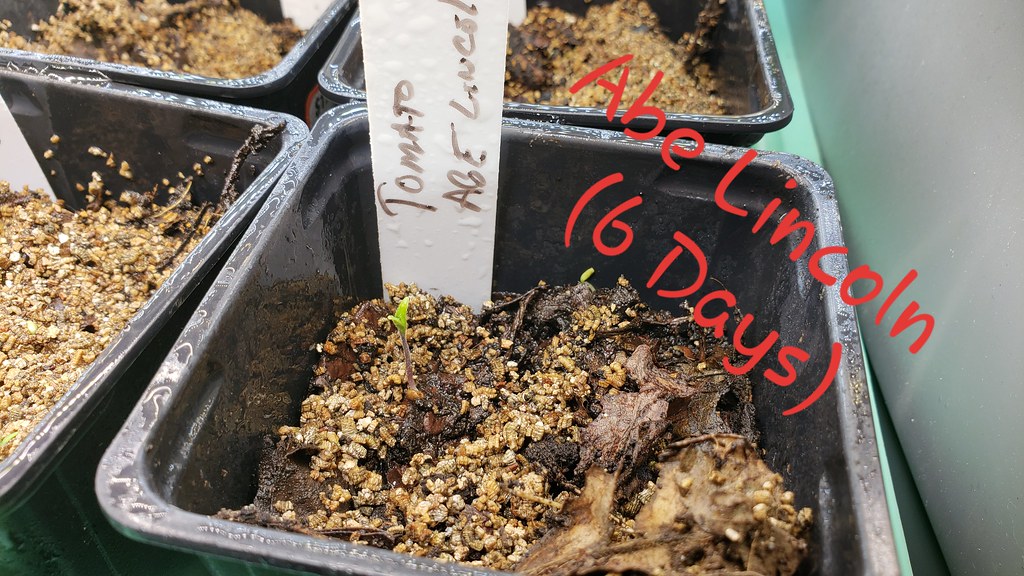
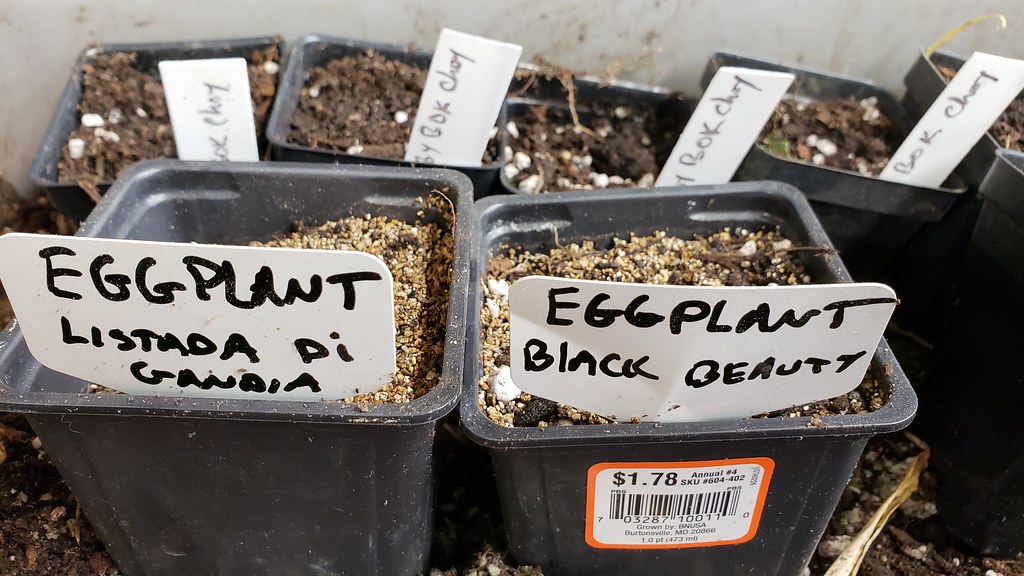
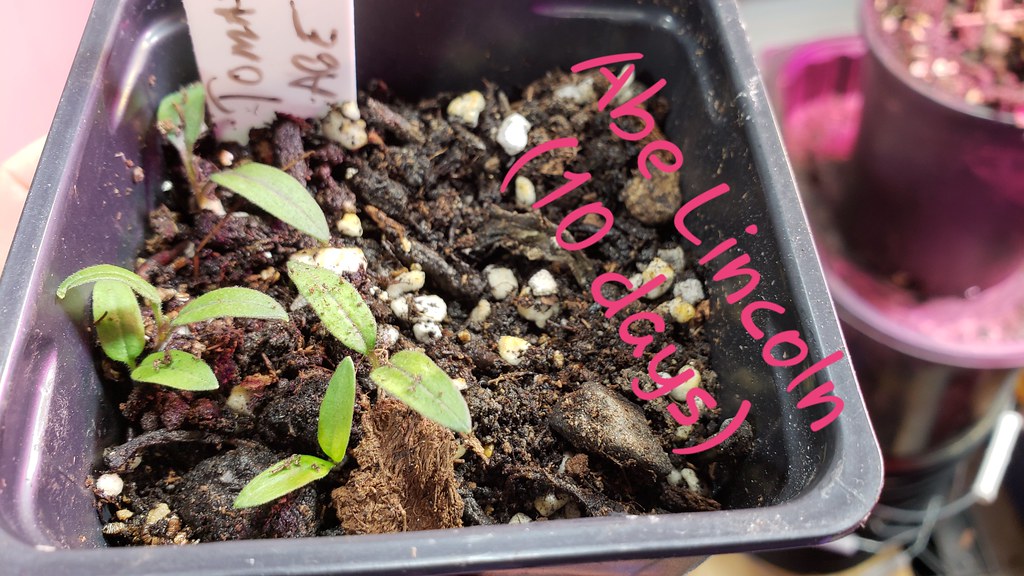
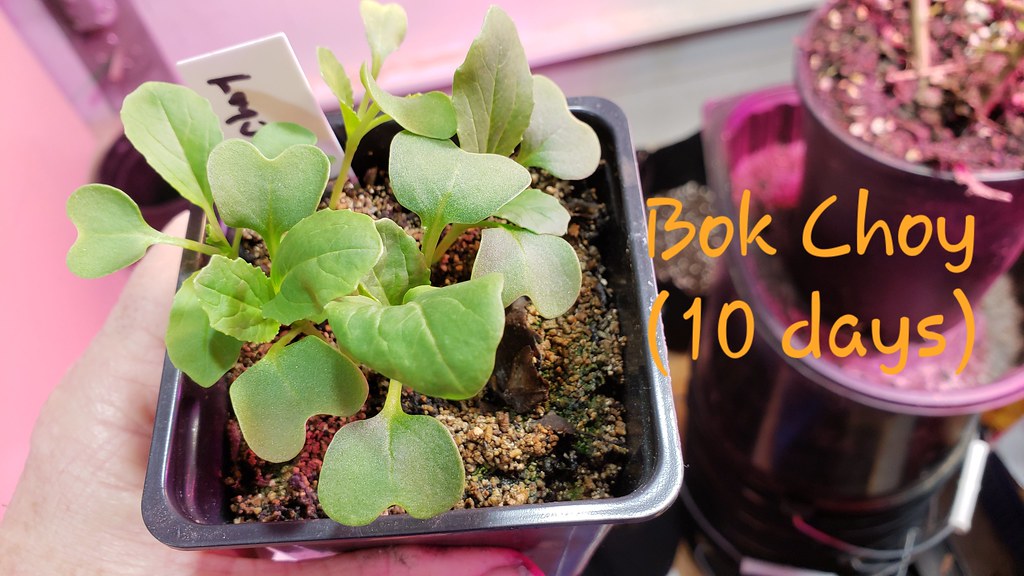
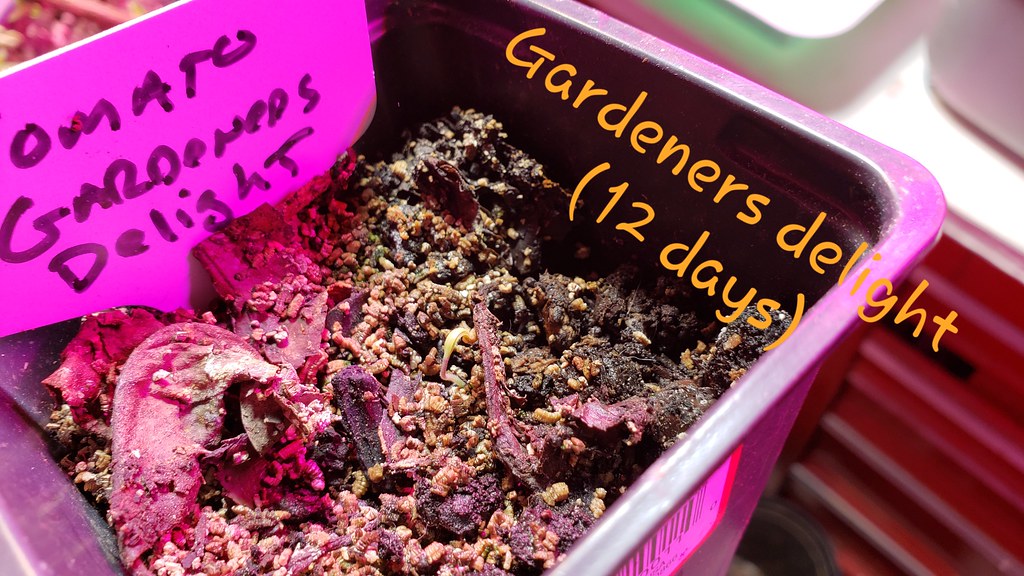
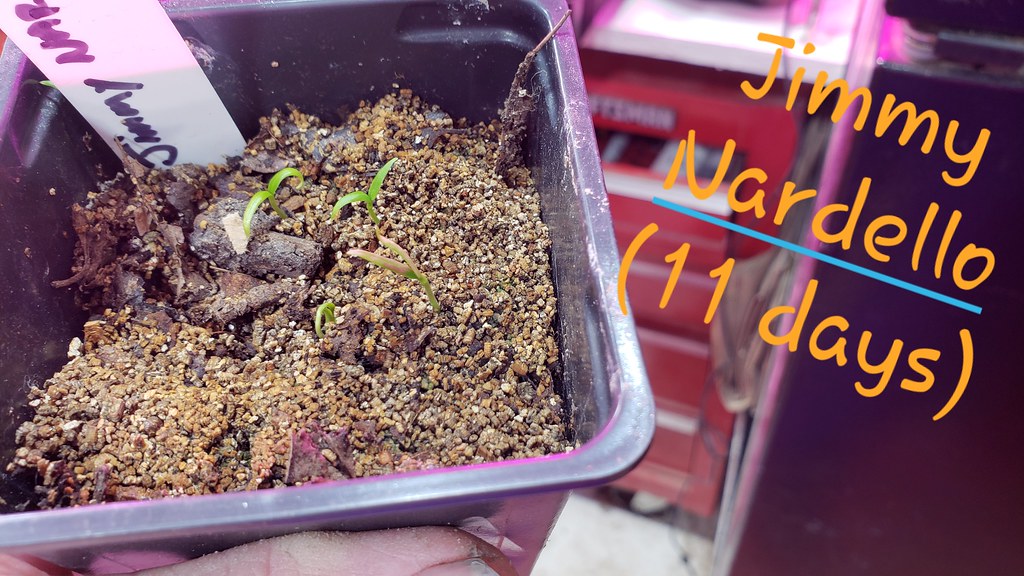
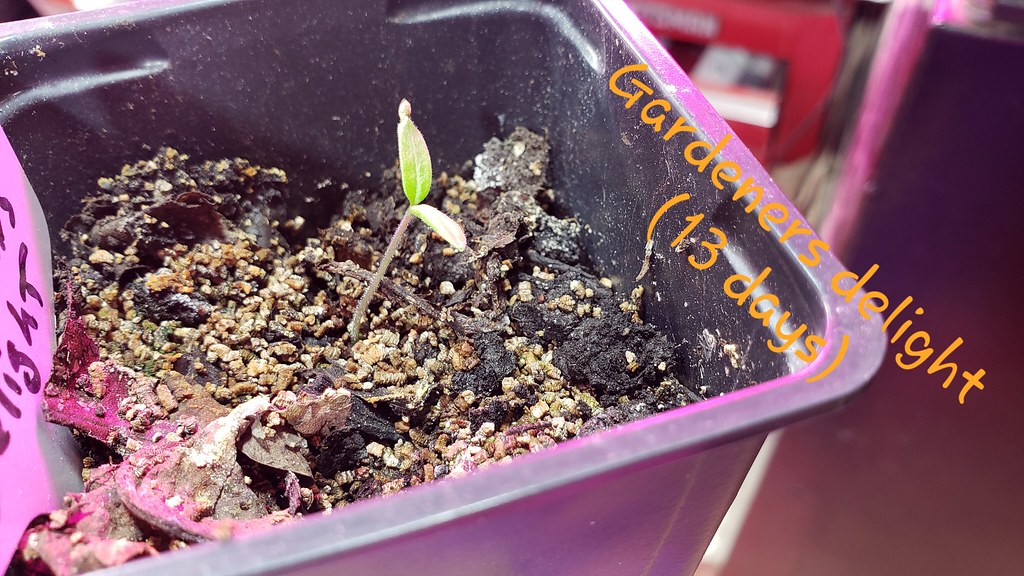
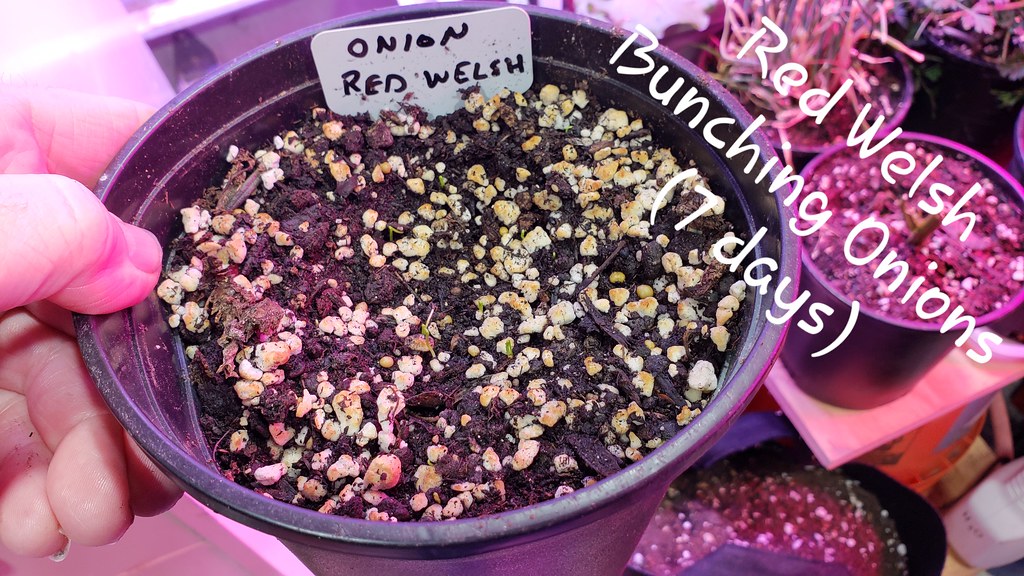
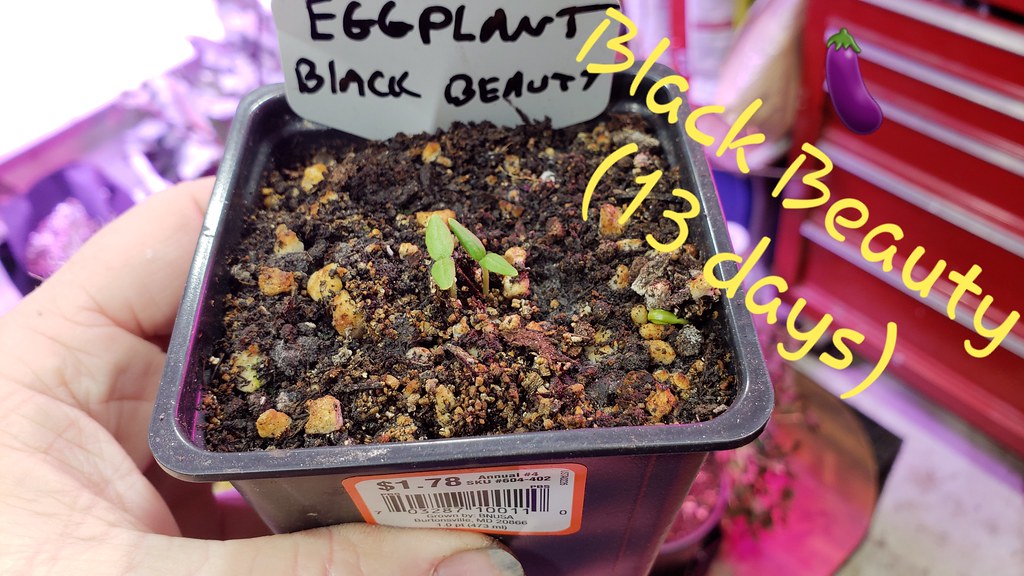
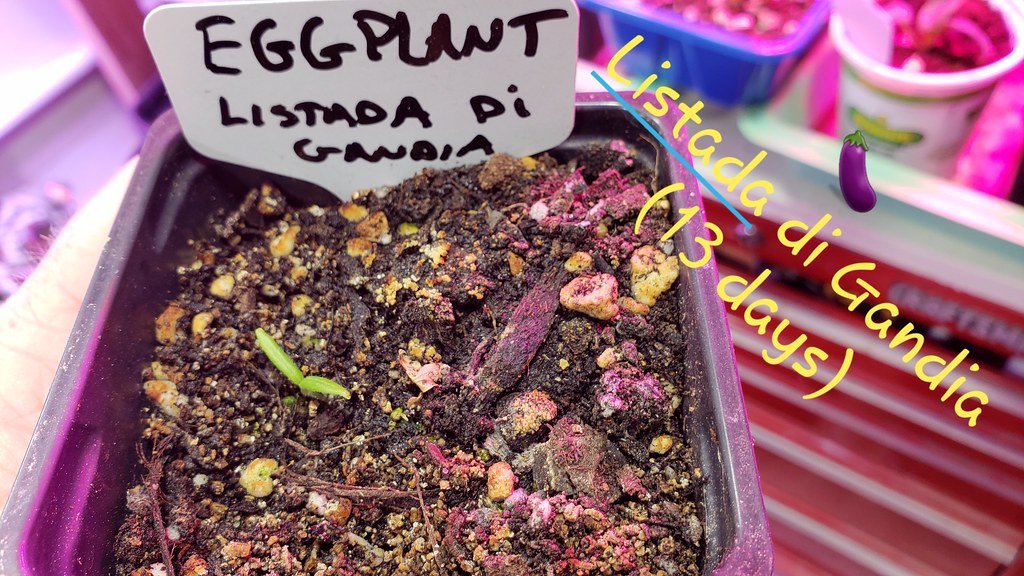
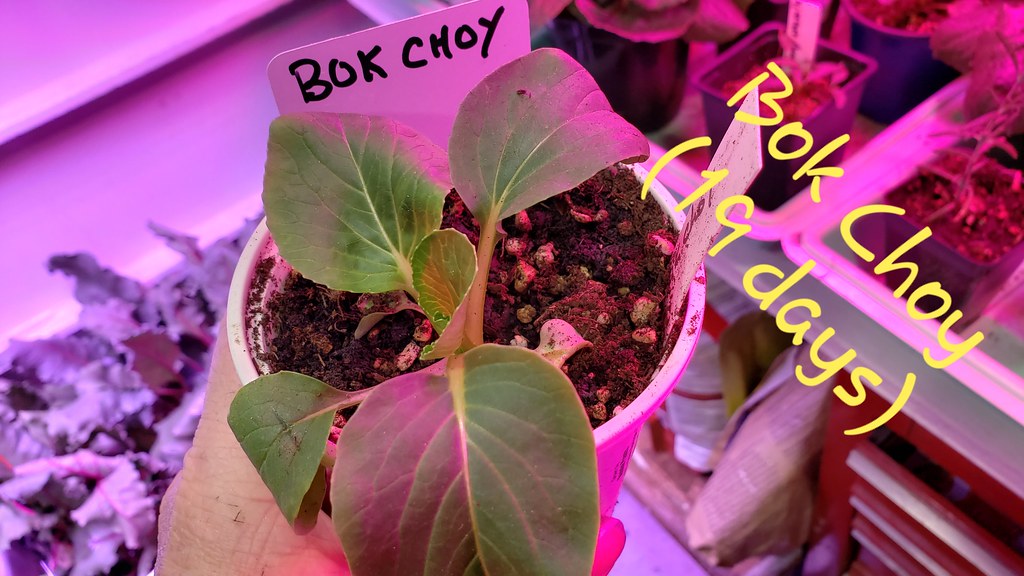
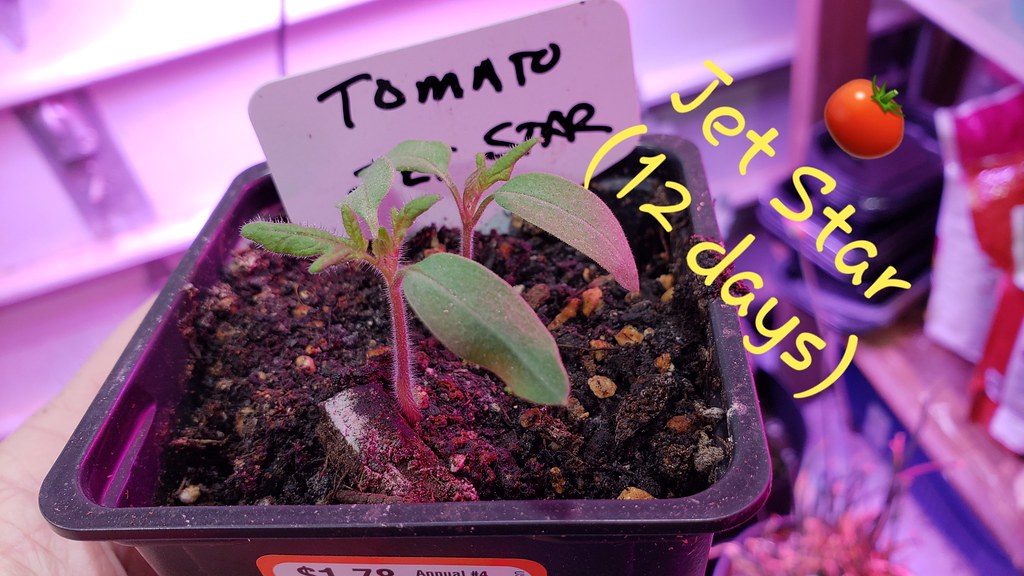
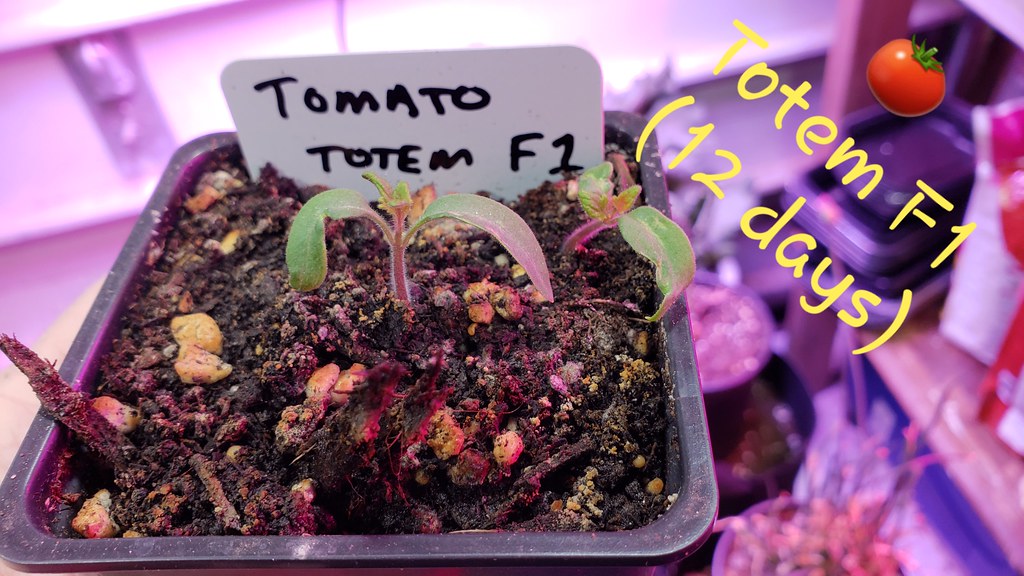
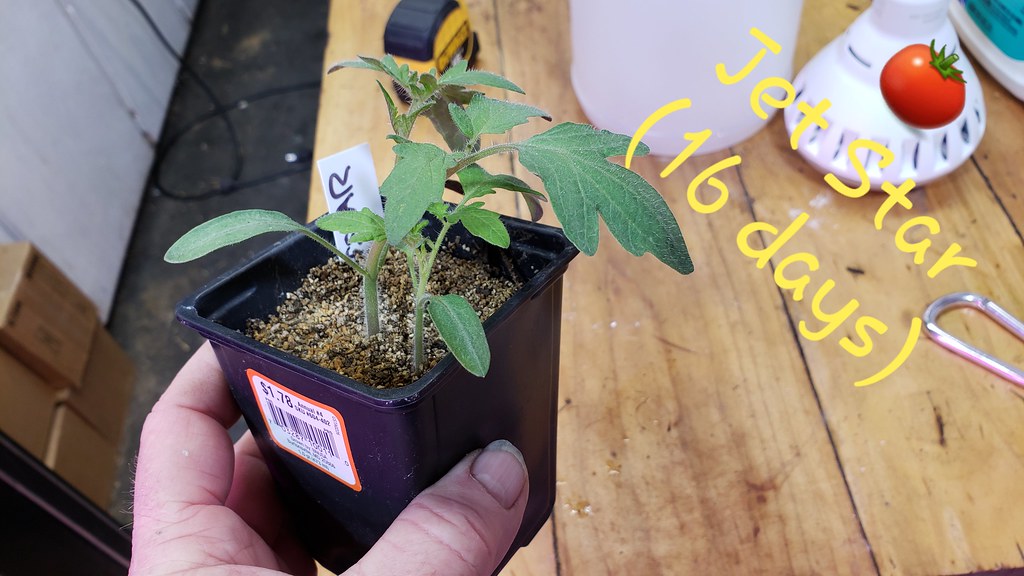
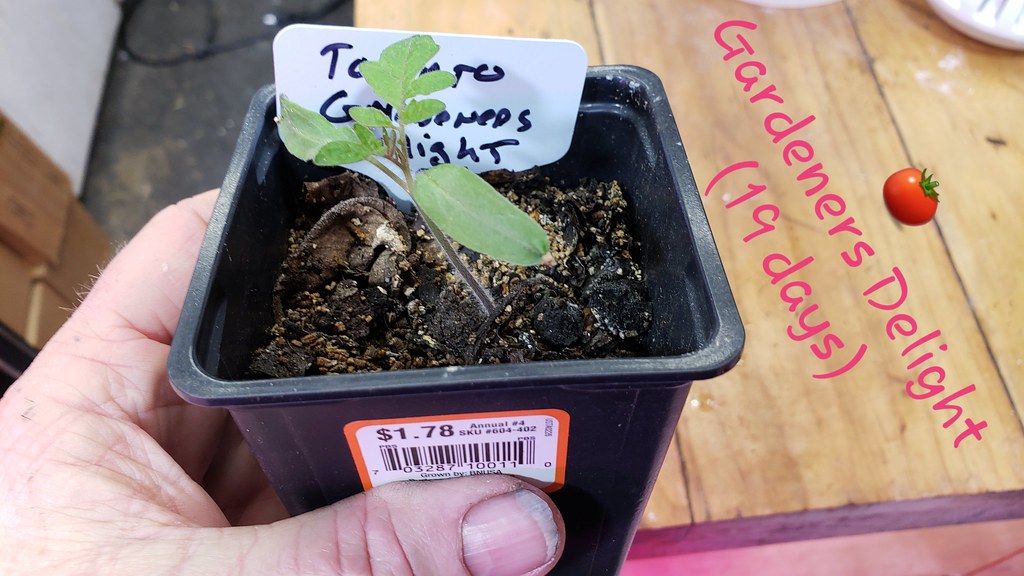
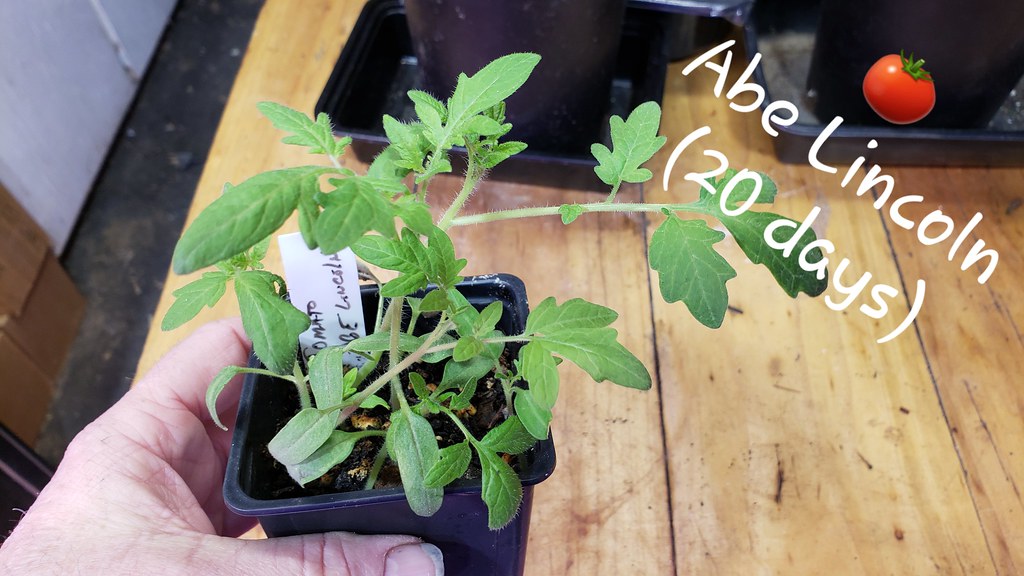
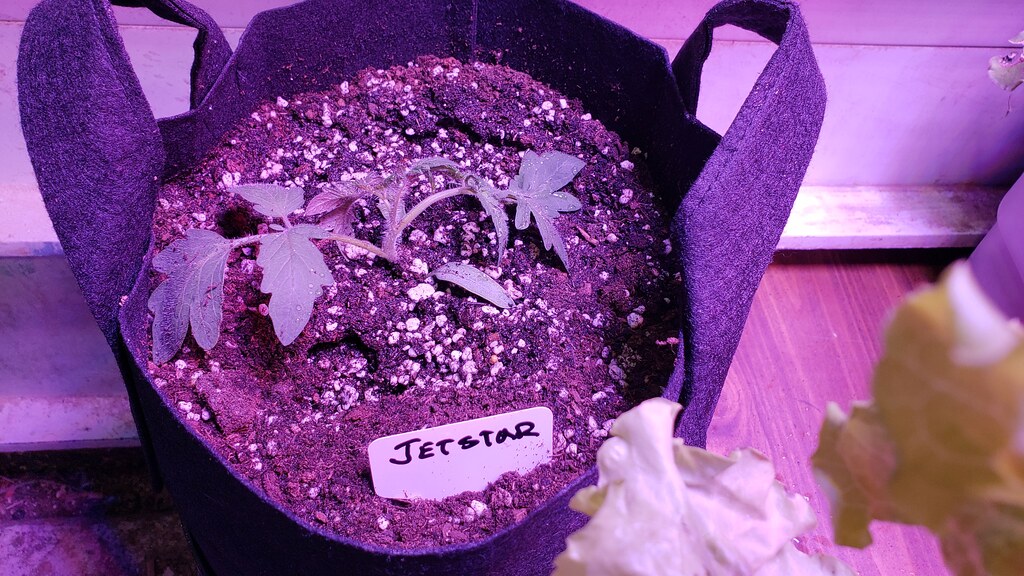
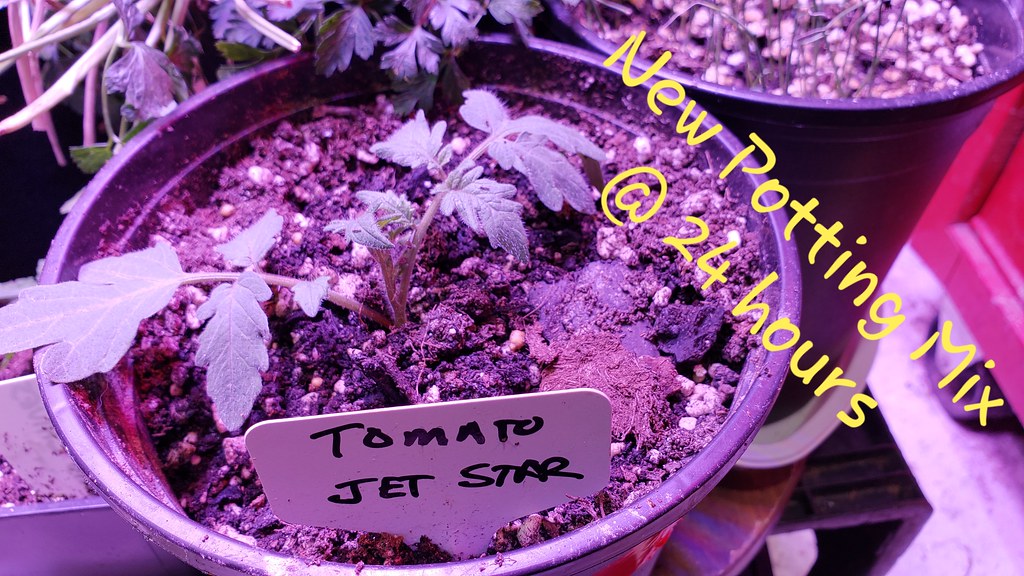
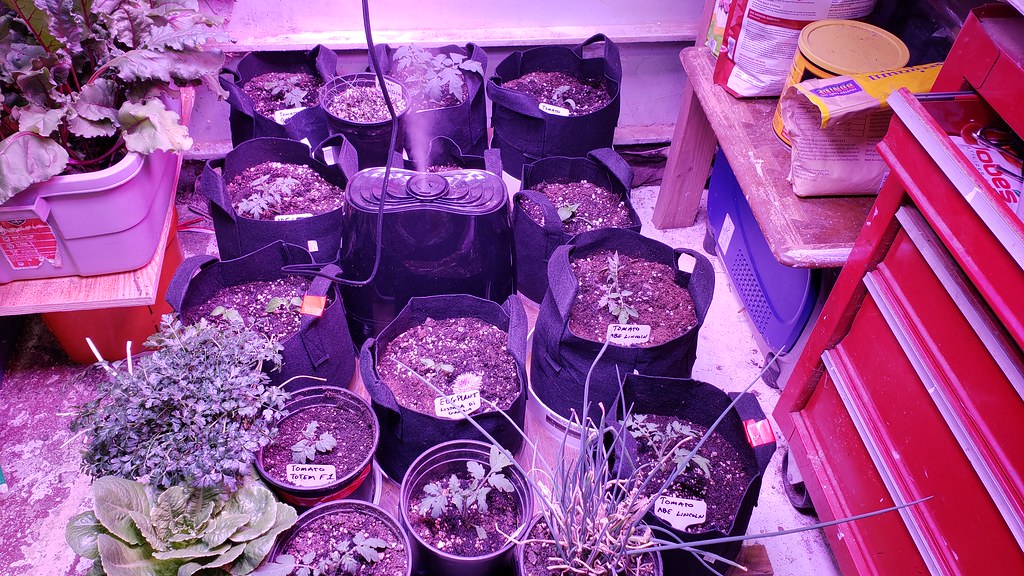
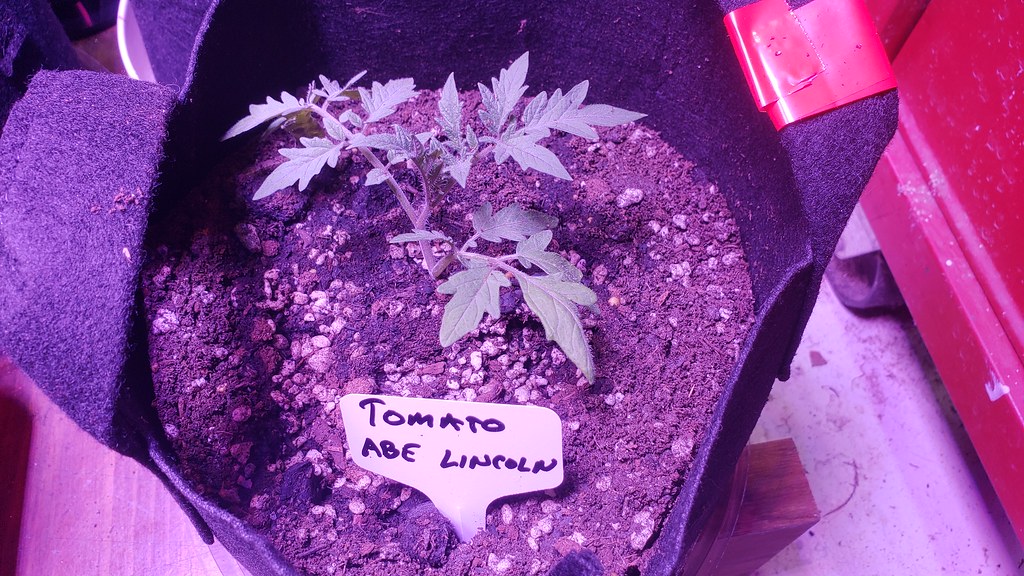
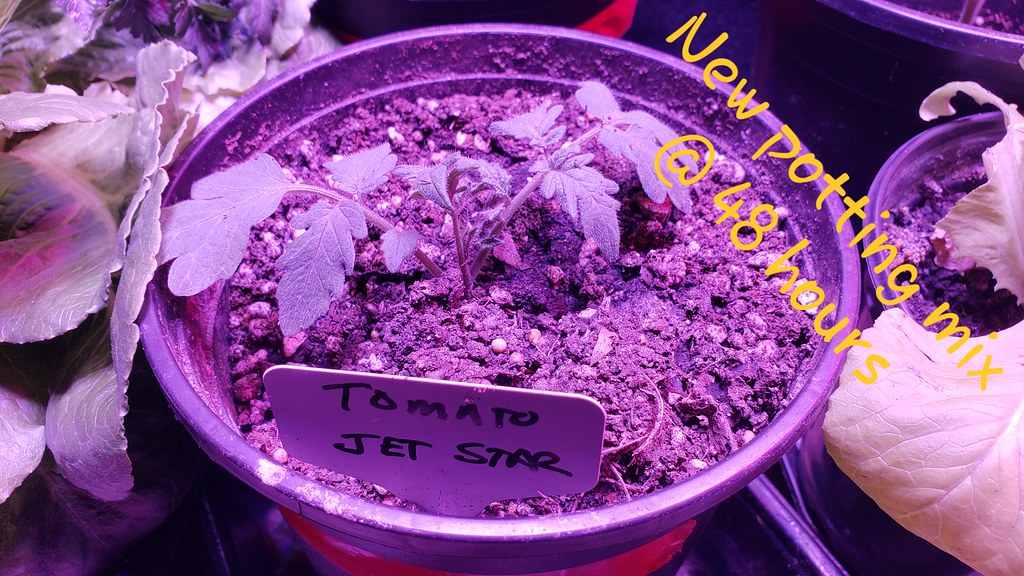
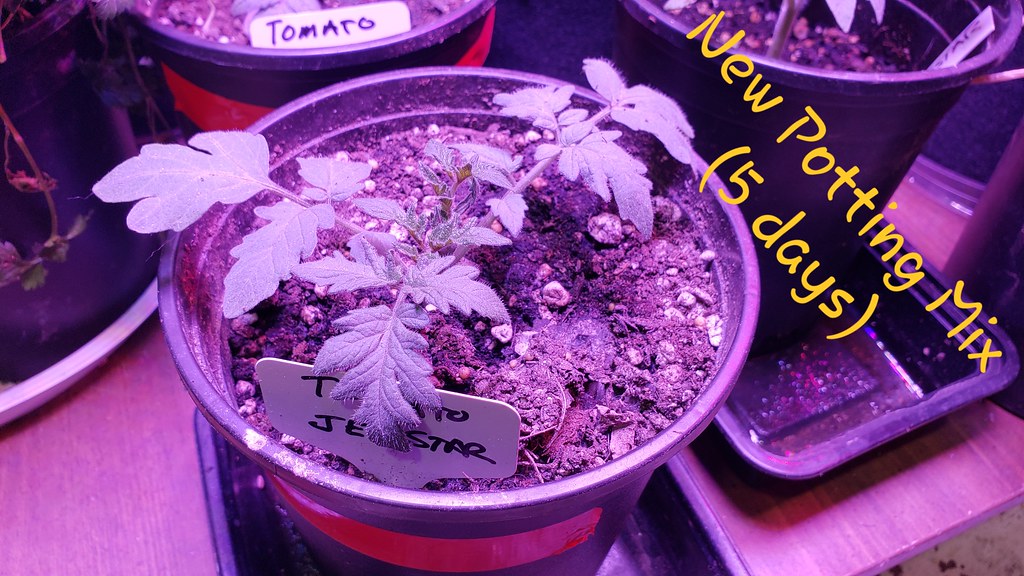
Planted some Baby Bok Choy - Suzhou Baby Bok Choy (30 days), Gardeners Delight Cherry Tomato (65 days) and an Abe Lincoln Tomato (87 days). I also ordered some Totem FI seeds (75 days)
Image


December 18th, 2018

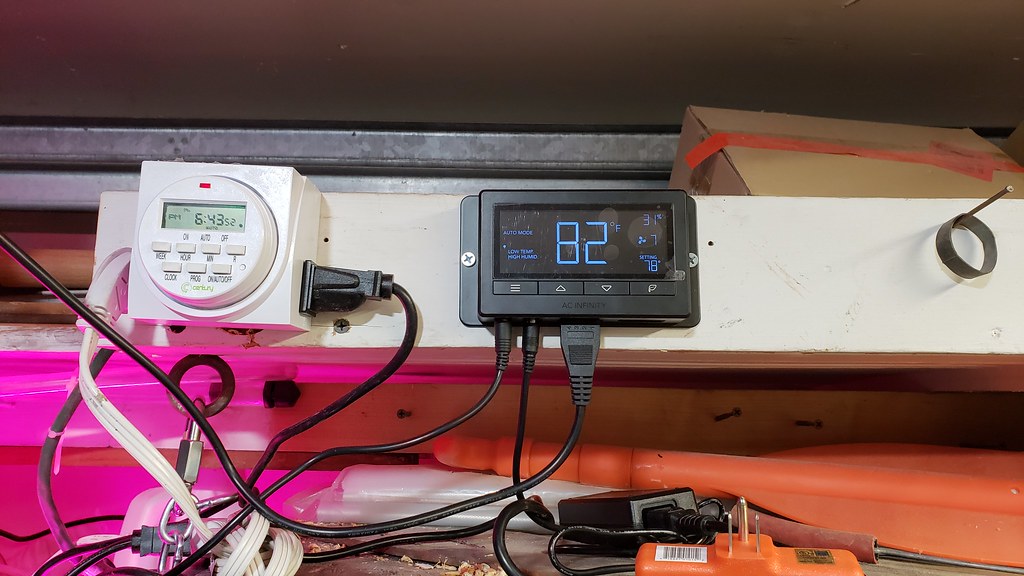
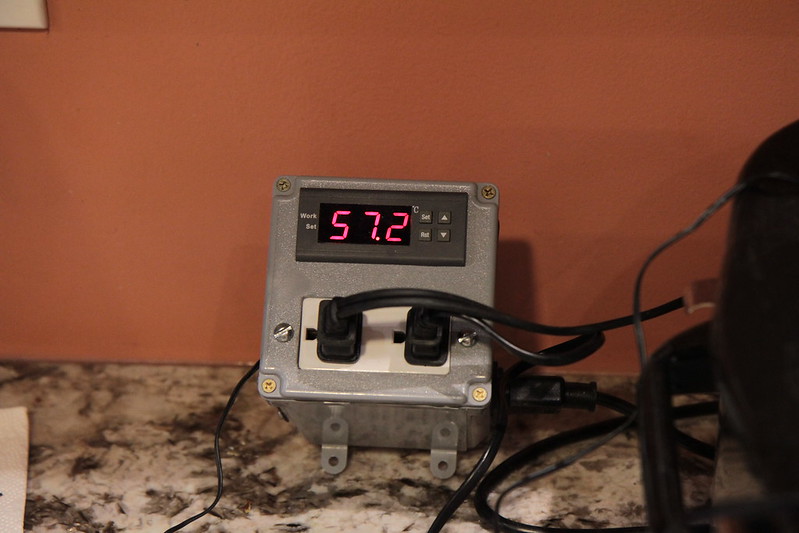
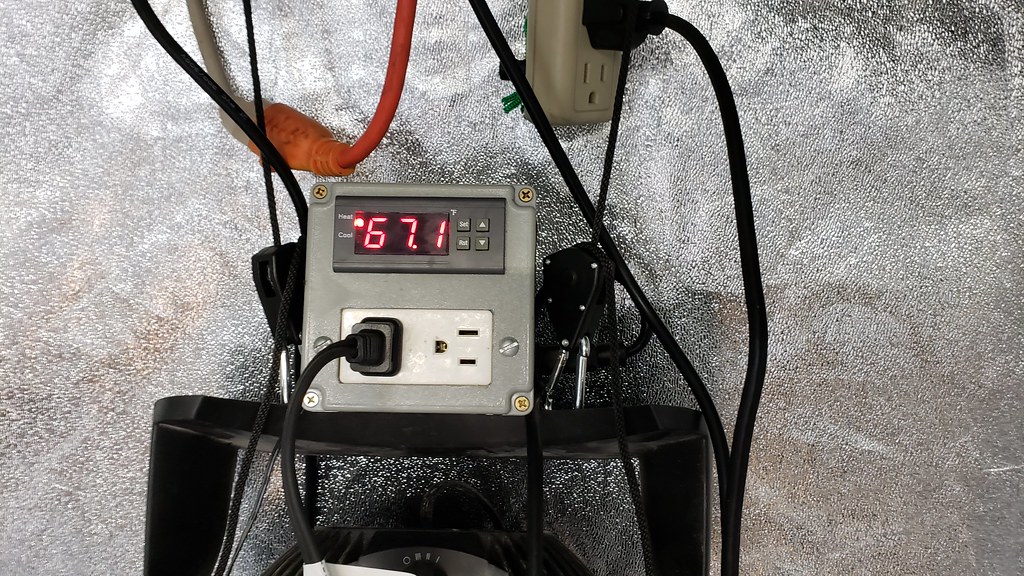
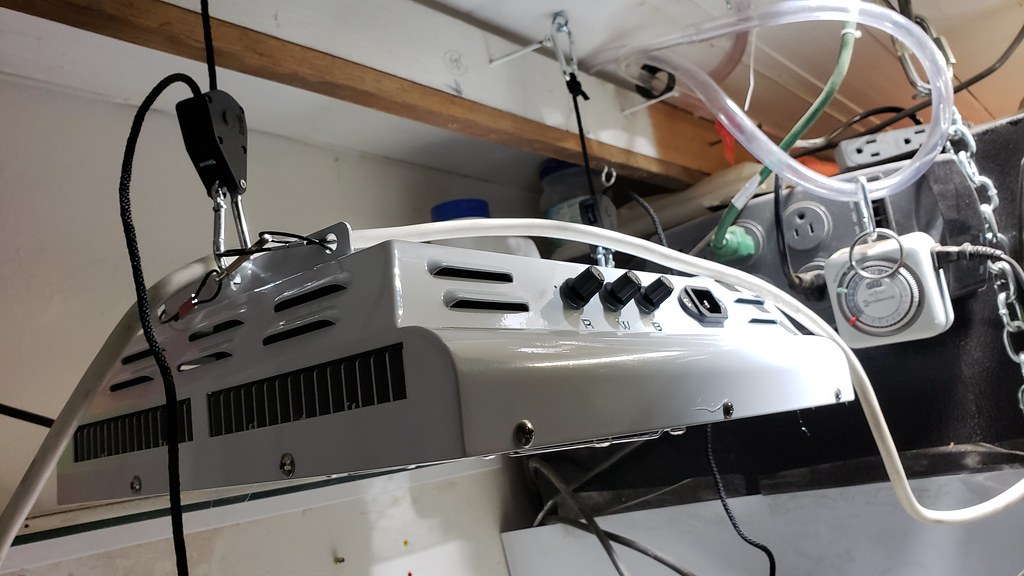
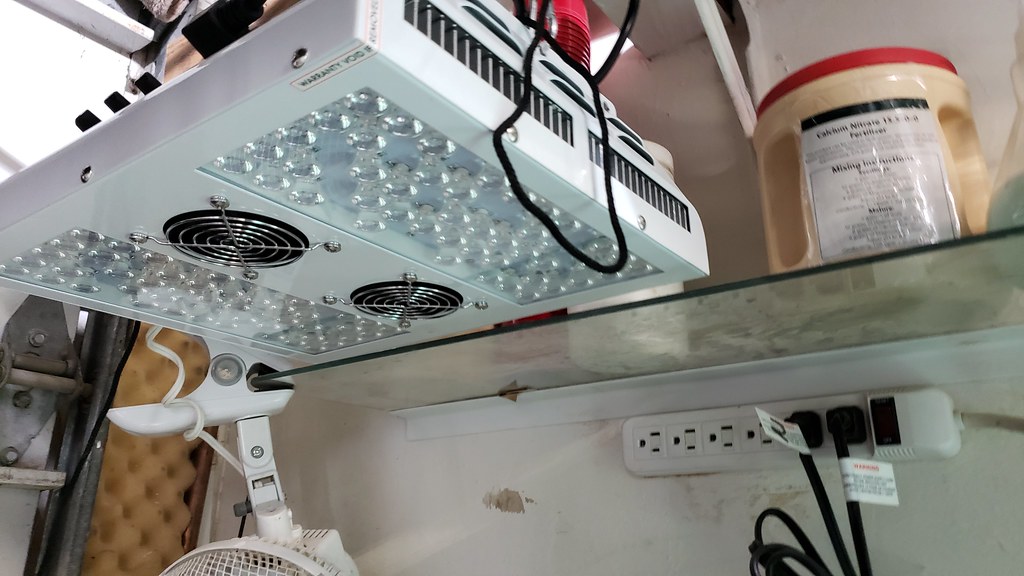
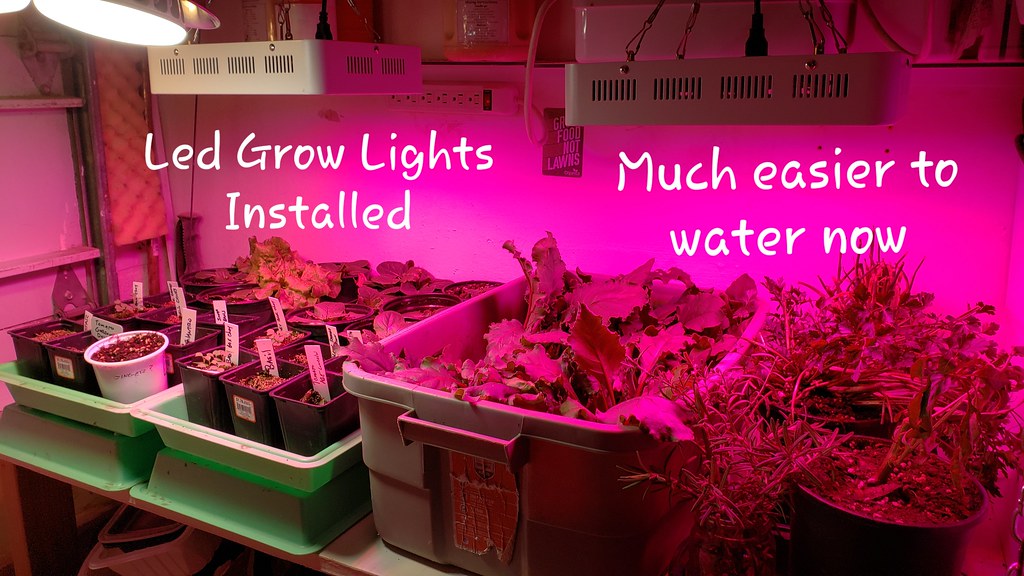
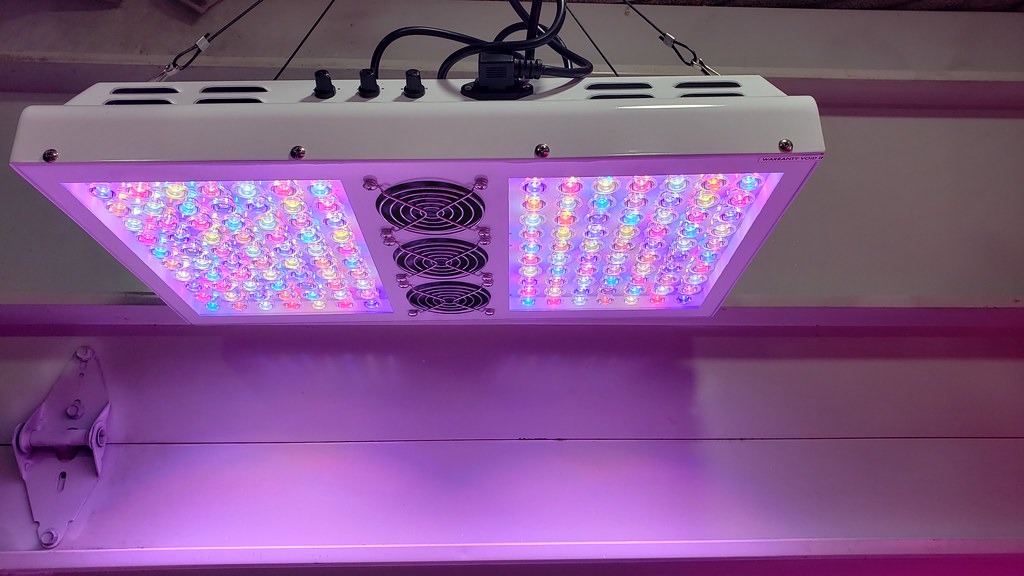
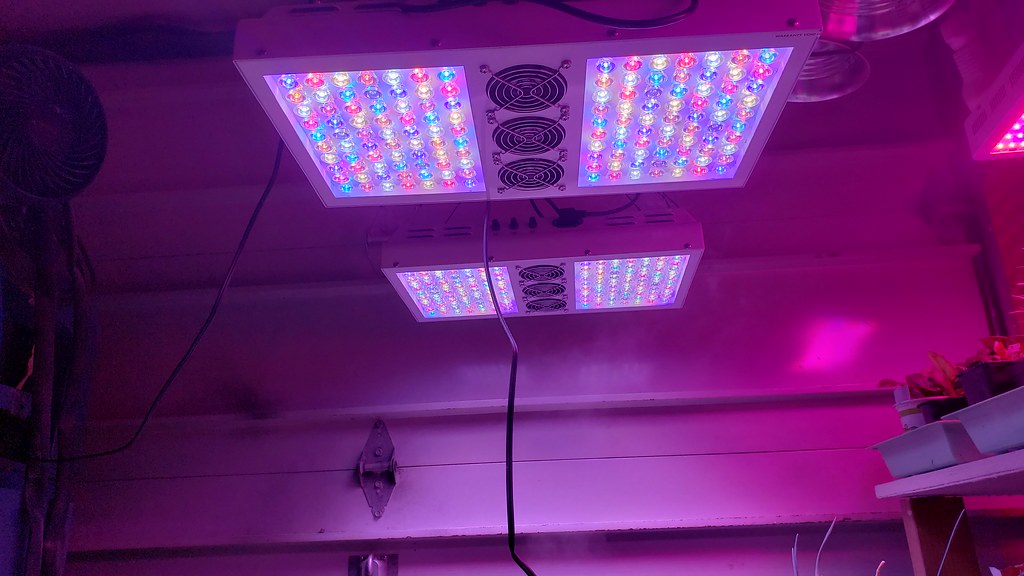
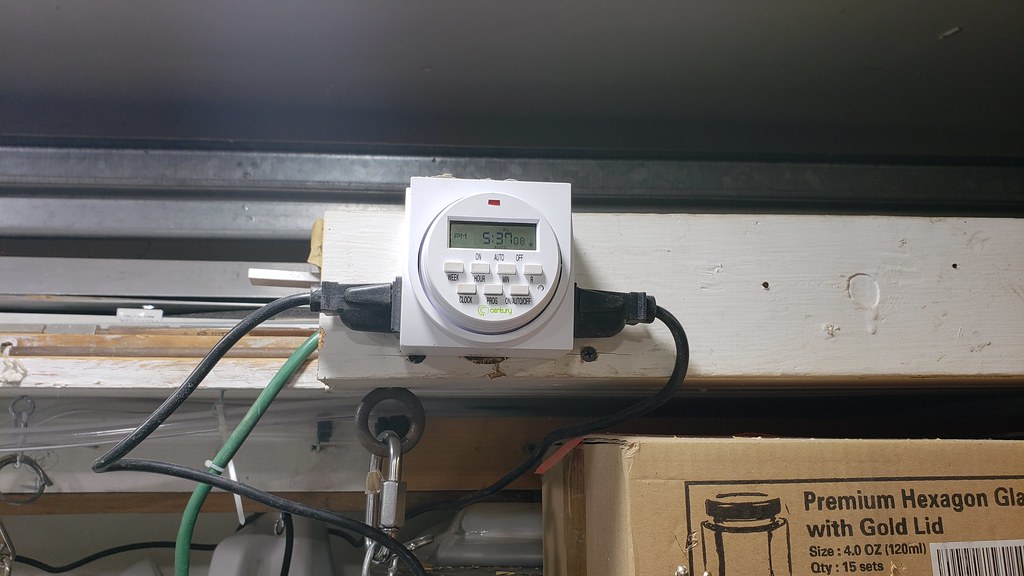
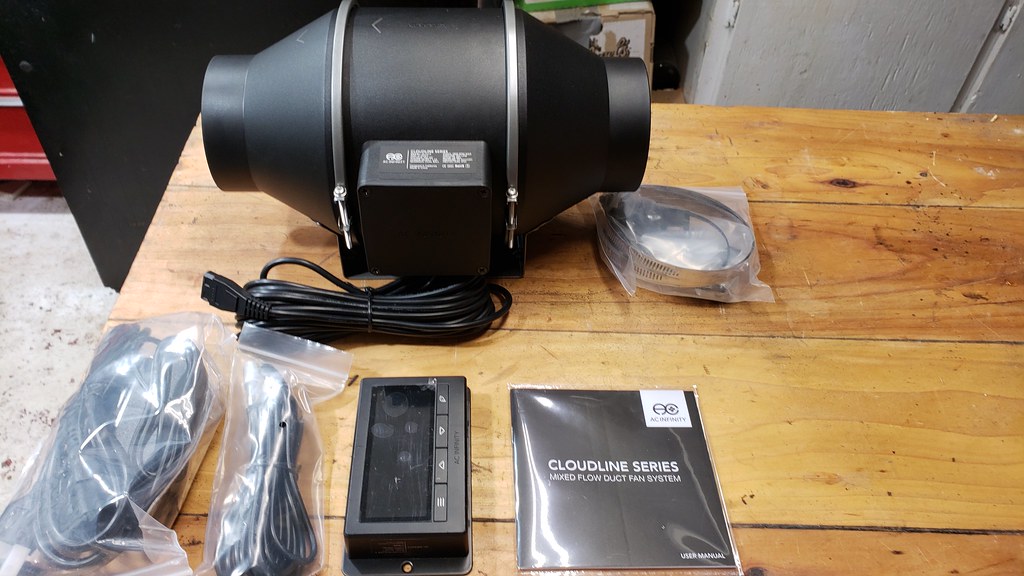
I ordered some "BR" bulbs, a UFO Full spectrum Grow light and a few Clamp Light fixtures for this project.

Feit 3000k 30 watt (250W Equivalent) 2500L (250W Equivalent)
Kobi 5000k 52 watt (205W Equivalent) 5300L
Growstar 300W UFO Led Grow Light, Full Spectrum UV & IR Plant Light with High Par Value Cree COB Grow Light
1/8" Adjustable Grow Light Rope Hanger
150-Watt Incandescent Clamp Light


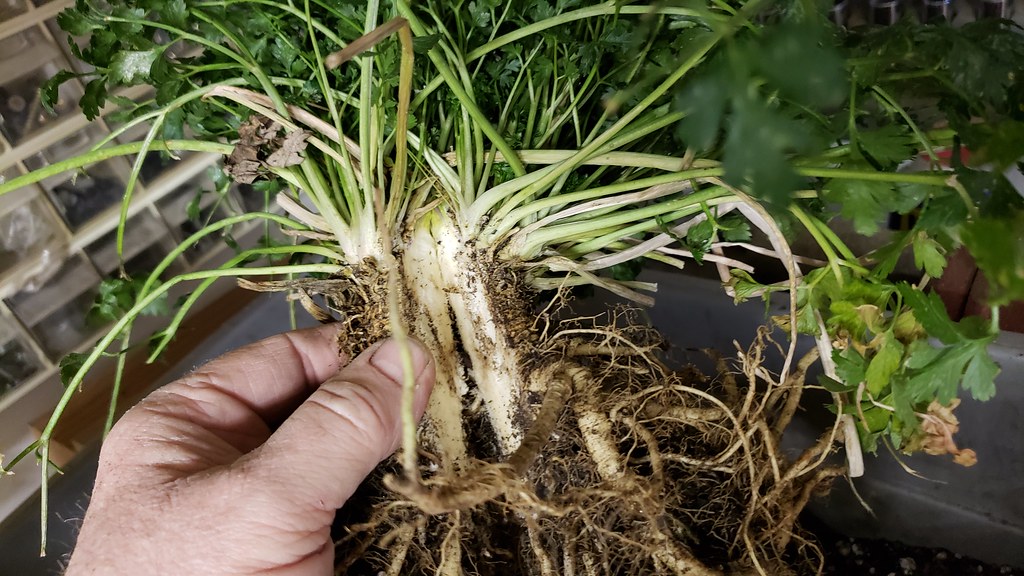
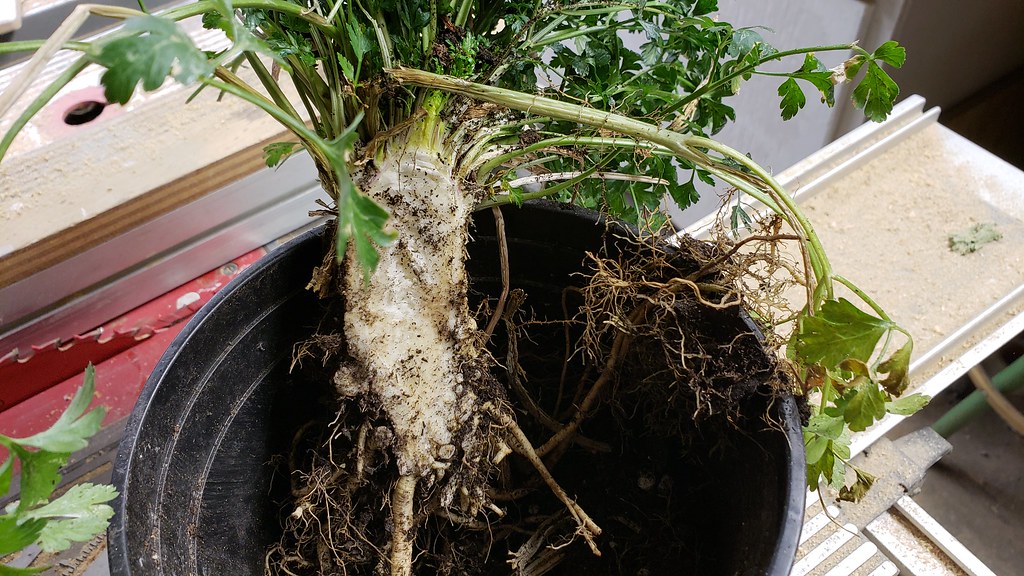
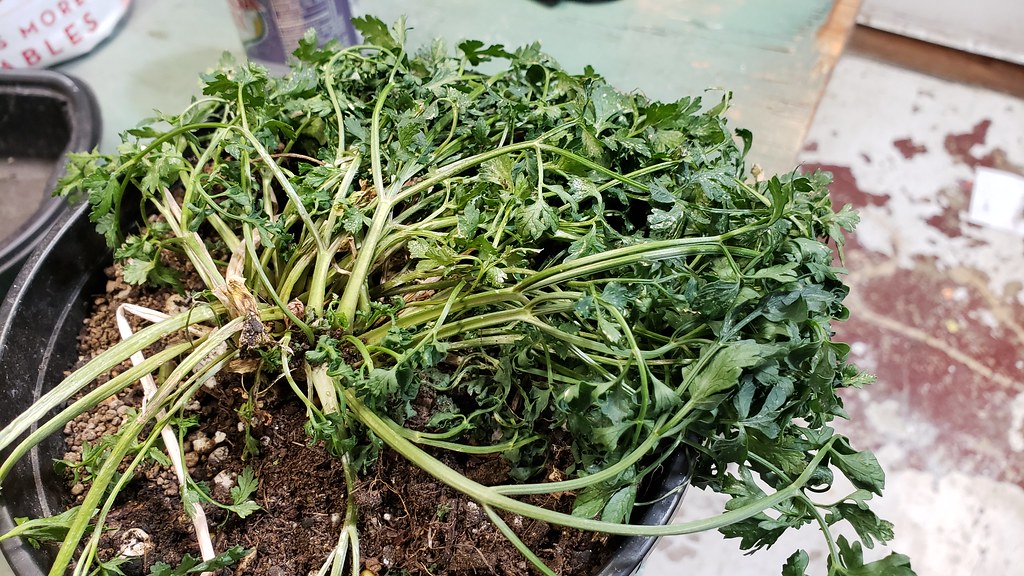
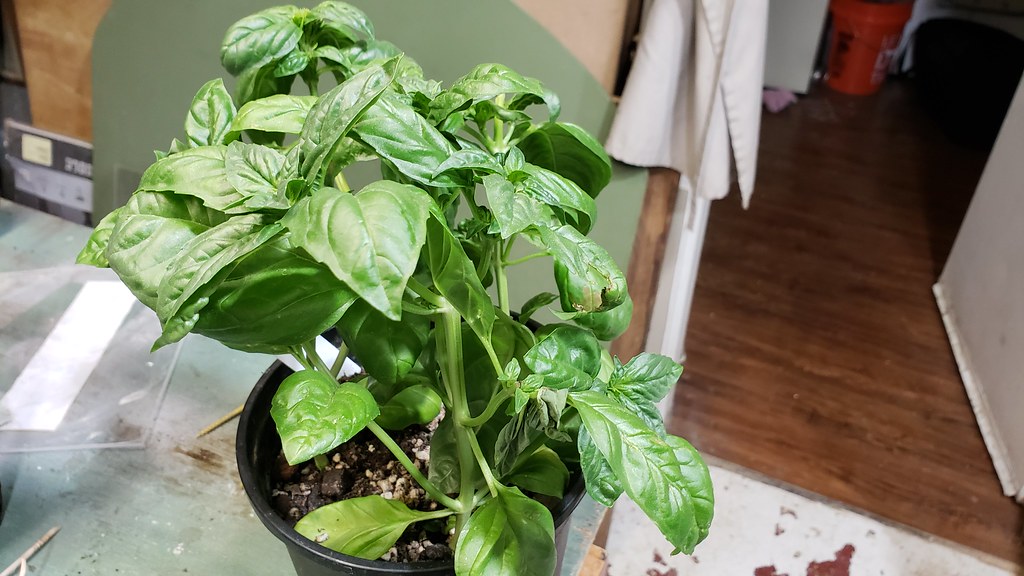
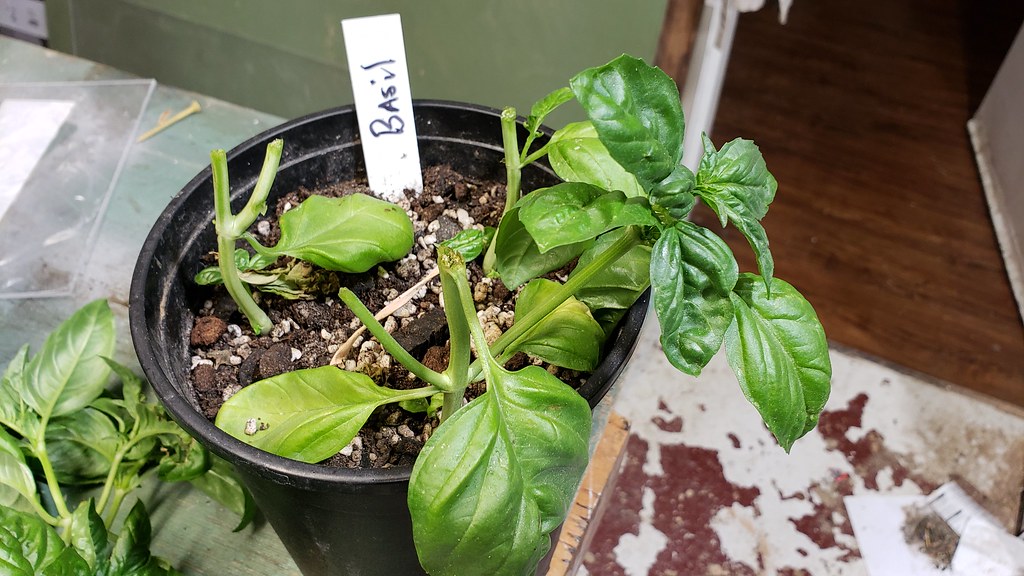
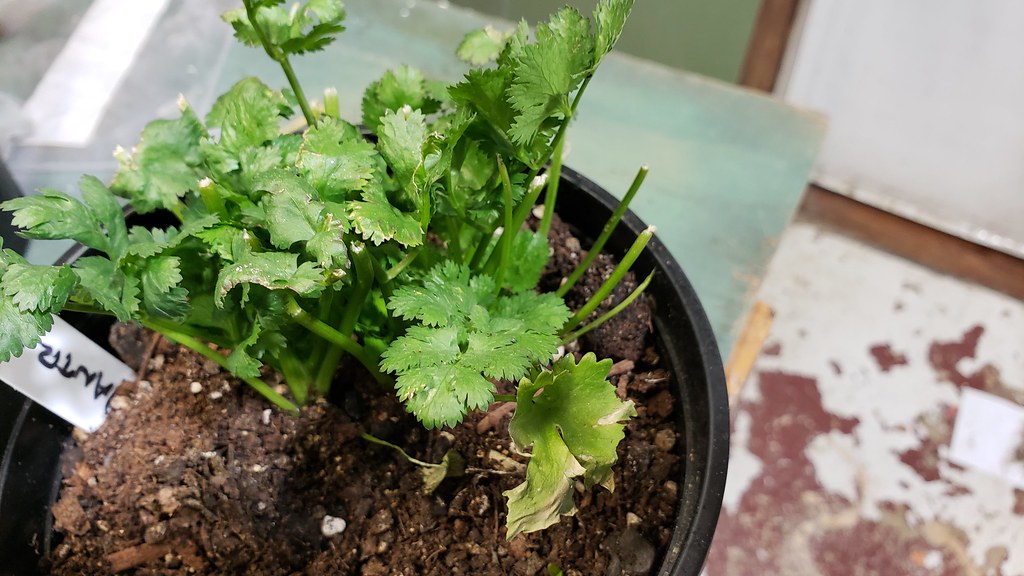
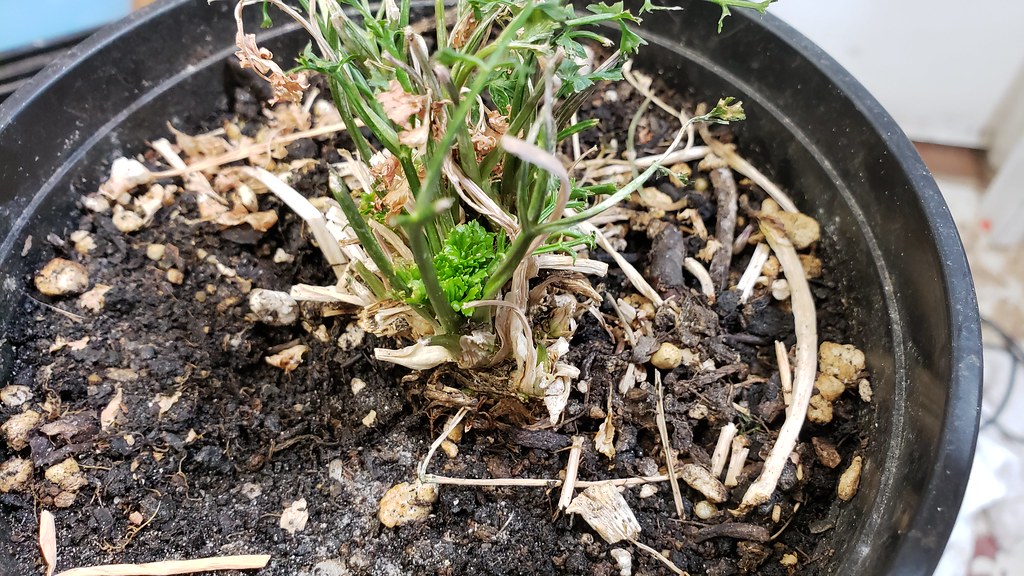
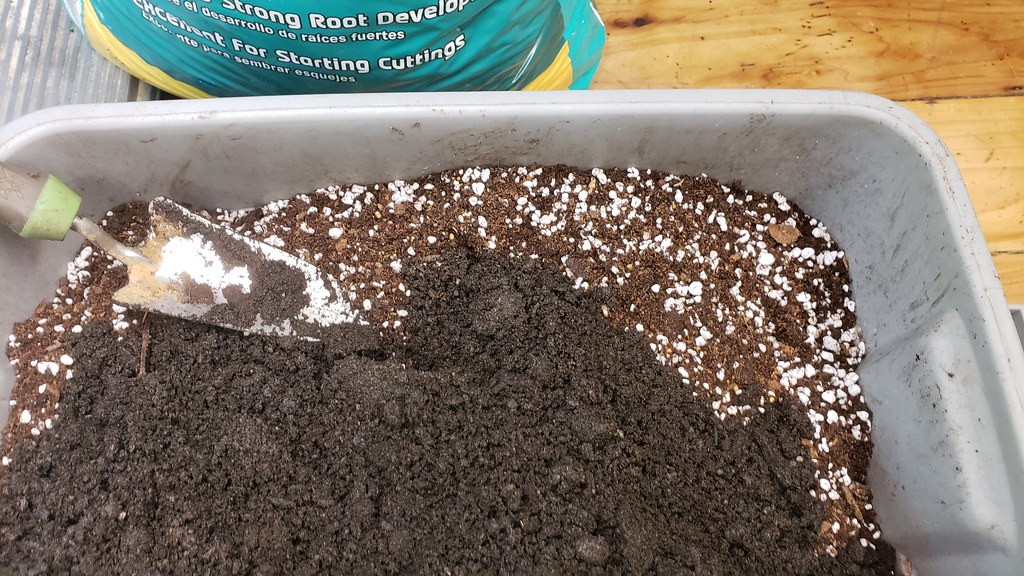
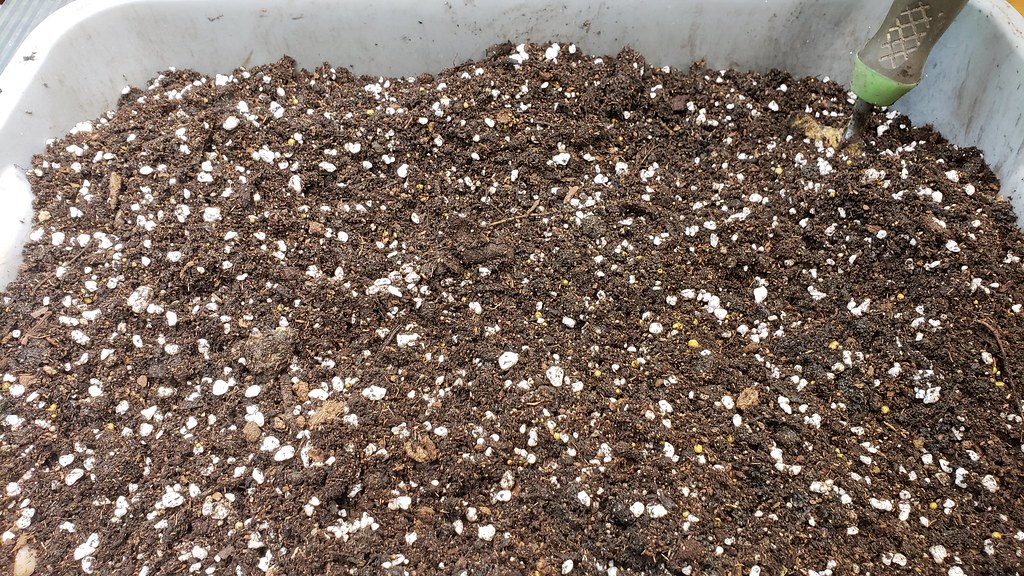
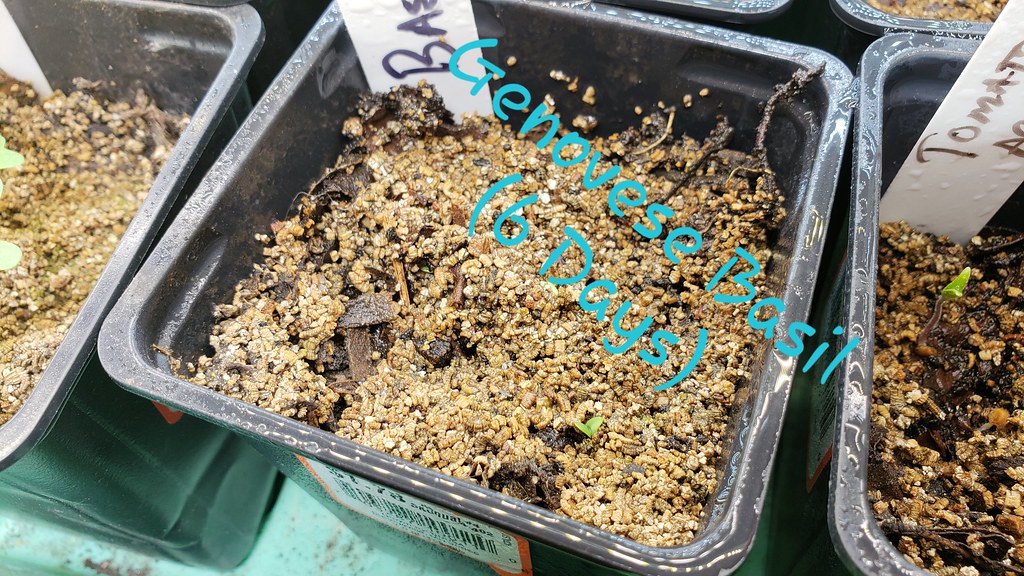
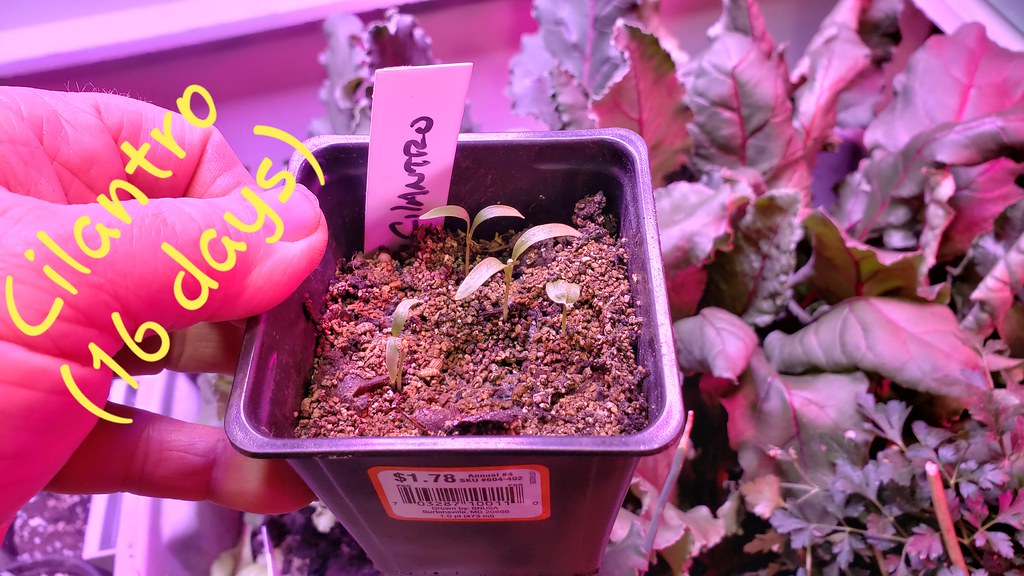
Today I planted cilantro (30 days) and Genovese Basil (66 days) and mixed up some fertilizer this is for my herbs and greens.

Nute Mix per 5 gallons for greens (20-18-38)

10 grams Calcium Nitrate Fertilizer 15.5-0-0
10 grams Hydroponic Tomato Fertilizer 4-18-38
5 grams epsom salts Magnesium Sulphate

SQWIB
Greener Thumb
Posts: 970
Joined: Tue Feb 16, 2016 9:21 am
Location: Zone 7A - Philadelphia, PA

December 19th, 2018

I got caught up in all the hype after doing a bit of research and reading reviews and ordered another Led Grow light and some Panda Film.

*Roleadro LED Grow Light, Galaxyhydro Series 1000W Indoor Plant Grow Lights Full Spectrum with UV&IR for Veg and Flower-1000w
*Panda Film


After work today, I cleared a spot for the new table.
Image


I will be using this table top I made that covers the Table Saw when not in use.
Image


Hung a few lamp holders but I'm not sure if I'm even going to use them.
Image


Some tables I had in the downstairs bathroom
Image


Table added and clamped to the garage door with C-clamps. The idea is, if the plants (hopefully) get tall to the point I can't raise the lights anymore, I will drop the table down onto some crates.
Image


OK, this isn't pretty but it is functional, I wanted a strong support for the lights and the floor rafters didn't really line up to where I wanted them to to screw in eyebolts. The solution was simpler than I originally figured. I used 3" deck screws and a few washers screwed into the floor joists then wrapped a coat hanger around them. I will have to hit it with some white spray paint.
Image


After the table was situated, I planted some Garlic Chives (90 days), Jimmy Nardello Pepper (90 days), Bush Snap Beans (48 days) and a few more Black Seeded Simpson (45 days).
Image


So far so good, it's not real pretty but should work
Image


Beets @ 25 days
Image

SQWIB
Greener Thumb
Posts: 970
Joined: Tue Feb 16, 2016 9:21 am
Location: Zone 7A - Philadelphia, PA

December 20th, 2018

After a bit more reading (slow day at work) I decided to cancel the UFO grow light and for $30.00 more ordered another, Roleadro Galaxyhydro Series 1000W LED Grow Light.
I really need to stay off of the computer!


When I got home I mixed some potting mix for the indoor veggies.

1 bucket (2 gallons) peat moss
1 bucket (2 gallons) Perlite
1/2 bucket (1 gallons) Black Kow composted cow manure
1 cup pelleted time-release fertilizer (osmocote)
1/4 cup of Blood Meal
½ cup lime (to counter the acid of peat and keep the pH level near neutral)


Image

Image


I had two pepper plants that I pulled at the end of the season from the Aquaponics and raised bed. I had the plants by a window in the basement bathroom, I wanted to see if I could overwinter them. I decided to re-pot them and move them to the grow room. I know one is a Tabasco, but not sure what the other is. I took them out of their terracotta pots and tried to clean off most of the Aphid skeletons lol.
Image

Re-potted the pepper plants using the new mix and watered real well. The one root-ball looked pretty dry, so I'm not sure if it will make it, anyhow, I put the neglected pepper plants under a few Led lights for the time being and setup the fan.
Image

Image


The Baby Bok Choy is up (3 days) without the use of heat mats.
Image

SQWIB
Greener Thumb
Posts: 970
Joined: Tue Feb 16, 2016 9:21 am
Location: Zone 7A - Philadelphia, PA

I thought I had posted my update here, hmmm. Let me try again. lol.


Ordered some more seeds from Bakers Creek for the indoor (salad) garden
  • Red Welsh Bunching Onion
  • Arugula
  • Rocky Top Lettuce Mix Salad Blend
  • Green Wave Mustard


December 21st - 23rd, 2018

New lights arrived.

One thing I really like about the Led's, even the semi-cheapos, is how far you can keep them from the canopy with awesome results. This makes managing everything much easier. I'm still trying to wrap my head around a lot of this LED stuff, veg, bloom and all the other junk.

For the average person doing seedlings and indoor greens using a few fluorescent tubes has you covered.


What a difference.
Image

2017
Image

Image

Image

Image

Image

Image

Image

Image

Image


For my tomato plants I wanted at least two gallon containers, I didn't want any hard type planters so opted for grow bags for easier storage.
Image

Image


One nice thing about the old lights over the Led's is you can monitor the plants better from a visual standpoint (true color), but I'm working on that.

Every Led array and setup is unique to the way it is setup, I don't have any way to test light output or whatever they do but did find one tip that I have been using.

I test the leaves with an IR thermometer and if they are at the same temp and /or lower than the ambient temp, I should be at the right height.
I also have a fan that is on the entire time the lights are on.

"Thermal energy exchange includes convection (air temperature), conduction (substrate temperature), absorption of radiation (light intensity), and evaporative cooling (transpiration)".
Image

Image

Image

Image


Planted some Eggplant, Peppers and Tomatoes..
Image

Image


December 26th, 2018
Image

Image

Image

Image

Image


December 27th, 2018

Today after work I tried getting the humidity up in the room a bit by adding a pan of water on top of the heater.
I reset the Hygrometer and Thermometer the next morning to see if the pan of water I added makes a difference in the humidity in the room. By the end of this week I'll know if I need to make more adjustments to the heat and humidity.
Parsley is doing real well and the chives have greened up a bit. Planted some Arugula, Bunching Onions, Lettuce mix and mustard greens.
Image

Image

Image

Image

Image

Image

Image

SQWIB
Greener Thumb
Posts: 970
Joined: Tue Feb 16, 2016 9:21 am
Location: Zone 7A - Philadelphia, PA

December 28th - 30th, 2018

I played around in the garden a little this weekend, transplanted some Bok Choy, mixed some potting soil, setup my grow bags, cut some drip trays from 5 gallon buckets, filled my two gallon and three gallon grow bags and battled some aphids. My new Viparspectra 700 is due to come in Wednesday so I can get that hung and move the beets to the lower table to make room for my greens on the upper table.

I also got a bit carried away again this weekend, I saw a used Viparspectra 700 on e-Bay and decided to bid on it. There were a decent amount of bidders and watchers so I placed a high bid at 3 seconds and won the bid at $180.00, a bit more than I had hoped for but it's better than paying $300.00.
Image

Image

Image

Image

Image

Image

Image

Image

Image

SQWIB
Greener Thumb
Posts: 970
Joined: Tue Feb 16, 2016 9:21 am
Location: Zone 7A - Philadelphia, PA

January 1st-2nd, 2019

Two new toys came in today, a Viparspectra 700 and a 6 liter ultrasonic humidifier. I setup the humidifier on the lowest setting to turn on with the lights and fan. Hopefully I can keep at least a 40% relative humidity in the grow area while the lights are running. The water pan on the heater has helped a good bit keeping the humidity up slightly in the garage but hopefully the Ultrasonic Humidifier will help even more.

I unboxed the Viparspectra and this thing is a tank, all metal and about 14 pounds. I was a bit nervous hanging this from my makeshift ceiling cable. After the Viparspectra was installed I unplugged the two BR Led bulbs.
Image

Image

Image

Image


The grow room is coming along nicely.
Image

SQWIB
Greener Thumb
Posts: 970
Joined: Tue Feb 16, 2016 9:21 am
Location: Zone 7A - Philadelphia, PA

January 3rd, 2019

The garage was like a sauna when I walked in this evening, so it's obvious the humidifier is working out nicely on the lowest setting. I just hope I can get at least 3-4 days out of a fill.
Image


The Black Seeded Simpson has another 5 days and the Romaine has 30 more days to maturity
Image

Image

Image

Image


The beets have another 19 days, I really don't think I'm going to get beets but I can at least harvest the Beet Greens.
Image

User avatar
jal_ut
Super Green Thumb
Posts: 7447
Joined: Sun Jan 18, 2009 10:20 pm
Location: Northern Utah Zone 5

You are having way too much fun!

My winter garden is one 6 inch pot with a few tomato seeds and a few radish seeds planted. The radish came right up in two days. The tomatoes took about ten days. They are up but not growing. I guess not enough hours of sunlight? Today outdoors, its 31 degrees and snowing. My garden is covered with 6 inches of snow. The only thing growing is ice.

SQWIB
Greener Thumb
Posts: 970
Joined: Tue Feb 16, 2016 9:21 am
Location: Zone 7A - Philadelphia, PA

Jal_ut

It keeps me busy and out of trouble, yes it is definitely fun, I guess because it is still new and I'm learning a lot. If I am creating/building something I am a happy camper, I love to tinker.
Hopefully this year will be a success, I can tweak next year, I got a lot of $$ invested now, we will see.

SQWIB
Greener Thumb
Posts: 970
Joined: Tue Feb 16, 2016 9:21 am
Location: Zone 7A - Philadelphia, PA

January 4th -6th, 2019

There are going to be quite a few changes to the grow room by the end of this week but first let me recap this weekend. I made some observations and changes to the grow room. The garage was near 50% humidity during the day and I got a little shy of three days with one fill of the humidifier, I have the humidifier on a the same timer as the lights 16 hours a day, I may put the humidifier on a separate timer and run 10 hours a day instead of the 16. The plants are now drinking a lot of water and need to be checked every day, mainly the lettuces. I removed the filing cabinet and placed it in the outside playhouse, then removed the existing table and placed a new table that is 12" longer. This gives me a bit of room to get around the table and more grow room for the plants.

I also noticed something pretty interesting in the Grow Lights, more on that later.


Image


Time to revamp the existing area
Image


but first a beer.
Image

Image


The pots are for extra plants that have germinated.
Image


Moving that filing cabinet was a chore, another beer is in order
Image


all the plants are on the table, yep you guessed it...
Image


I'm also working on different lighting for my greens/seedling table, more on that later.
Image


Lets have a look at some growth.
Image

Image

Image

Image

Image

Image

Image

Image

Image

Image

Image


I felt bad for these guys, somehow they ended up under a Parris Island Romaine and got a tad leggy.
Image


Now here is where it gets a bit interesting.
Image

Image


All 4 plants were potted and watered exactly the same but two were moved off of the greens table and onto the lower table with the Viparspectra lights barely 5 days ago, coincidence??
Image

I don't think so.
Image


Anyhow, I decide that I was going to jump in this hard and hopefully reduce the chance of failure. My thought is, if I do this half @ssed in the beginning and fail, I may not want to try this again, so I made the $$ decision to add another Viparspectra 700 to the greens table and lower and butt up the two Galaxy Hydro led's.

Oh, almost forgot, I also got a cool pair of grow room shades, lol. I keep these hanging by the entry door.
Image

SQWIB
Greener Thumb
Posts: 970
Joined: Tue Feb 16, 2016 9:21 am
Location: Zone 7A - Philadelphia, PA

Another one of the Viparspectra 700's came in, this was a used item from eBay, one fan of the three doesn't work and it runs slightly hotter than the New Viparspectra, I need to replace the fan. I hooked the humidifier up to a separate timer and it will cycle about 8 hours a day.
Image

Image

I started transplanting the tomatoes, I had to move the Beets out of the way to make room, the beets won't get as much light here but I really needed to start making room on the Greens table and wanted to get the tomatoes under the Viparspectra lights.
Image

Morning check before the lights come on.
Image

Image


January 8th, 2019

Not much going on in the grow room, just a bit of tweaking. I sacrificed some plants to make room for the grow bags. I usualy check the grow room 5:45 am in the morning under normal lights. Then when I get home from work 4pm or so, I'll water and tweak some stuff.
Image

I need to thin out the greens table a bit more.
Image

I promised my wife a "Grilled Chicken Caesar salad" for Fridays dinner, I just hope the romaine is ready by then.
Image

I can't believe the growth on this Jetstar after 24 hours
Image

January 11th, 2019

Image

Image

Dinner
Image

Black Seeded Simpson, Romaine Caesar Salad.
Image

I decided to drop the table a bit lower to allow more growing space.
Image

Image

I have a feeling this table is going to get a bit tight when the plants start maturing a bit.
Image

I can't wait to be done with these beets.
Image

I don't think I'm going to get any actual beets.
Image


January 12th, 2019

Image

My new potting mix hasn't killed anything yet.
Image


January 13th, 2019


The Romaine and Black Seeded Simpson that was harvested for the Caesar salad Friday had some of that feared milky white substance on the heavier parts of the plant like the stalks and was a bit bitter, I was a bit miffed by this. I'm guessing that 75°F - 80°F may be a bit too much for growing the lettuce, the only other variables would be duration of light or nutrients. Watering could not be an issue as the soil was always moist.

Sunday I pulled a romaine that still had another week to go and there was still the milky substance but barely noticeable, a quick rinse after slicing and it was perfectly fine.

So from what I could find out, it is called Lactucarium. I have had this problem before when growing outside. Researching this I found it to be a form of "Natural" Latex and my daughter is allergic to "synthetic" latex, she didn't seem to be bothered by it.

I'm going to try and grow the lettuce on the concrete floor, here it will be a bit cooler and receive less light. I also ordered a few more lettuces to try that are supposedly more heat tolerant.

Since the arugula and mustard greens are in the Brassica family this may not be a problem.

I was going to regrow the heads but I have so much Romaine that I decided to toss the cut heads that showed lactucarium and only regrow ones that weren't as milky.
Image

I was happier with the immature head of Romaine. The white specs on the lettuce is water droplets and a crappy camera pic, not Lactucarium.
Image

Image

Moved some of the older Romaine to the cooler floor, not sure if its too late for these guys are not.
Image

User avatar
applestar
Mod
Posts: 30543
Joined: Thu May 01, 2008 7:21 pm
Location: Zone 6, NJ (3/M)4/E ~ 10/M(11/B)

Wow, you really ARE going all out — “whole hog” might be the words I’m looking for, to match your culinary style :wink:

I was going to say move the lettuce to the floor, but you wrote that you did, a few lines later. LOL but floor closest to the garage door would have been my suggestion. It’s always a good idea to move your temp/humidity sensor around to get a feel for the available micro environments.

You could also try sticking them outside when it’s in the 40’s or above for a couple of days before harvesting — of course we are suddenly getting “normal” winter weather.... :roll: — did you get a lot of snow? — A large clear/translucent storage tote with tight fitting lid in the sun might be enough protection for lettuce.

...arugula is better treated like lettuce. They will bolt if they get too hot/dry and taste sharper to bitter.

...mustard greens will depend — some are warm season and won’t tolerate below 55F, some are cold/freeze tolerant or cool season only and will bolt in heat. Notably some of the Asian greens.

::: OK ETA (edited to add) — as long as you are tinkering around, consider if it’s possible to create two zones — around 60F and the current temp. Tomatoes are better growing between 55-65F in the seedling stage. Your greens will grow better here as well. Your peppers and eggplants would probably prefer the temp you are maintaining. What’s the lowest temp during the night?

SQWIB
Greener Thumb
Posts: 970
Joined: Tue Feb 16, 2016 9:21 am
Location: Zone 7A - Philadelphia, PA

Thanks Apple

Lowest temp has been around 70°F highest 80°F
I'm thinking on tweaking the temps down to 66°F - 76°F

We got about an inch of snow and outside temps are around 24°F - 28°F as the low.

Lettuce will be moved closer to the garage door when the beets are finally done, I'll have to put a thermo there and check to see how cool it is.

User avatar
applestar
Mod
Posts: 30543
Joined: Thu May 01, 2008 7:21 pm
Location: Zone 6, NJ (3/M)4/E ~ 10/M(11/B)

Subject: Loss of Interest
SQWIB wrote:I carry scissors with me.
Leatherman Wave.
^^^ this is misleading — based on your most recent set of photos, you carry a bottle opener with you, and the scissors just happens to be part of the set. LMFAO :kidding: :>

::: I could NOT resist — blame it on the snow and cabin fever :::

SQWIB
Greener Thumb
Posts: 970
Joined: Tue Feb 16, 2016 9:21 am
Location: Zone 7A - Philadelphia, PA

applestar wrote:Subject: Loss of Interest
SQWIB wrote:I carry scissors with me.
Leatherman Wave.
^^^ this is misleading — based on your most recent set of photos, you carry a bottle opener with you, and the scissors just happens to be part of the set. LMFAO :kidding: :>

::: I could NOT resist — blame it on the snow and cabin fever :::
True that.
Gotta carry a bottle opener at all times.

SQWIB
Greener Thumb
Posts: 970
Joined: Tue Feb 16, 2016 9:21 am
Location: Zone 7A - Philadelphia, PA

January 15th, 2019

Not a whole lot going on in the grow room, just watering every day, tweaking the temperature and shuffling plants around. I'm trying to get the temps to stay between 66°F and 76°F. This is proving to be a bit difficult heating a garage with one of those oil type radiator heaters with a dial control.

It has been nice eating lettuce the last few days, the romaine seems to be fine uncovered in the fridge for about 4 days.
The new potting mix seems to be fine so far.
Image

Image


January 16th, 2019


I have been happy with the latest Romaine, I think it likes the floor a little better.
Image

Image

Image


I have been trying to tweak the temps between 66°F and 76°F but I am having a hell of a time, seems when I lower the temperature setting on the heater, the swing in temp between high and low increases. It could be drafting issues as well.
Image


I decided to change up a few things in the grow room, well actually, REDESIGN the entire thing. First off, I'm going to run the grow lights at night and have them off during the day.

They will run 6:00pm - 10:00am. They're currently running 6:00am - 10:00pm. Hopefully this will reduce the temp swing a bit as the day times are usually warmer.

Secondly I also ordered a grow tent and of course had to get an exhaust fan, I'm just hoping that hooking up the exhaust fan to one port will be enough to have a negative pressure in the tent. I am not too worried about intake and exhaust because I mainly wanted to get a tent for the reflective material, my original plan was to hang Panda Film but figured that the cost of the Panda film would be near as much as a grow tent and be a hassle trying to figure out how to hang it, heck, who am I kidding, cost never entered my mind.
So if ventilation and/or humidity become a problem and the exhaust fan doesn't work adequately, I'll leave the front of the tent completely open. The tent will at the least reduce drafting and increase the led lights effectiveness.

Third, since I ordered the tent I also ordered a mini Oil Heater for the tent, I'm hoping by using the oil heater, I can place a pan of water on top of the heater and ditch the humidifier, that is of course if I seal the tent entirely.

So my project this weekend is to clear some room for the tent and it is going to be freak'n tight!!.


January 17th, 2019


Parsley filled out a bit
Image


Potting mix seems OK, hasn't killed anything yet
Image


The lights seem adequate for now, I have them 24" above the canopy.
Image


Romaine from yesterday, very pleased.
Image

Image

Image


I was pretty psyched after work today, I made a quick Roast Beef wrap and headed down to the grow room. I cleaned up a bit and starting throwing out stuff to make room for the tent. I'm going to have to make a few sacrifices and modifications to get this to work and it will be real tight, especially accessing the greens table and when I start my seedlings in February, however, I am optimistic. I have a couple ideas on how to access and setup the greens/seedling table with the tent in front of it.

I watered the plants and set the light timers and fan to run at night, I also tweaked the humidifier for 6 hours when the lights are on

SQWIB
Greener Thumb
Posts: 970
Joined: Tue Feb 16, 2016 9:21 am
Location: Zone 7A - Philadelphia, PA

January 18th -21st, 2019


I made some modifications when I got home after work today to accommodate the grow tent that is arriving this week.
Image

I had to find another spot for the seedling fan. Once the grow tent is in place, it will completely block off this table.
Image

My new toy came in
Image


Here is some romaine that I am regrowing from harvested heads. When you're not watching it like you would your first child ready to take their first step, then the stuff seems to grow pretty quick!
Image]

Image

The new potting mix seems to be working out OK. My goal for the potting mix is not to have better growth up front but to be able to sustain the plant for as long as possible with minimal input as the plant starts to grow/fruit... that is if I ever make it that far.
Image


Everything seems to be growing fairly well under the lights, nothing seems leggy or is getting bleached.
Image

Image

Image

SQWIB
Greener Thumb
Posts: 970
Joined: Tue Feb 16, 2016 9:21 am
Location: Zone 7A - Philadelphia, PA

January 21st, 2019


Woohooo! UPS was here.
Image
Crazy eyed Psycho!


Time to clean up the grow area, first thing up, get rid of the beets.
Image

Image

Image

Image


I consider this a fail!! Good riddance!!
Image


Cleaned out the area for the third time!
Image

Image


Packaged very nicely
Image


OK, I'm going to try and be organized about this, so first I numbered all of the poles.
Image


Then labeled their position
Image

Image


This is going to be tight!
Image

Image

Image

Image


Put in the tub floor and hooked up the lighting.
Image


The tent went up fairly easy and I don't foresee this being a problem setting up or breaking down in the future.
Image


Hooked up the Cloudline vent fan and controller. This thing is actually pretty cool.
Image


Moved the plants into their new home... again!
Image


Added the humidifier.
Image


Played with the cloudline vent fan settings. With all 3 lights on and the vent fan set to 78°F, the heat in the tent hovers around 80°F - 82°F. I will need to play around a bit with the Garage temperature and how to draw the air in for cooling. I closed off the top vents and opened the bottom vents to pull in some of the cooler air that is drafting from the garage door. I'll need about a week to find the sweet spot.
Image


I have to access the seedling/greens table with the side door. I just need to make sure I leave a clearing in the tent to access the table.
Image

The extension cord was getting a bit too hot for my comfort, so I turned the lamps down to 50% until I can get a heavy duty appliance extension cord installed.
Image

SQWIB
Greener Thumb
Posts: 970
Joined: Tue Feb 16, 2016 9:21 am
Location: Zone 7A - Philadelphia, PA

January 22nd, 2019

I switched out the extension cord for a heavy duty appliance extension cord and installed one of the fans, the fan runs the entire time the lights are on.
Image


Added the mini oil heater to the tent. I am tweaking the heat in the garage and in the tent so it will take time to dial it in properly, I may get a digital thermostat for the heater in the tent but hopefully I can tweak it without more electronics. The tent stays at 79°-80° degrees with all three grow lights on and the cloudline set to 78°F. Pulling air in from the bottom back of the tent has helped keep the tent a few degrees cooler.

My goal is to have the garage between 65°F - 70°F and the tent between 72°F - 80°F.

Organized my herbs on a tray in 1 gallon pots, Parsley, Chives, Cilantro and Basil.
Image


I planted some more lettuce varieties.
Image


There is definitely a learning curve to the AC Infinity duct fan, when I got home the temp in the tent was 59°F, ooops! I started playing with the settings and realized that I had the fan set to go on when the temp dropped to a lower temperature, anyhow, I scrolled to the low humidity and set that to "off" then I scrolled to the low temperature and set that to "off".

A quick note about the AC Infinity Cloudline T4 Duct fan, well actually a quick note about the company. I ordered this through Amazon at $119.00, yeah I know, its a bit pricey, anyhow I saw it on Amazon the next day for $99.00...really.
I immediately wrote to the seller AC Infinity asking for a refund of the difference, but not expecting a refund, I got an e-mail approving the refund for the difference...including tax!

SQWIB
Greener Thumb
Posts: 970
Joined: Tue Feb 16, 2016 9:21 am
Location: Zone 7A - Philadelphia, PA

January 23rd, 2019


After work today I checked the temperature gauge and the tent maintained 78°F - 81°F in a 24 hour period, I'm going to start working on the humidity next.

And another little surprise I had was my Jimmy Nardello peppers were infested with white flies or something on the top leaves, the bottom of the leaves were loaded with aphids, so I hand washed each leaf and will continue to monitor the plants closely.

I'm liking this Rocky Top Blend a lot, days to mature is 45-50, I'm guessing this can be harvested @30-35 days.
Image

I received my new pot trays and they are a tad too big, they take up too much room in the tent, I may use a couple but to be honest the 5 gallon home made saucers work better with a few caveats, first, it's hard to see the water level in the tray with the three gallon bags and second, sometimes when you add water the water runs out of the bag onto the floor missing the saucer.

However, next year I am limiting the tent to 9 plants.


January 24th, 2019

When I got home I headed right to the grow room and checked the plants, I removed all the Romaine and BSS Lettuce from the grow table and Grow tent and took them upstairs.
Image

Image

I also noticed something chewing on my Bok Choy and some droppings in my Romaine.
I hope it was from this guy, sorry buddy!
Image

It was round 2 with the aphids, they were worse today after the purge yesterday. I removed everything from the grow tent and placed them on the table. I topped off all the pots with some potting mix, inspected every plant and trimmed some leaves and branches from the tomato plants.
I hand washed every leaf on the Jimmy Nardello peppers and some leaves on the tomatoes and eggplants with warm water, massaging the leaves between my fingers, for some reason the aphids are loving the pepper plants. I don't want to use insecticidal soap or anything just yet, as I am afraid to damage the plants.

I am really impressed with the growth of the tomato plants, the stems are very thick and stout.
Image

Image


This Abe Lincoln even has a few flower buds already, I don't know if that is a good thing or a bad thing?
Image


Everything is placed back in the tent.
Image


I ordered these pot saucers which are very nice but take up too much floor space so they were sent back.
Image


I installed my Monkey fan but plan on keeping both fans in the tent.
Image


My original goal of having the garage between 65°F - 70°F and the tent between 72°F - 82°F, is going to be a lot harder than I thought.
I am having a hell of a time controlling the temperature in the tent and the garage, it's not so bad when it is cold outside but the temp swing outside is just unbelievable, it was 9°F a few days ago then today it was 61°F
Image


I have a digital temperature controller that I made a few years ago for my Sous Vide machine, I'm going to give that a shot, but to be honest I don't think it will help when the outside temps are warmer.

With all the Grow Lights running at 100% it gets pretty hot in the tent. The only other thing I can think of is pulling in more air from outside which should work just as long as it stays cool (below 35°F) outside.
I also turned the "Red" settings on the grow lights to 50%. I'll bump them back up to 100% when I start getting flowers.
Image


January 25th, 2019

When I got home I installed the temperature controller.
Image

Image


I'm still battling the aphids, I'm going to hand clean each plant a few more days before I start spraying. The pics below are 24 hours after the last cleaning.
Image

Image

Image


They aren't damaging the plant yet but its getting harder to get these nasty guys out of the new leaves.
Image

Image


They're easy to maintain when they are under the leaves.
Image


I turned the lights up to 100% and I'm also still battling the heat in the tent, 87°F seems about the highest it will get. If it gets any higher I need to figure out a better exhaust and intake.


Two of my tomato plants have put on flower buds, the Jet Star and the Abe Lincoln.
Image

Image


Decided to harvest most of the Bok Choy for dinner.
Image

Image


January 27th, 2019


Once the tomato plant flowered, I fertilized the Jet Star with a Jobes 2-7-4 and will see how that does before fertilizing the Abe Lincoln which has also flowered. I hit the flower with an electric toothbrush.
Image


Here is a quick Grow Room Tour


User avatar
applestar
Mod
Posts: 30543
Joined: Thu May 01, 2008 7:21 pm
Location: Zone 6, NJ (3/M)4/E ~ 10/M(11/B)

Check for stray ant incursion — it’s been too warm and the scouts start looking for evacuation sites when their colony gets flooded. If they come across likely pastures, they run home to bring the aphid herders. Once the aphids armature enough to fly they can spread on their own.

If you are not spraying, then ladybugs are my personal choice for control along with borax ant bait on the floor/access routes.

If you are not using biological control, then DE dusted inside the lettuce Rosetta and pepper leaf nodes is a good way to keep both the aphids and the ants something to think about. (I have to stop the DE altogether after the ladybugs are introduced, but they still find some that I missed wiping up.)

If you are “spraying”, dipping in solution gets the aphids better — personally I would follow with good rinse in another bucket or wash tub — even if they haven’t been killed, their grip on the plants are weakened and a lot more of them come off. Be sure to repeat at 2-3 day intervals at first to interrupt their life cycle.

SQWIB
Greener Thumb
Posts: 970
Joined: Tue Feb 16, 2016 9:21 am
Location: Zone 7A - Philadelphia, PA

applestar wrote:Check for stray ant incursion — it’s been too warm and the scouts start looking for evacuation sites when their colony gets flooded. If they come across likely pastures, they run home to bring the aphid herders. Once the aphids armature enough to fly they can spread on their own.

If you are not spraying, then ladybugs are my personal choice for control along with borax ant bait on the floor/access routes.

If you are not using biological control, then DE dusted inside the lettuce Rosetta and pepper leaf nodes is a good way to keep both the aphids and the ants something to think about. (I have to stop the DE altogether after the ladybugs are introduced, but they still find some that I missed wiping up.)

If you are “spraying”, dipping in solution gets the aphids better — personally I would follow with good rinse in another bucket or wash tub — even if they haven’t been killed, their grip on the plants are weakened and a lot more of them come off. Be sure to repeat at 2-3 day intervals at first to interrupt their life cycle.

I have some dish soap/cayenne and water mix ready to go. Just don't want to spray until the plants are a bit more robust. I may add some onion and garlic to the spray if it doesn't work as is. I'm hoping the plants are sturdy enough to spray in a day or two, we will see.
No ants yet.

SQWIB
Greener Thumb
Posts: 970
Joined: Tue Feb 16, 2016 9:21 am
Location: Zone 7A - Philadelphia, PA

January 28th, 2019

I sprayed the Jimmy Nardello pepper with my "Aphid X" (1/4 teaspoon cayenne pepper - Teaspoon Dish Soap - 1qt. water)

Here is my Robotic Bee!
Image


January 29th, 2019


I really don't get this temp swing, I can't see how it can get to 67°F when I have the temperature controller set to 72°F, anyhow I adjusted the Temperature controller to 75°F. So the low (oil heater) is set for 75°F and the high (vent fan) is set for 80°F
Image


I have three tomato plants with flowers, time to pollinate with my robotic bee! Everything is doing pretty good except my one pot of Jimmy Nardello peppers, the plants seem to be at a standstill.

I found where the Aphids were congregating, seems they love the cilantro. I sprayed the cilantro real good then washed the entire plant under tepid water.


January 31st, 2019


Still enduring an ongoing battle with aphids, mostly on my cilantro.

Yay! I finally got the temperature to settle down a bit, I guess with the temperature being 6°F outside helps with the cooling a bit. I think when the lights kick off and the temp in the tent drops it takes a while for the Oil Heater to come up to operating temperature from a cold start.
Image


The plants are all doing real well, except for my Bunching Onions... I think I over watered them and one pot of Jimmy Nardellos is still a bit stunted. I have a few backups that are doing real well under the led bulbs, they're about 6" tall and already have little flower buds in the center, good, bad? who knows I'm just going to let everything do its thing with as little intervention as possible.

Most of the tomato plant have flowered and are growing extremely bushy with very thick stems, I pollinate with the electric tooth brush every day or every other day.


The tomato plant that I fertilized with the Jobes doesn't seem any different than the rest of the plants, so I will fertilize the rest of the plants this weekend.
Image


The color of these pictures are actually a lot more purple looking than they actually are. I'll have to take some photos with the lights off.

My little tree!
Image


I love when I'm in the tent and get that tomato plant smell, it really is a tease when its 6°F outside!
Image


I really need to stay on top of the watering, the tomato plants are drinking up tons of water.
Image


These Black Beauty Eggplant Plants are doing well. I also have a Listada di Gandia Eggplant Plant in a pot that has my trial potting mix in that is not doing as well, not sure if its the mix or because its a different variety. All the other plants in the Trial potting mix seem to be doing just as good as the original potting mix, no worse, no better.

I may separate the two Black Beauties and abort the Listada di Gandia and replace with one of these.
Image


February 1st - 3rd, 2019


Aphids are out of control on the Cilantro, finally decided to cut down the cilantro and toss the cuttings, I then resprayed the cilantro and will keep an eye on it.

The Aphids are still appearing on the pepper plants but not as bad, haven't seen any on the basil, tomato, eggplants, or parsley yet.

All the tomato plants are loaded with flowers and buds, but no signs of a tomato yet, plants are like small trees, the growth is pretty incredible. Fertilized everything in the tent with some Jobes.

I called it quits on the Greens table for the season, between slow growth and battling a mouse that loves lettuce I decided to clean up the area and bait it, I'll be starting my seedlings in a few weeks anyhow.

My brother stopped over so I gave him a few Abe Lincoln Tomato Plants, some basil, cilantro and split my parsley in half, I was impressed with the roots on this guy.
Image

Image

User avatar
applestar
Mod
Posts: 30543
Joined: Thu May 01, 2008 7:21 pm
Location: Zone 6, NJ (3/M)4/E ~ 10/M(11/B)

Looking GREAT! What fun! :-()

Optimum conditions for successful pollination — Try to electric tooth brush the tomato blossoms (back of flowers or flower stems) when temps are around upper-60’s to mid-70’s and humidity is not too high... I guess 40’s% or lower. If possible, try to get at the same blossom 2 to 3 times within an 8 to 32 hour period once the bud opens and petals start to turn yellow. Watch closely for the pollen flow from the anther cone if you can, especially if you haven’t seen this happening before. Pointing a maglight-flashlight bean at it with your other hand while using the toothbrush would make the pollen dramatically visible.


...I should have parsley and celery seedlings growing outside in the garden — I hope they made it. But maybe I should start some back ups. I need to stick with cool weather stuff for now. Cilantro sounds like another good one. That would be a welcome addition to combat the winter blahs. :wink:

User avatar
jal_ut
Super Green Thumb
Posts: 7447
Joined: Sun Jan 18, 2009 10:20 pm
Location: Northern Utah Zone 5

Thanks for sharing your story and pictures.

SQWIB
Greener Thumb
Posts: 970
Joined: Tue Feb 16, 2016 9:21 am
Location: Zone 7A - Philadelphia, PA

Thanks for persevering!

SQWIB
Greener Thumb
Posts: 970
Joined: Tue Feb 16, 2016 9:21 am
Location: Zone 7A - Philadelphia, PA

February 4th - 5th, 2019

I wasn't real happy with the growth of the greens under the Roleadro Galaxyhydro led's compared to the Viparspectra led's, so I ordered a Viparspectra 450 and have another on the way. I think the wavelength of the Galaxyhydro were too much of the "Red" side (700 nanometers+). They are great for starting seedlings but "vegetative" growth is much better under the Viparspectras, plus I can control the wavelengths. For my starts I'll drop the red side down to 20% and bump the white and blue to about 80%.
Image


I moved the lettuces to the Fluorescent Led's because of the mice problem, after these perk up a bit, they'll be harvested and I 'll be done with the greens for the season
Image


Hopefully I can get this mice problem under control before I start my seedlings.
Image

I'm pretty sure my parsley will recover from the division the other day, but it looks pathetic.
Image


Topped off my basil, yeah I know, I could have done a better job.
Image

Image

The Black Beauties are doing well. I'm not sure if I'm going to cull one or transplant, I really don't have the room.
Image


My Trial Potting Mix seems to be doing fine.
Image


Chives are doing well, I divided these from my garden and I 'm growing them out for my brother.
Image

Image


The cilantro bounced back after a few day.
Image


These peppers have me a bit puzzled, the peppers on the right have been in the grow room since they sprouted, the ones on the left have been on the grow table with the Galaxyhydro Led's then moved to the fluorescent Led's.
The ones on the right are starting to come back but I am curious as to what happened, could it be the Aphids? Could it be the potting mix? or could it be the lighting, temperature? Who knows but I may replace these with the stockier ones.
Image


Looks like we have a little Jimmy Nardello
Image


I'm wondering how long I can go before I need to start trimming the tomato plants. I am going to try and time it to when I can start cloning.
Image


I did move the lights up about 4" the other day.
Image

WHAT!! What is that!!?
Image

Image

Image

Image

Image

Image

Image


I watered the plants this morning and used the "Robotic Bee" on all the flowers. The Abe Lincoln Tomato actually had noticeable growth after only 14 hours.
The entire garage was pretty warm this morning, I had to open the door from the garage to the utility room, high temp in the tent was 88°F.

SQWIB
Greener Thumb
Posts: 970
Joined: Tue Feb 16, 2016 9:21 am
Location: Zone 7A - Philadelphia, PA

February 5th, 2019

The weather has been pretty mild or should I say absurdly hot for this time of year, for goodness sakes it's 60°F today and supposed to be 60°F again Friday. I have been trying to keep the temperature below 85°F but it has been hoovering around 88°F and reached 89°F yesterday. I had to come up with a game-plan and quick. I figured venting into the garage was not an option anymore because the garage heats up a good bit, for now I have the basement door open. The basement is a bit cooler than the garage at the moment.
Image

Here is what I decided to try. The ceiling is insulated and the floor joist run horizontal to the house so the hot air is exhausted to the closet in the basement. I pushed up the insulation for a clear path to the other room.
Image

Image

Image

Image

Image


Did it make a difference? Well based on one day I would have to say NO. I checked the temp this morning and it was 88°F inside the tent. I opened up the tent, watered the plants and hand pollinated the tomato plants and the temp dropped 3°F in 5 minutes, so I decided to just leave the door to the tent partially open during this heatwave. As long as it doesn't get any hotter I should be OK.
Next year I can run an intake to the far corner of the garage door where it will definitely pull in more outside air.

Am I being too critical? Maybe.
Am I expecting too much? I don't know, I never done this before.

When I start a project I am willing to invest a lot of time and research and in this case a lot of money, which I really don't have. Since this is my first year, I figured there would be challenges and expense and that next year would be much easier, I am still holding onto that belief, but, and this is a big BUT, I'm at the point where it's a sink or swim situation, I threw everything at this project and have maxed out, I won't be putting any more money into this project so it will have to work.

SQWIB
Greener Thumb
Posts: 970
Joined: Tue Feb 16, 2016 9:21 am
Location: Zone 7A - Philadelphia, PA

February 6th, 2019

The new Viaprspectra 450 came in, so I installed that. I removed the Roleadro Galaxy Hydro led's. What I like about the 450's over the Galaxy Hydro's is, I can tweak each individual set of wavelengths. The Roleadros were great for starts, but felt I could get better results with the Viparspectra's.
Image

Image

Image


My starts and greens do great under the 6000k led bulbs in the ceiling.
I adjusted the fan to go on twice in a cycle for two hours each, 16 hours was totally unnecessary.
Arugula, Mustard Greens, Rocky Top Lettuce, Some Bok Choy and misc plants.
Image


Every morning and evening I have been pollinating with the bee. It's actually pretty neat when hand pollinating, every once in a while I see this little puff of yellow pollen. The tomato plants need a good watering about every 24 hours. I top off the humidifier if needed, I believe around every 3-4 days. This weekend I may do some more culling.

Jetstar
Image


Abe Lincoln
Image


Totem F-1
Image

SQWIB
Greener Thumb
Posts: 970
Joined: Tue Feb 16, 2016 9:21 am
Location: Zone 7A - Philadelphia, PA

February 8th - 9th, 2019


Replaced my adjusting straps on my ceiling grow light for easier adjusting.
Image

Image


Harvested the Rocky Top Lettuce mix, and some Arugula and was pleasantly surprised by the dinner salad.
Image

Image


Placed the greens back under the lights and watered with a tiny bit of fertilizer.

Topped of a few pepper plants.
Image

Image

Decided to terminate these two Jimmy Nardello pepper plants and replace with two healthier looking ones, then I topped them off.
Image

Replacements
Image

Topped
Image


Topped the soil with coffee grounds in an effort to keep the aphids population down, I'm pretty sure that this is a garden myth but at the least, it will act as a mulch and fertilizer, well thats what I'm telling myself, lol. If the grounds form a shell I'll work them into the potting mix.I still have one back up Jimmy Nardello under the ceiling grow area with the greens.
Image

Image

Image


It was a sad day in the grow room today, looks like a real bad case of BER. I made a slurry of Lime and added that to the all of the plants. I also tossed in a pinch of Epsom salts and in hindsight should not have done the Epsom salts, ooops.
Inconsistent watering, too much Nitrogen, Not enough calcium, who knows? The tomato plants in the trial potting mix and my original potting mix have been affected, I am hoping this problem goes away after the initial fruit set.
Image

Image

Image

Image

On a much happier note, my Rosemary cutting seems to be doing ok on the windowsill in the basement bathroom. The Rosemary is showing new growth.
Image


Topped two of my Jetstar Tomato plants, these tomato plants are for experimenting with.
Image

Image

Image


Found this rogue bean plant, I did plant bush snap beans back in mid December, I'm going to let this guy go and see what he can do.
Image


Added some Neem oil to my Aphid X spray and sprayed some of the plants.

SQWIB
Greener Thumb
Posts: 970
Joined: Tue Feb 16, 2016 9:21 am
Location: Zone 7A - Philadelphia, PA


February 11th-12th, 2019


Getting a bit of leaf curl, not sure if this is a problem or not, it may be related to the BER issue. The plants seem very healthy otherwise.
Image


I am getting a lot of fruit set but still have some signs of BER
Image

Image


Peppers and Eggplants are growing slowly.
Image


Topped Jetstar plants after three days.
Image

Image

SQWIB
Greener Thumb
Posts: 970
Joined: Tue Feb 16, 2016 9:21 am
Location: Zone 7A - Philadelphia, PA

February 14th-17th, 2019


Took all of the tomato plants out of the tent, fertilized with Jobes Organics Vegetable and Tomato 2 - 7 - 4, added some lime slurry, topped with potting soil, trimmed, placed back in the tent and watered real well.
Image

Image


The tomato plants are all loaded with fruit and the plants look very healthy.
Image

Image

Image


I inspected the plants and BER is still a problem, I am leaving the fruit on the plants to see what happens. A lot of the newer fruit doesn't have what I would call typical BER but there is something going on, there looks like little tiny bruises forming on the fruit. Everything seems to be pointing to a calcium deficiency, curling leaves, BER.
Image

Image


My first thought would be stink bugs or some pest, but I don't see any insects, even the Aphids have seem to have dissipated.
Image

Image


Some of the earlier fruits I'm leaving on the plant.
Image

Image


Leaf curl on some of the larger leaves
Image

Image


The topped Jet Star tomato plants have really come back.
Image

Image
The tomato plants have to be watered heavily every single day or they will dry out.


Cleaned up my Parsley and chives
Image

Image


My Indoor Salad garden is doing real well.
Image

Image

Image


Planted some Waltham Broccoli, Sun King Broccoli and Baby Bok Choy. This is my last attempt at growing Broccoli, this is actually the start of my 2019 gardening year.
Image

Image


I just keep thinking to myself, MAN! I have to put all this stuff away!
Image
Last edited by SQWIB on Wed Feb 20, 2019 8:40 am, edited 1 time in total.

User avatar
applestar
Mod
Posts: 30543
Joined: Thu May 01, 2008 7:21 pm
Location: Zone 6, NJ (3/M)4/E ~ 10/M(11/B)

Ha! You really ARE growing tomatoes in the middle of winter. Hats off to you.

I think between the BER and leaf curl symptoms, and what you said
The tomato plants have to be watered heavily every single day or they will dry out.
It’s the inconsistent moisture levels that is causing the calcium uptake interruption.


...how about this — I’ve often thought about doing this but it’s a bit high on the difficulty scale for me and I have not tried it yet, but I think you are already doing most of the similar tinkering, so it will be easy for you:

— Set the tomatoes in a large shallow tub type of container, and arrange an ebb and drain watering system — pump/drain water in, let sit for up to 20-30 minutes, then drain/pump out remaining water in the tray. Pump/drain depends on where you position the reservoir — above or below.
— Set it up to do cycle twice or three times a day. This is a sort of system that carnivorous/bog plants enthusiasts sometimes set up. You can control the amount of moisture by how frequently it cycles.

At some point, though they will have to be Uppotted. But I know the difficulty with that is limitation in available space.


I think you will also find it’s somewhat easier to keep multiple large containers from drying out/watered when they are bottom watered together in a large tray...check out flood/drain pan for washers or for hot water heater...

To minimize chance of anaerobic root and biome asphyxiation in deeper containers, make vent holes or slits up the side of the container.

...I guess alternatively, you can set up automated drip irrigation — thats Another thing I haven’t tried, so I didn’t think of that as first choice. :lol:

User avatar
Gary350
Super Green Thumb
Posts: 7419
Joined: Mon Mar 23, 2009 1:59 pm
Location: TN. 50 years of gardening experience.

WOW that looks great. I have always wanted to grow tomatoes in winter. About 30 years ago I know a man that grew tomatoes in 5 gallon buckets. He drilled a circle of holes around the bucket near the bottom, bottom of bucket held water and wicked moisture to the soil on top. He only needed to water plants every 3 days with plants outside. Reservoir of water in bottom keeps soil on top from drying out and supplies water to plants when roots grow down that deep. I tried it one summer we often were gone 3 days camping over the weekends tomatoes did good setting in full sun at the edge of the garden. Only way I knew to give plants the good nutrients was to mix 1 shovel of garden soil with 5 gallons of water add pellet lime for BER stir well then use dirty water to water my 3 plants. Plants did good and grew good tomatoes outside in full sun. When temperature got 100 degrees I moved buckets under a shade tree they did good. Here is photo of bucket with black spots marking location of drill holes maybe you can use this idea to grow your plants.
Attachments
100_2637.JPG

SQWIB
Greener Thumb
Posts: 970
Joined: Tue Feb 16, 2016 9:21 am
Location: Zone 7A - Philadelphia, PA

Thanks Guys.
I am going to be a little proactive and work on it this week

I have kept the soil fairly moist the last few weeks, or at least I think I have lol. I am not convinced that watering is the problem but will start working on something this week. I haven't had any plants droop due to inadequate watering.
My current setup is the grow bags sitting in 5 gallon bucket bottoms (1.5” high). The problem is that the tomato plants are in 3 gallon grow bags and fit pretty snug in the 5 gallon drip trays so I can't really bottom water or even see if water has made it to the drip pan, theres no room.

When I water the plants sometimes the water comes out of the sides and lands in the drip tray, so even if I could see water in there, it really wouldn't be a true indicator of the plants being watered thoroughly. I have been going by the weight of the grow bag and using a finger testing for moisture.

Also the fact that I am using grow bags, increases evaporation. I could mulch the top with cardboard or something but watering is already a PITA.
If I go any bigger with drip trays, the plants don't fit, using a 5 gallon size gives me 4 plants in either direction.

I have a few options I may try tonight, Apple, I looked for trays and did find one that is 21.65 a 47.24 but what I have read that the dimensions are actually larger than in the description (50") so may not fit in the tent.
However, If my memory serves me right I think I have an old Rabbit Hutch tray that would be great. If I can find it!, I think it had a 24” x 48” tray, that would be perfect, if not I was going to cut a few more 5 gallon buckets about 6” high and see if that helps, if either don't pan out, I'll look into purchasing a few garden trays to sit the plants in.

I have thought of Global Buckets, earth buckets, wicking buckets, self watering setups and the like. I really want to try and Avoid using 5 gallons worth of media for a plant. I probably could come up with a wicking system using a 5 gallon bucket and the three gallon grow bag but overflow would be an issue without getting into an elaborate setup.
I really want to keep it simple, but if it don't work out using drip trays I'll try using 5 gallon buckets tied in together with a control bucket, this way I'll only have to water one bucket.
I can also do a tray with a Kerick float valve hooked into a control bucket, but don't think that will be needed.

Ebb and flow is out,
Also looked into one of those oasis automatic watering systems but there really is no kind of control.

SQWIB
Greener Thumb
Posts: 970
Joined: Tue Feb 16, 2016 9:21 am
Location: Zone 7A - Philadelphia, PA

February 19th, 2019


.... Later that day. Got home and found the tray, wooohooo!


Moved out the plants and wiped up the tent tub floor.
Image

Image

Image

I took some photos when I had the plants out.
Image


I haven't really been hand pollinating these much lately but they seem to have no problem pollinating on their own.
Image


First set of tomatoes with BER and a few new tomatoes (fingers crossed).
Image

Image


I have had almost no flower drop and most of the flowers are pollinating with or without intervention.
Image


Bottoms of the above picture, the fruit on the left has potting mix on it from my hands, so far no signs of BER or any thing else wrong with the fruit but it may be too soon to tell (rubbing my rabbit foot).
Image


Soil on the tomato.
Image

User avatar
applestar
Mod
Posts: 30543
Joined: Thu May 01, 2008 7:21 pm
Location: Zone 6, NJ (3/M)4/E ~ 10/M(11/B)

You weren’t kidding — it really is turning into a jungle! They look amazing. Well-fertilized.

...and you were right — that blue tray is a perfect fit. :D

Now, in case you ever put too much water in the tray and feel like some needs to be removed, my two best tools have been Turkey baster and one of those cheap kerosene oil/gas transfer hand pumps — I can picture it in my head but can’t remember what they are called — it looks like a giant turkey baster with 2 legs, has a red plastic accordion bulb with one way valve flaps so it sucks up with one tube and drains out by the other tube with each squeeze.

User avatar
Gary350
Super Green Thumb
Posts: 7419
Joined: Mon Mar 23, 2009 1:59 pm
Location: TN. 50 years of gardening experience.

You probably don't need to worry about too much water on your tomato plants. My tomato plants are often under water for 2 whole weeks and it never hurts them. Sometimes it is too wet to till so I plant them in mud it still never hurts the plants. I have never lost a tomato plant because of too much water. Maybe because plants have already been hardened off. You need pellet lime for BER.
Attachments
100_6086.JPG
Last edited by Gary350 on Thu Feb 21, 2019 9:37 pm, edited 2 times in total.

SQWIB
Greener Thumb
Posts: 970
Joined: Tue Feb 16, 2016 9:21 am
Location: Zone 7A - Philadelphia, PA

February 20th, 2019


Yay, my first Indoor Red Tomato!!! or is it?
Image

Its one of the earlier BER maters, I was taking a picture and it fell off the plant.
Image

Image

Well anyhow, the parsley is regrowing after the hack job.
Image

SQWIB
Greener Thumb
Posts: 970
Joined: Tue Feb 16, 2016 9:21 am
Location: Zone 7A - Philadelphia, PA

I got tired of knocking over and spilling the humidifier so I removed it from the tent and will check the humidity in a few days.


February 22nd - 23rd, 2019

Finished up the salad greens to make room for my outdoor plants.
Image

Image

Image


Some tomatoes that I am hoping don't get BER.
Image

Image


Checked the tent humidity without the humidifier and the readings seem about the same as when the humidifier was in the tent, I was a bit surprised but pleased.


Return to “Vegetable Gardening Forum”