SQWIB
Greener Thumb
Posts: 970
Joined: Tue Feb 16, 2016 9:21 am
Location: Zone 7A - Philadelphia, PA

Re: Indoor Garden 2018-2019 Revisited

January 15th, 2019

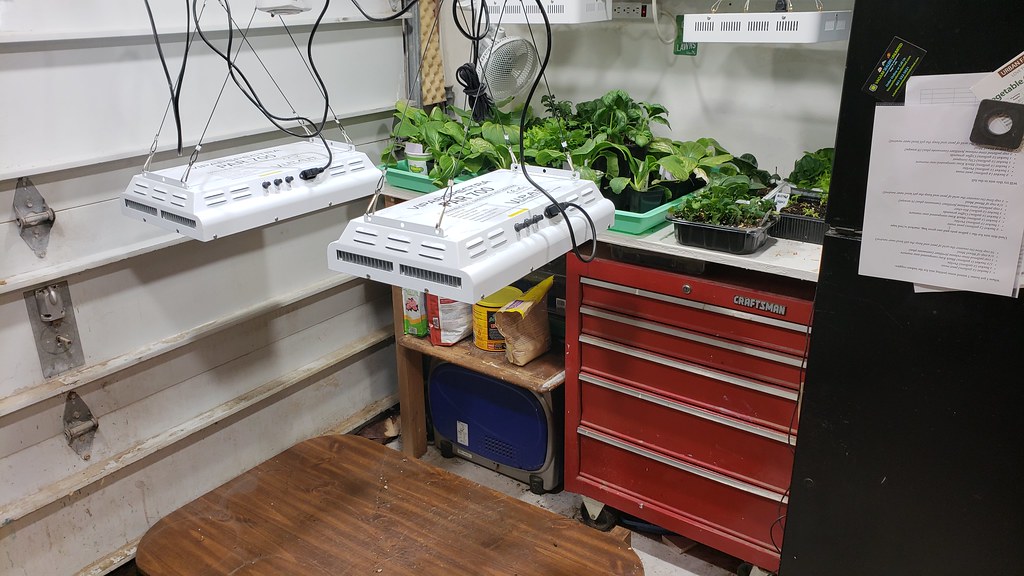
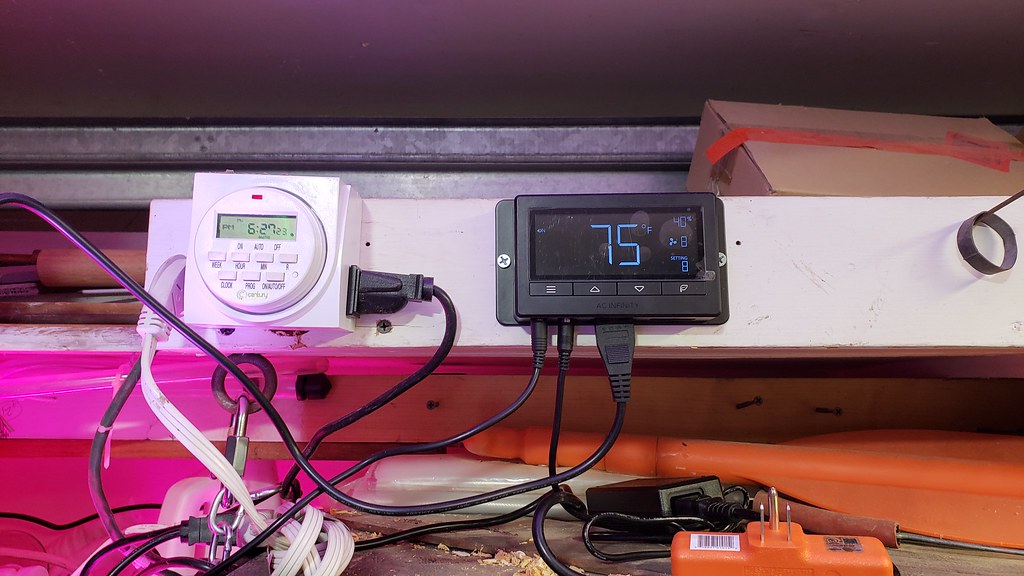
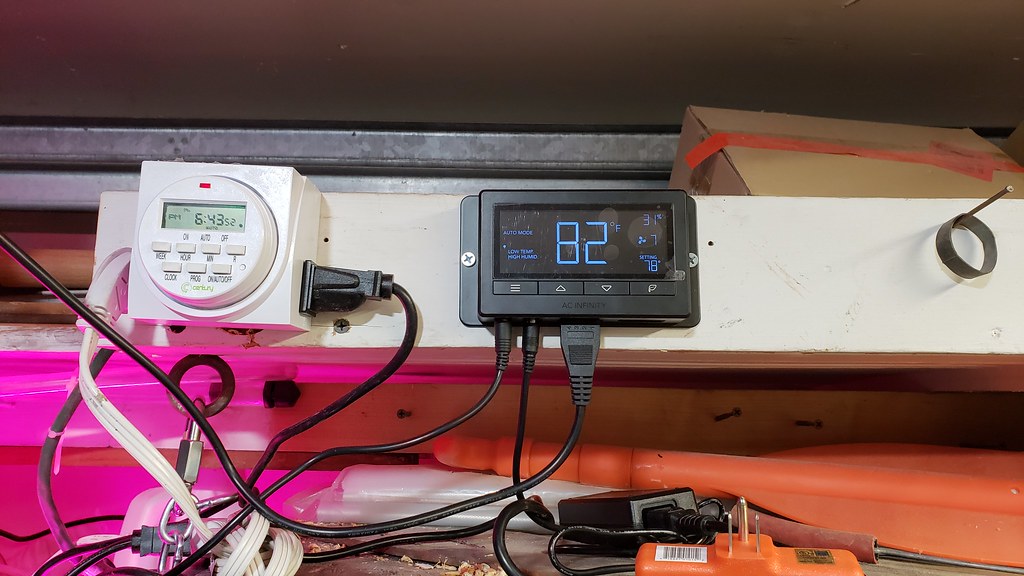
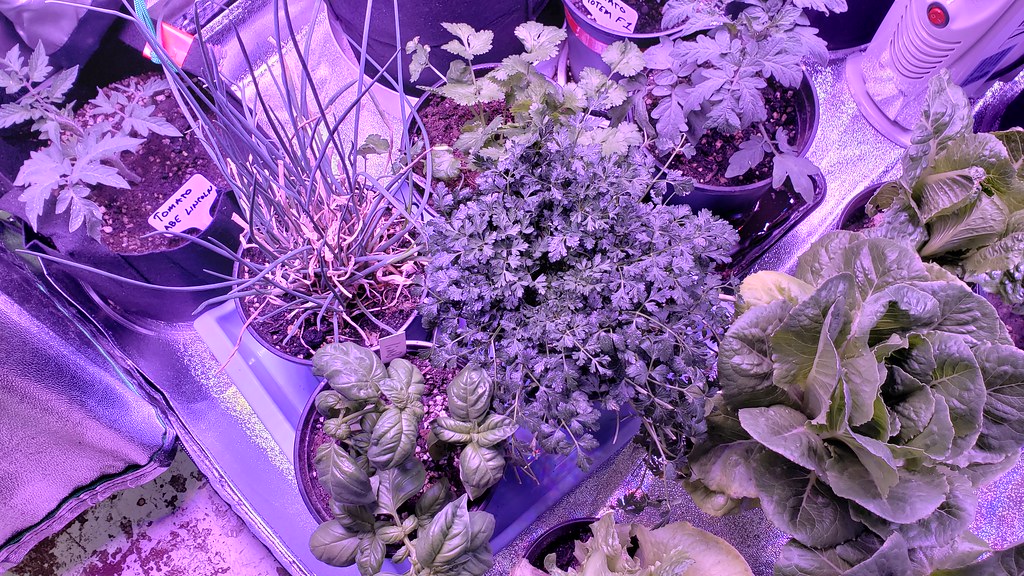
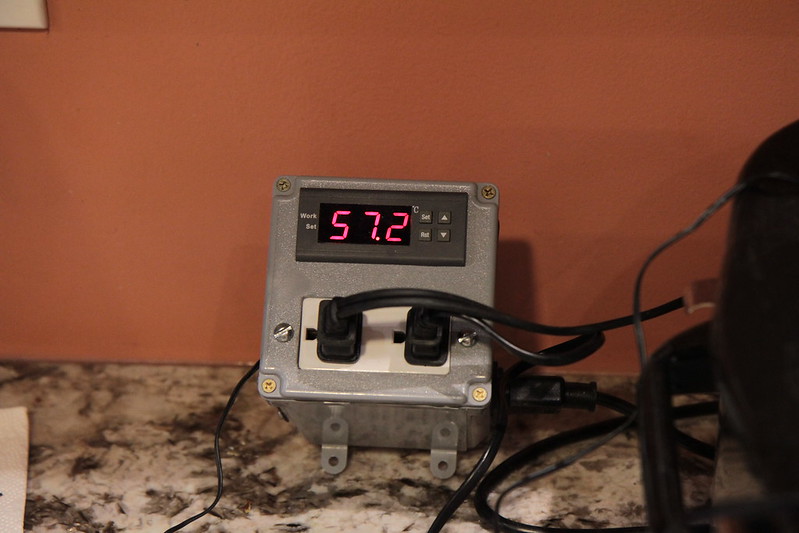
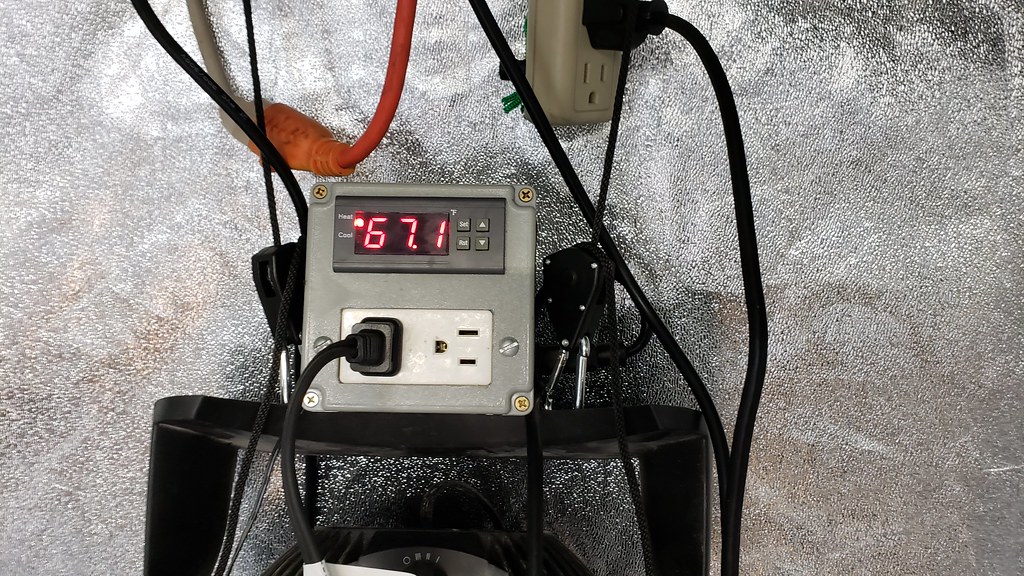
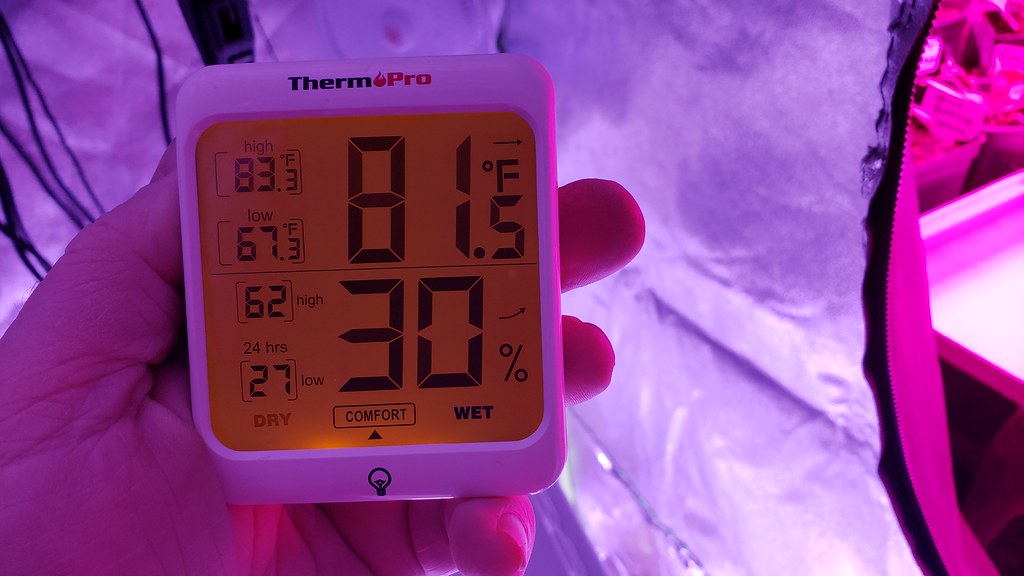
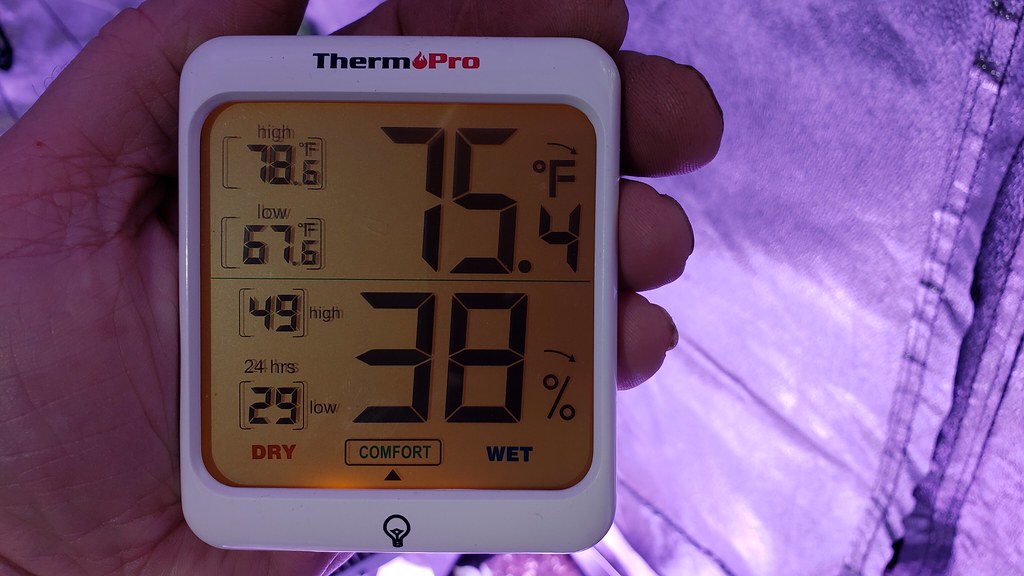
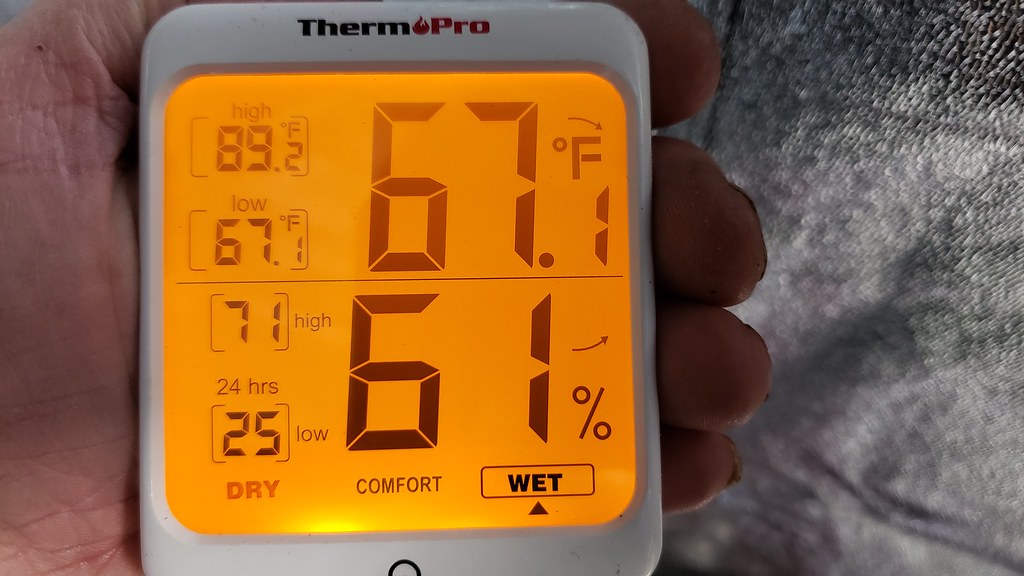
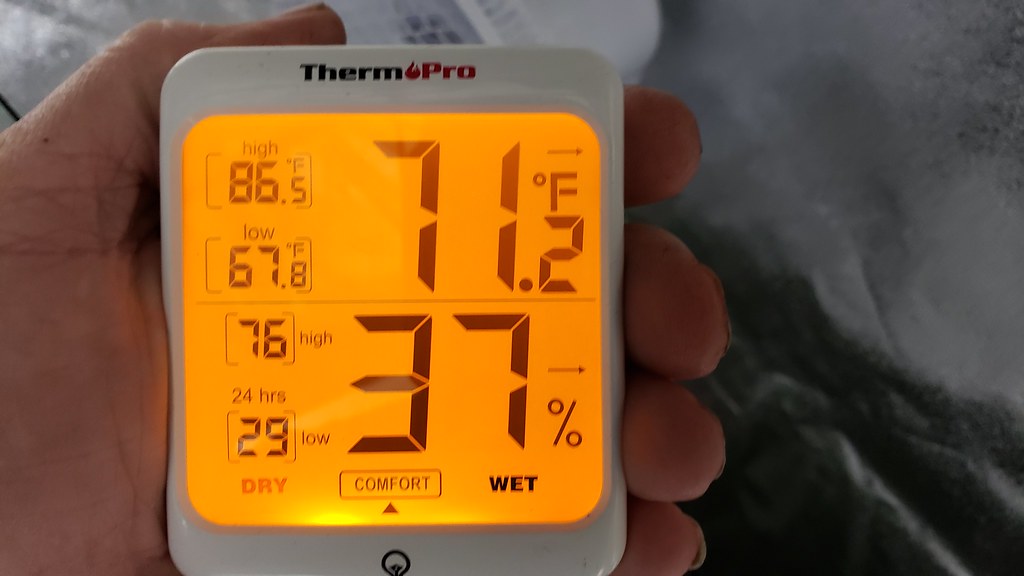
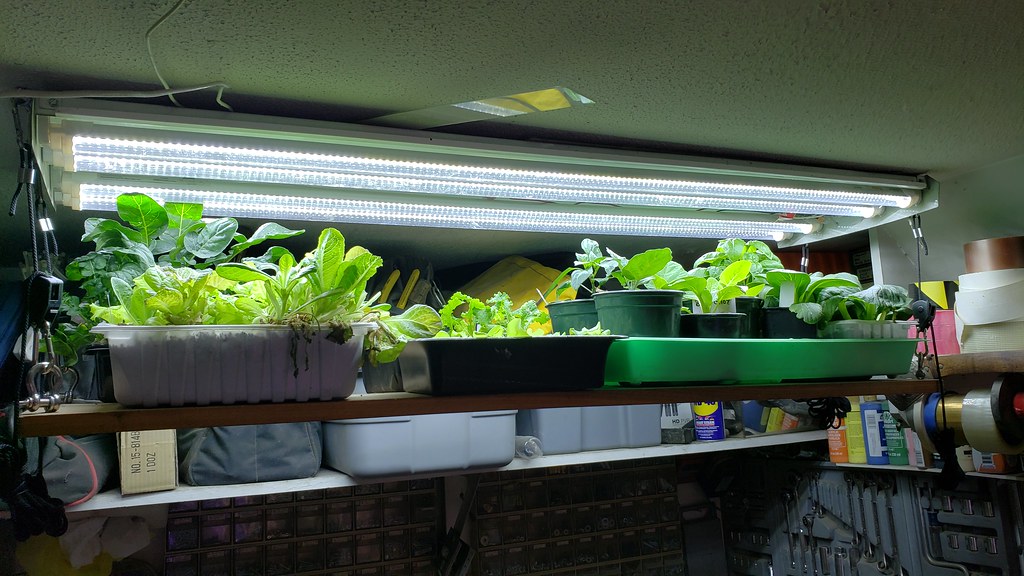
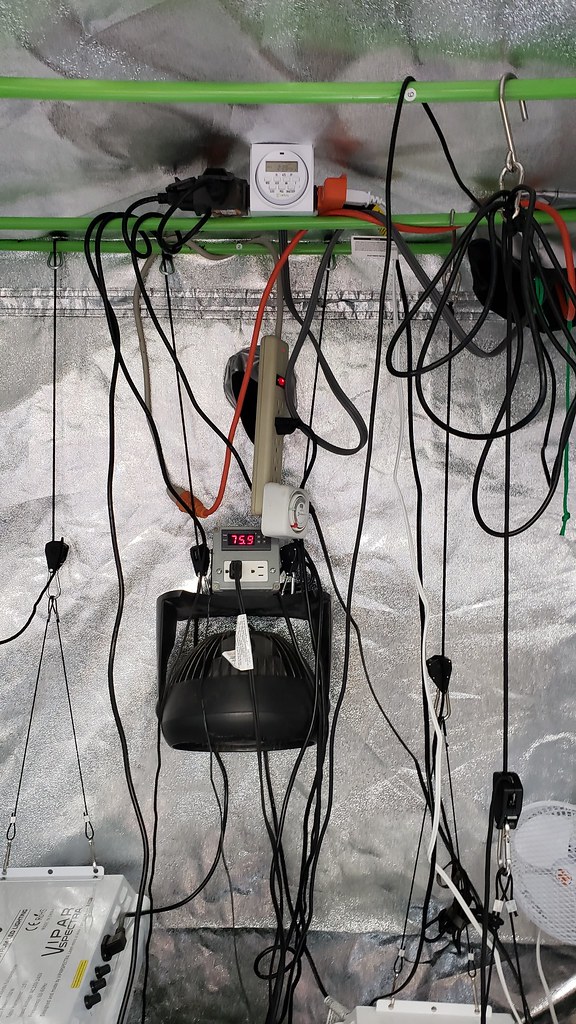
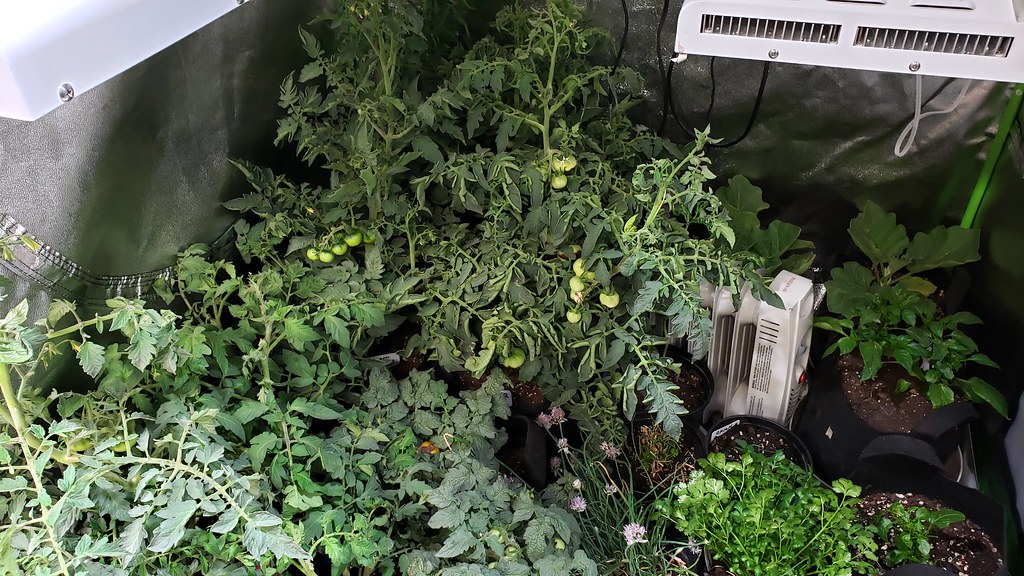
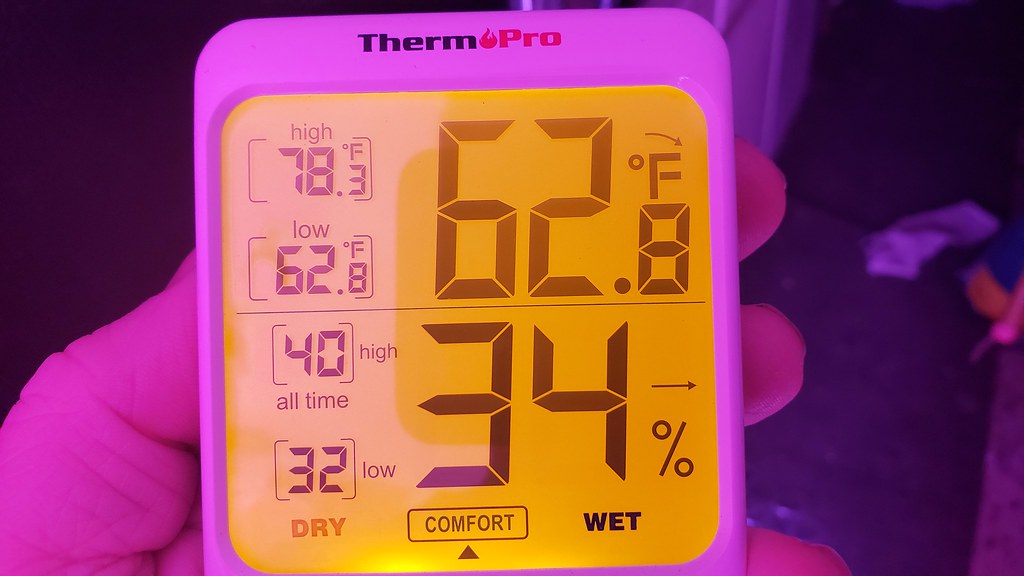
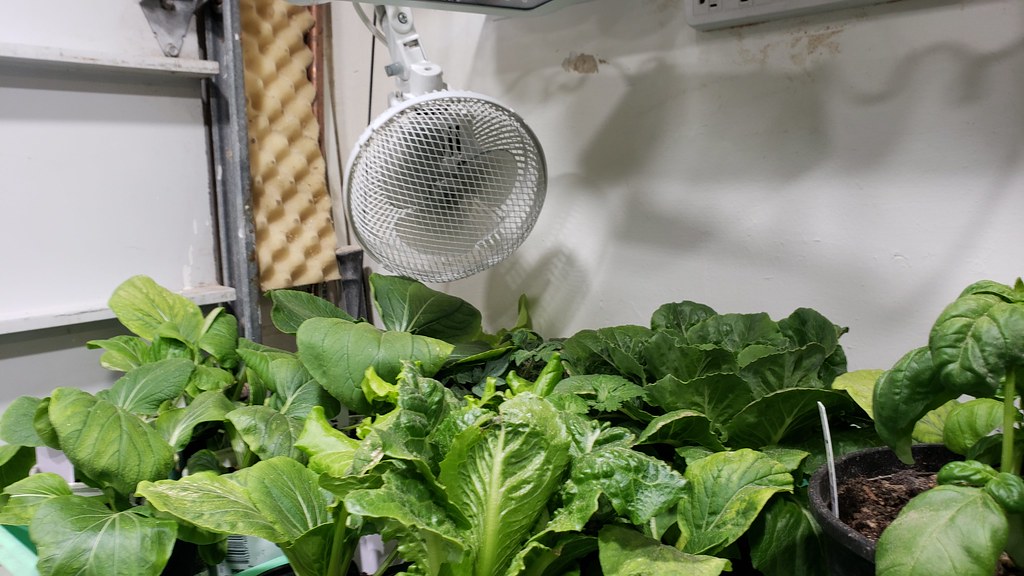
Not a whole lot going on in the grow room, just watering every day, tweaking the temperature and shuffling plants around. I'm trying to get the temps to stay between 66°F and 76°F. This is proving to be a bit difficult heating a garage with one of those oil type radiator heaters with a dial control.

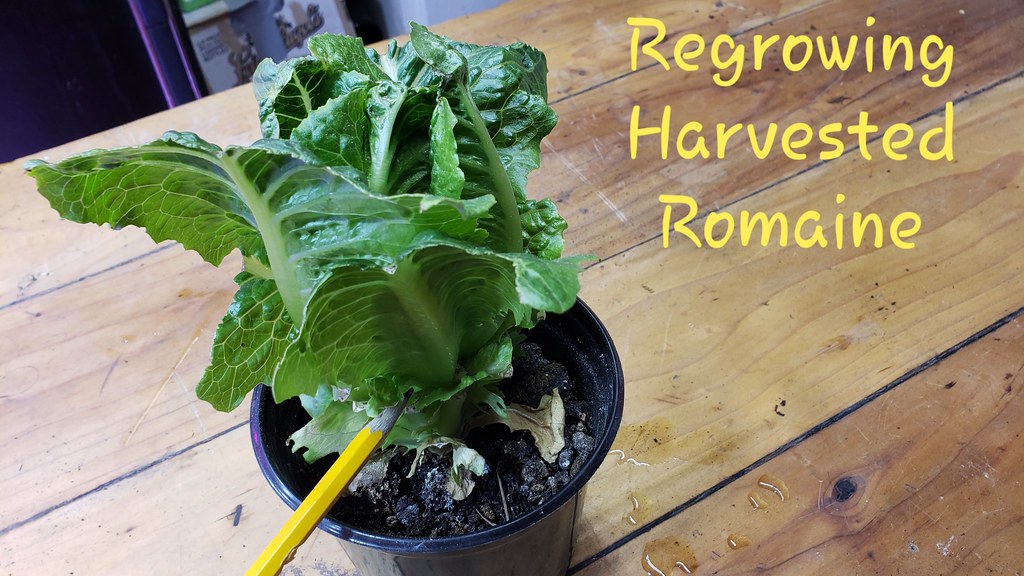
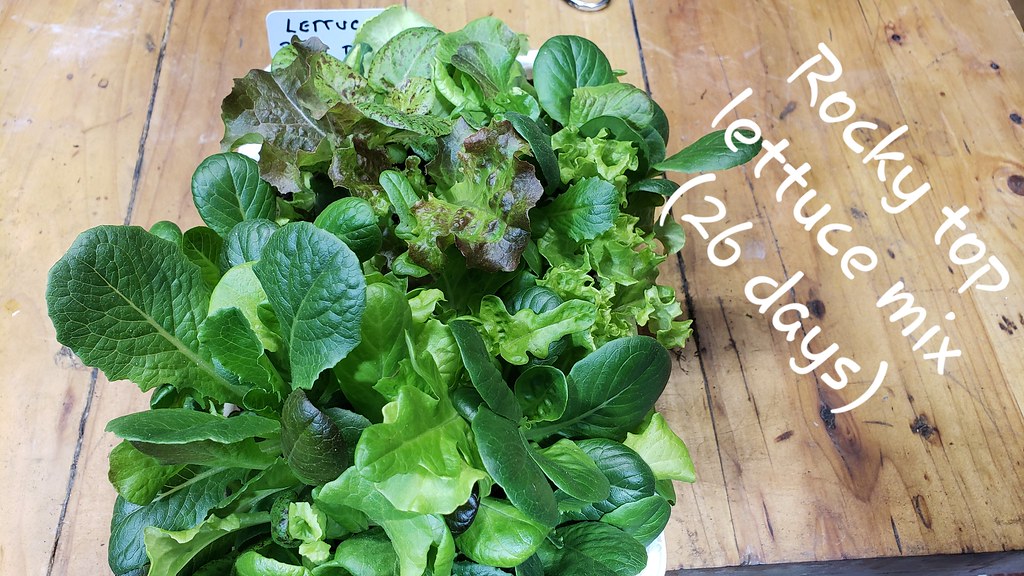
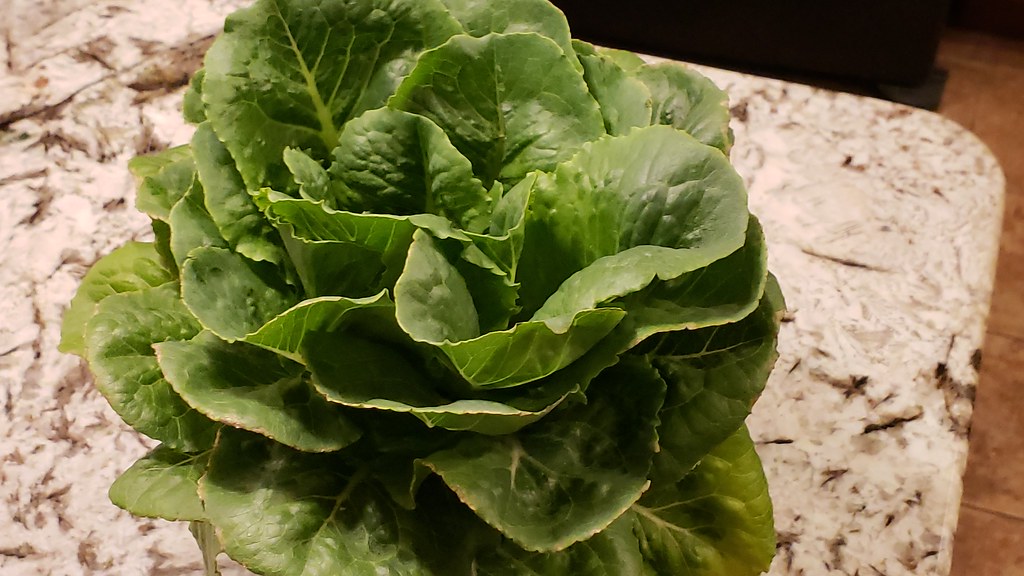
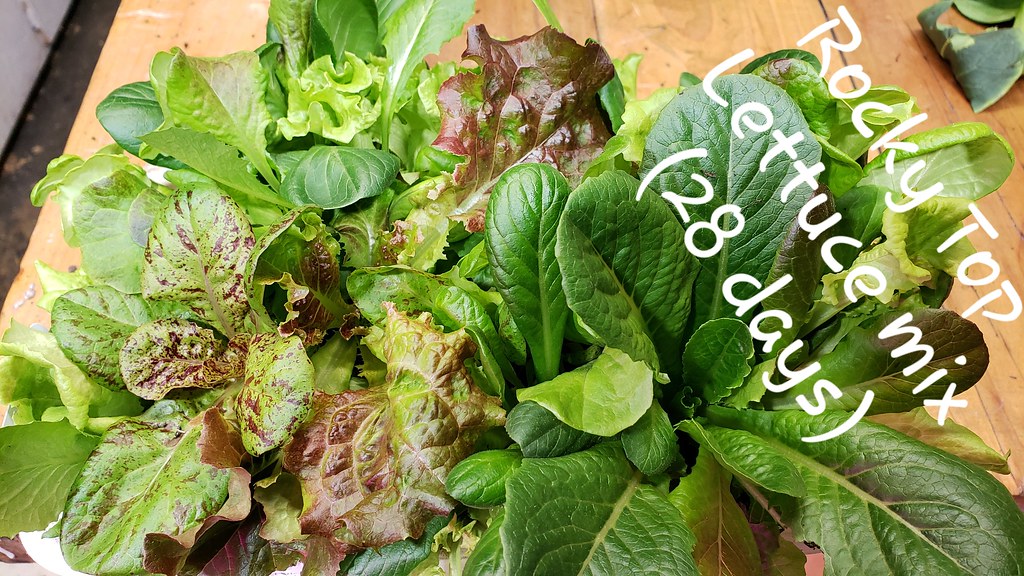
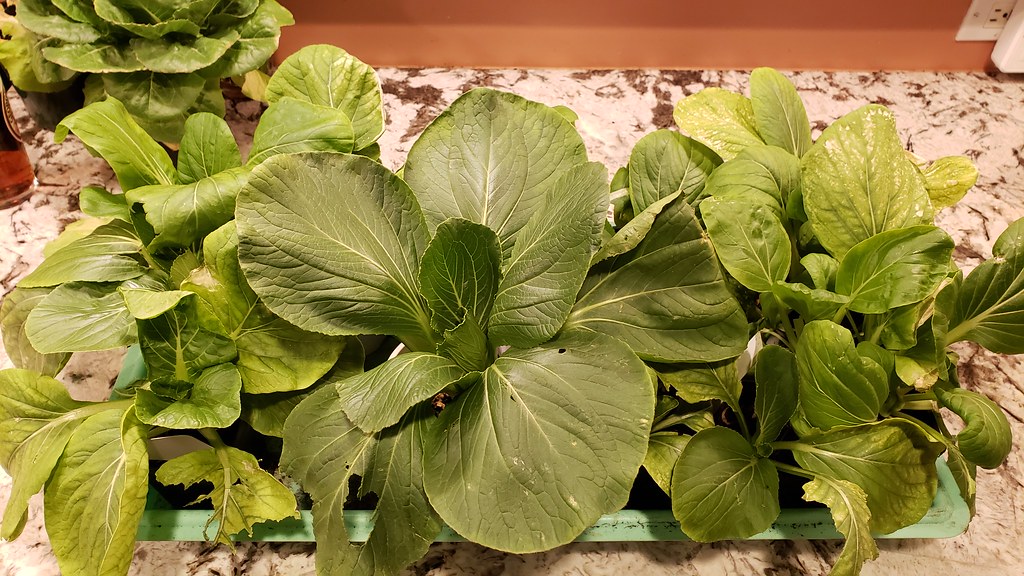
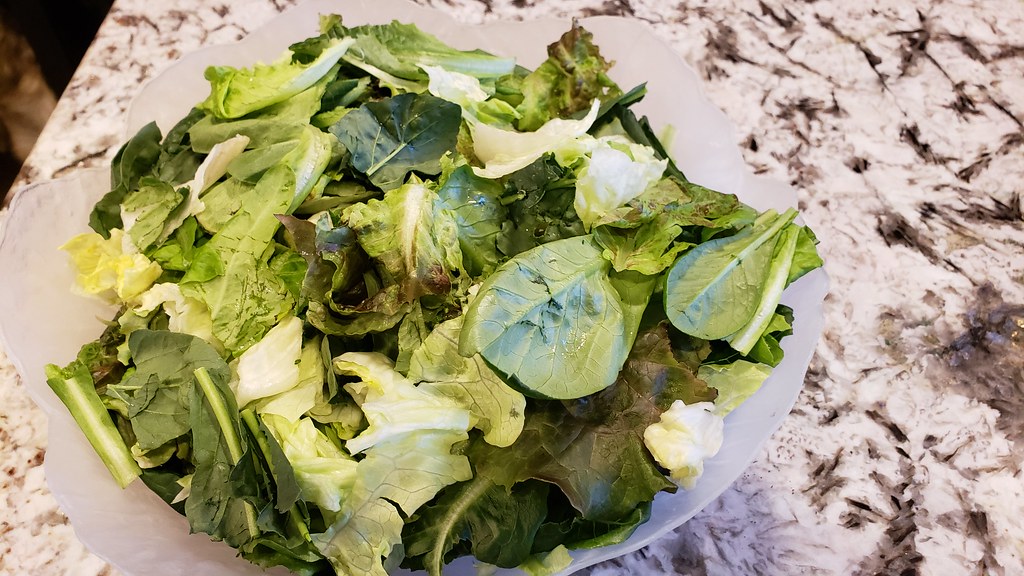
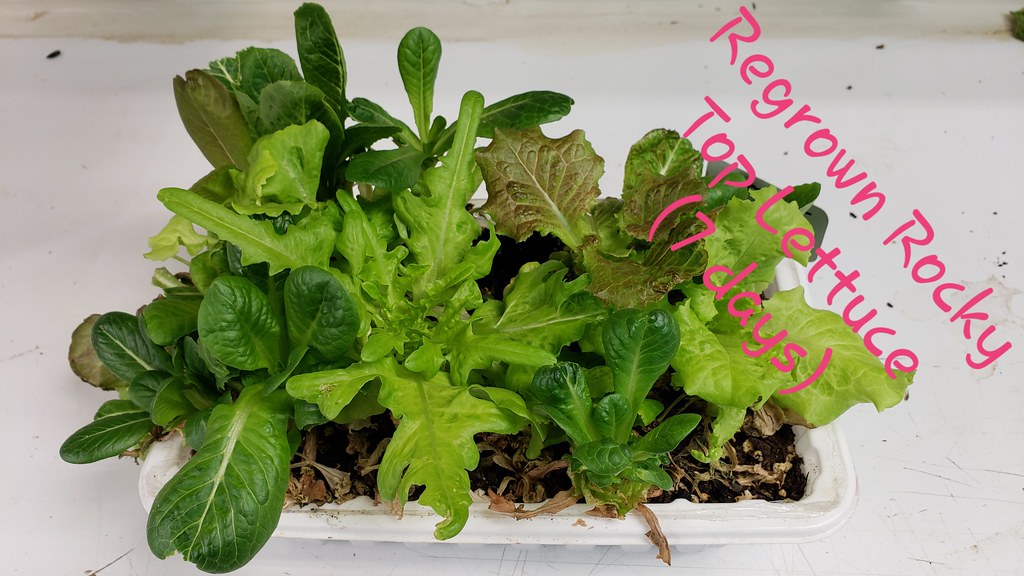
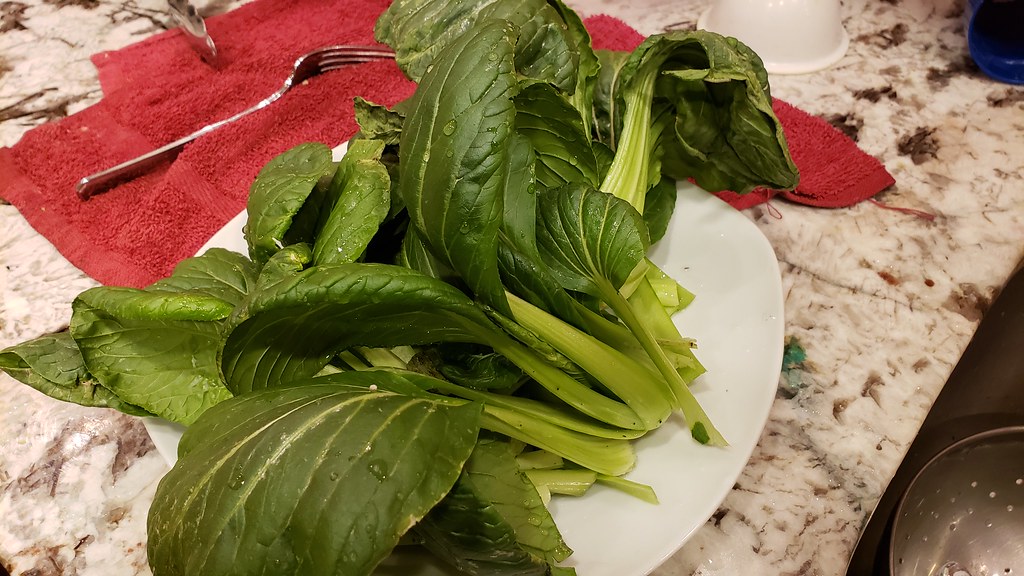
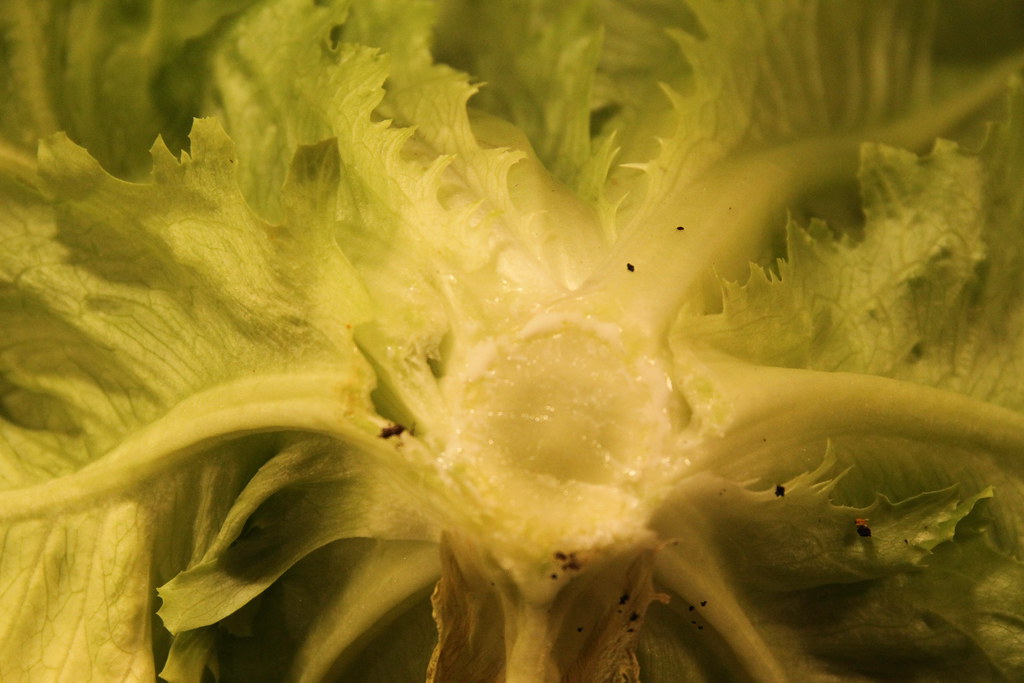
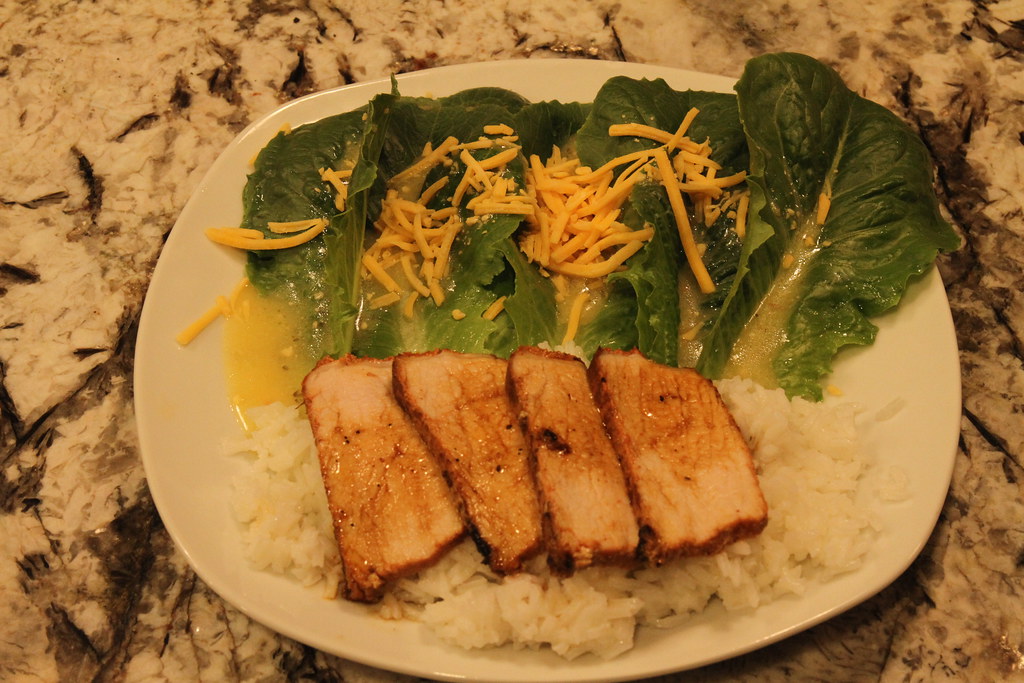
It has been nice eating lettuce the last few days, the romaine seems to be fine uncovered in the fridge for about 4 days.
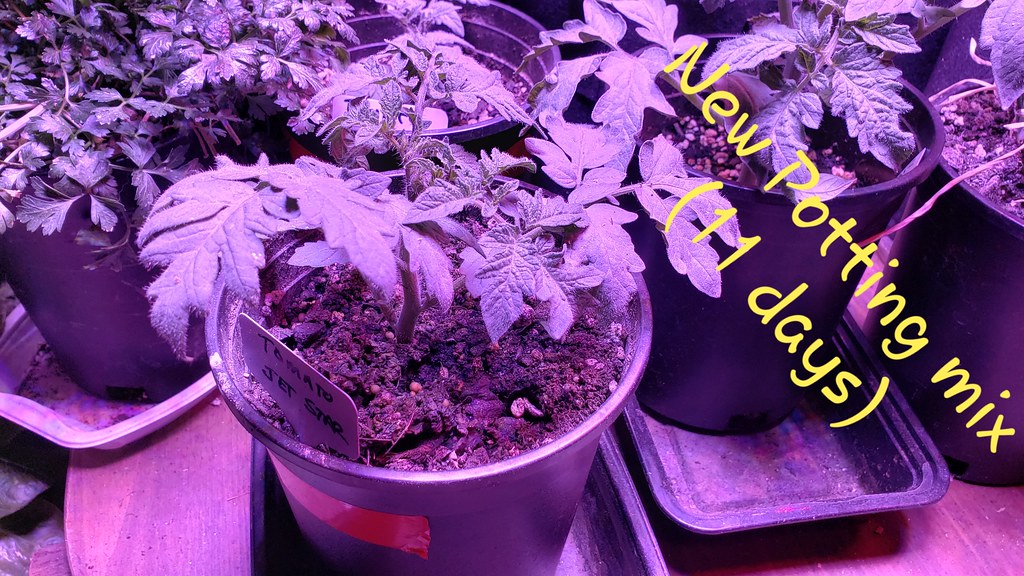
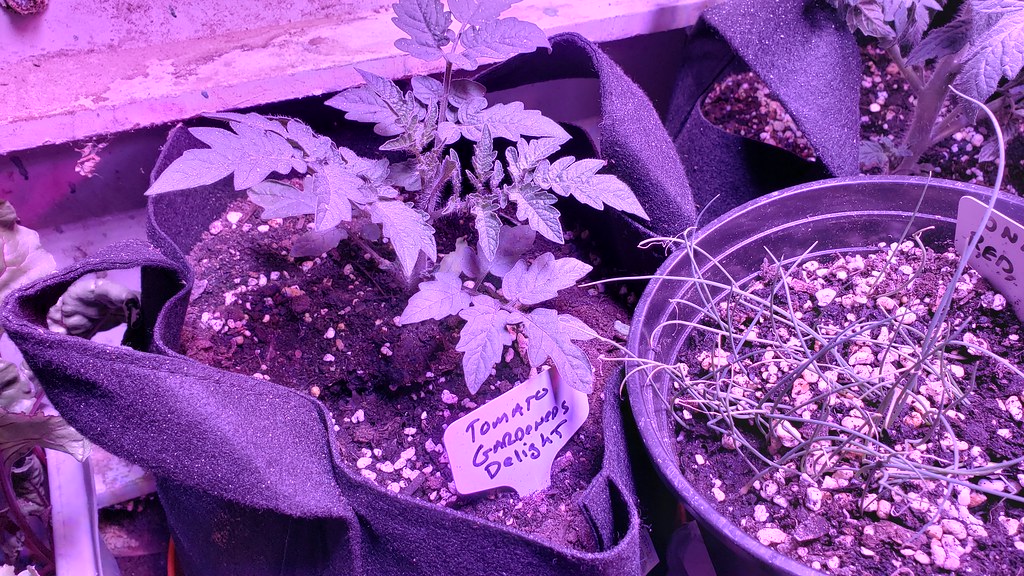
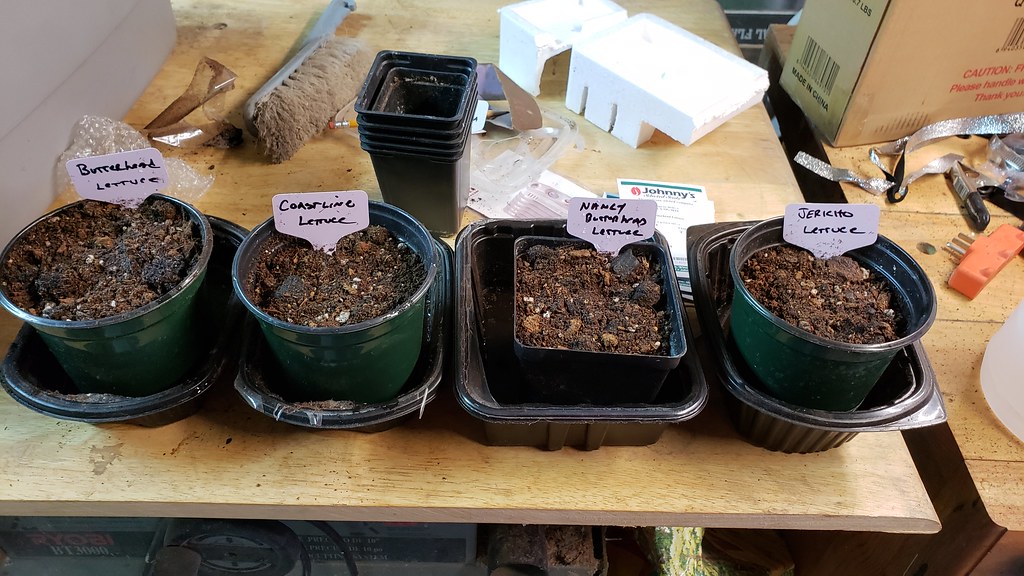
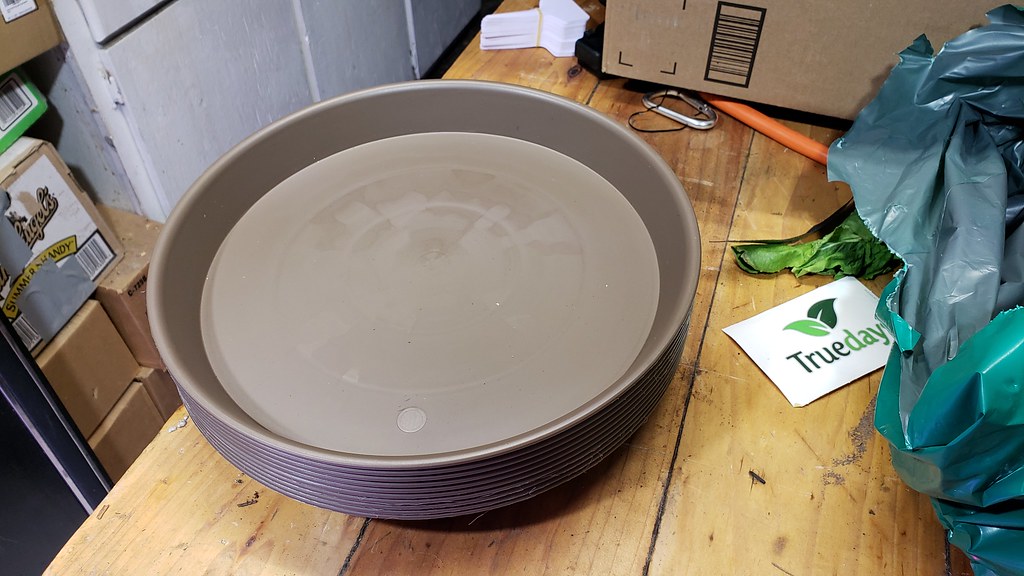
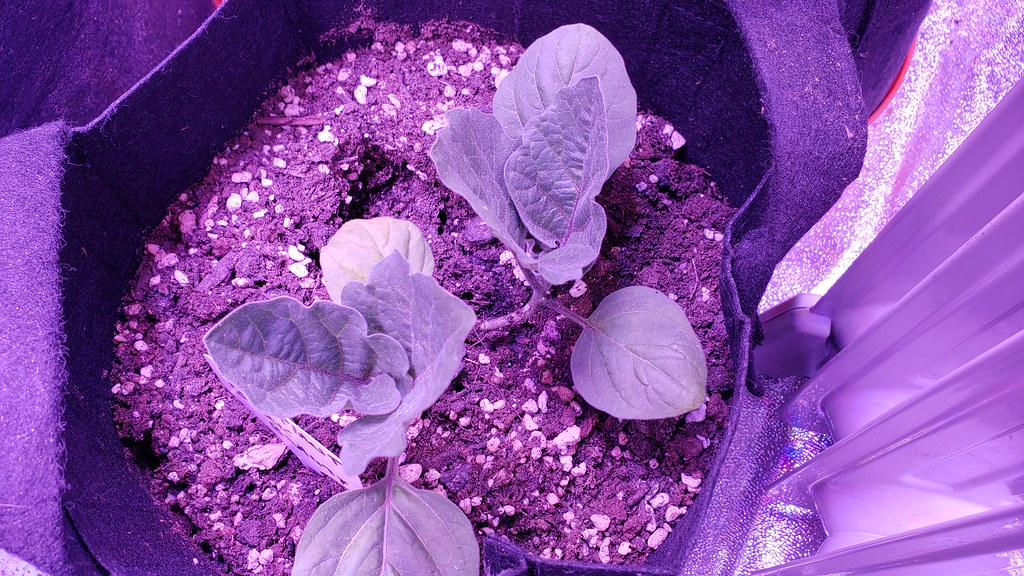
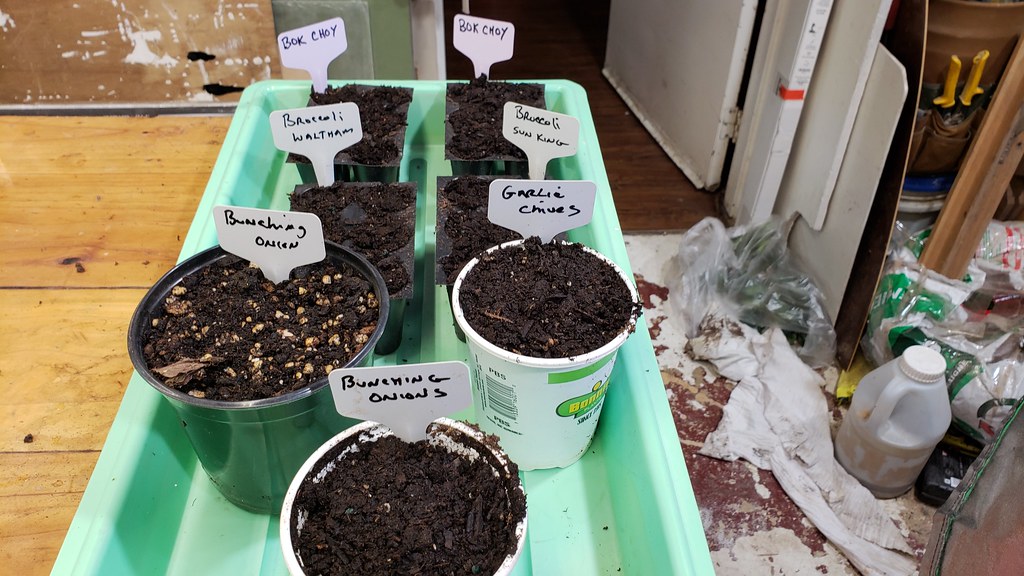
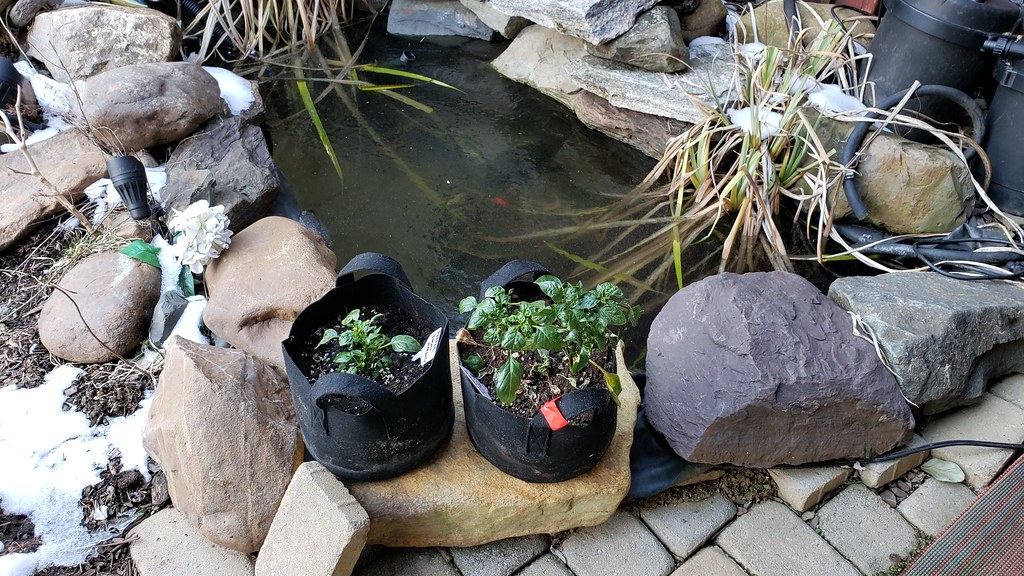
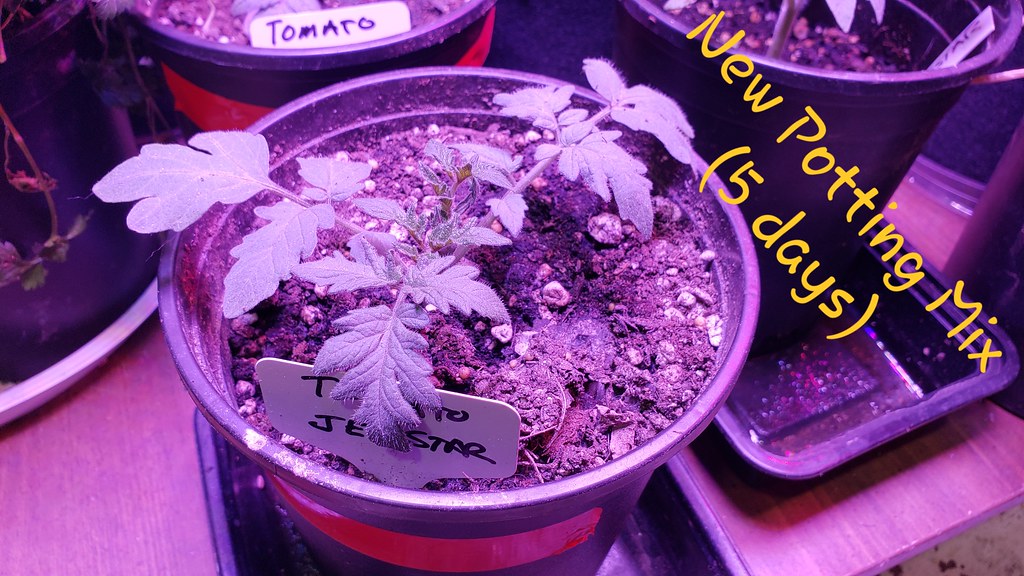
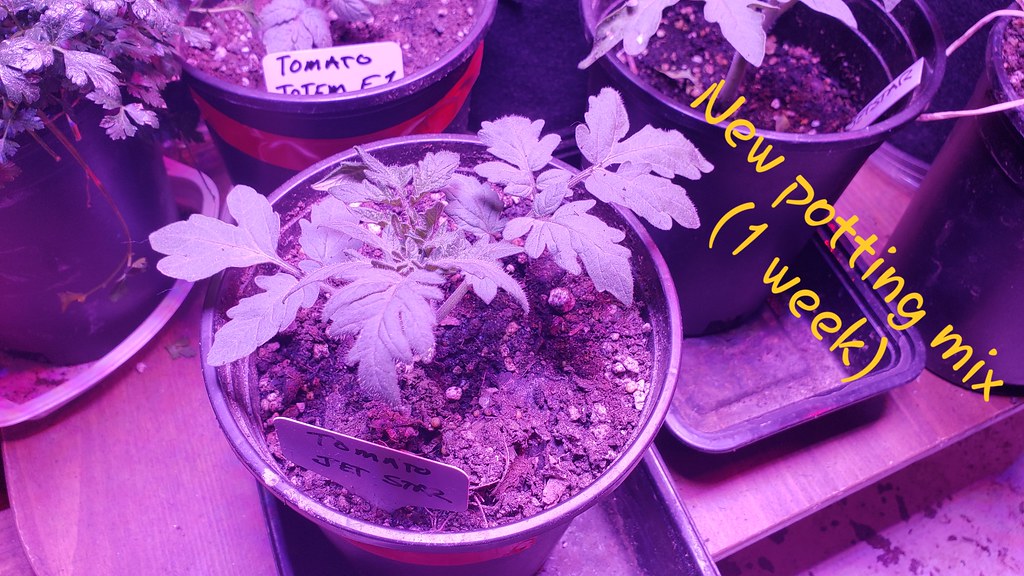
The new potting mix seems to be fine so far.
Image

Image


January 16th, 2019


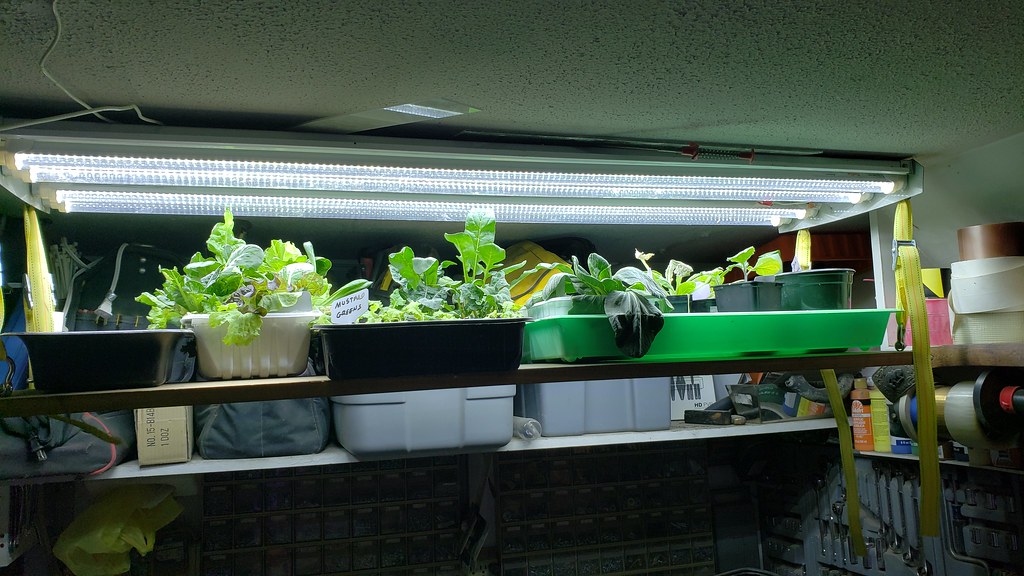
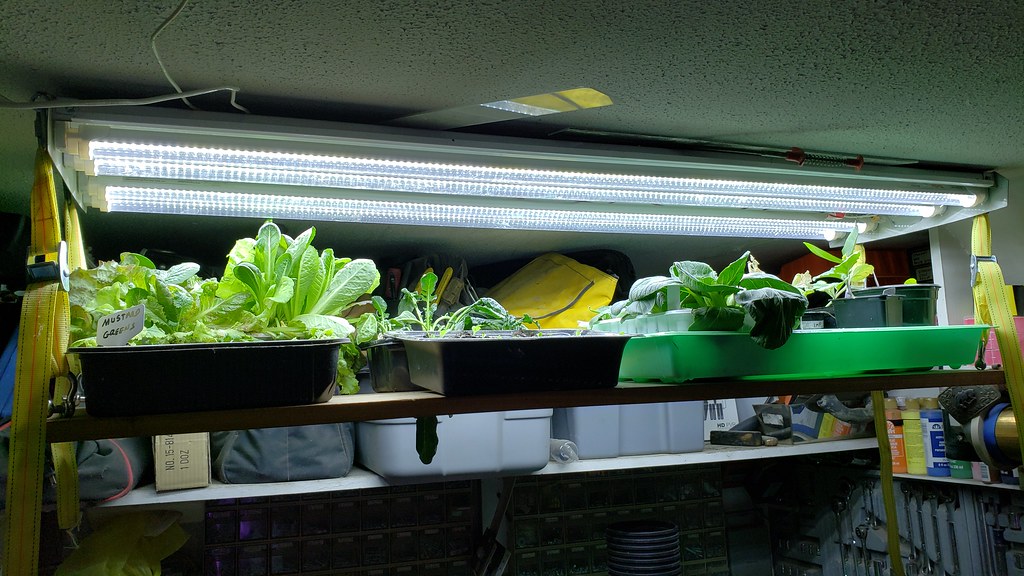
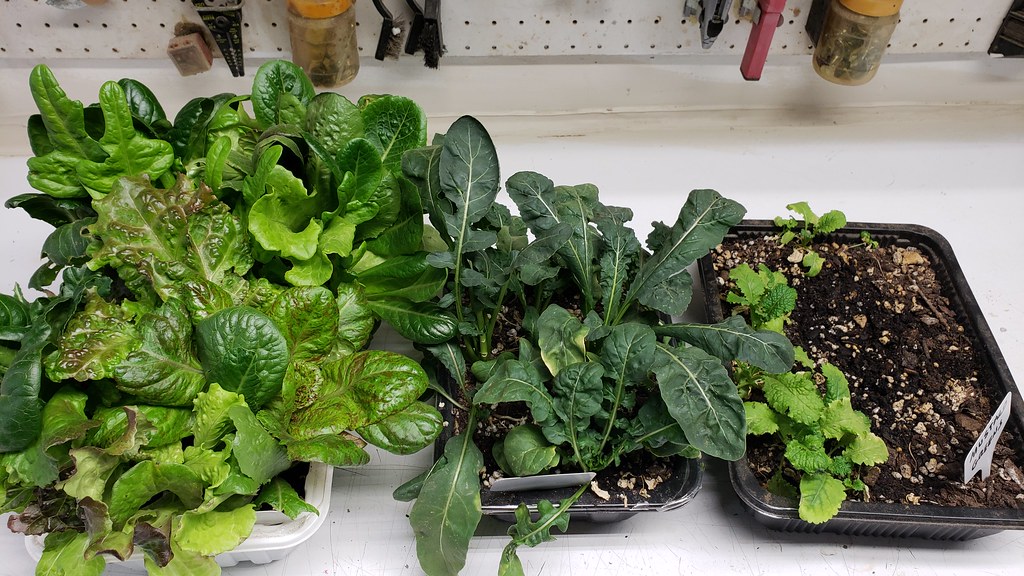
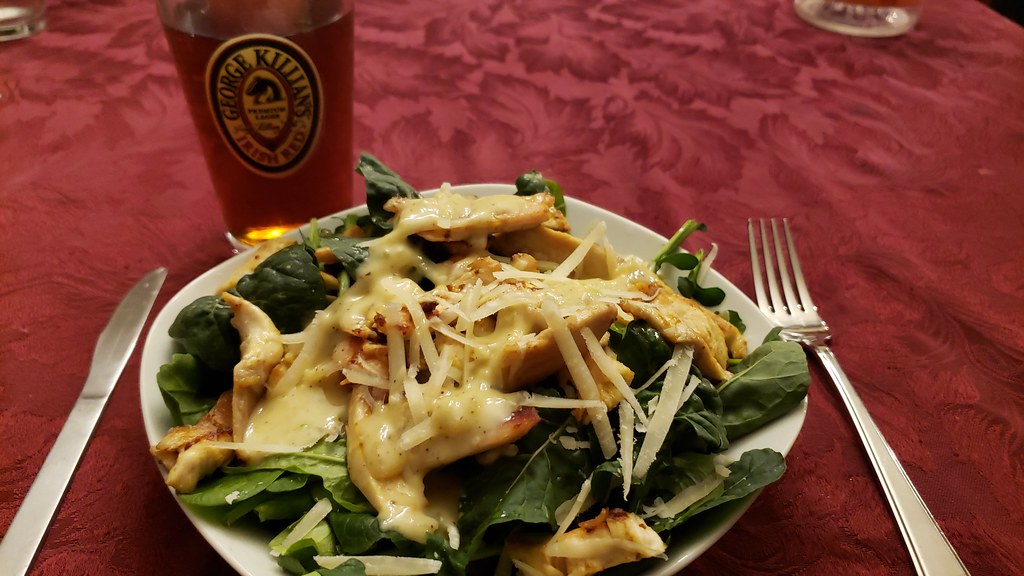
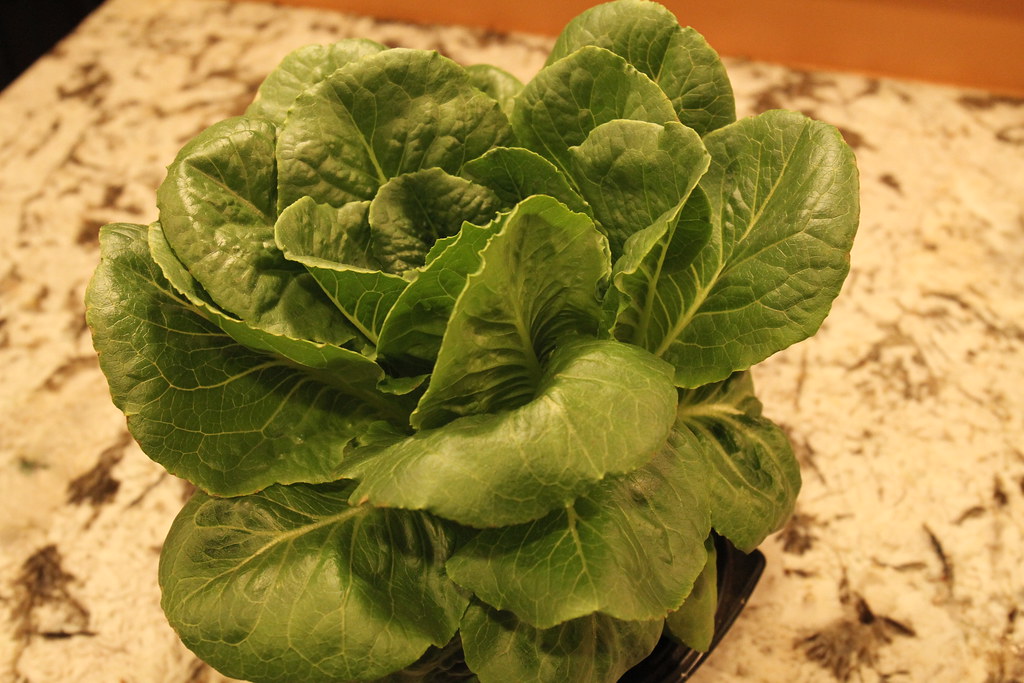
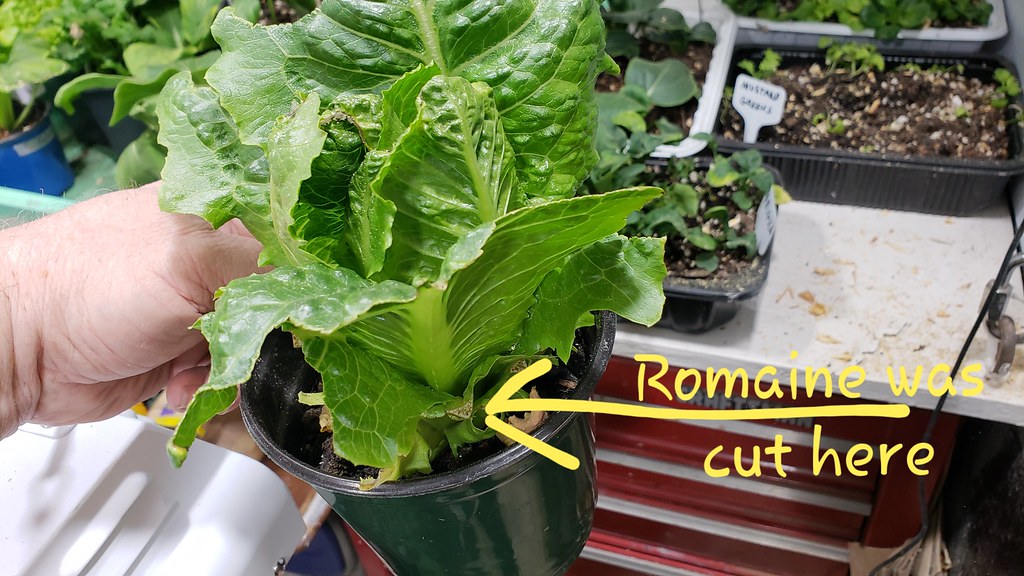
I have been happy with the latest Romaine, I think it likes the floor a little better.
Image

Image

Image


I have been trying to tweak the temps between 66°F and 76°F but I am having a hell of a time, seems when I lower the temperature setting on the heater, the swing in temp between high and low increases. It could be drafting issues as well.
Image


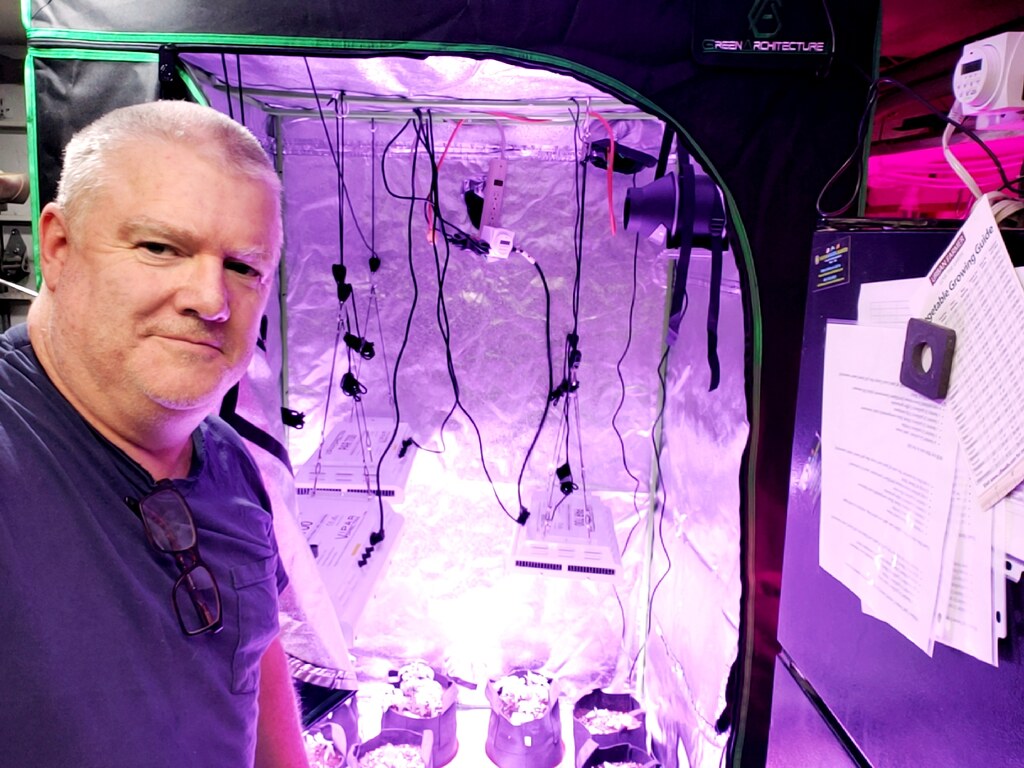
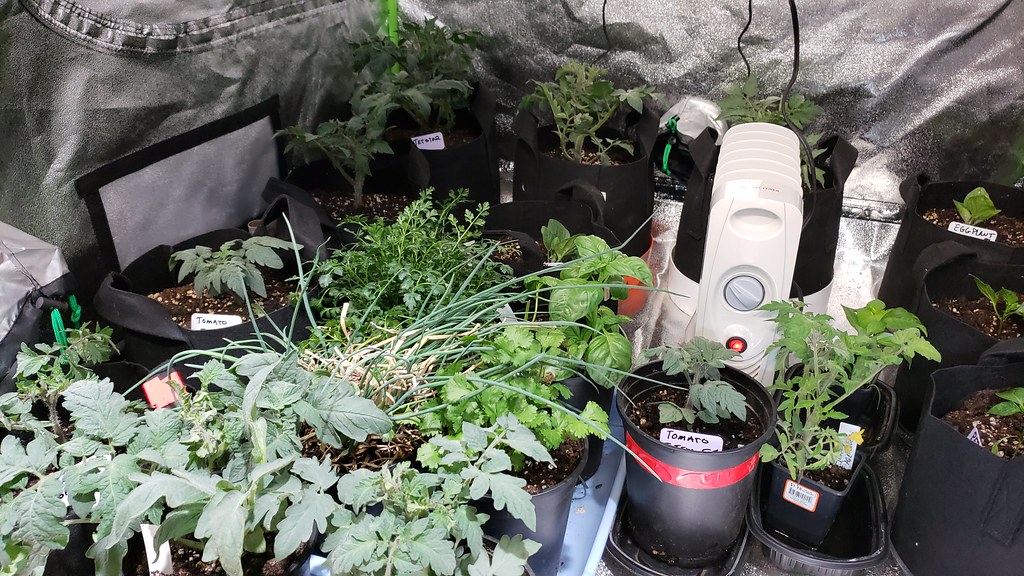
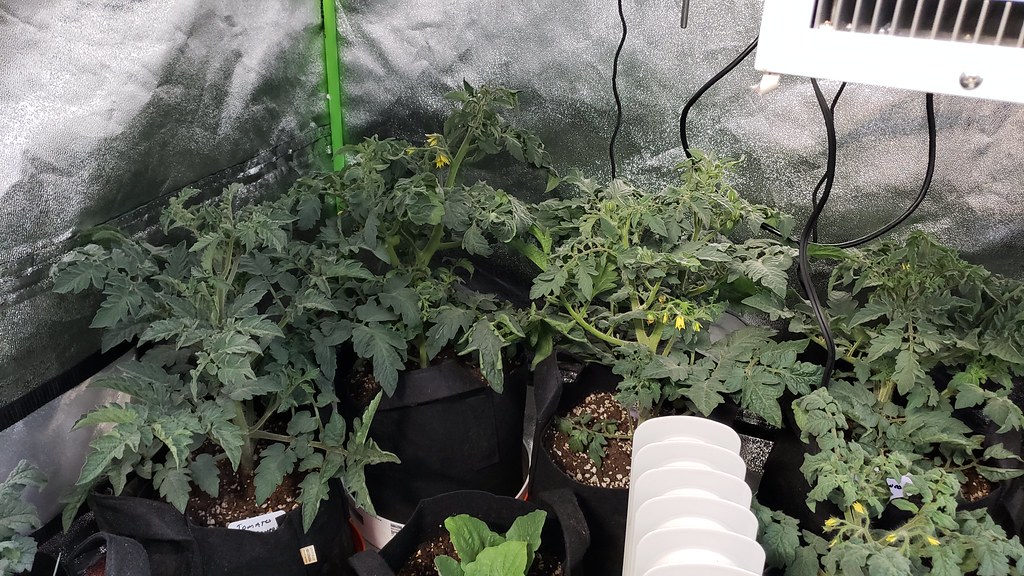
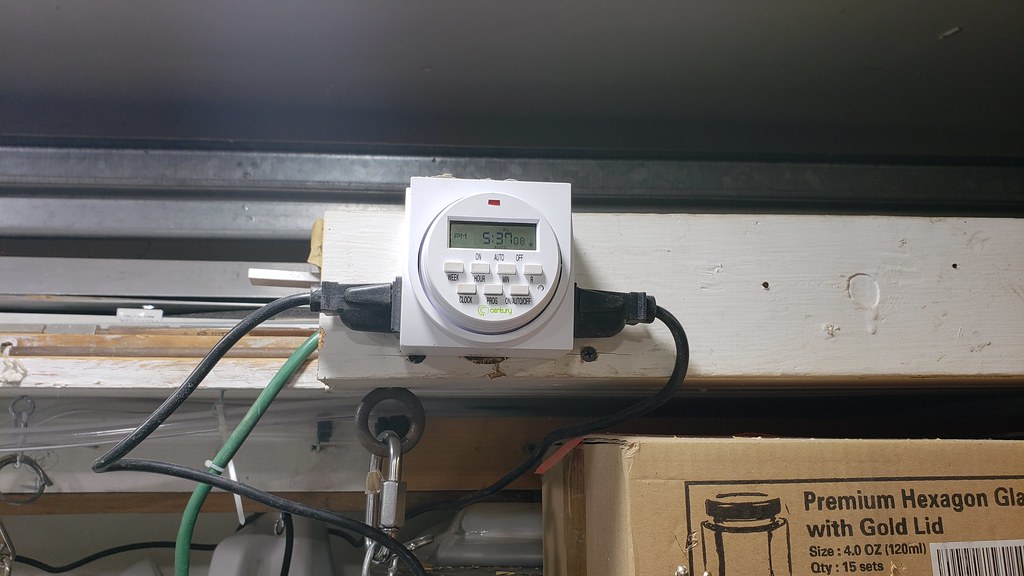
I decided to change up a few things in the grow room, well actually, REDESIGN the entire thing. First off, I'm going to run the grow lights at night and have them off during the day.

They will run 6:00pm - 10:00am. They're currently running 6:00am - 10:00pm. Hopefully this will reduce the temp swing a bit as the day times are usually warmer.

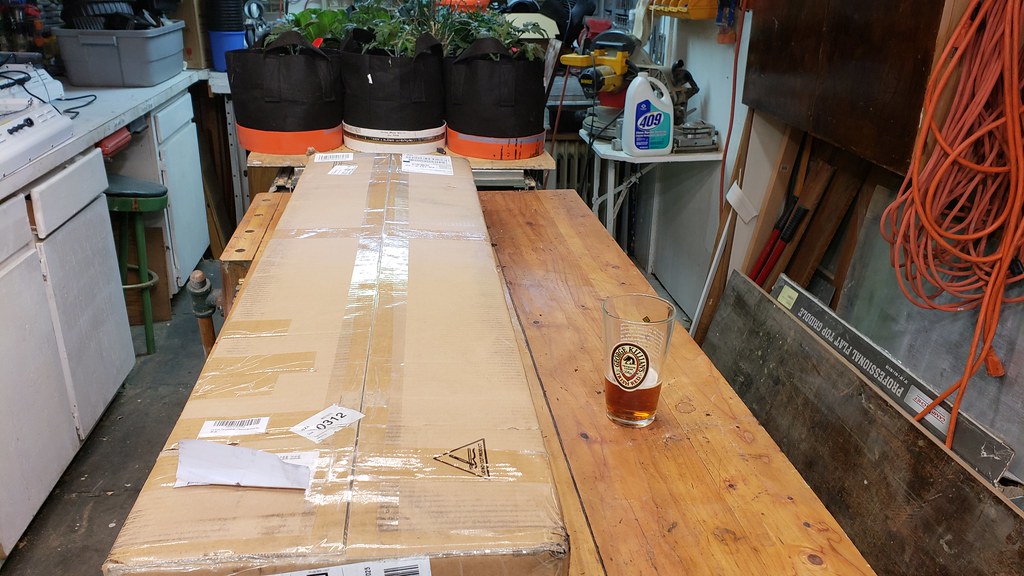
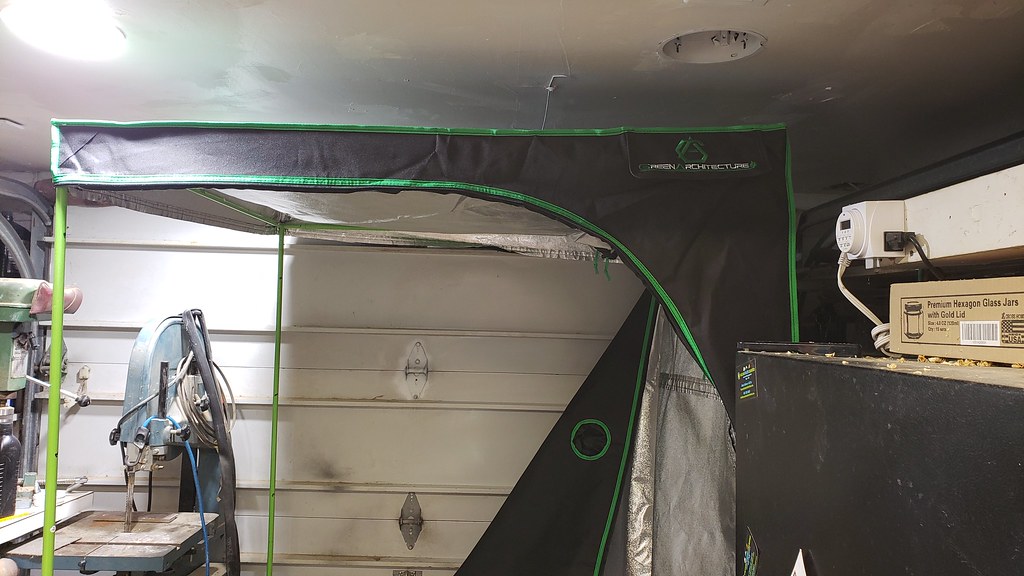
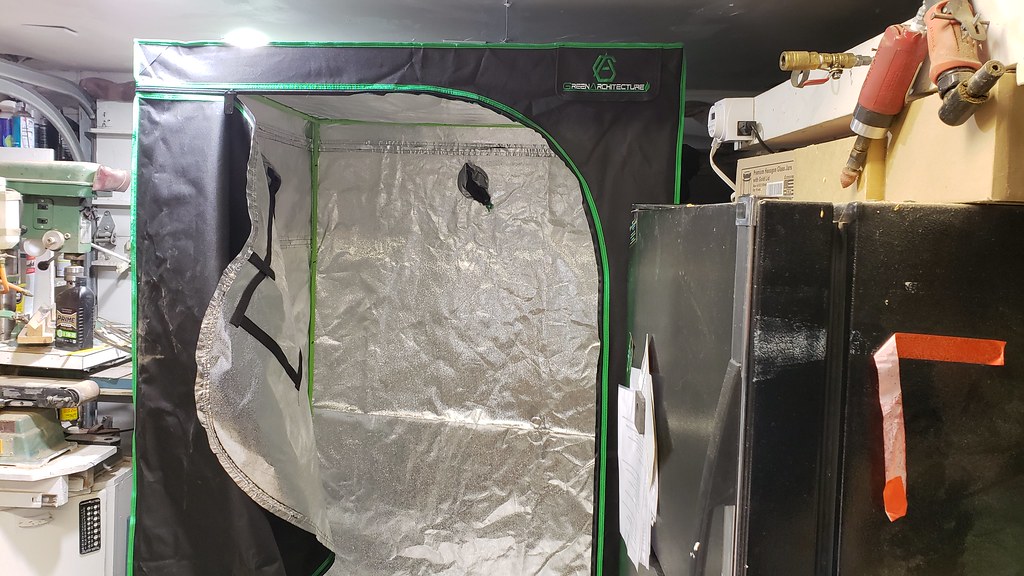
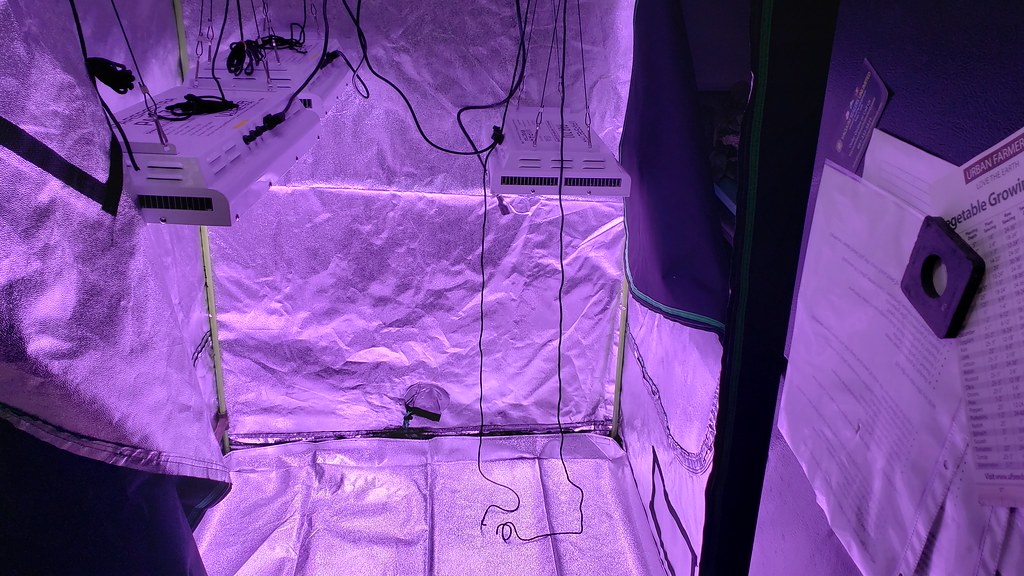
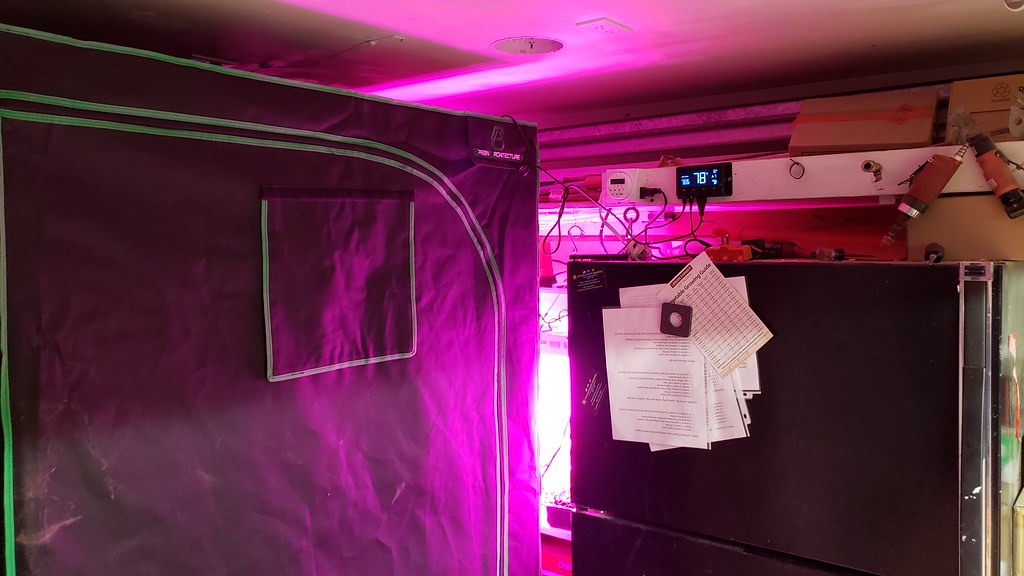
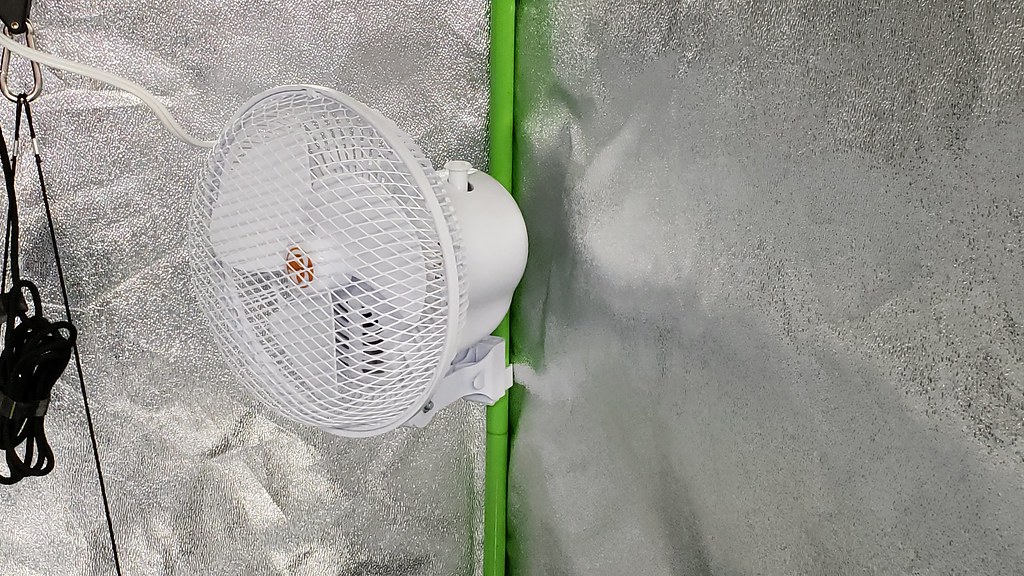
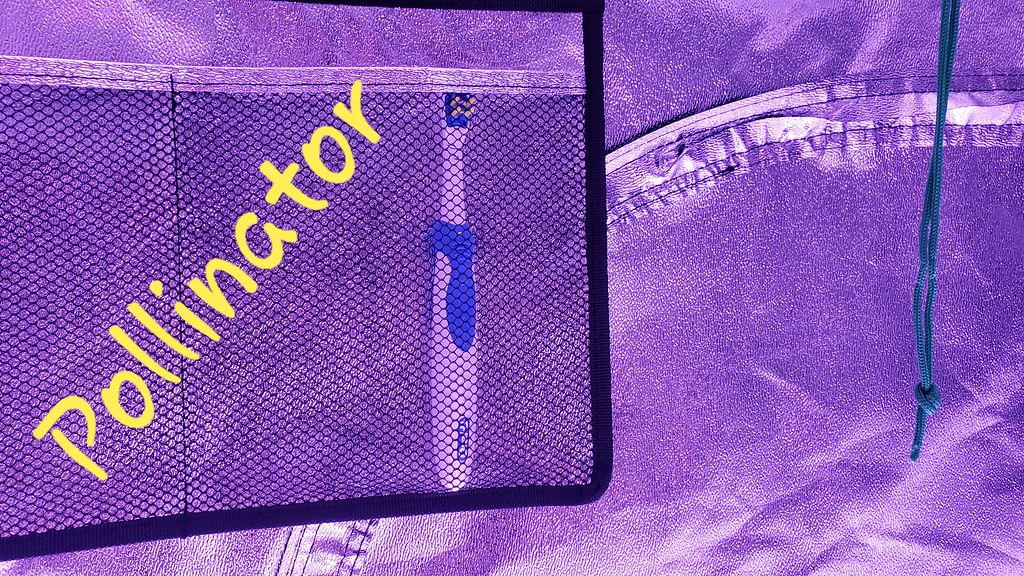
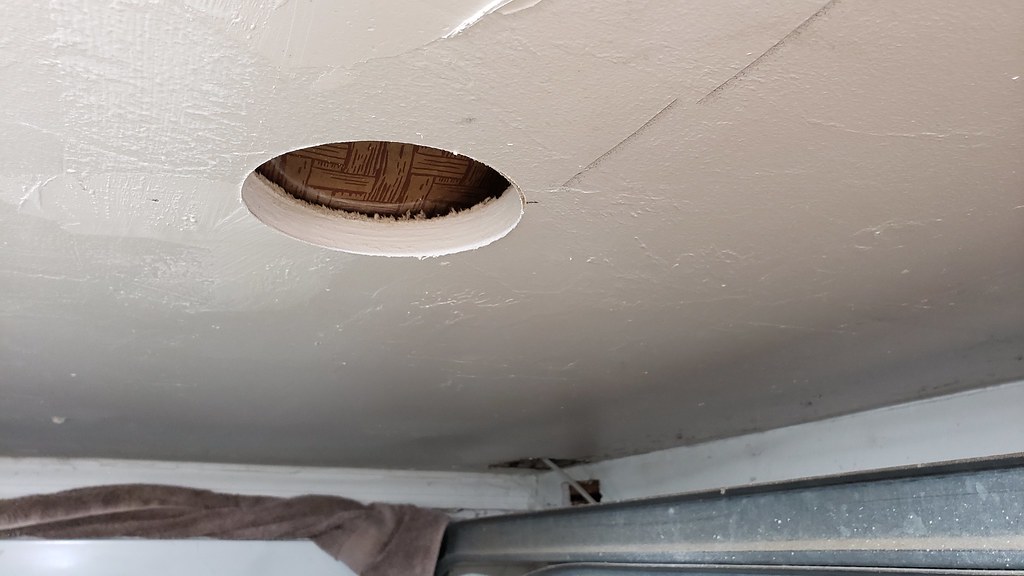
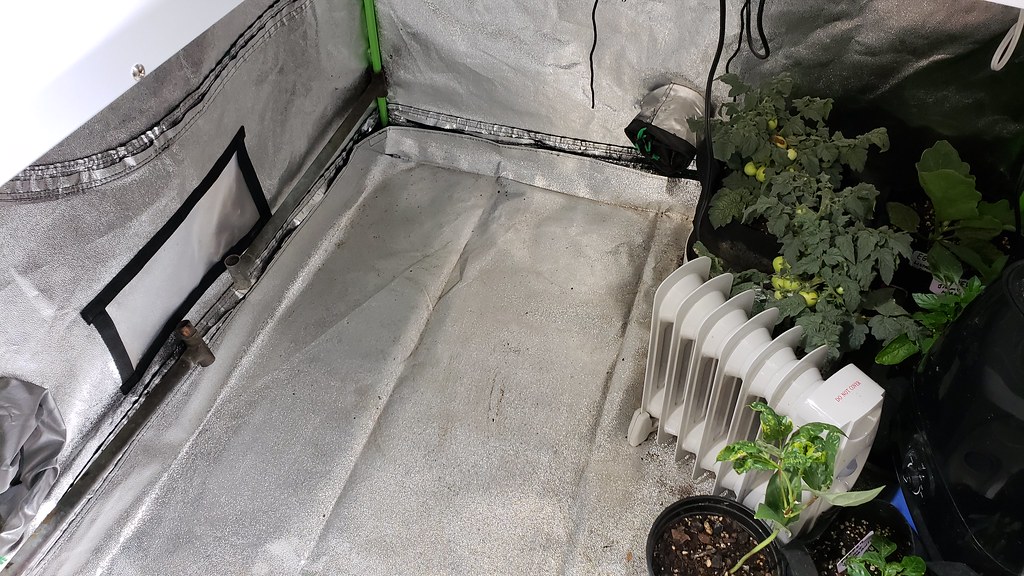
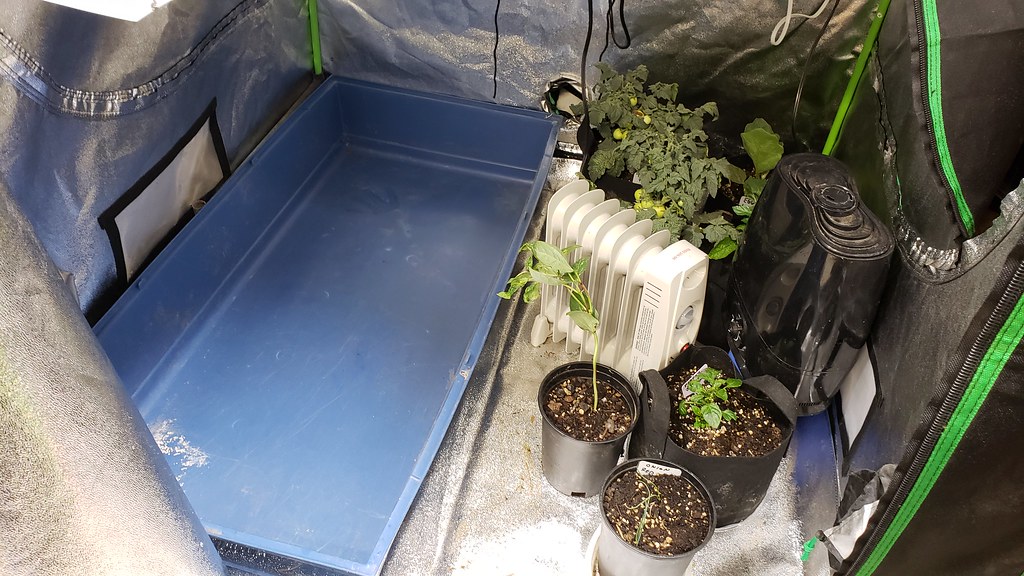
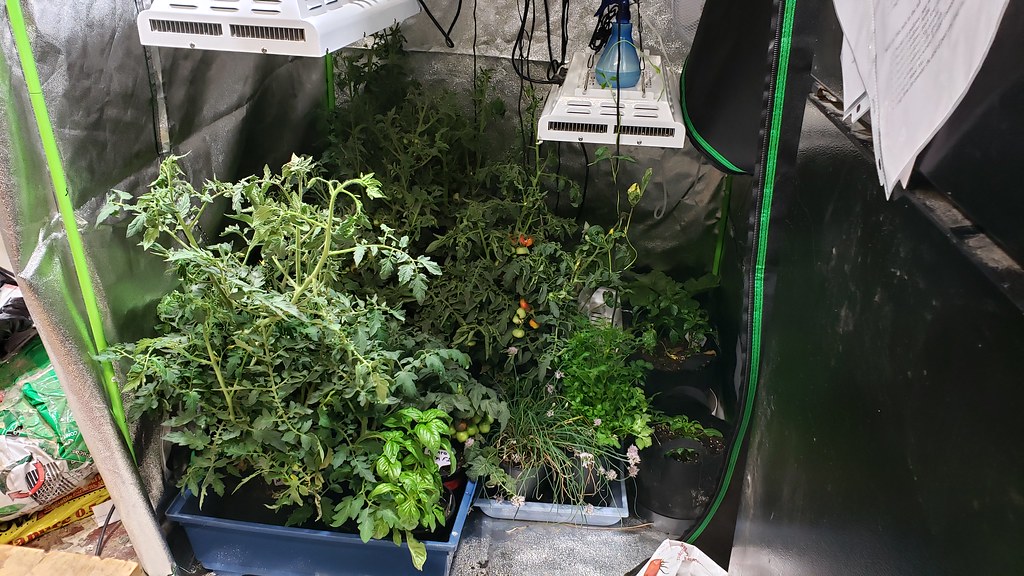
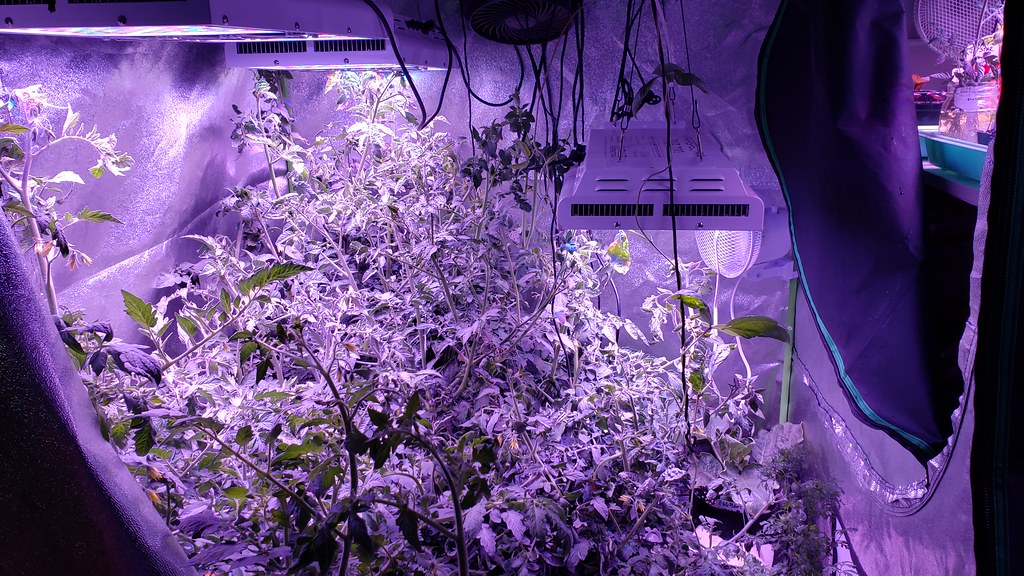
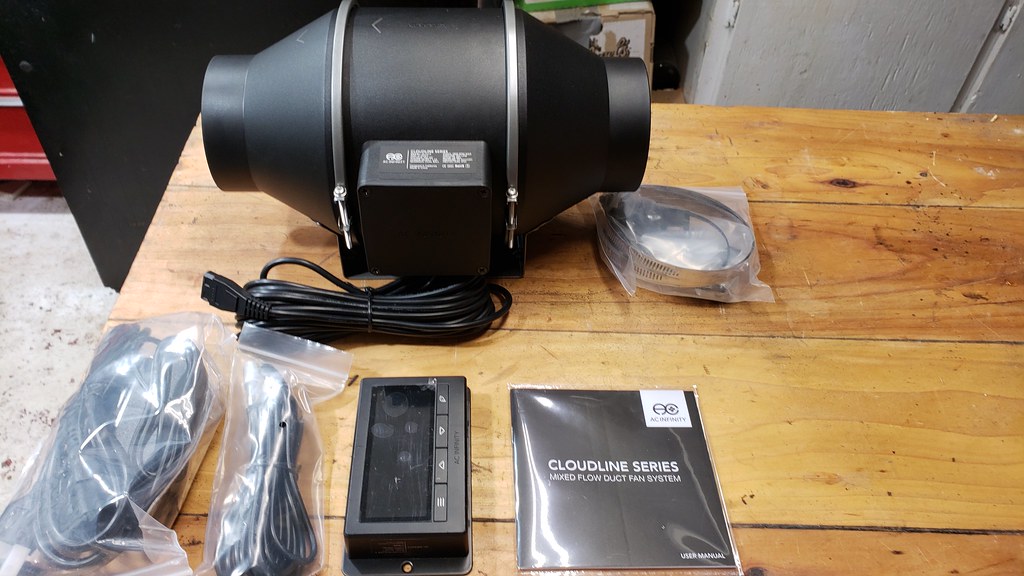
Secondly I also ordered a grow tent and of course had to get an exhaust fan, I'm just hoping that hooking up the exhaust fan to one port will be enough to have a negative pressure in the tent. I am not too worried about intake and exhaust because I mainly wanted to get a tent for the reflective material, my original plan was to hang Panda Film but figured that the cost of the Panda film would be near as much as a grow tent and be a hassle trying to figure out how to hang it, heck, who am I kidding, cost never entered my mind.
So if ventilation and/or humidity become a problem and the exhaust fan doesn't work adequately, I'll leave the front of the tent completely open. The tent will at the least reduce drafting and increase the led lights effectiveness.

Third, since I ordered the tent I also ordered a mini Oil Heater for the tent, I'm hoping by using the oil heater, I can place a pan of water on top of the heater and ditch the humidifier, that is of course if I seal the tent entirely.

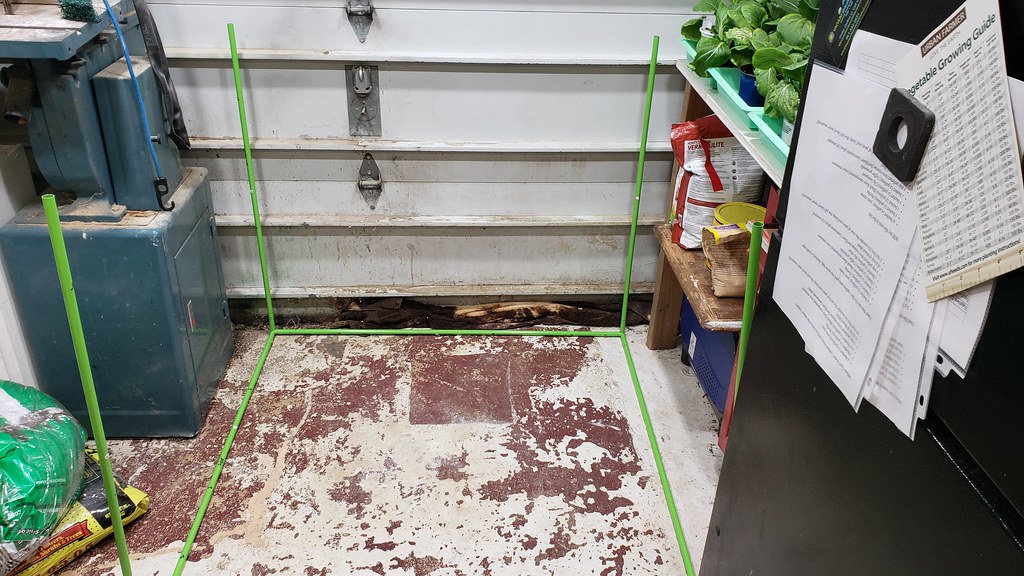
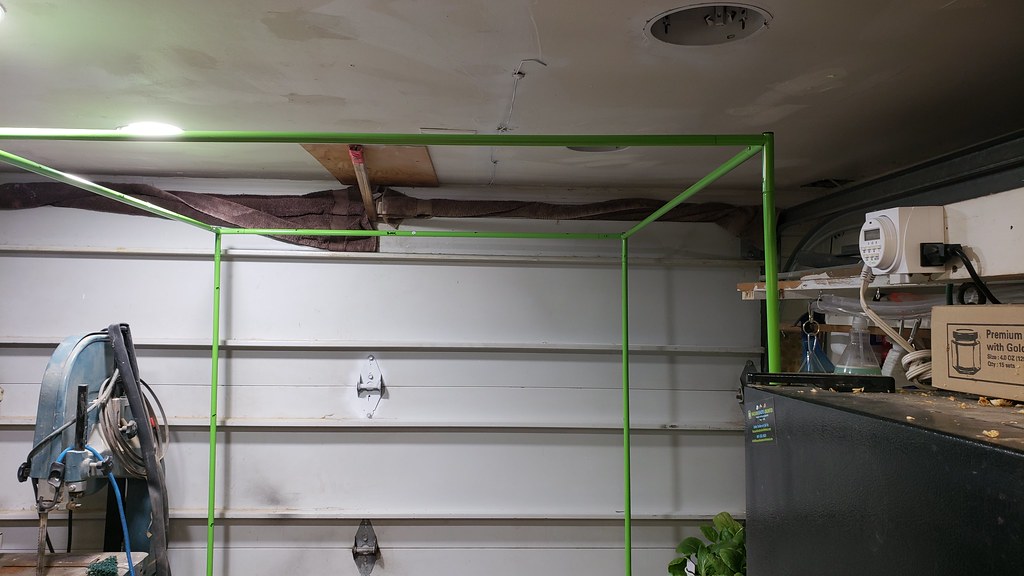
So my project this weekend is to clear some room for the tent and it is going to be freak'n tight!!.


January 17th, 2019


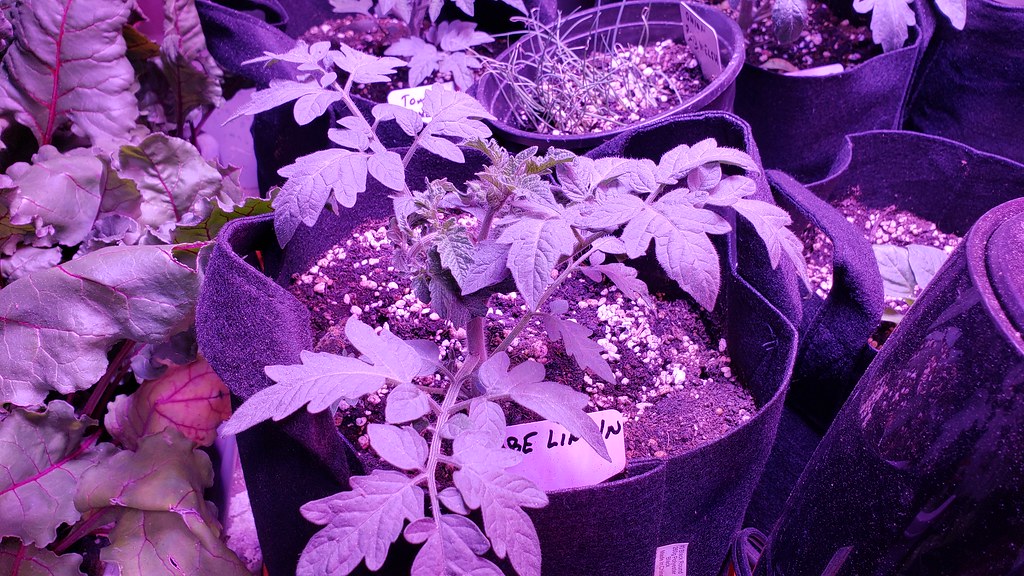
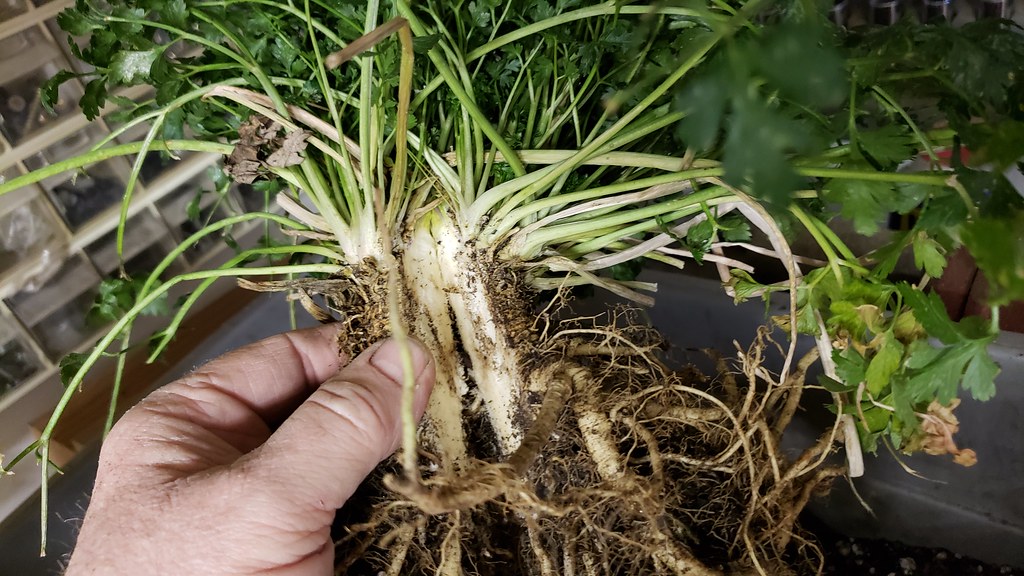
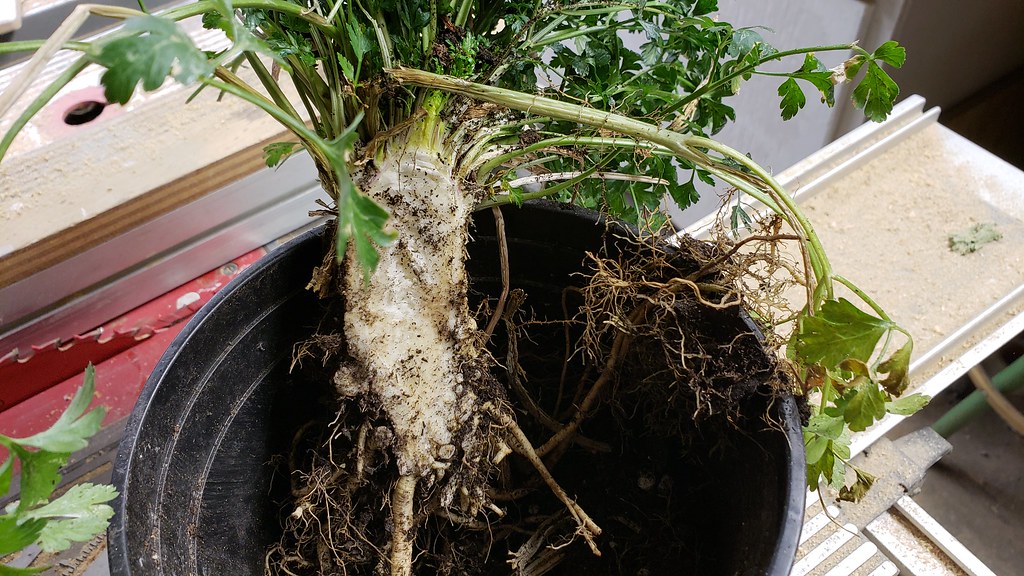
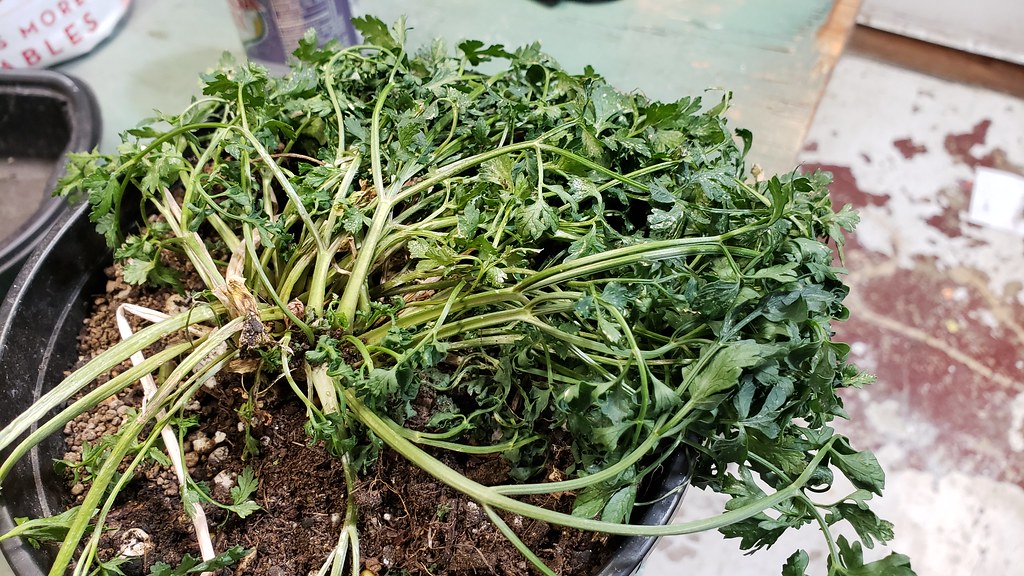
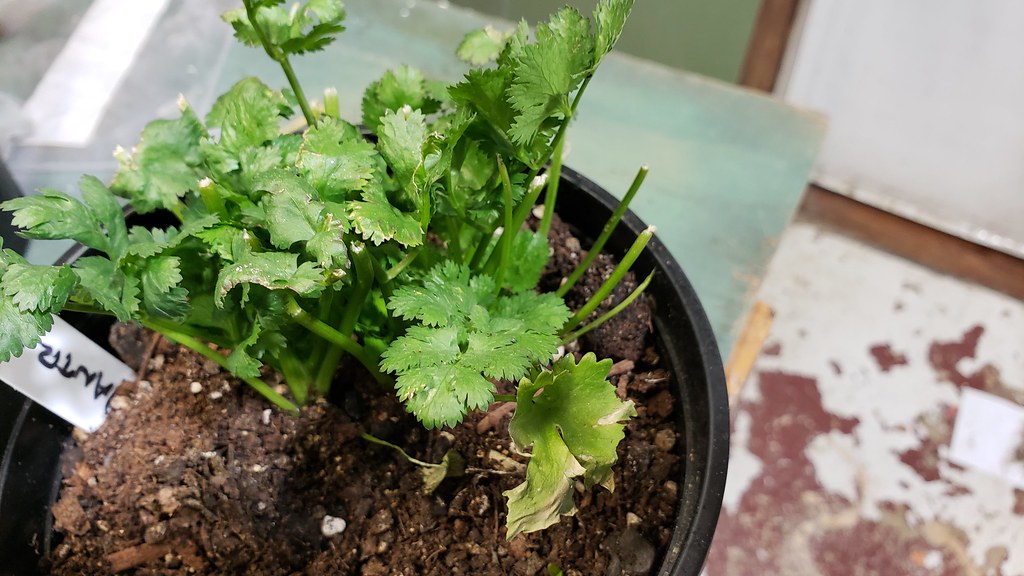
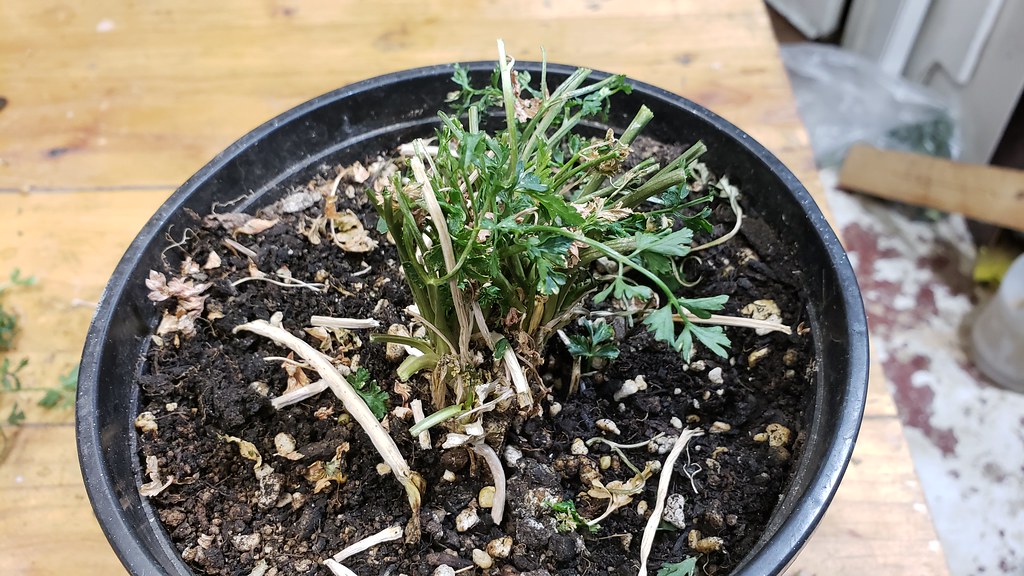
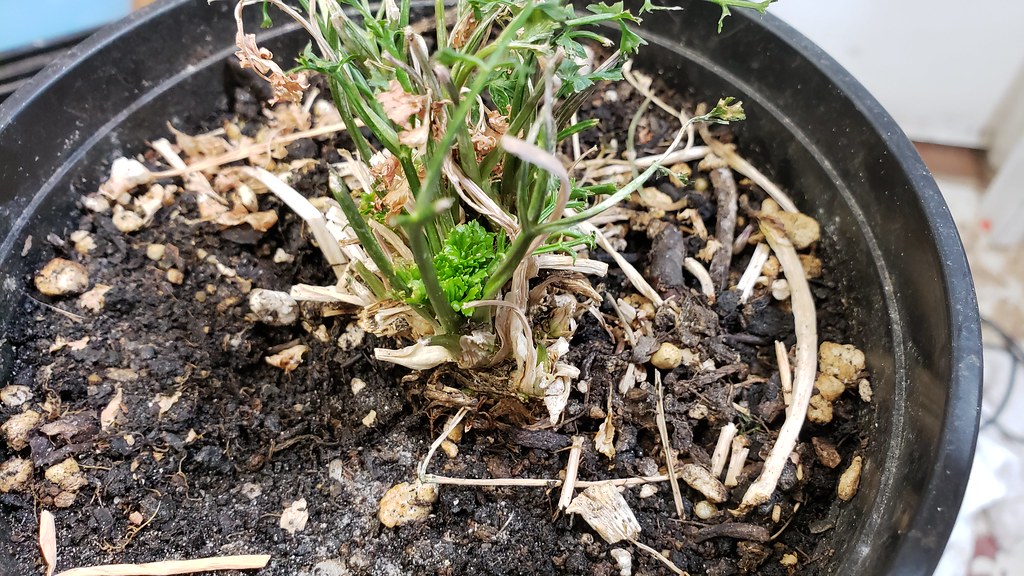
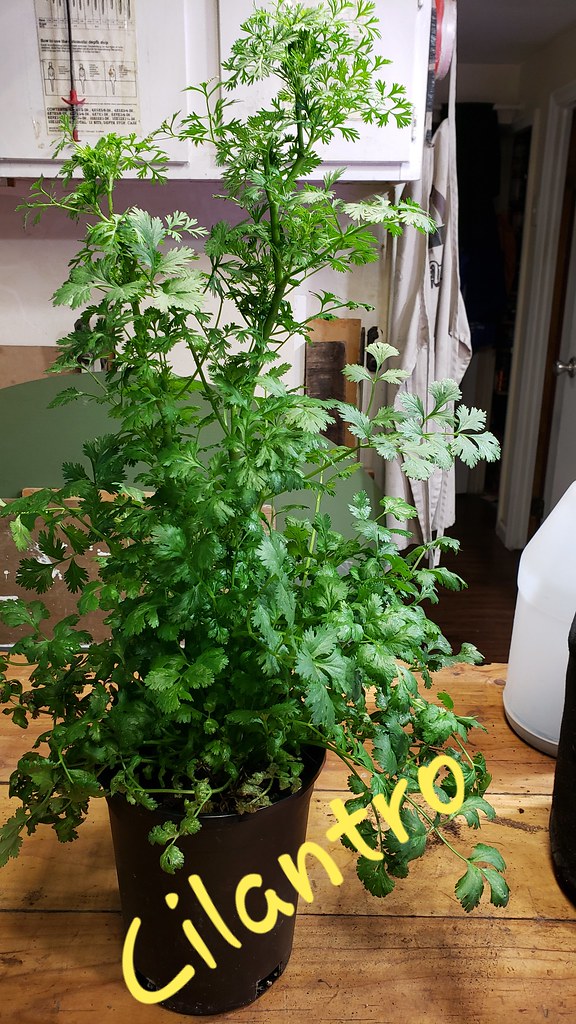
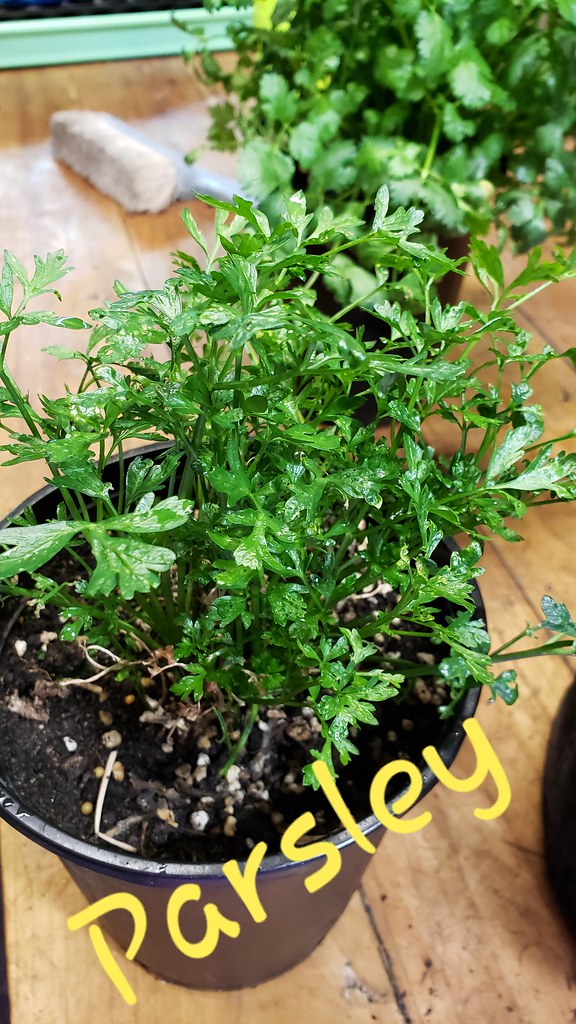
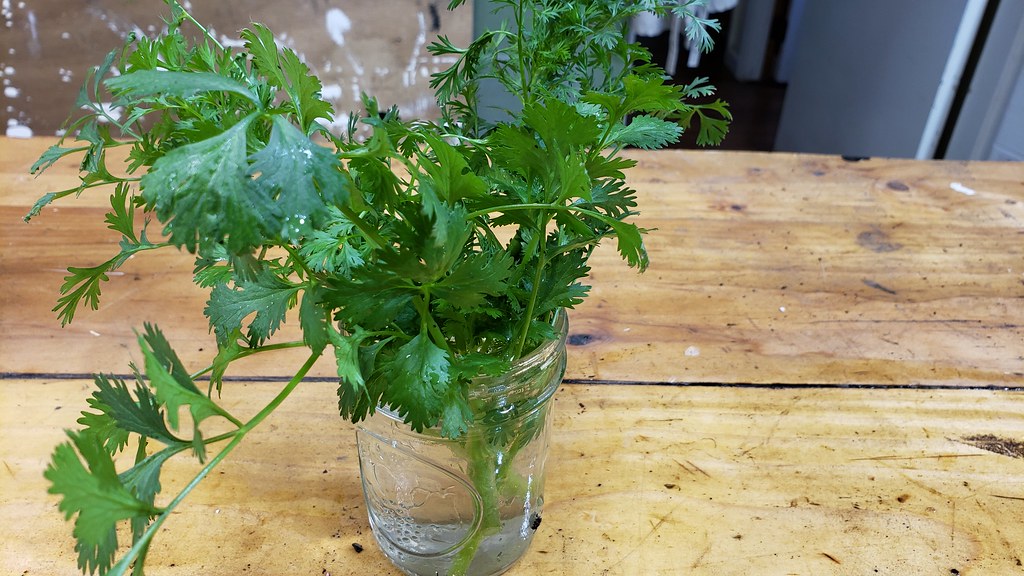
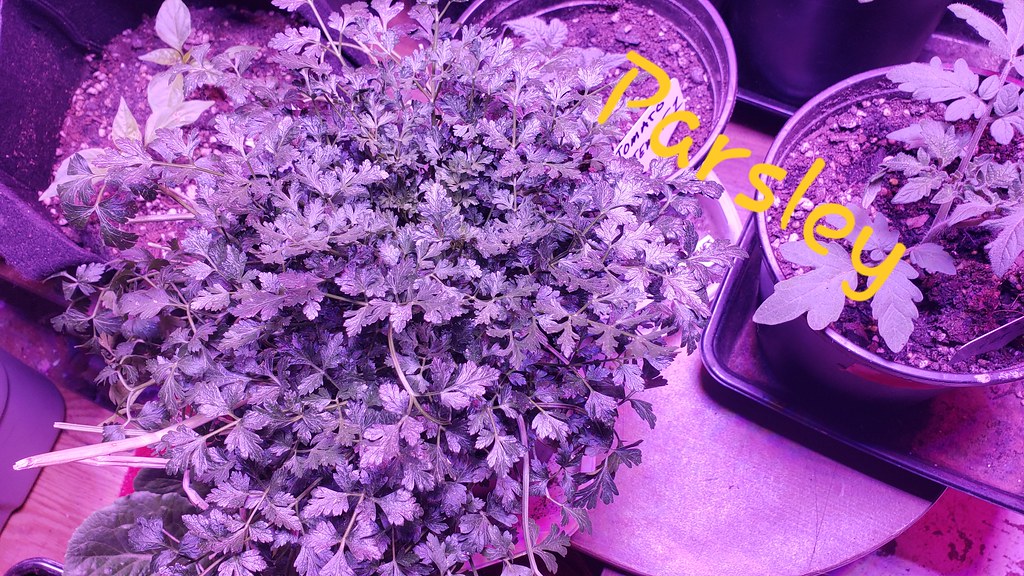
Parsley filled out a bit
Image


Potting mix seems OK, hasn't killed anything yet
Image


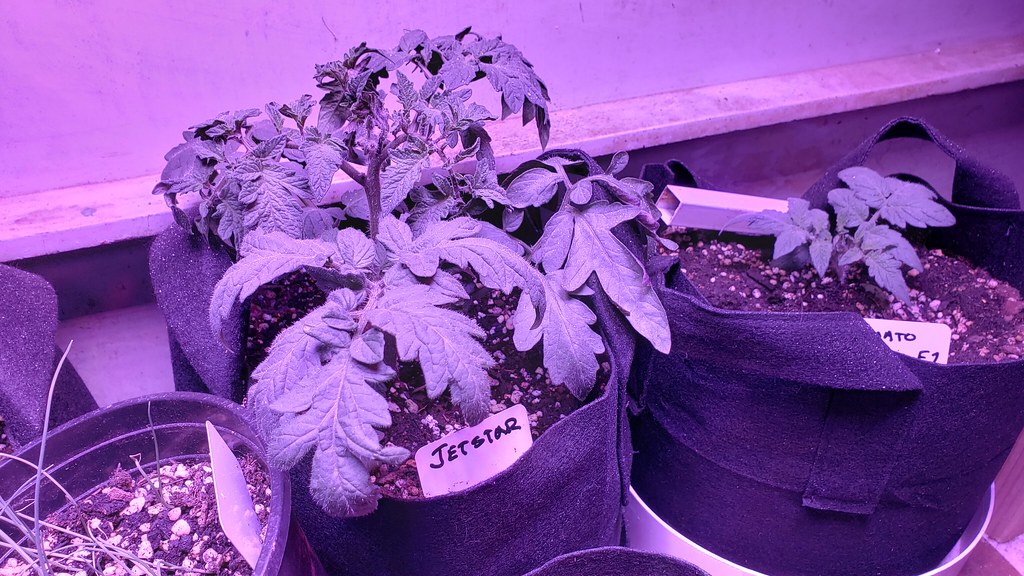
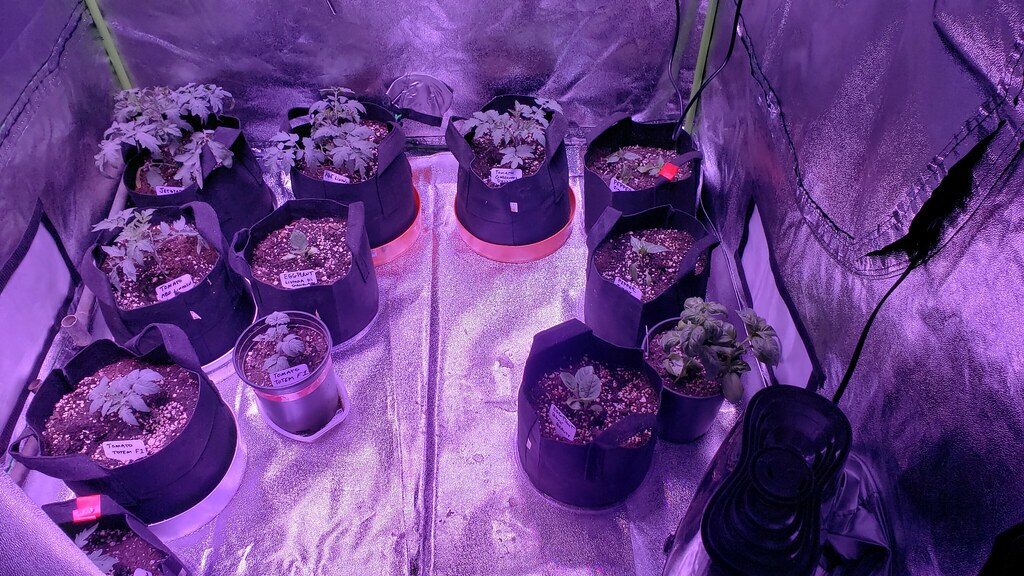
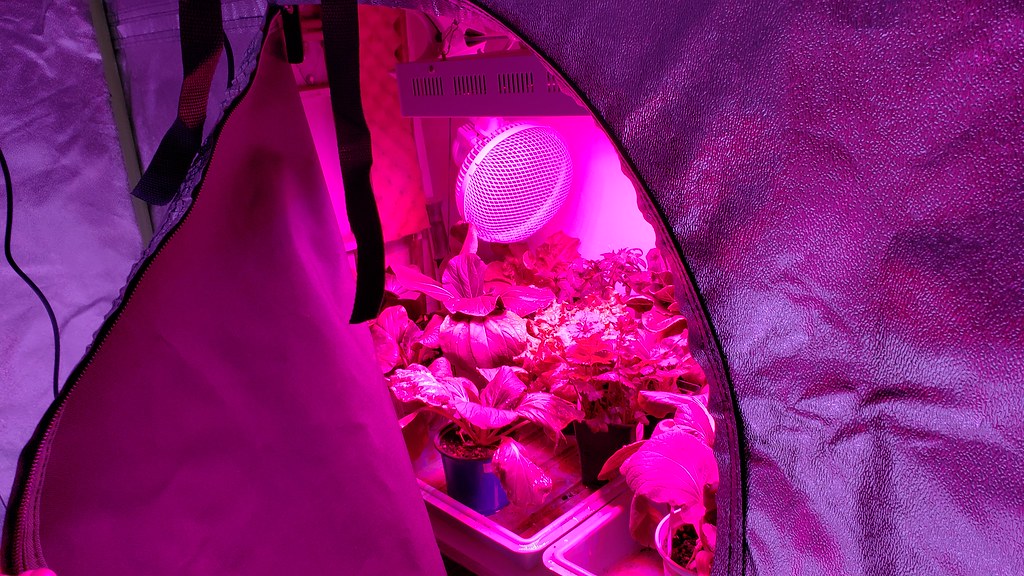
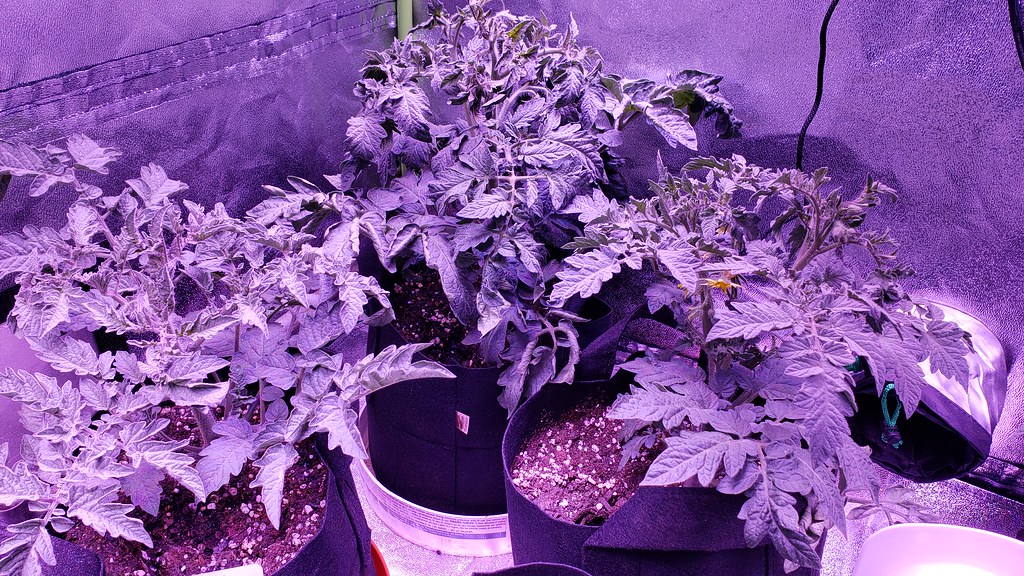
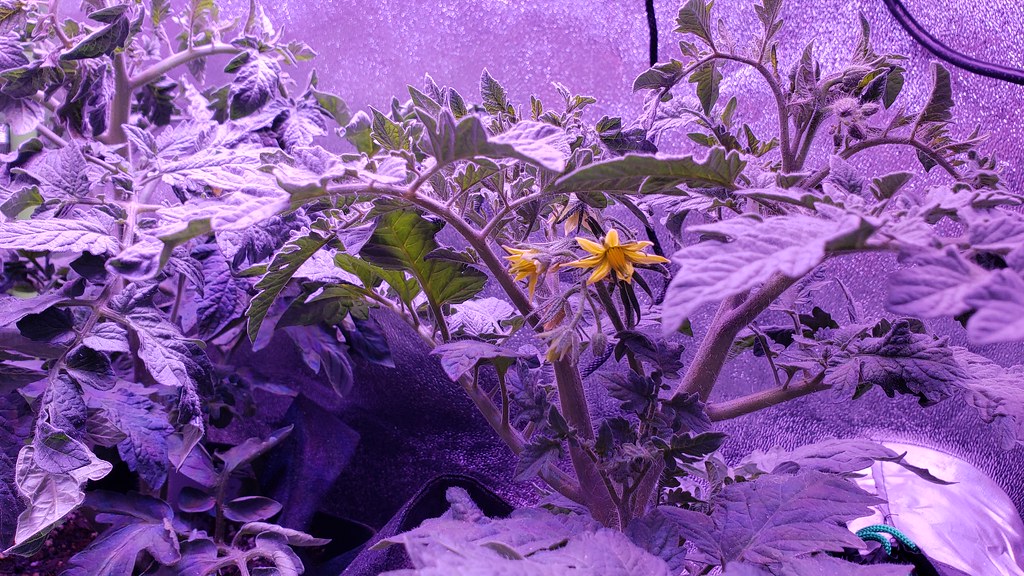
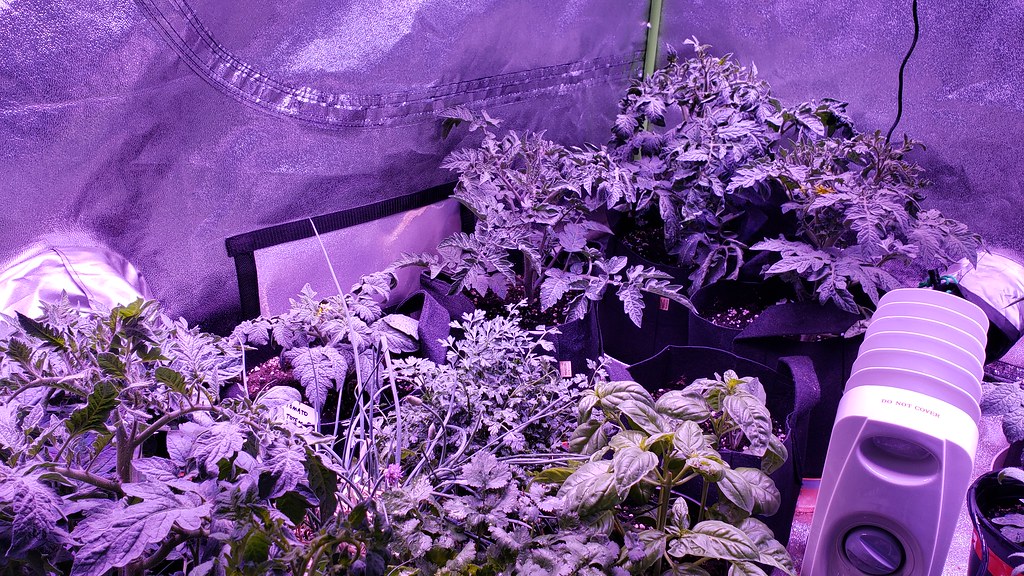
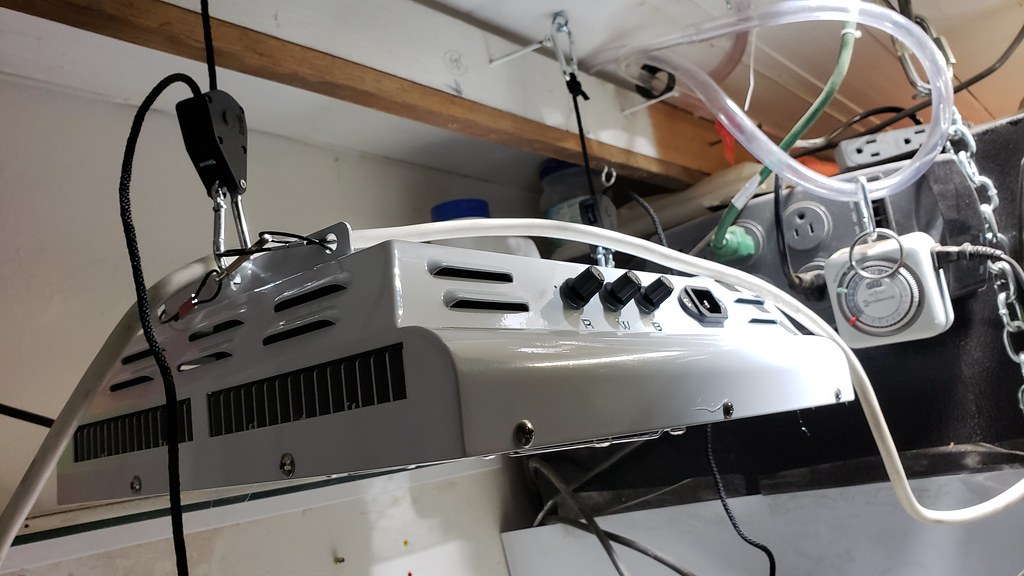
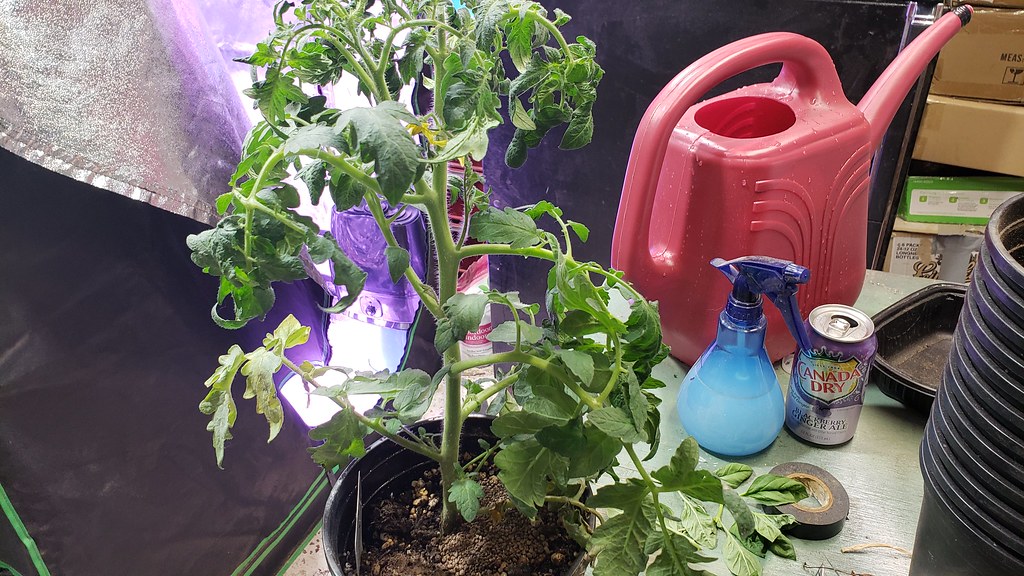
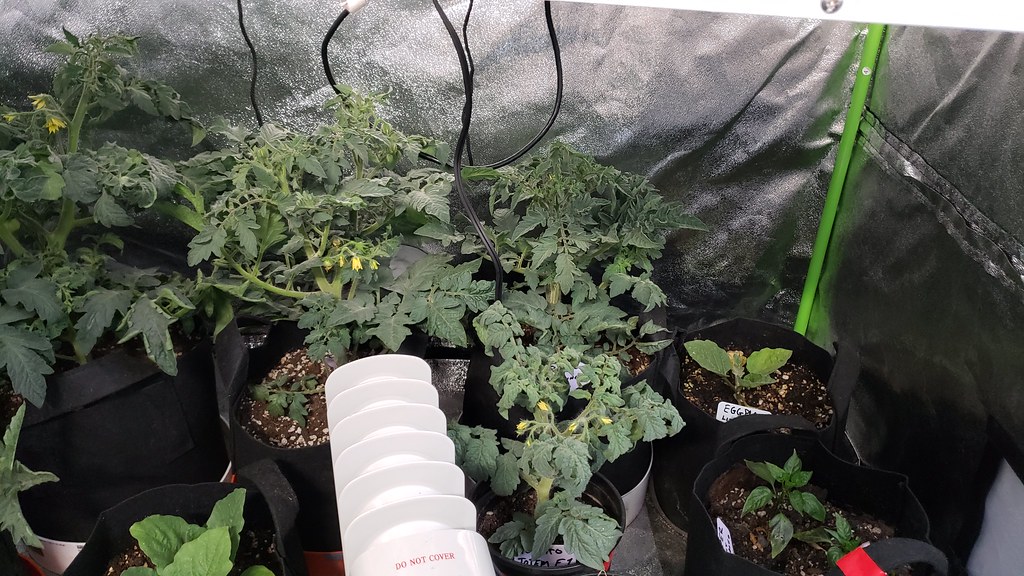
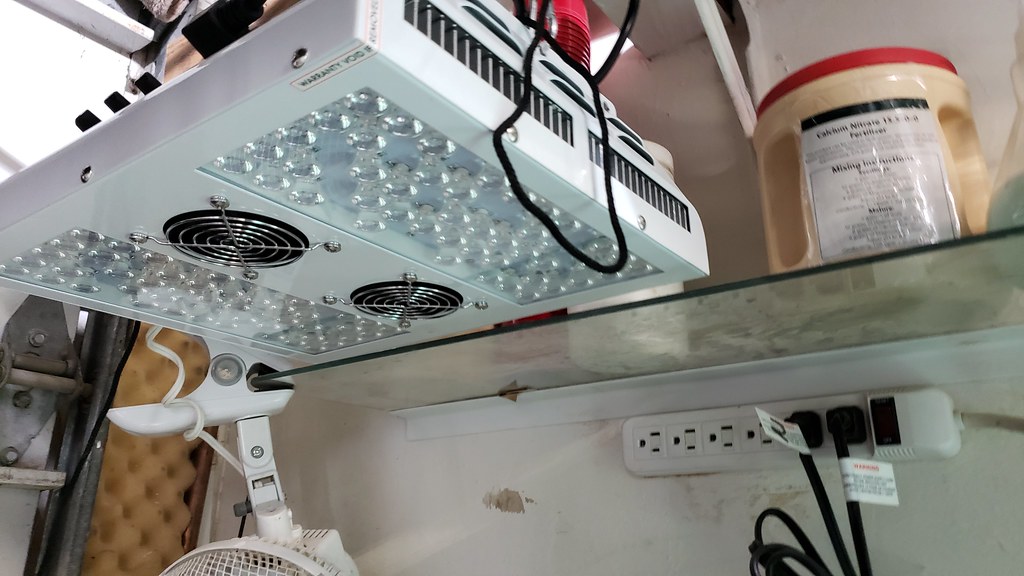
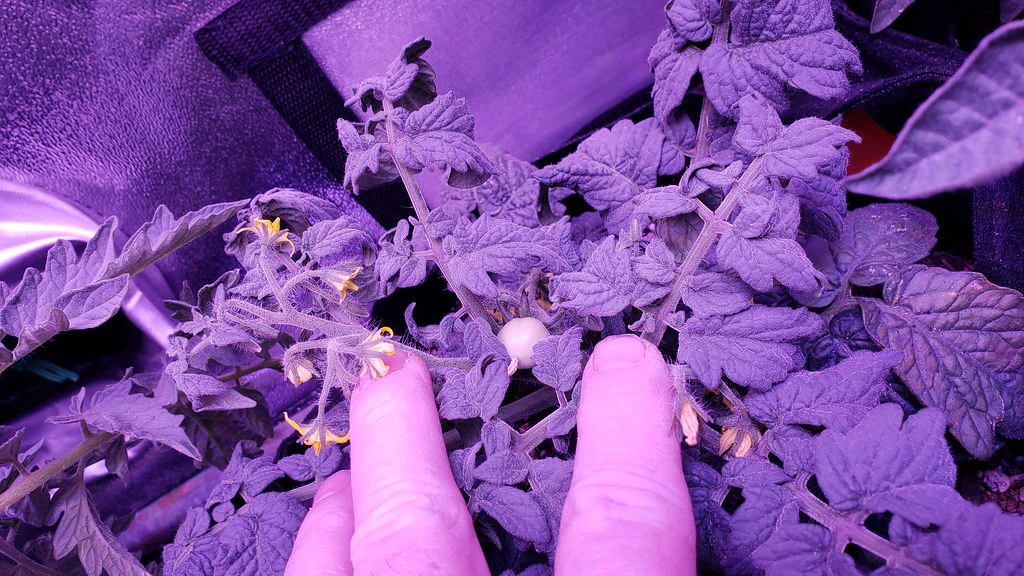
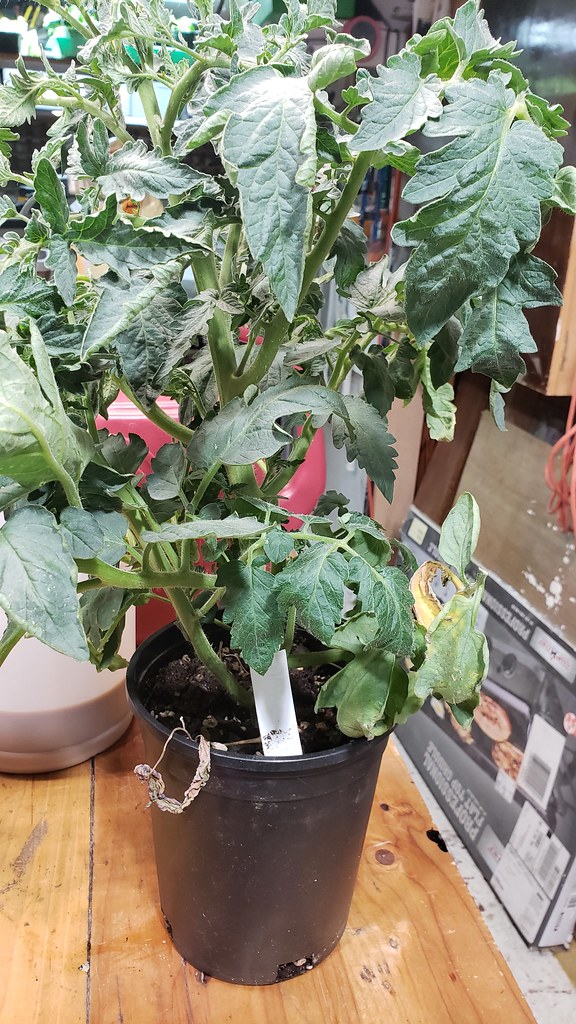
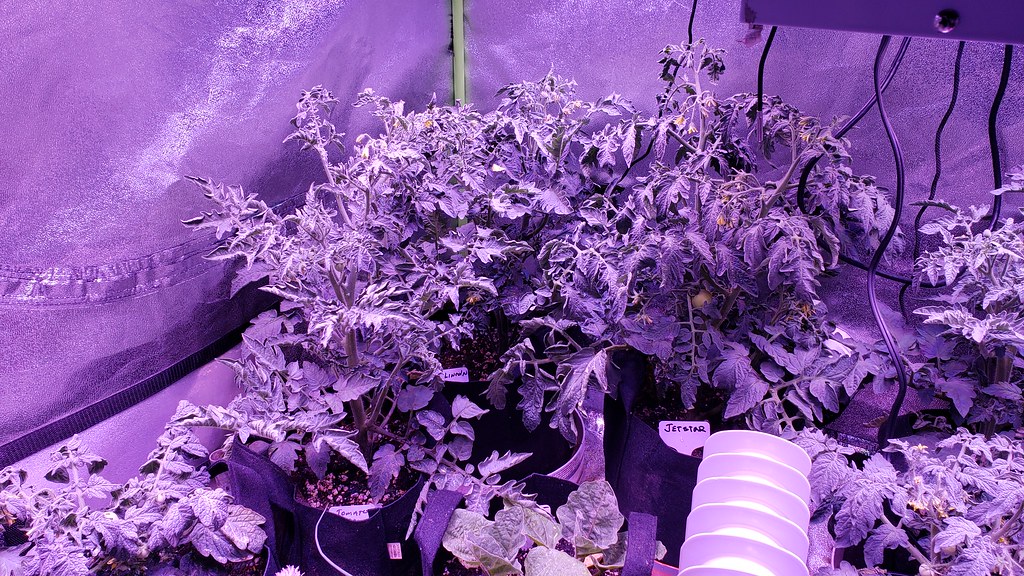
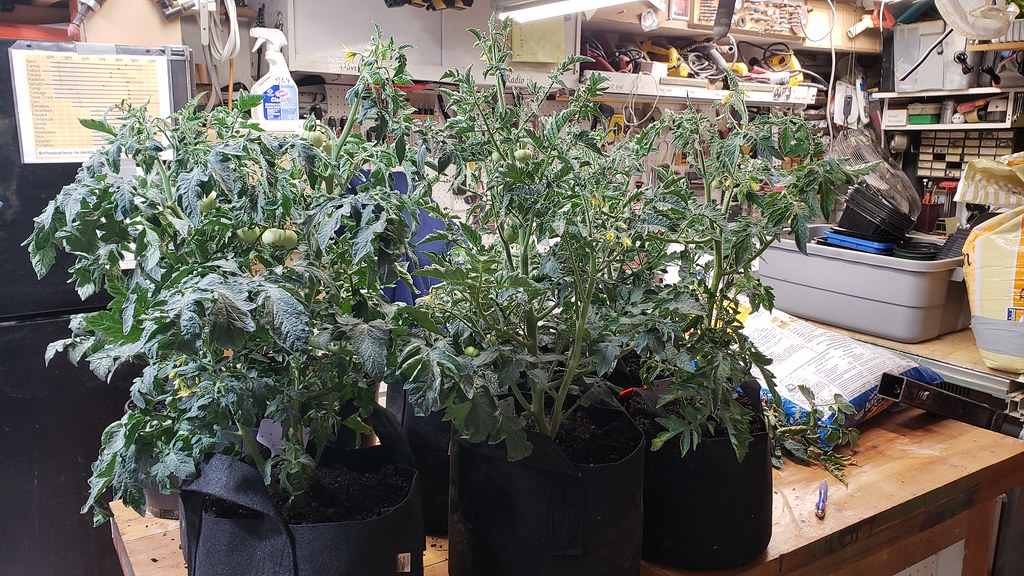
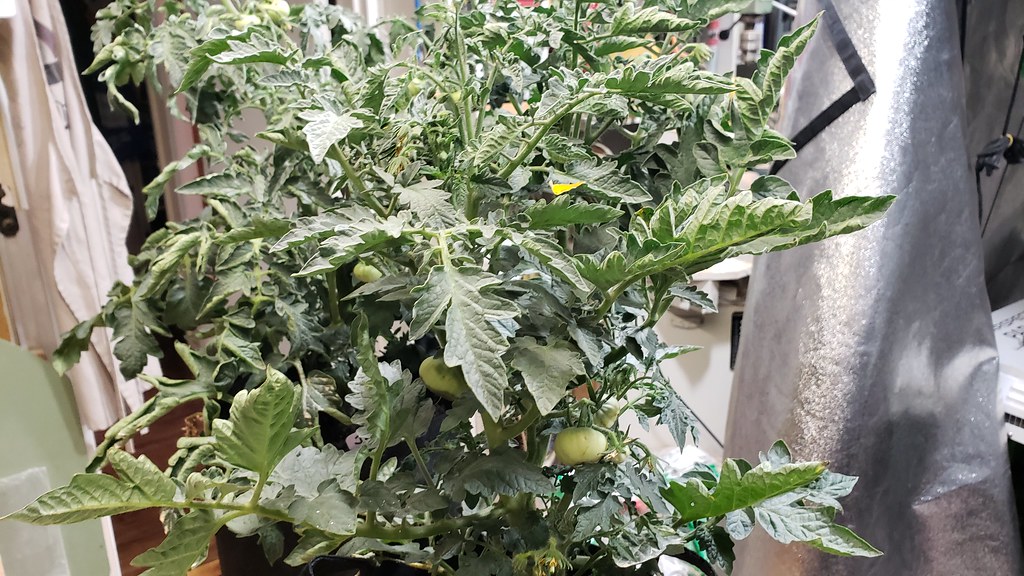
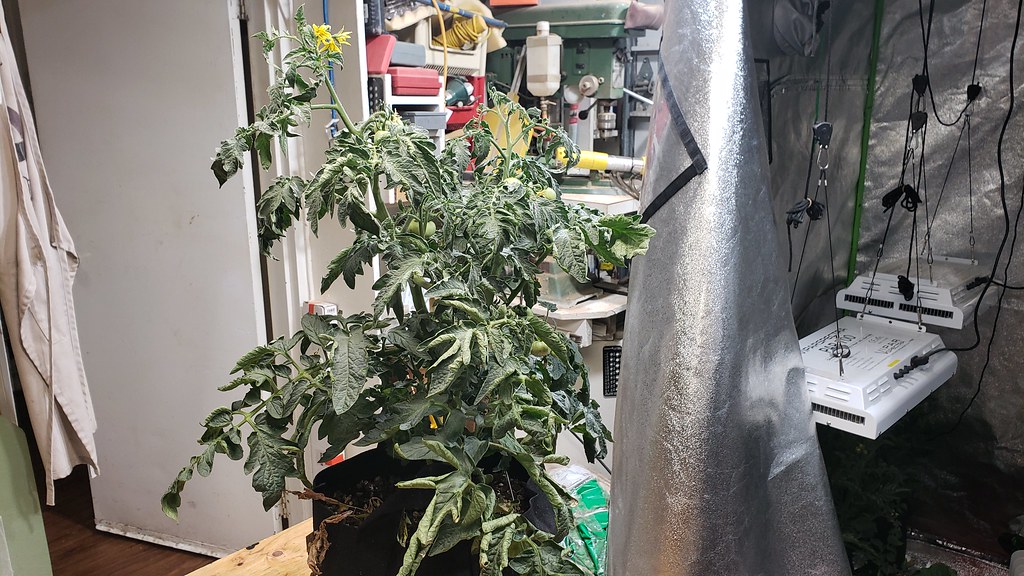
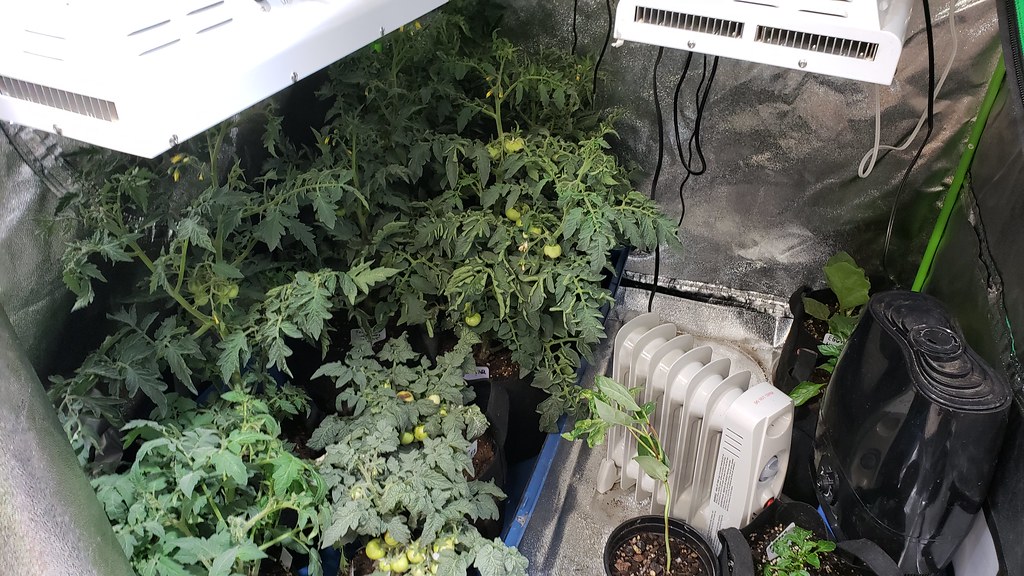
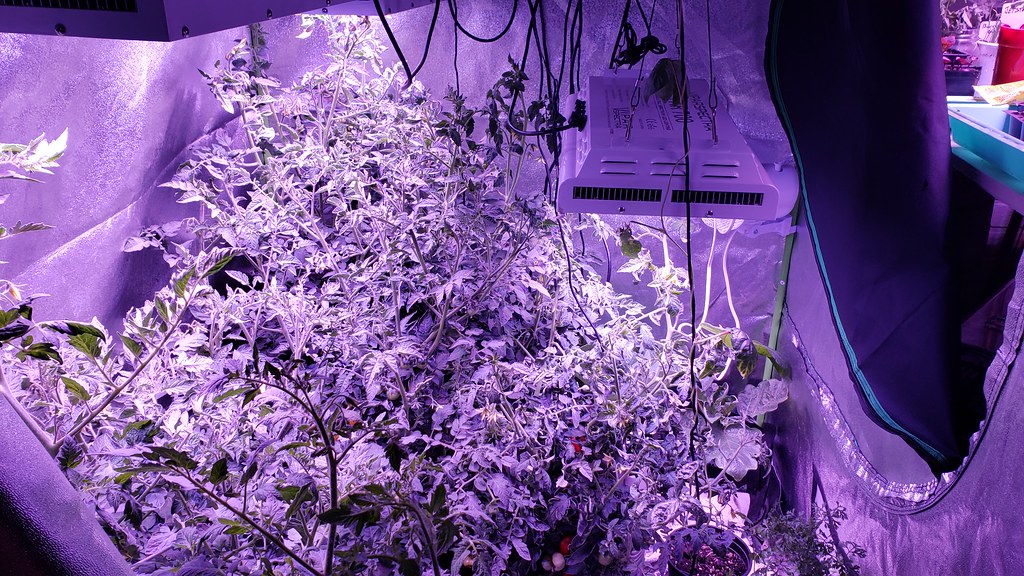
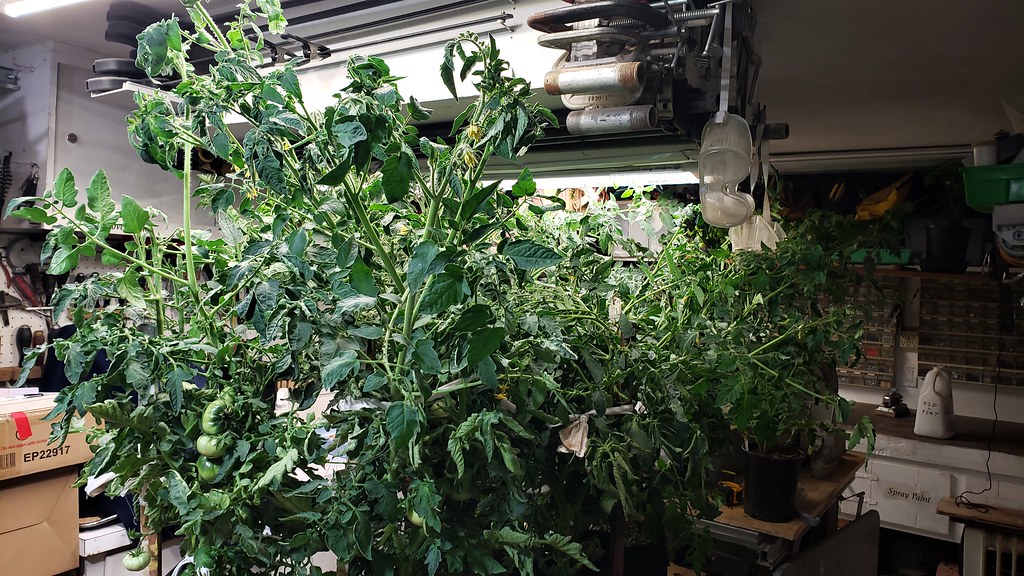
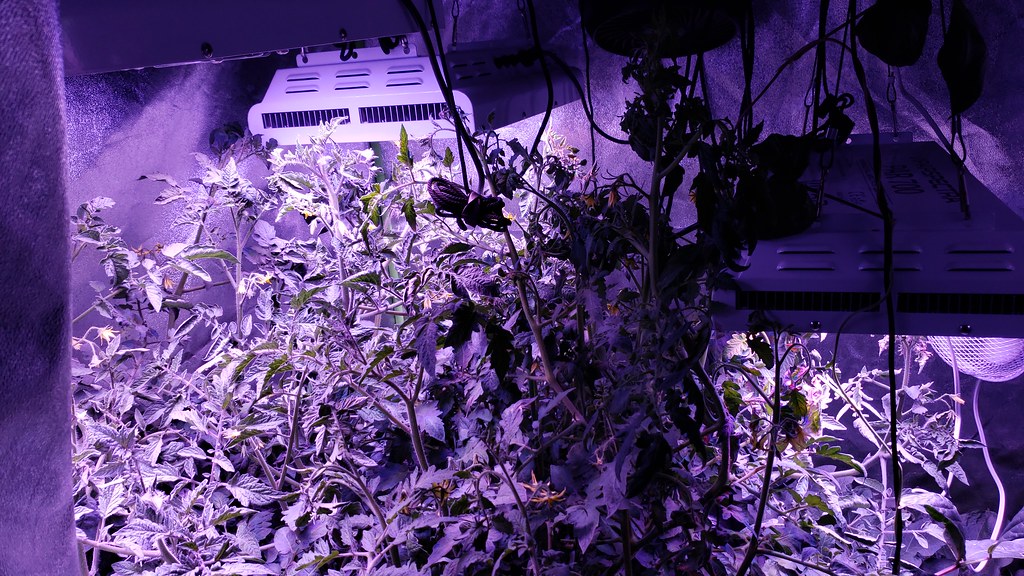
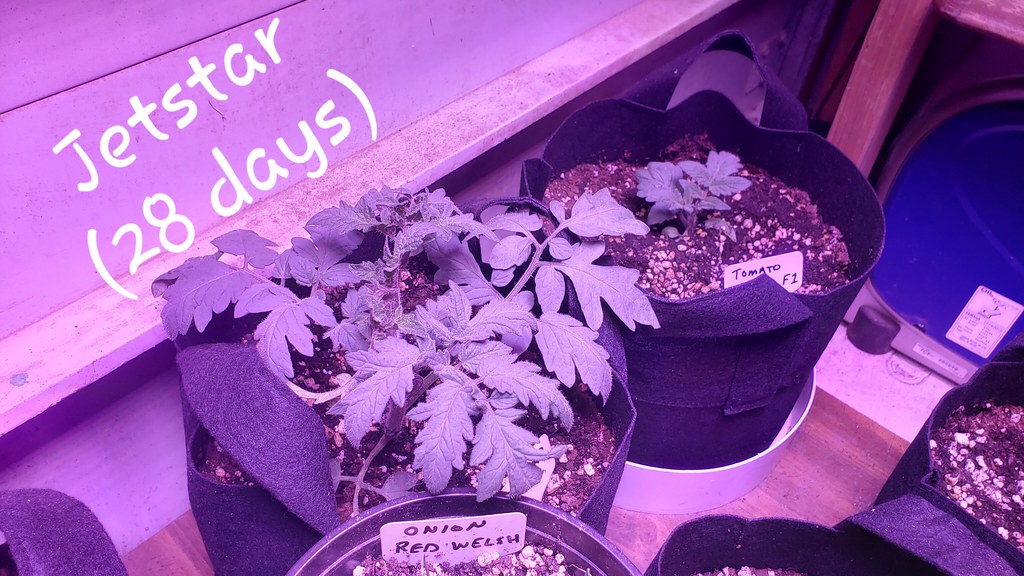
The lights seem adequate for now, I have them 24" above the canopy.
Image


Romaine from yesterday, very pleased.
Image

Image

Image


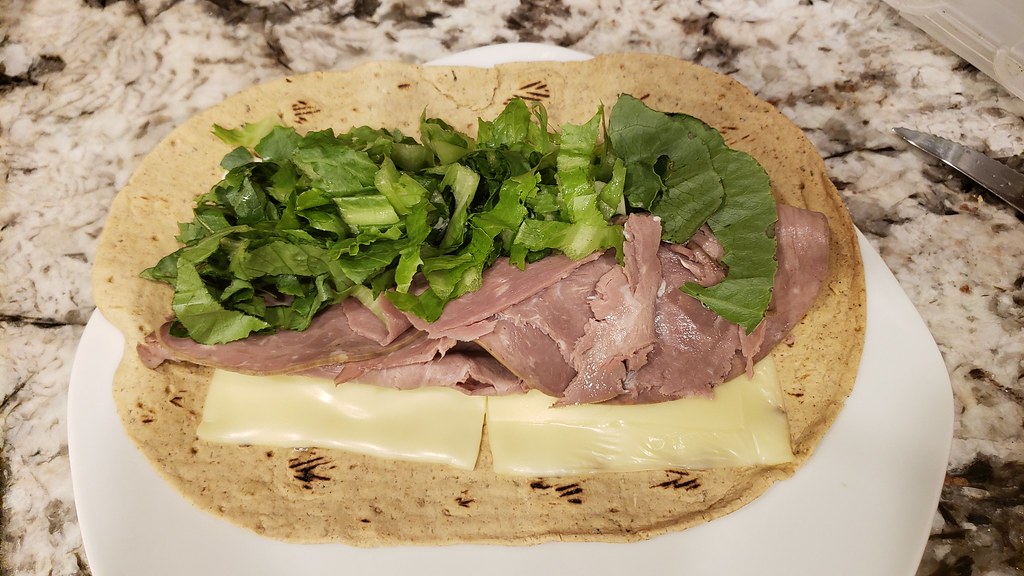
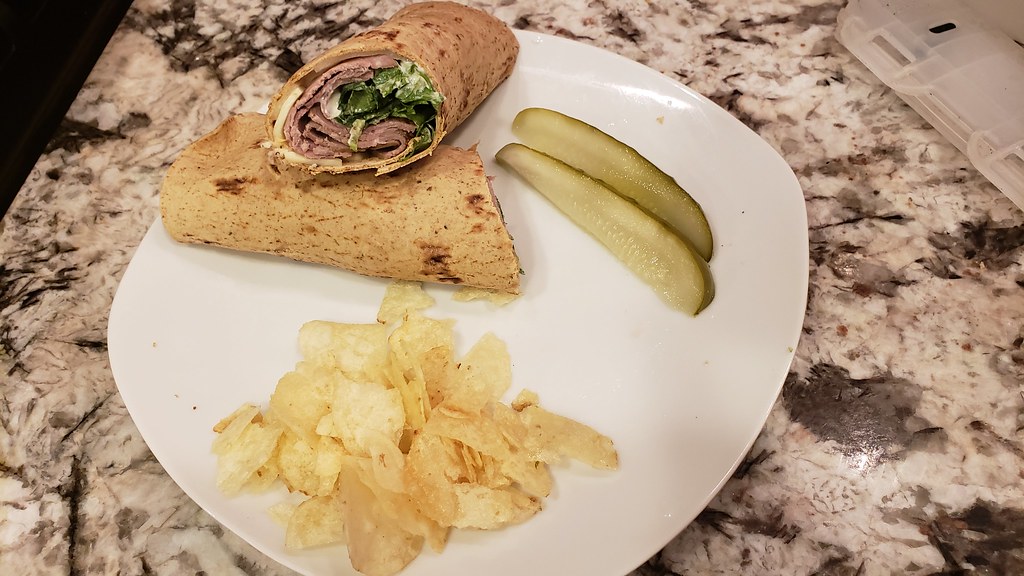
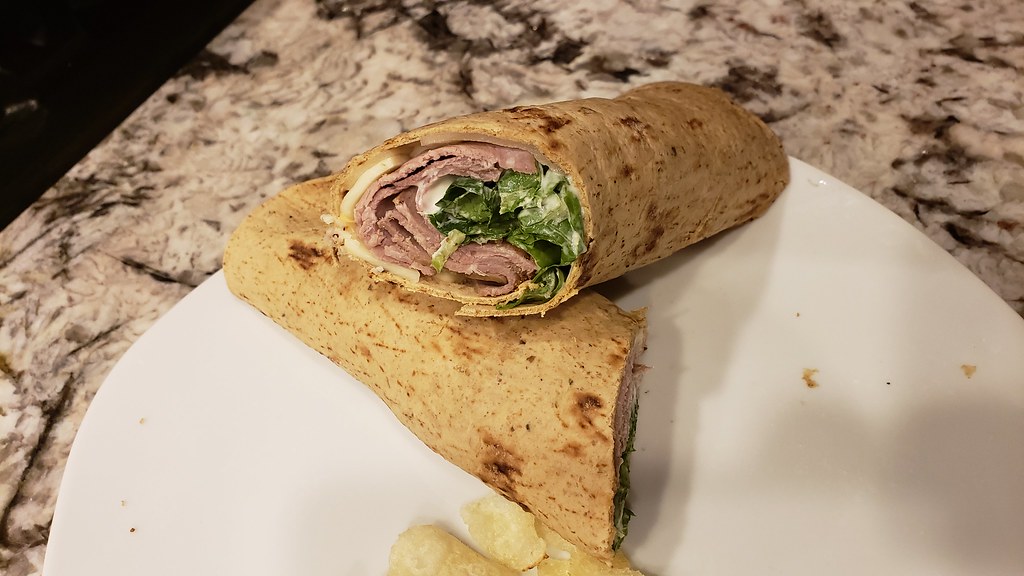
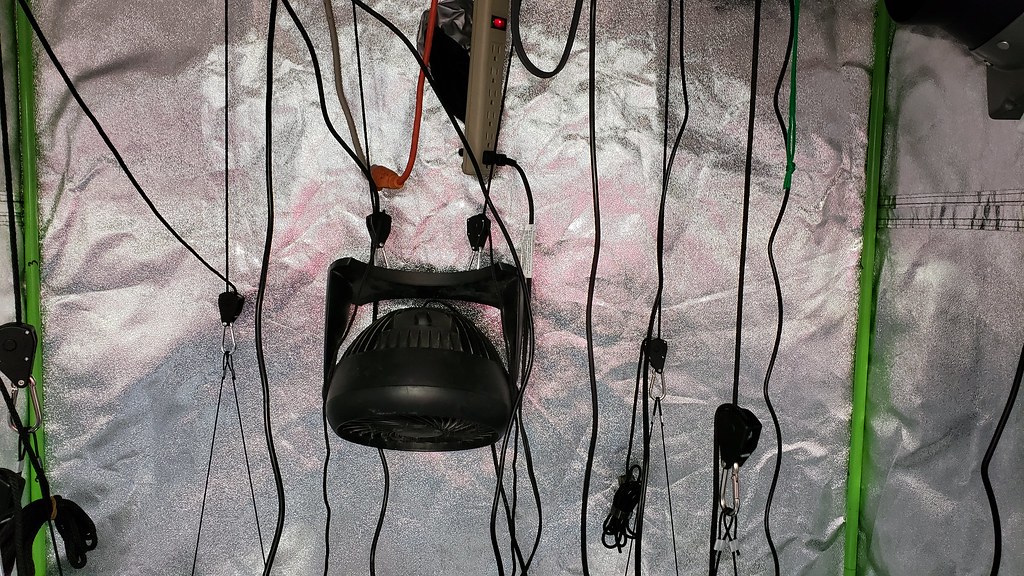
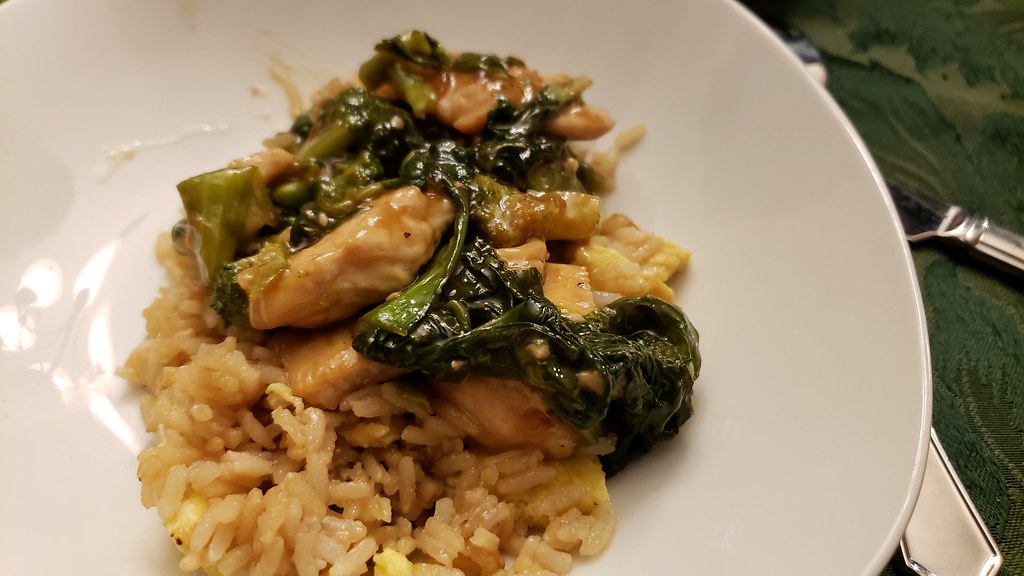
I was pretty psyched after work today, I made a quick Roast Beef wrap and headed down to the grow room. I cleaned up a bit and starting throwing out stuff to make room for the tent. I'm going to have to make a few sacrifices and modifications to get this to work and it will be real tight, especially accessing the greens table and when I start my seedlings in February, however, I am optimistic. I have a couple ideas on how to access and setup the greens/seedling table with the tent in front of it.

I watered the plants and set the light timers and fan to run at night, I also tweaked the humidifier for 6 hours when the lights are on

SQWIB
Greener Thumb
Posts: 970
Joined: Tue Feb 16, 2016 9:21 am
Location: Zone 7A - Philadelphia, PA

January 18th -21st, 2019


I made some modifications when I got home after work today to accommodate the grow tent that is arriving this week.
Image

I had to find another spot for the seedling fan. Once the grow tent is in place, it will completely block off this table.
Image

My new toy came in
Image


Here is some romaine that I am regrowing from harvested heads. When you're not watching it like you would your first child ready to take their first step, then the stuff seems to grow pretty quick!
Image]

Image

The new potting mix seems to be working out OK. My goal for the potting mix is not to have better growth up front but to be able to sustain the plant for as long as possible with minimal input as the plant starts to grow/fruit... that is if I ever make it that far.
Image


Everything seems to be growing fairly well under the lights, nothing seems leggy or is getting bleached.
Image

Image

Image

SQWIB
Greener Thumb
Posts: 970
Joined: Tue Feb 16, 2016 9:21 am
Location: Zone 7A - Philadelphia, PA

January 21st, 2019


Woohooo! UPS was here.
Image
Crazy eyed Psycho!


Time to clean up the grow area, first thing up, get rid of the beets.
Image

Image

Image

Image


I consider this a fail!! Good riddance!!
Image


Cleaned out the area for the third time!
Image

Image


Packaged very nicely
Image


OK, I'm going to try and be organized about this, so first I numbered all of the poles.
Image


Then labeled their position
Image

Image


This is going to be tight!
Image

Image

Image

Image


Put in the tub floor and hooked up the lighting.
Image


The tent went up fairly easy and I don't foresee this being a problem setting up or breaking down in the future.
Image


Hooked up the Cloudline vent fan and controller. This thing is actually pretty cool.
Image


Moved the plants into their new home... again!
Image


Added the humidifier.
Image


Played with the cloudline vent fan settings. With all 3 lights on and the vent fan set to 78°F, the heat in the tent hovers around 80°F - 82°F. I will need to play around a bit with the Garage temperature and how to draw the air in for cooling. I closed off the top vents and opened the bottom vents to pull in some of the cooler air that is drafting from the garage door. I'll need about a week to find the sweet spot.
Image


I have to access the seedling/greens table with the side door. I just need to make sure I leave a clearing in the tent to access the table.
Image

The extension cord was getting a bit too hot for my comfort, so I turned the lamps down to 50% until I can get a heavy duty appliance extension cord installed.
Image

SQWIB
Greener Thumb
Posts: 970
Joined: Tue Feb 16, 2016 9:21 am
Location: Zone 7A - Philadelphia, PA

January 22nd, 2019

I switched out the extension cord for a heavy duty appliance extension cord and installed one of the fans, the fan runs the entire time the lights are on.
Image


Added the mini oil heater to the tent. I am tweaking the heat in the garage and in the tent so it will take time to dial it in properly, I may get a digital thermostat for the heater in the tent but hopefully I can tweak it without more electronics. The tent stays at 79°-80° degrees with all three grow lights on and the cloudline set to 78°F. Pulling air in from the bottom back of the tent has helped keep the tent a few degrees cooler.

My goal is to have the garage between 65°F - 70°F and the tent between 72°F - 80°F.

Organized my herbs on a tray in 1 gallon pots, Parsley, Chives, Cilantro and Basil.
Image


I planted some more lettuce varieties.
Image


There is definitely a learning curve to the AC Infinity duct fan, when I got home the temp in the tent was 59°F, ooops! I started playing with the settings and realized that I had the fan set to go on when the temp dropped to a lower temperature, anyhow, I scrolled to the low humidity and set that to "off" then I scrolled to the low temperature and set that to "off".

A quick note about the AC Infinity Cloudline T4 Duct fan, well actually a quick note about the company. I ordered this through Amazon at $119.00, yeah I know, its a bit pricey, anyhow I saw it on Amazon the next day for $99.00...really.
I immediately wrote to the seller AC Infinity asking for a refund of the difference, but not expecting a refund, I got an e-mail approving the refund for the difference...including tax!

SQWIB
Greener Thumb
Posts: 970
Joined: Tue Feb 16, 2016 9:21 am
Location: Zone 7A - Philadelphia, PA

January 23rd, 2019


After work today I checked the temperature gauge and the tent maintained 78°F - 81°F in a 24 hour period, I'm going to start working on the humidity next.

And another little surprise I had was my Jimmy Nardello peppers were infested with white flies or something on the top leaves, the bottom of the leaves were loaded with aphids, so I hand washed each leaf and will continue to monitor the plants closely.

I'm liking this Rocky Top Blend a lot, days to mature is 45-50, I'm guessing this can be harvested @30-35 days.
Image

I received my new pot trays and they are a tad too big, they take up too much room in the tent, I may use a couple but to be honest the 5 gallon home made saucers work better with a few caveats, first, it's hard to see the water level in the tray with the three gallon bags and second, sometimes when you add water the water runs out of the bag onto the floor missing the saucer.

However, next year I am limiting the tent to 9 plants.


January 24th, 2019

When I got home I headed right to the grow room and checked the plants, I removed all the Romaine and BSS Lettuce from the grow table and Grow tent and took them upstairs.
Image

Image

I also noticed something chewing on my Bok Choy and some droppings in my Romaine.
I hope it was from this guy, sorry buddy!
Image

It was round 2 with the aphids, they were worse today after the purge yesterday. I removed everything from the grow tent and placed them on the table. I topped off all the pots with some potting mix, inspected every plant and trimmed some leaves and branches from the tomato plants.
I hand washed every leaf on the Jimmy Nardello peppers and some leaves on the tomatoes and eggplants with warm water, massaging the leaves between my fingers, for some reason the aphids are loving the pepper plants. I don't want to use insecticidal soap or anything just yet, as I am afraid to damage the plants.

I am really impressed with the growth of the tomato plants, the stems are very thick and stout.
Image

Image


This Abe Lincoln even has a few flower buds already, I don't know if that is a good thing or a bad thing?
Image


Everything is placed back in the tent.
Image


I ordered these pot saucers which are very nice but take up too much floor space so they were sent back.
Image


I installed my Monkey fan but plan on keeping both fans in the tent.
Image


My original goal of having the garage between 65°F - 70°F and the tent between 72°F - 82°F, is going to be a lot harder than I thought.
I am having a hell of a time controlling the temperature in the tent and the garage, it's not so bad when it is cold outside but the temp swing outside is just unbelievable, it was 9°F a few days ago then today it was 61°F
Image


I have a digital temperature controller that I made a few years ago for my Sous Vide machine, I'm going to give that a shot, but to be honest I don't think it will help when the outside temps are warmer.

With all the Grow Lights running at 100% it gets pretty hot in the tent. The only other thing I can think of is pulling in more air from outside which should work just as long as it stays cool (below 35°F) outside.
I also turned the "Red" settings on the grow lights to 50%. I'll bump them back up to 100% when I start getting flowers.
Image


January 25th, 2019

When I got home I installed the temperature controller.
Image

Image


I'm still battling the aphids, I'm going to hand clean each plant a few more days before I start spraying. The pics below are 24 hours after the last cleaning.
Image

Image

Image


They aren't damaging the plant yet but its getting harder to get these nasty guys out of the new leaves.
Image

Image


They're easy to maintain when they are under the leaves.
Image


I turned the lights up to 100% and I'm also still battling the heat in the tent, 87°F seems about the highest it will get. If it gets any higher I need to figure out a better exhaust and intake.


Two of my tomato plants have put on flower buds, the Jet Star and the Abe Lincoln.
Image

Image


Decided to harvest most of the Bok Choy for dinner.
Image

Image


January 27th, 2019


Once the tomato plant flowered, I fertilized the Jet Star with a Jobes 2-7-4 and will see how that does before fertilizing the Abe Lincoln which has also flowered. I hit the flower with an electric toothbrush.
Image


Here is a quick Grow Room Tour


User avatar
applestar
Mod
Posts: 30541
Joined: Thu May 01, 2008 7:21 pm
Location: Zone 6, NJ (3/M)4/E ~ 10/M(11/B)

Check for stray ant incursion — it’s been too warm and the scouts start looking for evacuation sites when their colony gets flooded. If they come across likely pastures, they run home to bring the aphid herders. Once the aphids armature enough to fly they can spread on their own.

If you are not spraying, then ladybugs are my personal choice for control along with borax ant bait on the floor/access routes.

If you are not using biological control, then DE dusted inside the lettuce Rosetta and pepper leaf nodes is a good way to keep both the aphids and the ants something to think about. (I have to stop the DE altogether after the ladybugs are introduced, but they still find some that I missed wiping up.)

If you are “spraying”, dipping in solution gets the aphids better — personally I would follow with good rinse in another bucket or wash tub — even if they haven’t been killed, their grip on the plants are weakened and a lot more of them come off. Be sure to repeat at 2-3 day intervals at first to interrupt their life cycle.

SQWIB
Greener Thumb
Posts: 970
Joined: Tue Feb 16, 2016 9:21 am
Location: Zone 7A - Philadelphia, PA

applestar wrote:Check for stray ant incursion — it’s been too warm and the scouts start looking for evacuation sites when their colony gets flooded. If they come across likely pastures, they run home to bring the aphid herders. Once the aphids armature enough to fly they can spread on their own.

If you are not spraying, then ladybugs are my personal choice for control along with borax ant bait on the floor/access routes.

If you are not using biological control, then DE dusted inside the lettuce Rosetta and pepper leaf nodes is a good way to keep both the aphids and the ants something to think about. (I have to stop the DE altogether after the ladybugs are introduced, but they still find some that I missed wiping up.)

If you are “spraying”, dipping in solution gets the aphids better — personally I would follow with good rinse in another bucket or wash tub — even if they haven’t been killed, their grip on the plants are weakened and a lot more of them come off. Be sure to repeat at 2-3 day intervals at first to interrupt their life cycle.

I have some dish soap/cayenne and water mix ready to go. Just don't want to spray until the plants are a bit more robust. I may add some onion and garlic to the spray if it doesn't work as is. I'm hoping the plants are sturdy enough to spray in a day or two, we will see.
No ants yet.

SQWIB
Greener Thumb
Posts: 970
Joined: Tue Feb 16, 2016 9:21 am
Location: Zone 7A - Philadelphia, PA

January 28th, 2019

I sprayed the Jimmy Nardello pepper with my "Aphid X" (1/4 teaspoon cayenne pepper - Teaspoon Dish Soap - 1qt. water)

Here is my Robotic Bee!
Image


January 29th, 2019


I really don't get this temp swing, I can't see how it can get to 67°F when I have the temperature controller set to 72°F, anyhow I adjusted the Temperature controller to 75°F. So the low (oil heater) is set for 75°F and the high (vent fan) is set for 80°F
Image


I have three tomato plants with flowers, time to pollinate with my robotic bee! Everything is doing pretty good except my one pot of Jimmy Nardello peppers, the plants seem to be at a standstill.

I found where the Aphids were congregating, seems they love the cilantro. I sprayed the cilantro real good then washed the entire plant under tepid water.


January 31st, 2019


Still enduring an ongoing battle with aphids, mostly on my cilantro.

Yay! I finally got the temperature to settle down a bit, I guess with the temperature being 6°F outside helps with the cooling a bit. I think when the lights kick off and the temp in the tent drops it takes a while for the Oil Heater to come up to operating temperature from a cold start.
Image


The plants are all doing real well, except for my Bunching Onions... I think I over watered them and one pot of Jimmy Nardellos is still a bit stunted. I have a few backups that are doing real well under the led bulbs, they're about 6" tall and already have little flower buds in the center, good, bad? who knows I'm just going to let everything do its thing with as little intervention as possible.

Most of the tomato plant have flowered and are growing extremely bushy with very thick stems, I pollinate with the electric tooth brush every day or every other day.


The tomato plant that I fertilized with the Jobes doesn't seem any different than the rest of the plants, so I will fertilize the rest of the plants this weekend.
Image


The color of these pictures are actually a lot more purple looking than they actually are. I'll have to take some photos with the lights off.

My little tree!
Image


I love when I'm in the tent and get that tomato plant smell, it really is a tease when its 6°F outside!
Image


I really need to stay on top of the watering, the tomato plants are drinking up tons of water.
Image


These Black Beauty Eggplant Plants are doing well. I also have a Listada di Gandia Eggplant Plant in a pot that has my trial potting mix in that is not doing as well, not sure if its the mix or because its a different variety. All the other plants in the Trial potting mix seem to be doing just as good as the original potting mix, no worse, no better.

I may separate the two Black Beauties and abort the Listada di Gandia and replace with one of these.
Image


February 1st - 3rd, 2019


Aphids are out of control on the Cilantro, finally decided to cut down the cilantro and toss the cuttings, I then resprayed the cilantro and will keep an eye on it.

The Aphids are still appearing on the pepper plants but not as bad, haven't seen any on the basil, tomato, eggplants, or parsley yet.

All the tomato plants are loaded with flowers and buds, but no signs of a tomato yet, plants are like small trees, the growth is pretty incredible. Fertilized everything in the tent with some Jobes.

I called it quits on the Greens table for the season, between slow growth and battling a mouse that loves lettuce I decided to clean up the area and bait it, I'll be starting my seedlings in a few weeks anyhow.

My brother stopped over so I gave him a few Abe Lincoln Tomato Plants, some basil, cilantro and split my parsley in half, I was impressed with the roots on this guy.
Image

Image

User avatar
applestar
Mod
Posts: 30541
Joined: Thu May 01, 2008 7:21 pm
Location: Zone 6, NJ (3/M)4/E ~ 10/M(11/B)

Looking GREAT! What fun! :-()

Optimum conditions for successful pollination — Try to electric tooth brush the tomato blossoms (back of flowers or flower stems) when temps are around upper-60’s to mid-70’s and humidity is not too high... I guess 40’s% or lower. If possible, try to get at the same blossom 2 to 3 times within an 8 to 32 hour period once the bud opens and petals start to turn yellow. Watch closely for the pollen flow from the anther cone if you can, especially if you haven’t seen this happening before. Pointing a maglight-flashlight bean at it with your other hand while using the toothbrush would make the pollen dramatically visible.


...I should have parsley and celery seedlings growing outside in the garden — I hope they made it. But maybe I should start some back ups. I need to stick with cool weather stuff for now. Cilantro sounds like another good one. That would be a welcome addition to combat the winter blahs. :wink:

User avatar
jal_ut
Super Green Thumb
Posts: 7447
Joined: Sun Jan 18, 2009 10:20 pm
Location: Northern Utah Zone 5

Thanks for sharing your story and pictures.

SQWIB
Greener Thumb
Posts: 970
Joined: Tue Feb 16, 2016 9:21 am
Location: Zone 7A - Philadelphia, PA

Thanks for persevering!

SQWIB
Greener Thumb
Posts: 970
Joined: Tue Feb 16, 2016 9:21 am
Location: Zone 7A - Philadelphia, PA

February 4th - 5th, 2019

I wasn't real happy with the growth of the greens under the Roleadro Galaxyhydro led's compared to the Viparspectra led's, so I ordered a Viparspectra 450 and have another on the way. I think the wavelength of the Galaxyhydro were too much of the "Red" side (700 nanometers+). They are great for starting seedlings but "vegetative" growth is much better under the Viparspectras, plus I can control the wavelengths. For my starts I'll drop the red side down to 20% and bump the white and blue to about 80%.
Image


I moved the lettuces to the Fluorescent Led's because of the mice problem, after these perk up a bit, they'll be harvested and I 'll be done with the greens for the season
Image


Hopefully I can get this mice problem under control before I start my seedlings.
Image

I'm pretty sure my parsley will recover from the division the other day, but it looks pathetic.
Image


Topped off my basil, yeah I know, I could have done a better job.
Image

Image

The Black Beauties are doing well. I'm not sure if I'm going to cull one or transplant, I really don't have the room.
Image


My Trial Potting Mix seems to be doing fine.
Image


Chives are doing well, I divided these from my garden and I 'm growing them out for my brother.
Image

Image


The cilantro bounced back after a few day.
Image


These peppers have me a bit puzzled, the peppers on the right have been in the grow room since they sprouted, the ones on the left have been on the grow table with the Galaxyhydro Led's then moved to the fluorescent Led's.
The ones on the right are starting to come back but I am curious as to what happened, could it be the Aphids? Could it be the potting mix? or could it be the lighting, temperature? Who knows but I may replace these with the stockier ones.
Image


Looks like we have a little Jimmy Nardello
Image


I'm wondering how long I can go before I need to start trimming the tomato plants. I am going to try and time it to when I can start cloning.
Image


I did move the lights up about 4" the other day.
Image

WHAT!! What is that!!?
Image

Image

Image

Image

Image

Image

Image


I watered the plants this morning and used the "Robotic Bee" on all the flowers. The Abe Lincoln Tomato actually had noticeable growth after only 14 hours.
The entire garage was pretty warm this morning, I had to open the door from the garage to the utility room, high temp in the tent was 88°F.

SQWIB
Greener Thumb
Posts: 970
Joined: Tue Feb 16, 2016 9:21 am
Location: Zone 7A - Philadelphia, PA

February 5th, 2019

The weather has been pretty mild or should I say absurdly hot for this time of year, for goodness sakes it's 60°F today and supposed to be 60°F again Friday. I have been trying to keep the temperature below 85°F but it has been hoovering around 88°F and reached 89°F yesterday. I had to come up with a game-plan and quick. I figured venting into the garage was not an option anymore because the garage heats up a good bit, for now I have the basement door open. The basement is a bit cooler than the garage at the moment.
Image

Here is what I decided to try. The ceiling is insulated and the floor joist run horizontal to the house so the hot air is exhausted to the closet in the basement. I pushed up the insulation for a clear path to the other room.
Image

Image

Image

Image

Image


Did it make a difference? Well based on one day I would have to say NO. I checked the temp this morning and it was 88°F inside the tent. I opened up the tent, watered the plants and hand pollinated the tomato plants and the temp dropped 3°F in 5 minutes, so I decided to just leave the door to the tent partially open during this heatwave. As long as it doesn't get any hotter I should be OK.
Next year I can run an intake to the far corner of the garage door where it will definitely pull in more outside air.

Am I being too critical? Maybe.
Am I expecting too much? I don't know, I never done this before.

When I start a project I am willing to invest a lot of time and research and in this case a lot of money, which I really don't have. Since this is my first year, I figured there would be challenges and expense and that next year would be much easier, I am still holding onto that belief, but, and this is a big BUT, I'm at the point where it's a sink or swim situation, I threw everything at this project and have maxed out, I won't be putting any more money into this project so it will have to work.

SQWIB
Greener Thumb
Posts: 970
Joined: Tue Feb 16, 2016 9:21 am
Location: Zone 7A - Philadelphia, PA

February 6th, 2019

The new Viaprspectra 450 came in, so I installed that. I removed the Roleadro Galaxy Hydro led's. What I like about the 450's over the Galaxy Hydro's is, I can tweak each individual set of wavelengths. The Roleadros were great for starts, but felt I could get better results with the Viparspectra's.
Image

Image

Image


My starts and greens do great under the 6000k led bulbs in the ceiling.
I adjusted the fan to go on twice in a cycle for two hours each, 16 hours was totally unnecessary.
Arugula, Mustard Greens, Rocky Top Lettuce, Some Bok Choy and misc plants.
Image


Every morning and evening I have been pollinating with the bee. It's actually pretty neat when hand pollinating, every once in a while I see this little puff of yellow pollen. The tomato plants need a good watering about every 24 hours. I top off the humidifier if needed, I believe around every 3-4 days. This weekend I may do some more culling.

Jetstar
Image


Abe Lincoln
Image


Totem F-1
Image

SQWIB
Greener Thumb
Posts: 970
Joined: Tue Feb 16, 2016 9:21 am
Location: Zone 7A - Philadelphia, PA

February 8th - 9th, 2019


Replaced my adjusting straps on my ceiling grow light for easier adjusting.
Image

Image


Harvested the Rocky Top Lettuce mix, and some Arugula and was pleasantly surprised by the dinner salad.
Image

Image


Placed the greens back under the lights and watered with a tiny bit of fertilizer.

Topped of a few pepper plants.
Image

Image

Decided to terminate these two Jimmy Nardello pepper plants and replace with two healthier looking ones, then I topped them off.
Image

Replacements
Image

Topped
Image


Topped the soil with coffee grounds in an effort to keep the aphids population down, I'm pretty sure that this is a garden myth but at the least, it will act as a mulch and fertilizer, well thats what I'm telling myself, lol. If the grounds form a shell I'll work them into the potting mix.I still have one back up Jimmy Nardello under the ceiling grow area with the greens.
Image

Image

Image


It was a sad day in the grow room today, looks like a real bad case of BER. I made a slurry of Lime and added that to the all of the plants. I also tossed in a pinch of Epsom salts and in hindsight should not have done the Epsom salts, ooops.
Inconsistent watering, too much Nitrogen, Not enough calcium, who knows? The tomato plants in the trial potting mix and my original potting mix have been affected, I am hoping this problem goes away after the initial fruit set.
Image

Image

Image

Image

On a much happier note, my Rosemary cutting seems to be doing ok on the windowsill in the basement bathroom. The Rosemary is showing new growth.
Image


Topped two of my Jetstar Tomato plants, these tomato plants are for experimenting with.
Image

Image

Image


Found this rogue bean plant, I did plant bush snap beans back in mid December, I'm going to let this guy go and see what he can do.
Image


Added some Neem oil to my Aphid X spray and sprayed some of the plants.

SQWIB
Greener Thumb
Posts: 970
Joined: Tue Feb 16, 2016 9:21 am
Location: Zone 7A - Philadelphia, PA


February 11th-12th, 2019


Getting a bit of leaf curl, not sure if this is a problem or not, it may be related to the BER issue. The plants seem very healthy otherwise.
Image


I am getting a lot of fruit set but still have some signs of BER
Image

Image


Peppers and Eggplants are growing slowly.
Image


Topped Jetstar plants after three days.
Image

Image

SQWIB
Greener Thumb
Posts: 970
Joined: Tue Feb 16, 2016 9:21 am
Location: Zone 7A - Philadelphia, PA

February 14th-17th, 2019


Took all of the tomato plants out of the tent, fertilized with Jobes Organics Vegetable and Tomato 2 - 7 - 4, added some lime slurry, topped with potting soil, trimmed, placed back in the tent and watered real well.
Image

Image


The tomato plants are all loaded with fruit and the plants look very healthy.
Image

Image

Image


I inspected the plants and BER is still a problem, I am leaving the fruit on the plants to see what happens. A lot of the newer fruit doesn't have what I would call typical BER but there is something going on, there looks like little tiny bruises forming on the fruit. Everything seems to be pointing to a calcium deficiency, curling leaves, BER.
Image

Image


My first thought would be stink bugs or some pest, but I don't see any insects, even the Aphids have seem to have dissipated.
Image

Image


Some of the earlier fruits I'm leaving on the plant.
Image

Image


Leaf curl on some of the larger leaves
Image

Image


The topped Jet Star tomato plants have really come back.
Image

Image
The tomato plants have to be watered heavily every single day or they will dry out.


Cleaned up my Parsley and chives
Image

Image


My Indoor Salad garden is doing real well.
Image

Image

Image


Planted some Waltham Broccoli, Sun King Broccoli and Baby Bok Choy. This is my last attempt at growing Broccoli, this is actually the start of my 2019 gardening year.
Image

Image


I just keep thinking to myself, MAN! I have to put all this stuff away!
Image
Last edited by SQWIB on Wed Feb 20, 2019 8:40 am, edited 1 time in total.

User avatar
applestar
Mod
Posts: 30541
Joined: Thu May 01, 2008 7:21 pm
Location: Zone 6, NJ (3/M)4/E ~ 10/M(11/B)

Ha! You really ARE growing tomatoes in the middle of winter. Hats off to you.

I think between the BER and leaf curl symptoms, and what you said
The tomato plants have to be watered heavily every single day or they will dry out.
It’s the inconsistent moisture levels that is causing the calcium uptake interruption.


...how about this — I’ve often thought about doing this but it’s a bit high on the difficulty scale for me and I have not tried it yet, but I think you are already doing most of the similar tinkering, so it will be easy for you:

— Set the tomatoes in a large shallow tub type of container, and arrange an ebb and drain watering system — pump/drain water in, let sit for up to 20-30 minutes, then drain/pump out remaining water in the tray. Pump/drain depends on where you position the reservoir — above or below.
— Set it up to do cycle twice or three times a day. This is a sort of system that carnivorous/bog plants enthusiasts sometimes set up. You can control the amount of moisture by how frequently it cycles.

At some point, though they will have to be Uppotted. But I know the difficulty with that is limitation in available space.


I think you will also find it’s somewhat easier to keep multiple large containers from drying out/watered when they are bottom watered together in a large tray...check out flood/drain pan for washers or for hot water heater...

To minimize chance of anaerobic root and biome asphyxiation in deeper containers, make vent holes or slits up the side of the container.

...I guess alternatively, you can set up automated drip irrigation — thats Another thing I haven’t tried, so I didn’t think of that as first choice. :lol:

User avatar
Gary350
Super Green Thumb
Posts: 7419
Joined: Mon Mar 23, 2009 1:59 pm
Location: TN. 50 years of gardening experience.

WOW that looks great. I have always wanted to grow tomatoes in winter. About 30 years ago I know a man that grew tomatoes in 5 gallon buckets. He drilled a circle of holes around the bucket near the bottom, bottom of bucket held water and wicked moisture to the soil on top. He only needed to water plants every 3 days with plants outside. Reservoir of water in bottom keeps soil on top from drying out and supplies water to plants when roots grow down that deep. I tried it one summer we often were gone 3 days camping over the weekends tomatoes did good setting in full sun at the edge of the garden. Only way I knew to give plants the good nutrients was to mix 1 shovel of garden soil with 5 gallons of water add pellet lime for BER stir well then use dirty water to water my 3 plants. Plants did good and grew good tomatoes outside in full sun. When temperature got 100 degrees I moved buckets under a shade tree they did good. Here is photo of bucket with black spots marking location of drill holes maybe you can use this idea to grow your plants.
Attachments
100_2637.JPG

SQWIB
Greener Thumb
Posts: 970
Joined: Tue Feb 16, 2016 9:21 am
Location: Zone 7A - Philadelphia, PA

Thanks Guys.
I am going to be a little proactive and work on it this week

I have kept the soil fairly moist the last few weeks, or at least I think I have lol. I am not convinced that watering is the problem but will start working on something this week. I haven't had any plants droop due to inadequate watering.
My current setup is the grow bags sitting in 5 gallon bucket bottoms (1.5” high). The problem is that the tomato plants are in 3 gallon grow bags and fit pretty snug in the 5 gallon drip trays so I can't really bottom water or even see if water has made it to the drip pan, theres no room.

When I water the plants sometimes the water comes out of the sides and lands in the drip tray, so even if I could see water in there, it really wouldn't be a true indicator of the plants being watered thoroughly. I have been going by the weight of the grow bag and using a finger testing for moisture.

Also the fact that I am using grow bags, increases evaporation. I could mulch the top with cardboard or something but watering is already a PITA.
If I go any bigger with drip trays, the plants don't fit, using a 5 gallon size gives me 4 plants in either direction.

I have a few options I may try tonight, Apple, I looked for trays and did find one that is 21.65 a 47.24 but what I have read that the dimensions are actually larger than in the description (50") so may not fit in the tent.
However, If my memory serves me right I think I have an old Rabbit Hutch tray that would be great. If I can find it!, I think it had a 24” x 48” tray, that would be perfect, if not I was going to cut a few more 5 gallon buckets about 6” high and see if that helps, if either don't pan out, I'll look into purchasing a few garden trays to sit the plants in.

I have thought of Global Buckets, earth buckets, wicking buckets, self watering setups and the like. I really want to try and Avoid using 5 gallons worth of media for a plant. I probably could come up with a wicking system using a 5 gallon bucket and the three gallon grow bag but overflow would be an issue without getting into an elaborate setup.
I really want to keep it simple, but if it don't work out using drip trays I'll try using 5 gallon buckets tied in together with a control bucket, this way I'll only have to water one bucket.
I can also do a tray with a Kerick float valve hooked into a control bucket, but don't think that will be needed.

Ebb and flow is out,
Also looked into one of those oasis automatic watering systems but there really is no kind of control.

SQWIB
Greener Thumb
Posts: 970
Joined: Tue Feb 16, 2016 9:21 am
Location: Zone 7A - Philadelphia, PA

February 19th, 2019


.... Later that day. Got home and found the tray, wooohooo!


Moved out the plants and wiped up the tent tub floor.
Image

Image

Image

I took some photos when I had the plants out.
Image


I haven't really been hand pollinating these much lately but they seem to have no problem pollinating on their own.
Image


First set of tomatoes with BER and a few new tomatoes (fingers crossed).
Image

Image


I have had almost no flower drop and most of the flowers are pollinating with or without intervention.
Image


Bottoms of the above picture, the fruit on the left has potting mix on it from my hands, so far no signs of BER or any thing else wrong with the fruit but it may be too soon to tell (rubbing my rabbit foot).
Image


Soil on the tomato.
Image

User avatar
applestar
Mod
Posts: 30541
Joined: Thu May 01, 2008 7:21 pm
Location: Zone 6, NJ (3/M)4/E ~ 10/M(11/B)

You weren’t kidding — it really is turning into a jungle! They look amazing. Well-fertilized.

...and you were right — that blue tray is a perfect fit. :D

Now, in case you ever put too much water in the tray and feel like some needs to be removed, my two best tools have been Turkey baster and one of those cheap kerosene oil/gas transfer hand pumps — I can picture it in my head but can’t remember what they are called — it looks like a giant turkey baster with 2 legs, has a red plastic accordion bulb with one way valve flaps so it sucks up with one tube and drains out by the other tube with each squeeze.

User avatar
Gary350
Super Green Thumb
Posts: 7419
Joined: Mon Mar 23, 2009 1:59 pm
Location: TN. 50 years of gardening experience.

You probably don't need to worry about too much water on your tomato plants. My tomato plants are often under water for 2 whole weeks and it never hurts them. Sometimes it is too wet to till so I plant them in mud it still never hurts the plants. I have never lost a tomato plant because of too much water. Maybe because plants have already been hardened off. You need pellet lime for BER.
Attachments
100_6086.JPG
Last edited by Gary350 on Thu Feb 21, 2019 9:37 pm, edited 2 times in total.

SQWIB
Greener Thumb
Posts: 970
Joined: Tue Feb 16, 2016 9:21 am
Location: Zone 7A - Philadelphia, PA

February 20th, 2019


Yay, my first Indoor Red Tomato!!! or is it?
Image

Its one of the earlier BER maters, I was taking a picture and it fell off the plant.
Image

Image

Well anyhow, the parsley is regrowing after the hack job.
Image

SQWIB
Greener Thumb
Posts: 970
Joined: Tue Feb 16, 2016 9:21 am
Location: Zone 7A - Philadelphia, PA

I got tired of knocking over and spilling the humidifier so I removed it from the tent and will check the humidity in a few days.


February 22nd - 23rd, 2019

Finished up the salad greens to make room for my outdoor plants.
Image

Image

Image


Some tomatoes that I am hoping don't get BER.
Image

Image


Checked the tent humidity without the humidifier and the readings seem about the same as when the humidifier was in the tent, I was a bit surprised but pleased.

SQWIB
Greener Thumb
Posts: 970
Joined: Tue Feb 16, 2016 9:21 am
Location: Zone 7A - Philadelphia, PA

Checked the tent humidity without the humidifier and the readings seem about the same as when the humidifier was in the tent, I was a bit surprised but pleased.


March 2nd - 3rd, 2019
Image

Image


March 5th, 2019

The plants are growing like crazy, with the exception of my Jimmy Nardello peppers, the JD's are very sickly looking and they will be trashed when this trial is over. The tomato plants have exploded and I have close to a hundred tomatoes and not one is without BER, not one!

I'm just about ready to call this a $1,200.00 fail as far as growing tomatoes and peppers indoors (definitely a fail for peppers). there's about 6 weeks left for the tent grow, so we will see if a miracle happens.
I will be trying this again next year, with a few changes, worst case scenario I can use the setup to get a jump start on the season.
One good thing is I have a few matured plants to go in the ground come planting time, well, I don't want to count my chickens yet but we'll see how they do outside.

Another bonus is that I can start a few plants and clone them for spring planting.
Image


At the end of this trial I'll post my changes for next years indoor grow.
Image


The parsley finally came back.
Image

User avatar
applestar
Mod
Posts: 30541
Joined: Thu May 01, 2008 7:21 pm
Location: Zone 6, NJ (3/M)4/E ~ 10/M(11/B)

Wow, that is a big bummer about the tomatoes. BER is a tricky problem to solve when it’s happening to maturing fruits because it’s a calcium *uptake* issue at time of fruit development. So the ones that already have symptoms are lost — plant has already basically aborted those fruits due to insufficient calcium in the plant.

Your only hope is to remediate the suspect sources of calcium uptake blockage — lack of calcium in soil, low pH, uneven watering. Also, in containers, flushing the potting mix in case of excessive fertilization (too much foliage growth) and mineral build-up (that sounds opposite of what you need to do, I know — but some combinations tie-up calcium, so in the small/limited biome of containers, your only course of action might be to try to bring everything back to balance from scratch.) ...and hope that there is enough time left in the season for the current and future floral trusses to set fruits and develop to unblemished maturity.

I have heard that some form of calcium nitrate (I think?) does provide a band-aid solution — I think earthbox users add this to the reservoir, and I might have heard that micro-fine spray (for foliar feed — so spray underside of leaf) can help.

It’s also a problem that, when growing in outside beds, the susceptible ones are obvious since all the plants are growing in same conditions. I’m not familiar with the varieties you grew so I don’t know if any of them are particularly susceptible. I’ve mostly systematically removed a handful of varieties that have suffered BER (among all of the dozens of others that don’t) from my grow list.

HOWEVER, this year, I will be challenging myself to try to grow one or two sausage-shaped, large fruited paste varieties (which are almost always BER susceptible) in specialty prepared environment — probably a SI for anti-drought moisture control, though it might be a single small bed since I’m not as experienced with growing in SIP’s and other factors might creep in — along with Blush which also has been susceptible.

I will be growing Totem F1 this season since my SIL gifted me with a packet of seeds, so maybe I should take extra pre-caution in preparing the containers for that one as well.....

SQWIB
Greener Thumb
Posts: 970
Joined: Tue Feb 16, 2016 9:21 am
Location: Zone 7A - Philadelphia, PA

My totem F1 plants are doing great but eventually show signs of BER.
Image

I have tried a watering regiment bottom watering every day to keep soil moist.

All the research I have done says that a Foliar spray does nothing for calcium uptake. (However I don't believe everything I read on the internet, even if it comes from a credible source)
Some nutrients do not move easily once inside the leaves so they don’t get to where they are needed eg iron, manganese and calcium. When calcium entering a leaf it will not be transported to developing fruits so it won’t prevent blossom end rot (BER) in tomatoes. Calcium entering roots can prevent BER..


by Dr. Curtis E. Swift, Colorado State Area Extension Agent

The use of a foliar spray is a common recommendation for the prevention of blossom end rot. A one percent (1%) calcium chloride (8 lbs. of calcium chloride per 100 gallons of water) has been thought to be beneficial. However, Drs. Hodges and Steinegger, Extension Specialists with the University of Nebraska, Lincoln, report calcium does not move from leaves to the fruits.
Thus, foliar sprays of calcium won't correct blossom end rot. Tomato fruits do not have openings in the epidermis (skin) through which calcium can be absorbed. Contrary to past belief the direct application of calcium as a spray, based on information from Hodges and Steinegger, is ineffective.

The addition of limestone, gypsum or crushed eggshells to the soil well before transplanting is recommended in some states to overcome the soil calcium deficiency. The use of calcium sulfate (gypsum) at the rate of two pounds per 100 square feet of soil area is recommended in some areas.

Research by Taylor, Locascio and Alligood found the form of calcium applied to the soil does make a difference on Ca uptake.

The addition of calcium sulfate (CaSO4) resulted in higher soil Ca concentrations than when calcium nitrate [Ca(NO3)2], calcium chloride (CaCl2), or calcium thiosulfate were applied to the soil (listed in descending order of benefit). They also found the addition of potassium (K) reduced the uptake of calcium resulting in more problems with blossom-end rot.

In high K soils as are found in much of Colorado, using a complete fertilizer containing K will contribute to problems with BER.
Liming is recommended in areas with low pH (acid) soils. The application of up to two cups of lime per plant is recommended in North Carolina. When used lime needs to be worked into the soil 12-inches deep. The addition of lime or gypsum is not, however, recommended in Western Colorado. For a more in-depth discussion on Western Colorado soils, refer to the Web Pages on this topic.

Maintaining the proper balance of potassium, phosphorus and other soil nutrients and avoiding excessive growth due to over-fertilization with nitrogen is recommended.

Excess levels of ammonium (NH4--N), magnesium, potassium and sodium have been reported to reduce the availability of calcium. English et al., report the use of nitrate nitrogen (NO3- - N) stimulates Ca uptake while ammonium nitrate (NH4- - N) reduces the uptake of CA. A soil test should be conducted to help determine what needs to be added and what should not be added to your garden soil.


My last ditch effort is Calcium Sulfate Dihydrate. I was going to try Calcium Chloride but was worried about salt.

I may pull all the plants, strip the ( noticeable BER) fruits, flush the pots and start watering with the Calcium Sulfate.

User avatar
applestar
Mod
Posts: 30541
Joined: Thu May 01, 2008 7:21 pm
Location: Zone 6, NJ (3/M)4/E ~ 10/M(11/B)

Ah ha. Your research is more thorough than mine — as mentioned, I’ve simply stopped growing varieties that disappointed me with BER since all the varieties around the affected plants were doing fine.

As for foliar spray, I’ve always suspected that spraying anything thoroughly until dripping would inevitably create a ring of solution on the soil in the drip line of the plant ...where the most actively feeding roots are. So maybe THATS how the anecdotally beneficial calcium uptake is occurring?

SQWIB
Greener Thumb
Posts: 970
Joined: Tue Feb 16, 2016 9:21 am
Location: Zone 7A - Philadelphia, PA

March 6th, 2019

The Jimmy Nardello peppers were evicted yesterday, I just got sick to my stomach looking at these things... absolutely disgusting. I was afraid if these were left in the tent any longer that they would infest the other plants.
Image


This is a comparison of one that was in the tent (left) and one that was under my Fluorescent shop lights (Right) and the one on the right was the runt. Just gets me sick.
I was going to wash the plant, remove from the pot and wash off the soil and repot with potting mix but these guys were too far gone.
Image


The one on the right has even put on fruit.
Image


They were put out in the 16°F cold to seal their fate.
The plant and potting mix will be dumped in the fire-pit when making bio-char.
Image


Trying to clone some Cilantro, Some say it can't be cloned and others say it can, we will see.
Image


The fruit production on the Gardeners delight is quite impressive, just a shame it has for nothing thus far!
Image

User avatar
applestar
Mod
Posts: 30541
Joined: Thu May 01, 2008 7:21 pm
Location: Zone 6, NJ (3/M)4/E ~ 10/M(11/B)

How tall is your Totem F1 at full maturity, and what size container do you have it in? I’m trying to figure out if it fits in the micro dwarf category. ...while we’re at it, diameter of typical fruit and possibly weight, too? THANKS :wink:

SQWIB
Greener Thumb
Posts: 970
Joined: Tue Feb 16, 2016 9:21 am
Location: Zone 7A - Philadelphia, PA

About 12"

One I just gave away was in a one gallon pot.
Not sure if the one gallon pot is a "nursery trade gallon" pot. (.75 gallon).
I have another in a three gallon grow bag that I am pretty sure is a true three gallon size.
The one gallon size is adequate and the plant in that pot done better than the other, coincidence, I don't know, but save yourself some space and potting mix and go with no more than a two gallon pot.

User avatar
applestar
Mod
Posts: 30541
Joined: Thu May 01, 2008 7:21 pm
Location: Zone 6, NJ (3/M)4/E ~ 10/M(11/B)

Thanks @SQWIB :D I really think that puts it in micro dwarf territory, but with added bonus of somewhat larger fruits than cherries according to some previous growers.

Now to find out if I like the flavor.... :wink: (I might try and see if I can make some crosses with it, too, though I have not been successful with the teeny tiny micro dwarf blossoms so far ...hmm... I need to look up if there are any restrictions on that — typically not, but they might have incorporated a male-sterile gene in the hybrid)

SQWIB
Greener Thumb
Posts: 970
Joined: Tue Feb 16, 2016 9:21 am
Location: Zone 7A - Philadelphia, PA

Correction on plant size.
20190310_123206.jpg
20190310_123314.jpg
Posting from phone sorry if the images are not oriented correctly.
The one I gaveve away was definitely taller but no taller than 12"
Hope this helps.

SQWIB
Greener Thumb
Posts: 970
Joined: Tue Feb 16, 2016 9:21 am
Location: Zone 7A - Philadelphia, PA


March 7th, 2019


Image


March 8th, 2019

Diluted a 1/4 cup of calcium sulfate dihydrate in a few gallons of water. I'll probably repeat the calcium feeding next week in the same amount.
Image


March 9th, 2019

Sad day in the grow tent, I removed all of the plants, removed all of the tomatoes with BER, staked and tied up the plants, trimmed a bit and placed back in the tent.
Image

Image

Image

Image

Image

Image

To make some room in the grow tent, I gave my brother the chives, one of the Totem F1 plants and put the other Totem F1 and parsley in the basement bathroom.
Image

SQWIB
Greener Thumb
Posts: 970
Joined: Tue Feb 16, 2016 9:21 am
Location: Zone 7A - Philadelphia, PA


March 14th, 2019


The tomato plants are growing nicely, tons of flowers and no noticeable leaf curl. I will have to cut them back soon because I'm almost out of adjusting room for the lights. I also neglected and almost lost my Cilantro plant.

Image

SQWIB
Greener Thumb
Posts: 970
Joined: Tue Feb 16, 2016 9:21 am
Location: Zone 7A - Philadelphia, PA

March 18th, 2019

The tomato plants are growing nicely and have been setting fruit throughout the week. I got a few flowers on the eggplants, I'm not really expecting fruiting or maturing fruit on the eggplants in the tent, I'm just trying to nurse them through until I can transplant outside.

The Tomato plants are getting about three gallons of water every 24 hours and I will probably increase to 3.5 gallons per day later this week. The tub is working out great and I never realized how much plants transpire when the lights are on until this last week, the entire garage is like a sauna. I guess given the fact that only 5% of the water taken up by roots remains in the plant and the rest is loss due to transpiration.
There is definitely no need for a humidifier.

I trimmed the plants a tad then diluted in water and fed some "Jobes Organics Vegetable and Tomato 2 - 7 - 4" @ 1/4 cup and some "Calcium Sulfate Dihydrate" @ 1/4 cup.

Raised the lights a bit, they're almost maxed out.

Image


What does a $1,200.00 tomato look like?

Image

SQWIB
Greener Thumb
Posts: 970
Joined: Tue Feb 16, 2016 9:21 am
Location: Zone 7A - Philadelphia, PA

March 21st, 2019

The aphids have spread to the pepper seedlings so everything has been getting treated with a Hydrogen Peroxide spray.
I have one tomato with signs of BER, I was getting pretty excited about the grow until this discovery. The Totem F1 tomatoes seem unaffected on this last batch.

Image


March 22nd, 2019


I have been checking the tomatoes every day, praying that the BER is almost gone. I do have a glimmer of hope with these Totem F1 tomato plants. At the least I know next year I can grow a dozen of these in the tent on shelves and get a decent tomato crop.

Image


The plants are growing like crazy, this picture is 4 days after the picture with me standing inside the tent (March 18th), you can see there is no room to stand in there now.

Image


Plenty of tomatoes considering I have been a bit laxed with the the robotic bee so the fruit set could be better.

Image


So far only one tomato has obvious BER, I get so anxious every day I check the tomatoes for BER. The tomato on the left is the one with the BER, you can see it barely at 7-8 o' clock

Image

Image

Image

SQWIB
Greener Thumb
Posts: 970
Joined: Tue Feb 16, 2016 9:21 am
Location: Zone 7A - Philadelphia, PA

March 22nd-24th, 2019

I fed the plants with this evenings watering, 4 scoops of "Jobes Organics Vegetable and Tomato 2 - 7 - 4" and 1 scoop of "Calcium Sulfate Dihydrate". I'm not sure what size the scoop is but I'm guessing about 3 tablespoons.

I had to trim everything back again Saturday. Some of the tomatoes are near Golf ball size.

Image


Got a tomato off of the Totem that was actually pretty good, what's crazy is that this was the only mater on the plant that showed signs of BER, I just cut that off and it was fine. Now I'm down to $600.00 per/tomato.

Image

SQWIB
Greener Thumb
Posts: 970
Joined: Tue Feb 16, 2016 9:21 am
Location: Zone 7A - Philadelphia, PA

March 25th, 2019

I was checking the plants real good today and noticed a few red tomatoes, I need to be more on top of these plants, I had about three that were past rip and tossed.
These are the Gardeners delight and no BER. You can see a few to the right that were also no good.

Image


Top 2 out of this batch were past ripe, they were fed to the rehab turtles.

Image


Keepers

Image


When I was grabbing for the over ripe tomato it appeared that half was green and half was over ripe so I yanked this guy off by mistake thinking it was a BER tomato... Ooops!
At first I was a bit upset and thought to myself, "Wow, this may not be a FAIL after all"! (Looking at the bigger picture of course).

Image


The over ripe tomato was here. The one I pulled above and the one below are about the same size.

Image


The gardeners delight was really good, much better than the totem, but to be fair, the totem may not have been at its ripest.
Although this is supposed to be a cherry type tomato, it's a bit more acidic and not as sweet as say a sweet 100 but it does have a great tomato flavor like your slicing tomatoes.

I can honestly say that this is the first time in March I had a great tasting tomato!

Image


Return to “Vegetable Gardening Forum”